Remove and reinstall a front wheel with a quick-release lever
This article will step you through the removal and reinstallation of a front wheel secured by a quick-release lever, which comes standard on most ebikes from Rad Power Bikes. Temporarily removing your wheel may be something you need to do to perform certain maintenance tasks.
This article does not apply to any wheel secured with a bolt-on axle, including rear wheels.
- A friend to help hold the bike fully upright and steady
- Nitrile gloves (optional)
- Any tools or components you need to perform maintenance tasks while the wheel is off.
Review the terms for the quick-release and axle components to ensure the subsequent procedural instructions make sense. Please note that your quick release lever may be on the other side of your bike, on the same side of the rotor. Either orientation can work, but putting the quick-release lever opposite the brake rotor makes it easier to avoid touching the brake rotor.
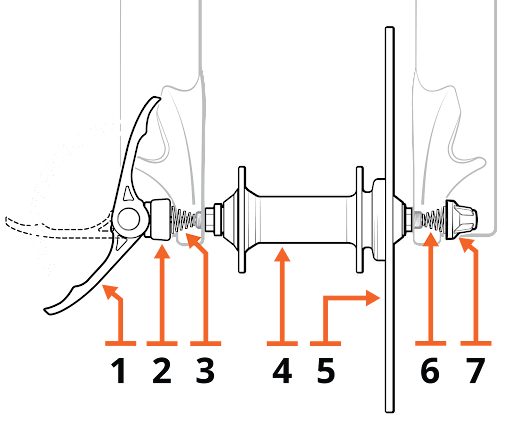
- Quick-release lever, which secures the axle in the fork
- Cam follower
- Cone spring (note its orientation pointing inward)
- Wheel hub
- Brake rotor
- Cone spring (note its orientation pointing inward)
- Thumbnut
|
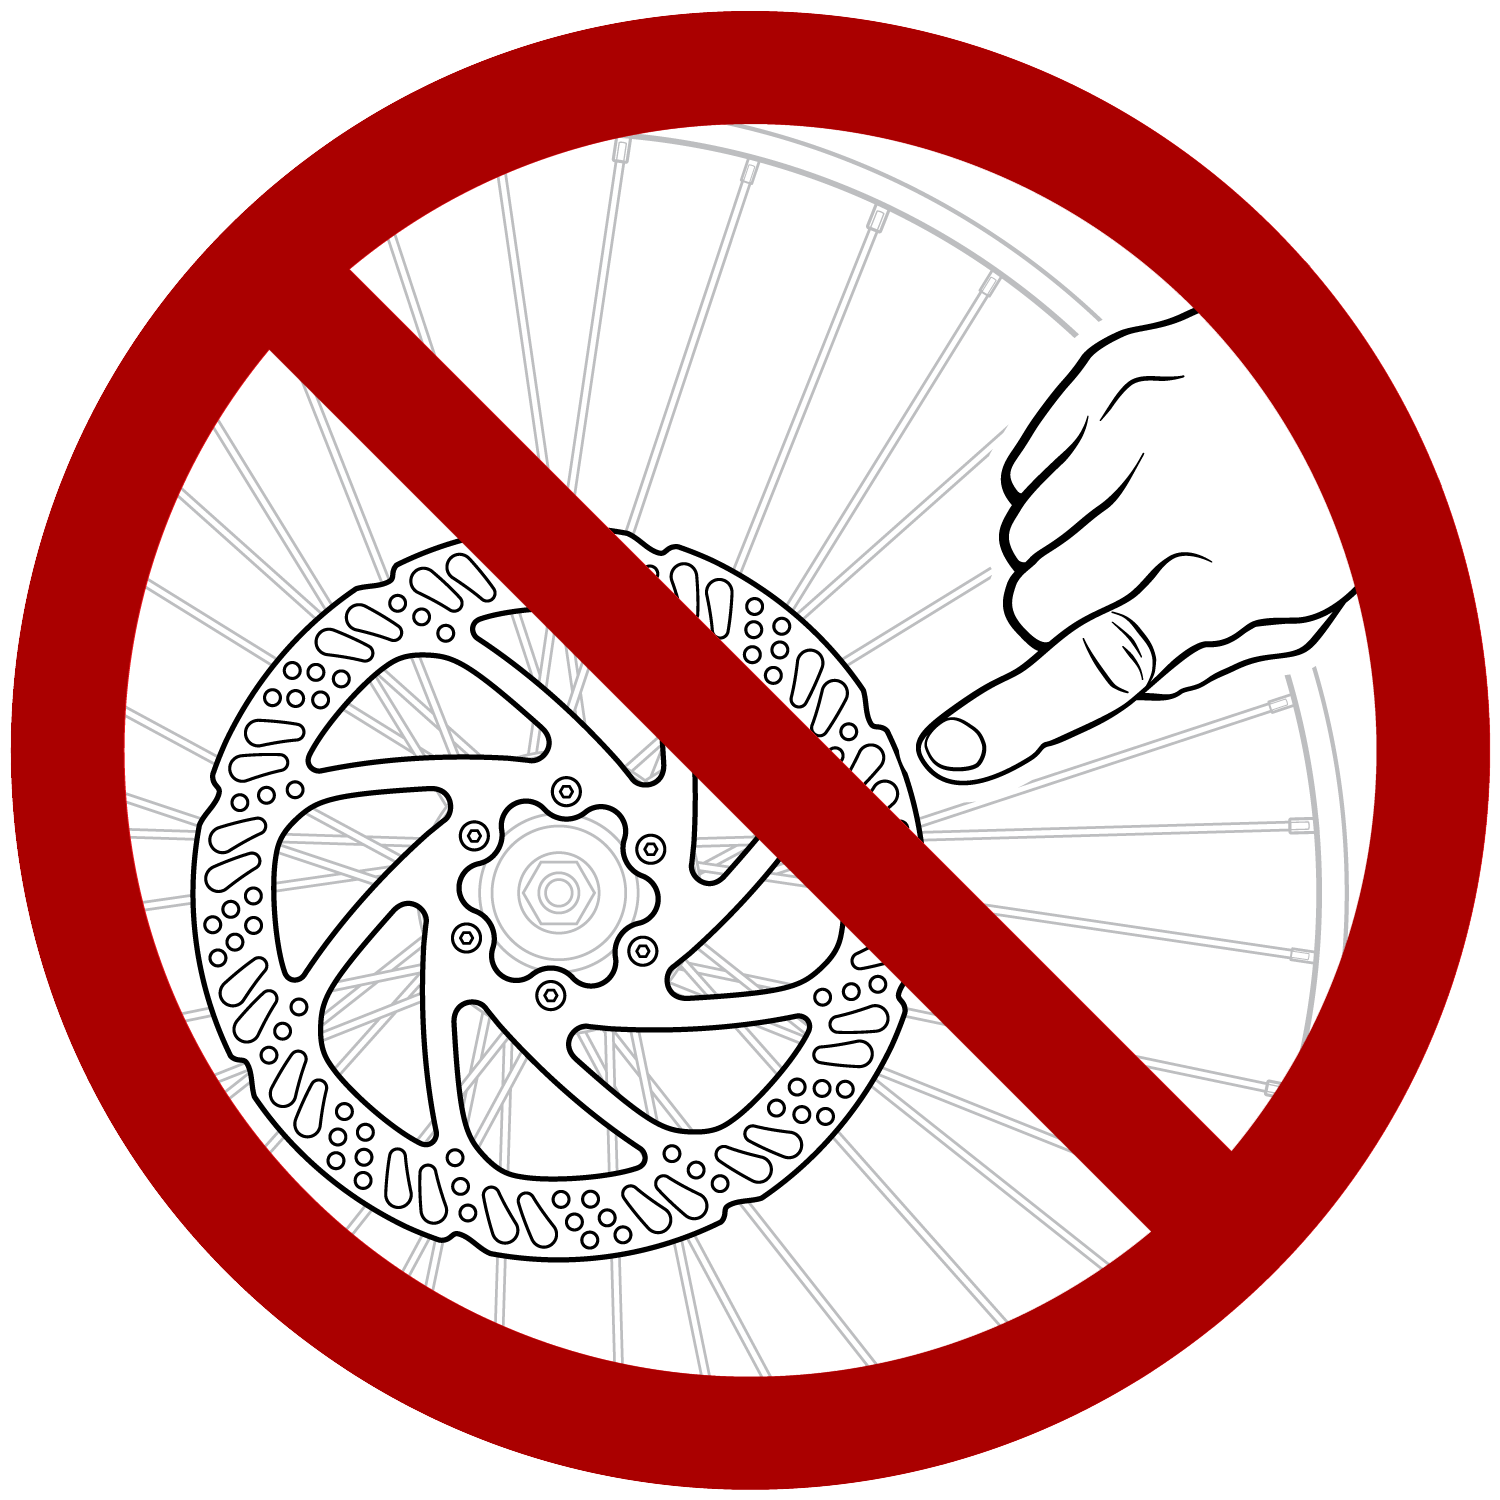
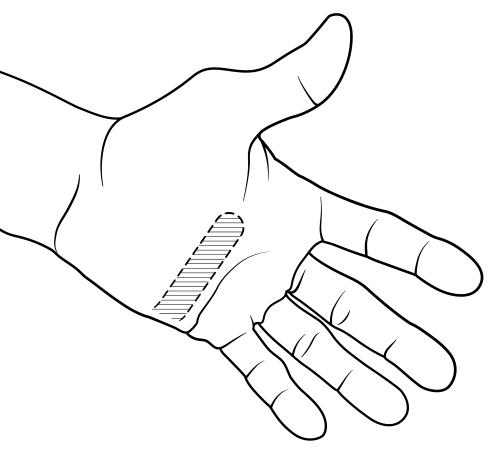
Do not touch the brake rotor, which has sharp edges and can cause serious injury. Touching the brake rotor or brake pads with bare skin can also transfer natural oils. Oils or other lubricants can decrease braking performance. We recommend wearing protective gloves when working near the braking system. |
 |
- Have a friend hold the bike steady.
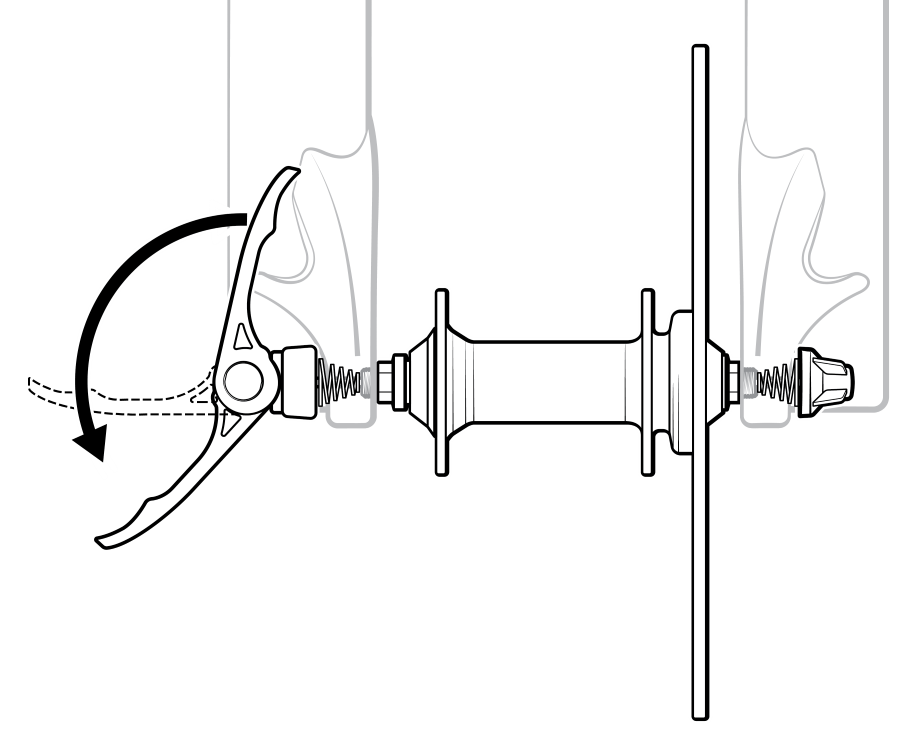
- Fully open the front-wheel quick-release lever (see the illustration).
- Turn the thumbnut on the other side of the wheel 2-3 turns counterclockwise to loosen the wheel so it can be lifted out of the dropouts.
- Have your friend grip the bike from its handlebar and lift slowly upward just a bit.
- Pay attention to the brake rotor as you lift the wheel. Make sure that the rotor slides out of the brake pads straight so that it doesn't get bent.
- Prop your bike up safely or rest it on the front forks. Now you're ready to perform maintenance on your wheel (e.g., replace a tire, etc.)
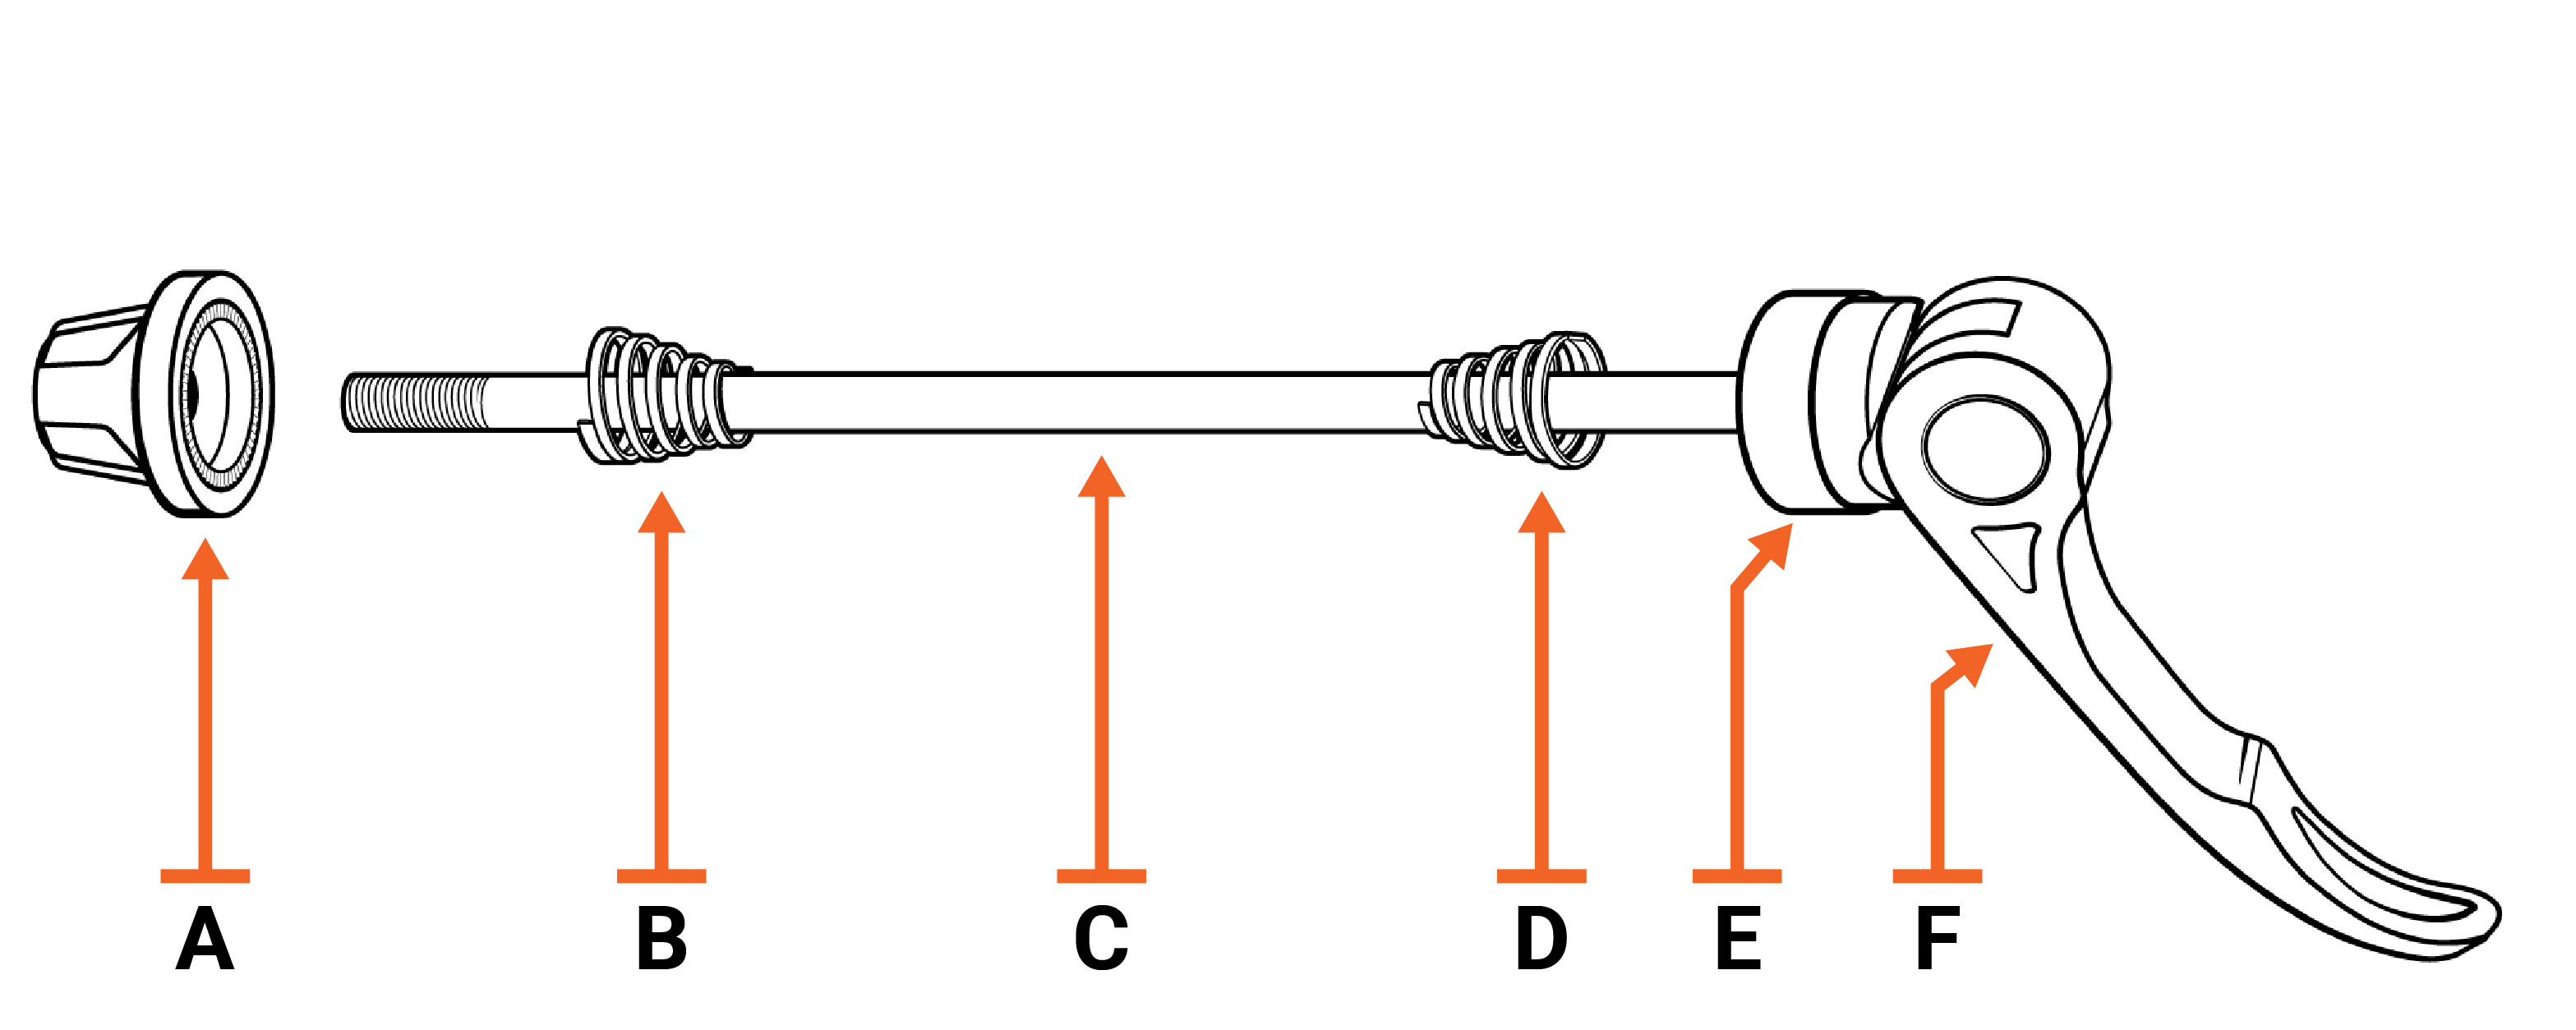
If your maintenance tasks require that you remove the quick-release skewer from the wheel, you can loosen the thumbnut all of the way and take it off. Be sure to retain the thumbnut (A), cone springs (B,D), and cam follower (E) so that you can replace them in the same positions later.
The video linked below takes you to the front-wheel installation portion of one of our ebike assembly videos. You may have a different ebike model, and this video assumes you are installing your wheel for the first time and need to remove it from the packaging. But the process for installing and securing the quick-release skewer will otherwise be very similar to the written instructions below.
- Replace the quick-release skewer if it's not already in the wheel. Make sure the cam follower and just one of the cone springs are still on the skewer, and then insert the skewer into the front wheel hub, starting from the side of the wheel without the brake rotor. Make sure to not touch the brake rotor. Reinstall the other cone spring on the skewer. Ensure both cone springs point inward. Keep the lever open and thread on the thumbnut a couple of turns, leaving enough room for the fork dropouts. See the illustration in the "Know your quick-release components" section above.
- Have your friend lift the front of the bike. Have a friend hold the bike steady and fully upright until you have finished securing the quick-release lever. Do not prop the ebike on its kickstand.
- Carefully lower the front fork onto the wheel. Pay attention to the brake rotor: It needs to slide between the brake pads. Once the rotor is between the brake pads, guide the fork so that the wheel axle enters the fork dropouts. (The fork dropouts are the slots on each end of the fork that the wheel axle fits into.)
If you have cable-operated brakes and it's difficult to get the brake rotor between the brake pads, you may need to loosen the brake calipers slightly. Use an Allen wrench to widen the gap between the brake pads by turning the inner pad adjuster “out” (counterclockwise) two clicks. Stop after you feel two clicks or have turned the adjustment bolt one quarter to one half of a full rotation. When wheel installation is complete, you can turn the pad adjuster back “in” (clockwise) if necessary to ensure the brakes engage properly.Loosening the calipers too much (more than two clicks or more than half a full rotation) can cause very small brake components, including a tiny spring and ball bearing, to fall out of the brake assembly, and those will need to be reinstalled by a professional mechanic. Failure to have them reinstalled properly may compromise brake function, potentially leading to serious injury or death.
- Double-check that the wheel is fully inserted into the dropouts, that the wheel axle is level and parallel to the ground, and that the wheel is centered in the fork.
- Make sure the quick-release lever is nestled into the curve of the cam follower, as shown below. The quick-release lever must nestle into the curve of the cam follower as shown in the top image. Do not balance the lever on the widest part of the cam follower, as shown in the bottom image.

- Make sure your friend is still holding the bike fully upright and steady, which will ensure there’s even pressure on both sides of the axle. This is critical for the next step.
- Secure the quick-release lever. The security and stability of your front wheel depends on very tight clamping force from the quick-release lever. A properly adjusted quick-release lever requires great force to close or open.
- Open the quick-release lever all the way. Hold the thumbnut steady with one hand while you spin the quick-release lever clockwise with the other hand. Tighten the lever as much as you can by hand. At this point, the lever will be too tight for you to close it halfway. Loosen it by a quarter spin and try to close the lever halfway again. Repeat until you can close the lever halfway.
- Make sure the lever is angled so that when you close it, it won’t hit any bike components like the fork or a fender bracket, which could keep it from closing fully.
- Close the lever. The lever will be difficult to close and leave an imprint in your hand. Fine-tuning the tightness of the lever can take several tries.
If you cannot exert great force on the quick release lever to close it, you must seek help from a professional bike mechanic. Failure to fully secure your front wheel can lead to serious injury or death.
- Inspect your front wheel installation:
- Make sure the quick-release lever is closed and doesn’t touch any bike components such as the fork, which could keep it from closing fully.
- Make sure the axle is fully seated in the fork dropouts and the wheel is centered.
- With your friend holding the front wheel off the ground, spin the front wheel to ensure it has no wobble or looseness.
- While straddling the bike with hands on the handlebars, squeeze the front-brake lever with your left hand. Rock the bike forward and backward. Ensure the front brake prevents the front wheel from spinning and that there’s no play or wiggle in the wheel, handlebar, or front fork.
Inspect and test both wheels before each ride. Either wheel and other components can loosen over time and with the normal vibration of riding. Failure to regularly inspect the security of your wheels can lead to accidents, serious injury, or death.