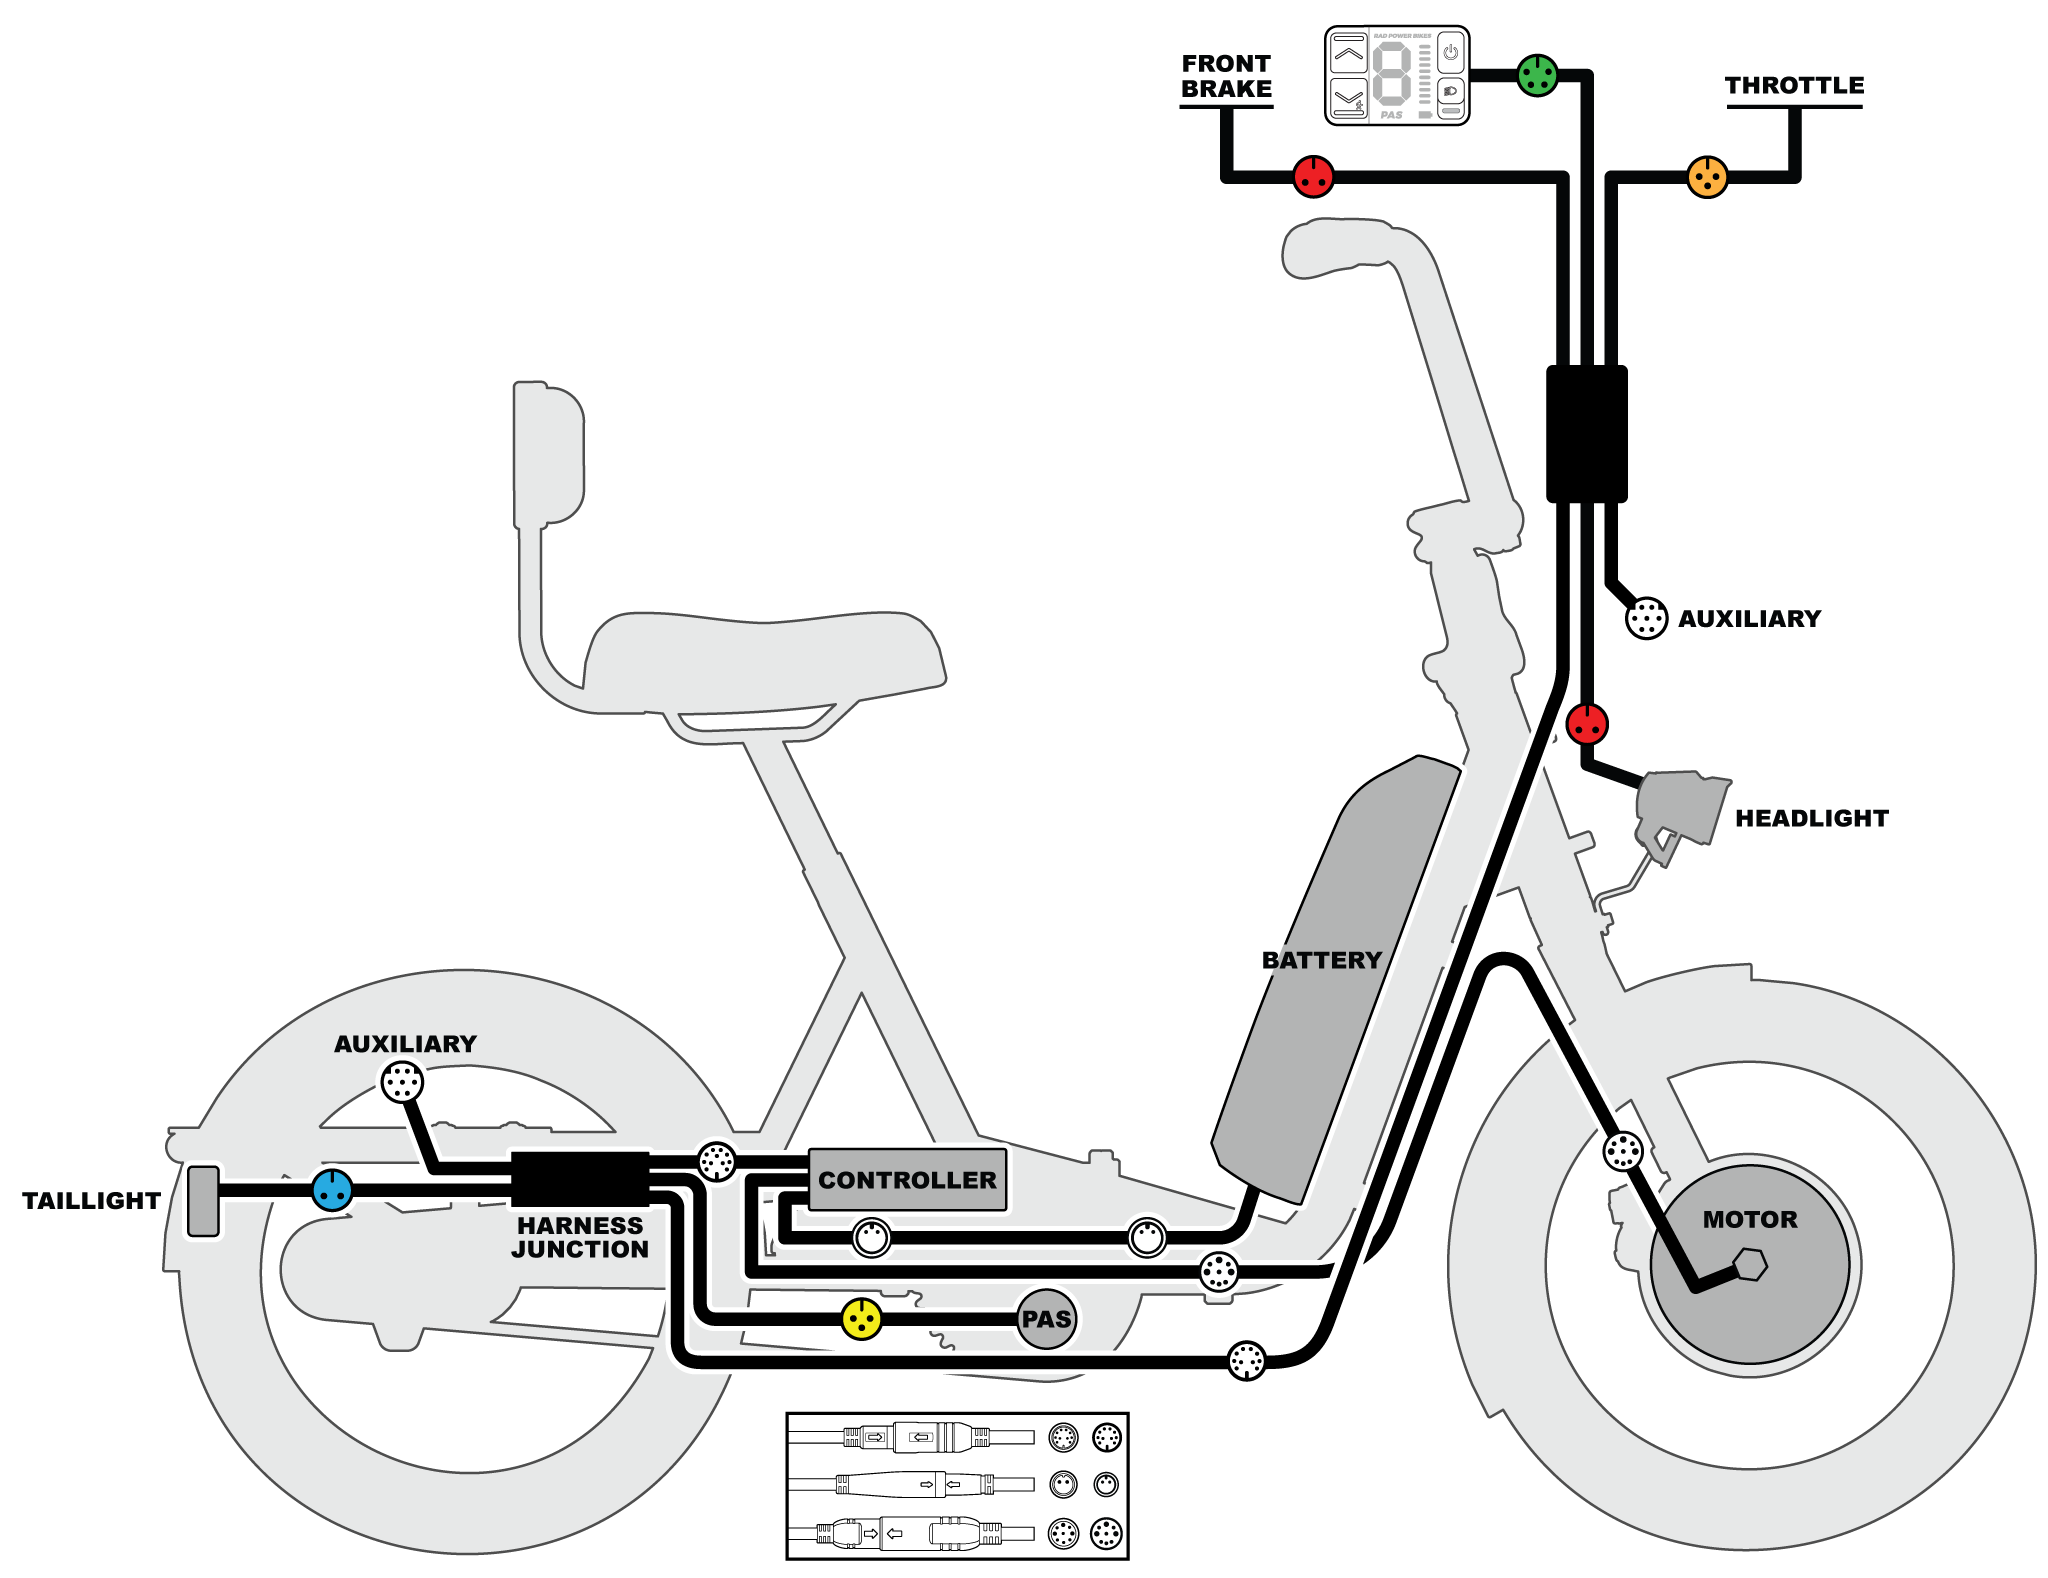
RadTrike 1 (2022) error 30 / connector check guide
This article will step you through a connector check of your RadTrike to help you troubleshoot electrical system problems including an Error 30 (Communication Error), a flashing battery LED on your Rad UI Remote not explained by a low state of battery charge, or other non-specific errors.
The process will require you to power off the bike, remove the battery, discharge residual power, unplug a connector and inspect it (take photos of any signs of moisture, debris, or damage), carefully plug the connector back in, turn on the battery, and check if the issue is resolved when you power on the bike. Repeat the process for each connector until the issue is resolved.
Tools needed:
- Flat side cutters to snip zip ties securing the connector cables,
- A camera to take photos of any moisture, debris, or damage for Rad Power Bikes Product Support,
- A 2.5 mm Allen wrench,
- Phillips head screwdriver, and
- Replacement zip ties to secure the cables once the process is complete
Before you start
- Prepare your bike for maintenance. Turn off the bike, remove the battery, and press and hold the power button to discharge remaining power.
- Inspect the battery and battery mount terminal contacts. If the contacts are damaged, dirty, or wet, the part may need to be replaced. Take a photo and contact Product Support for help. If the contacts are in good condition, set the battery aside for now.
|
Battery terminals on the underside of the battery |
Battery terminals on the bottom of the battery tray on your RadTrike |
Do not drop the battery or touch the connector terminals while handling the battery. Touching the terminals can bend or contaminate them, potentially leading to battery malfunction or failure. Dropping the battery can damage it permanently, even if there are no external signs of damage. A damaged battery can cause malfunction and potential fire hazard, leading to serious injury or death. If you damage your battery, do not use it. Recycle according to local rules and order a new battery from Rad Power Bikes.
The first three connector types
The first connectors you'll check are ones that, if damaged or loose, can prevent the bike from turning on or operating at all.
You will unplug one connector type at a time, inspect the insides, reconnect it, and turn on the bike to see if the error is resolved. As you work through the connectors, use flat-side cutters to snip zip ties as needed to create enough slack to unplug the connector.
Click on each heading below and follow the instructions within to check your connectors.
- Make sure the RadTrike is powered off.
- Remove the battery.
- Press and hold the power button to discharge any remaining power.
- Locate the Rad UI Remote connector. Find the Rad UI Remote on your handlebar, and trace the cable coming out of it to the first connector.
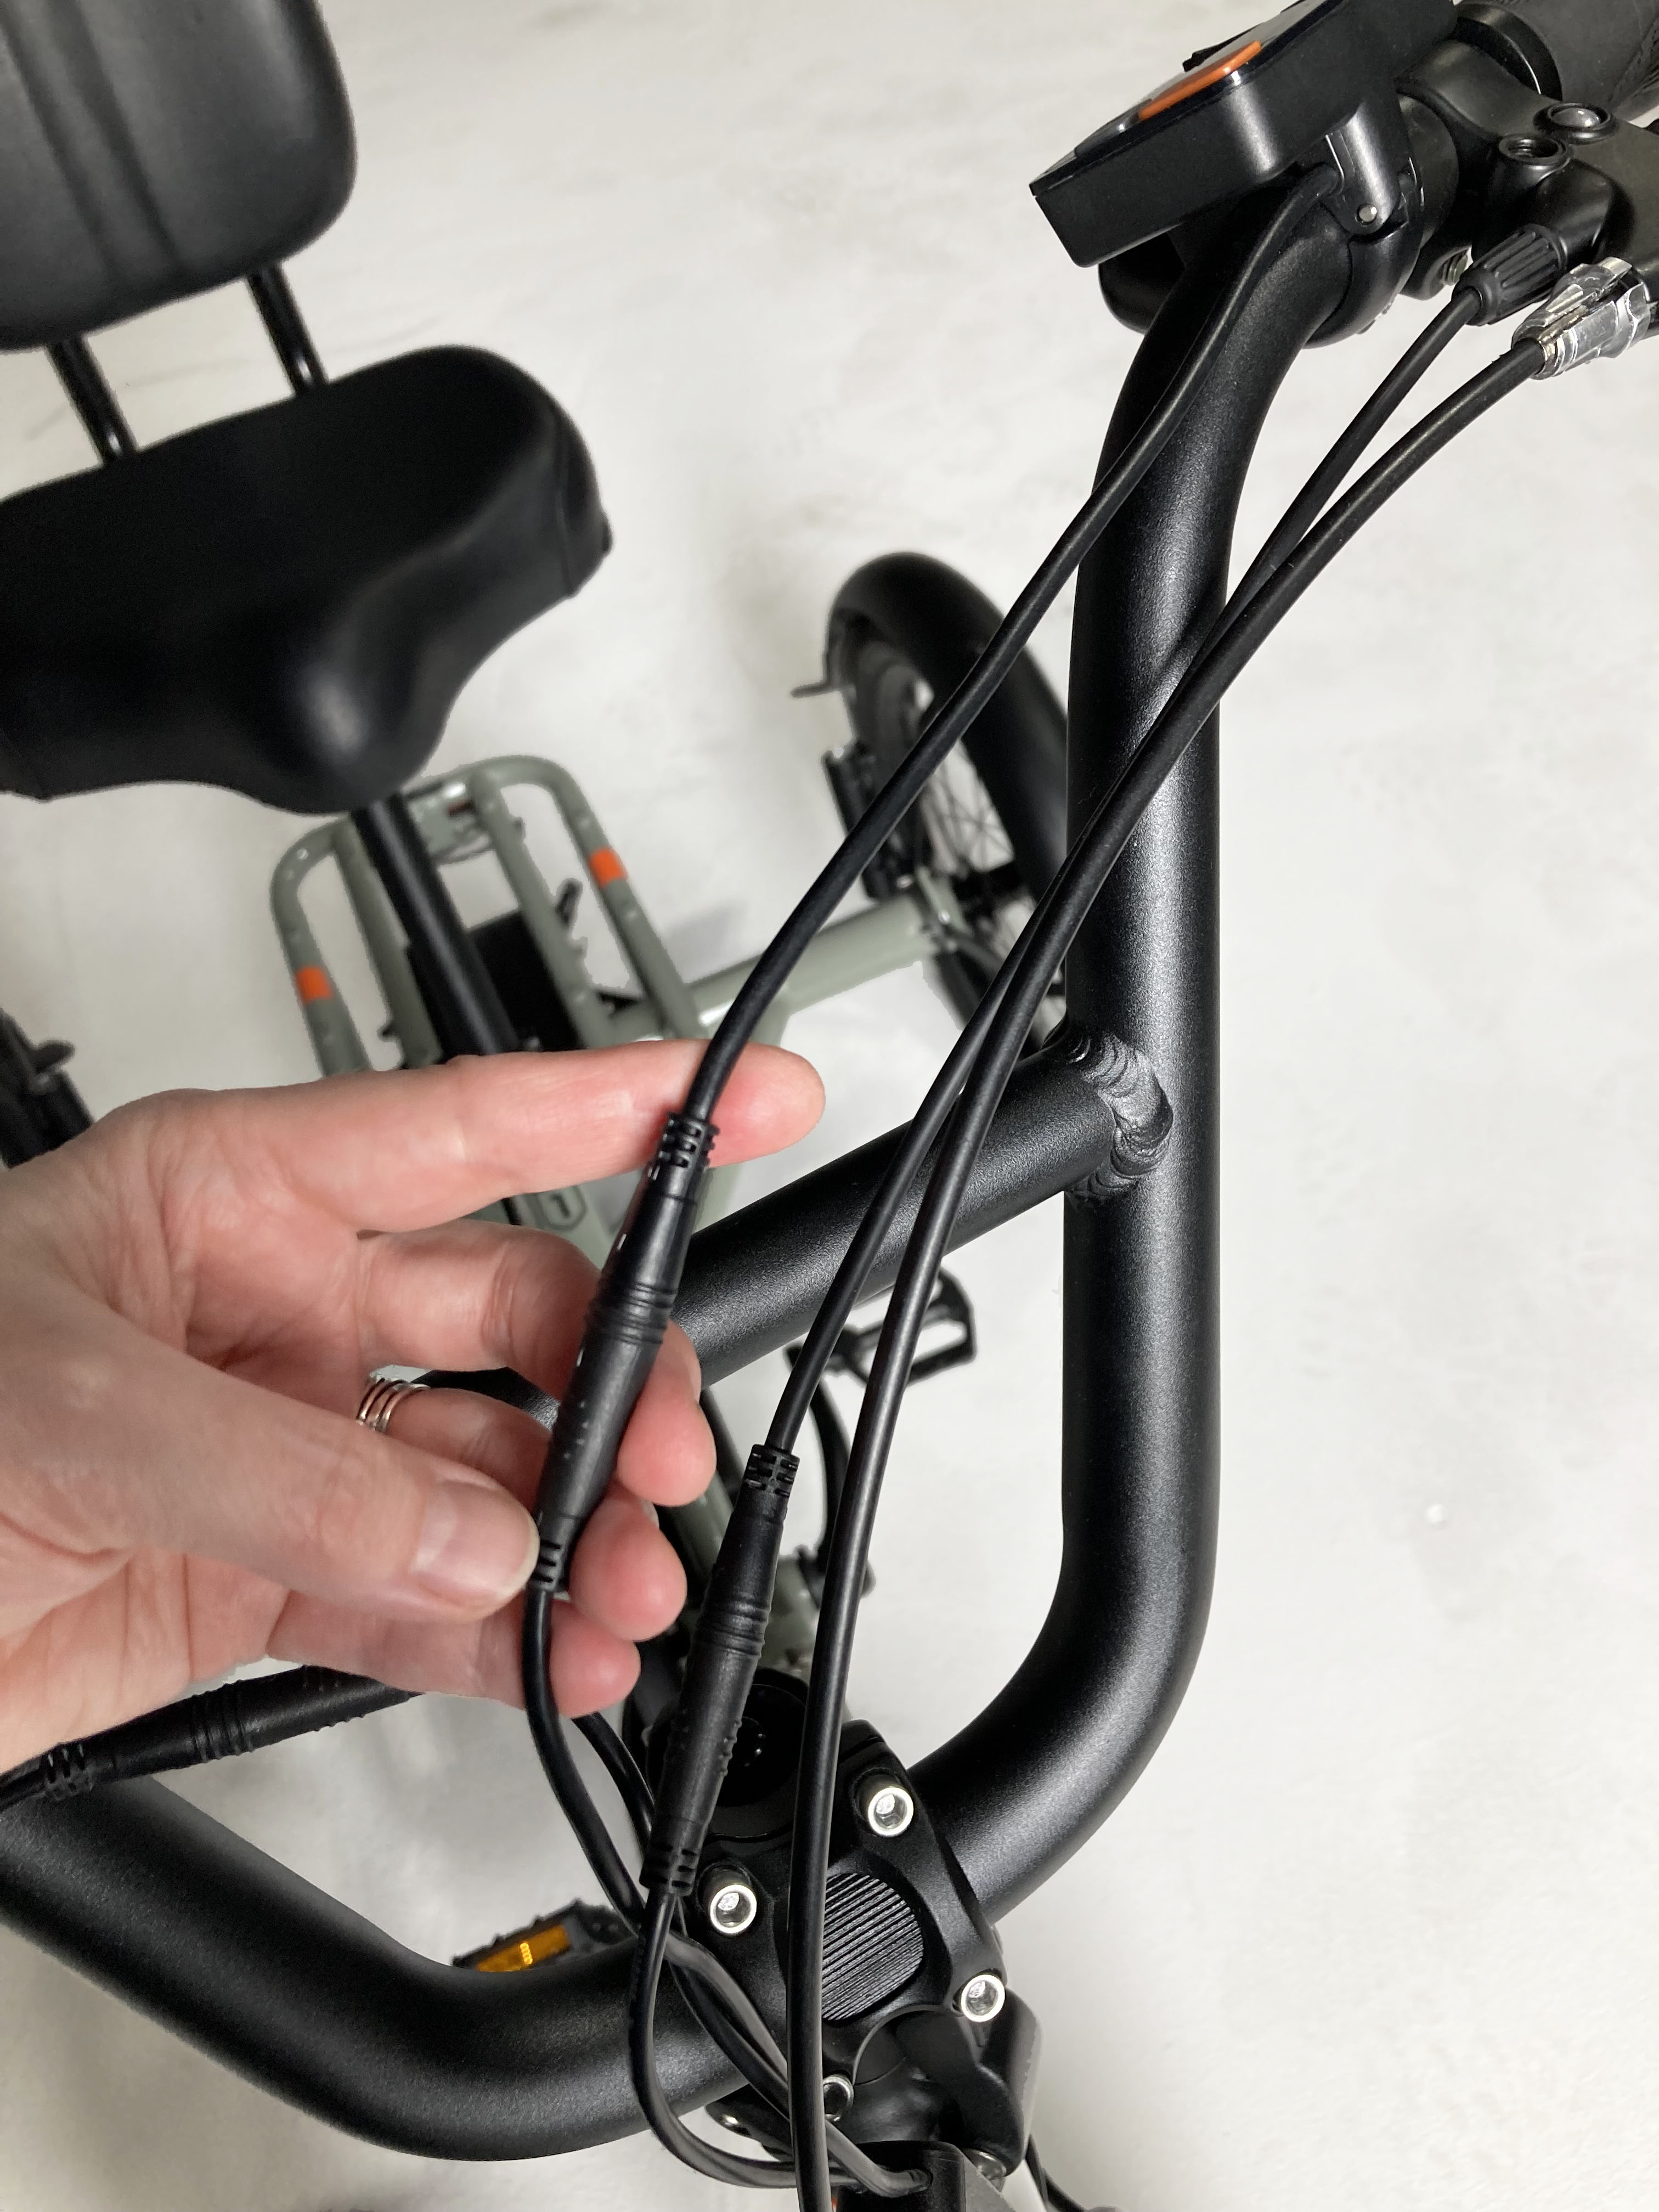
The RadUI connector
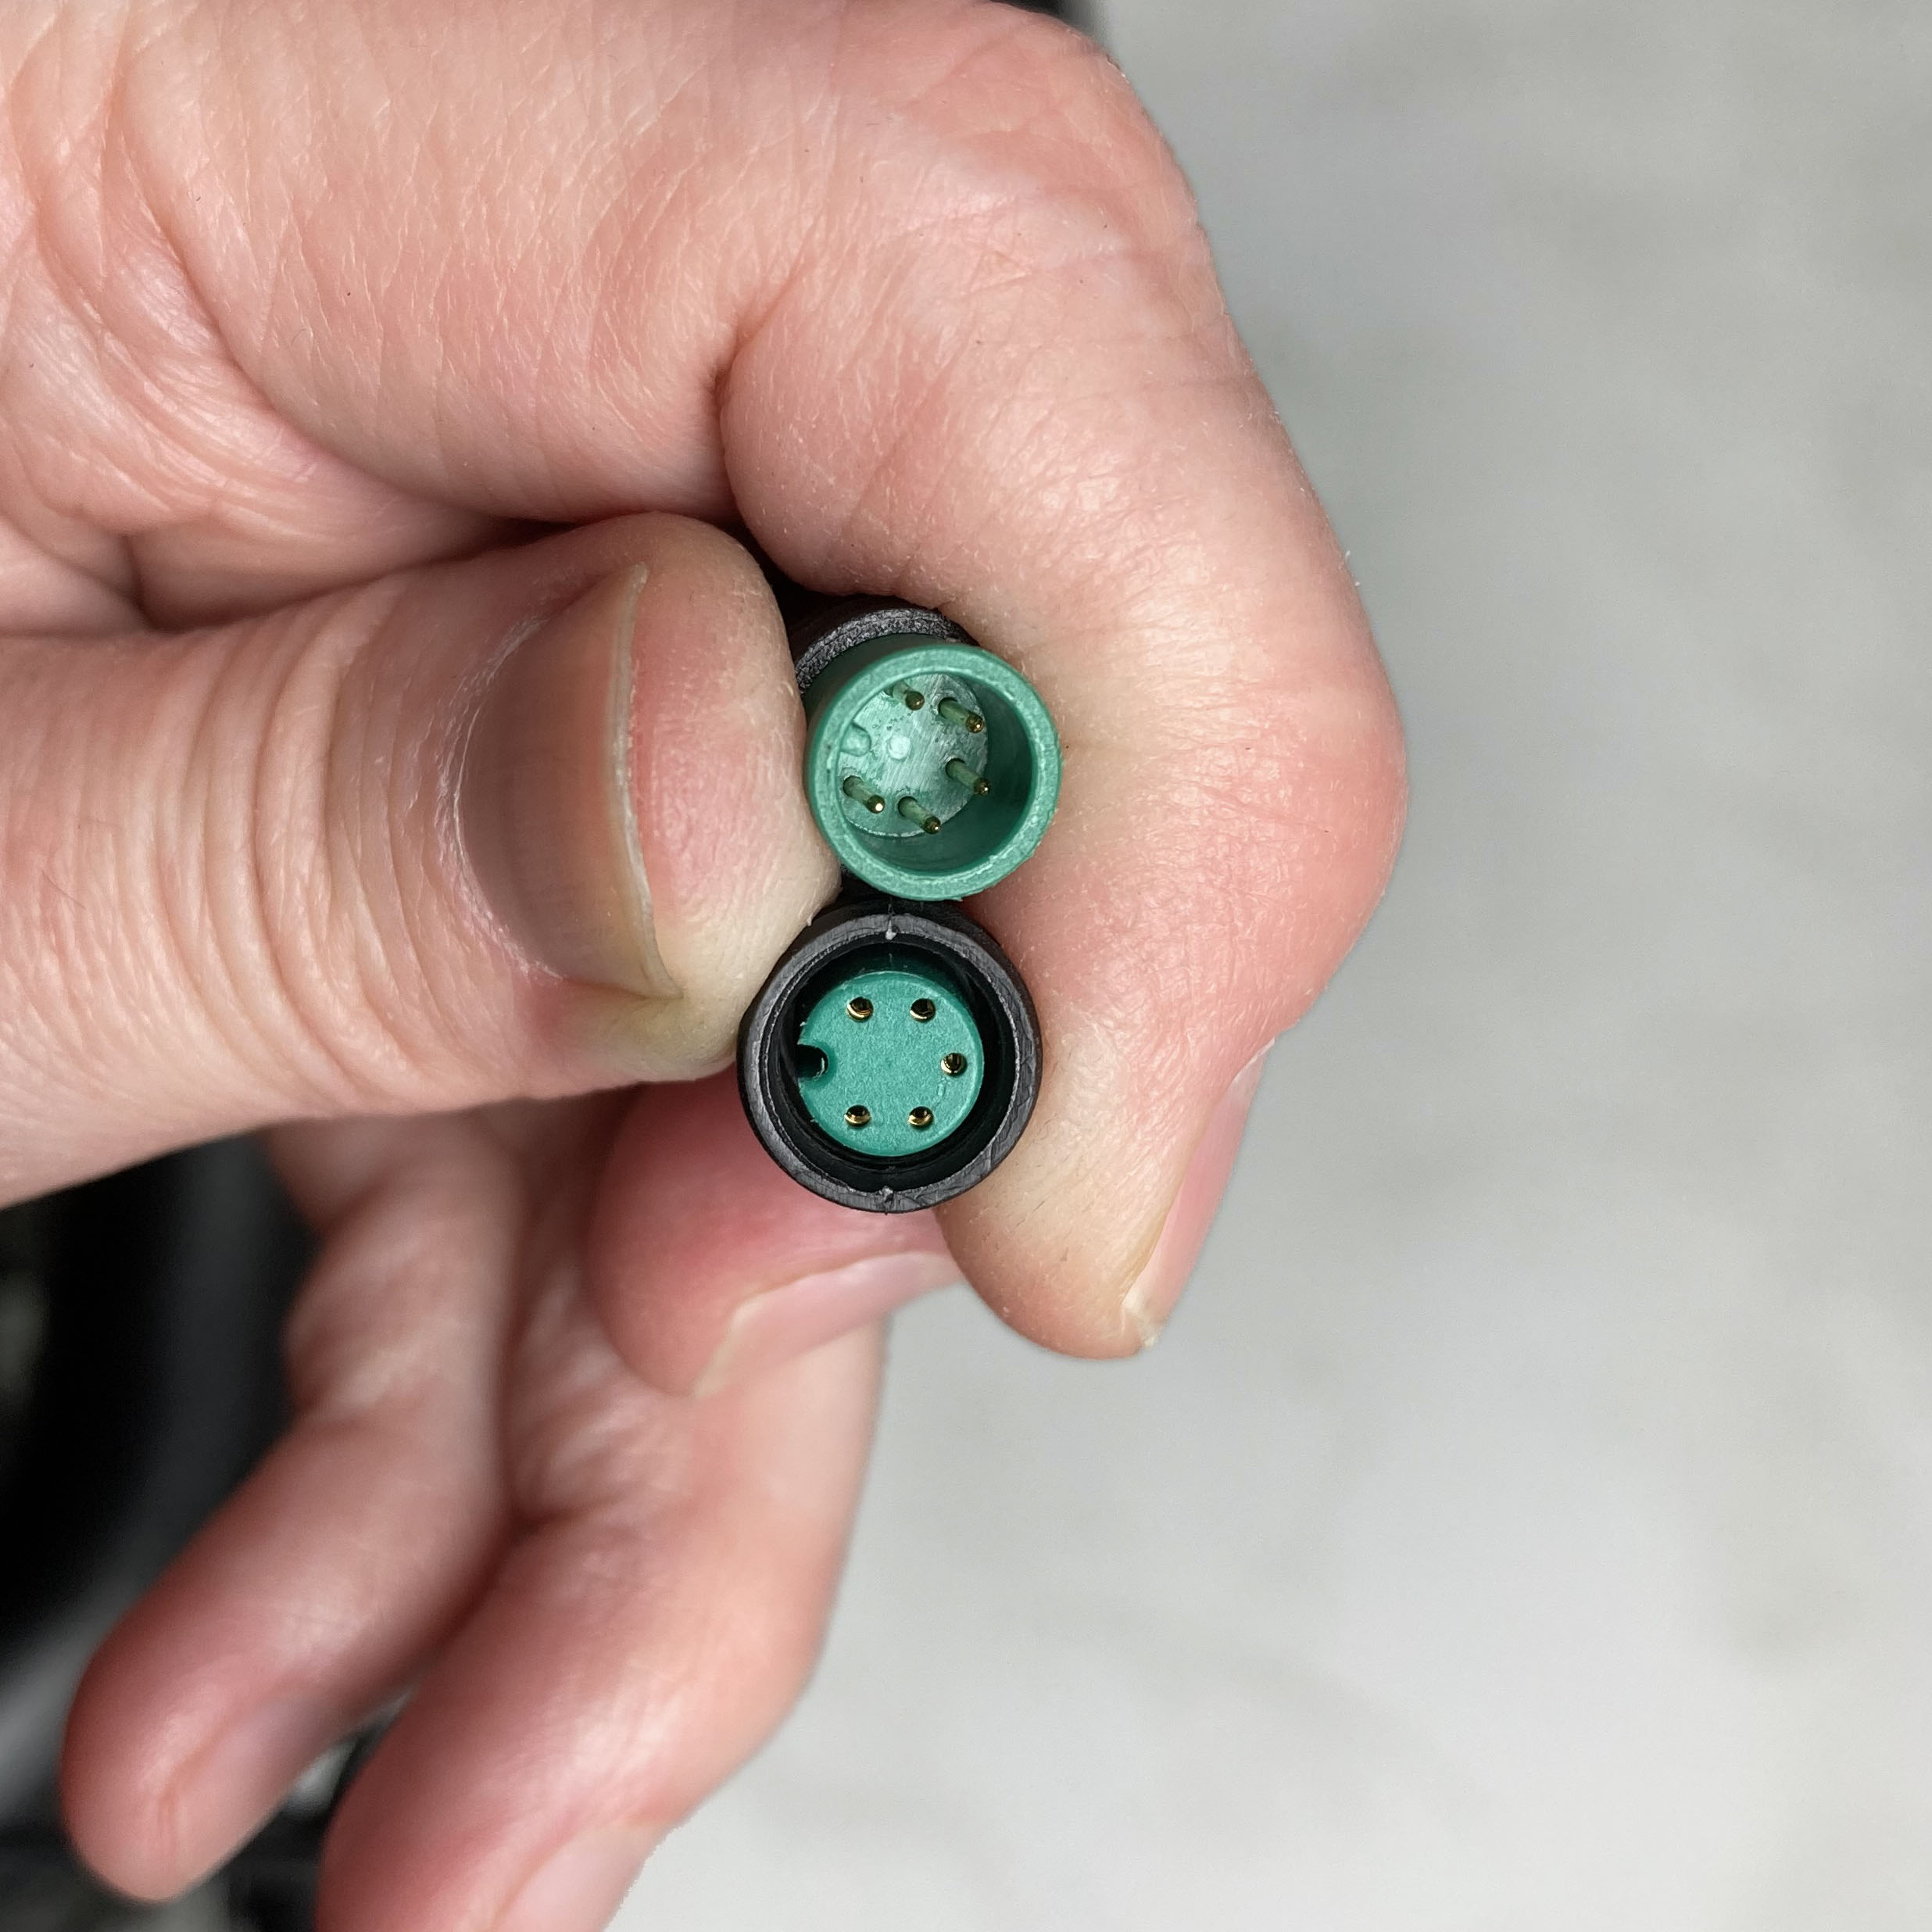
The interior of the RadUI connector is green with four pins.
- Open the connector. Gently but firmly pull the two sides of the connector apart without twisting. The interior of the connector is green with four pins.
- Inspect the connector. If the interior is damaged, dirty, or wet, you may need to replace any components attached to the damaged side(s) of connector (e.g., your Rad UI Remote of the front wiring harness). Take a picture of the damage and contact Rad Power Bikes Product Support for advice.
- If you find no damage, reconnect the connector and test the bike. Align the external arrows and internal pins, and push the connector halves together firmly without twisting. Reinstall the battery and turn on the bike.
- If the error stops displaying, you likely just fixed a loose connection. Re-secure all of your cables with new zip ties, making sure to not crimp any cables (if you need to bundle them, loop them gently). Perform a normal pre-ride safety check of your RadTrike and ride Rad!
- If the error continues, move onto the next connector check.
- Turn the RadTrike off by pressing and holding the power button.
- Remove the battery.
- Press and hold the power button to discharge any remaining power.
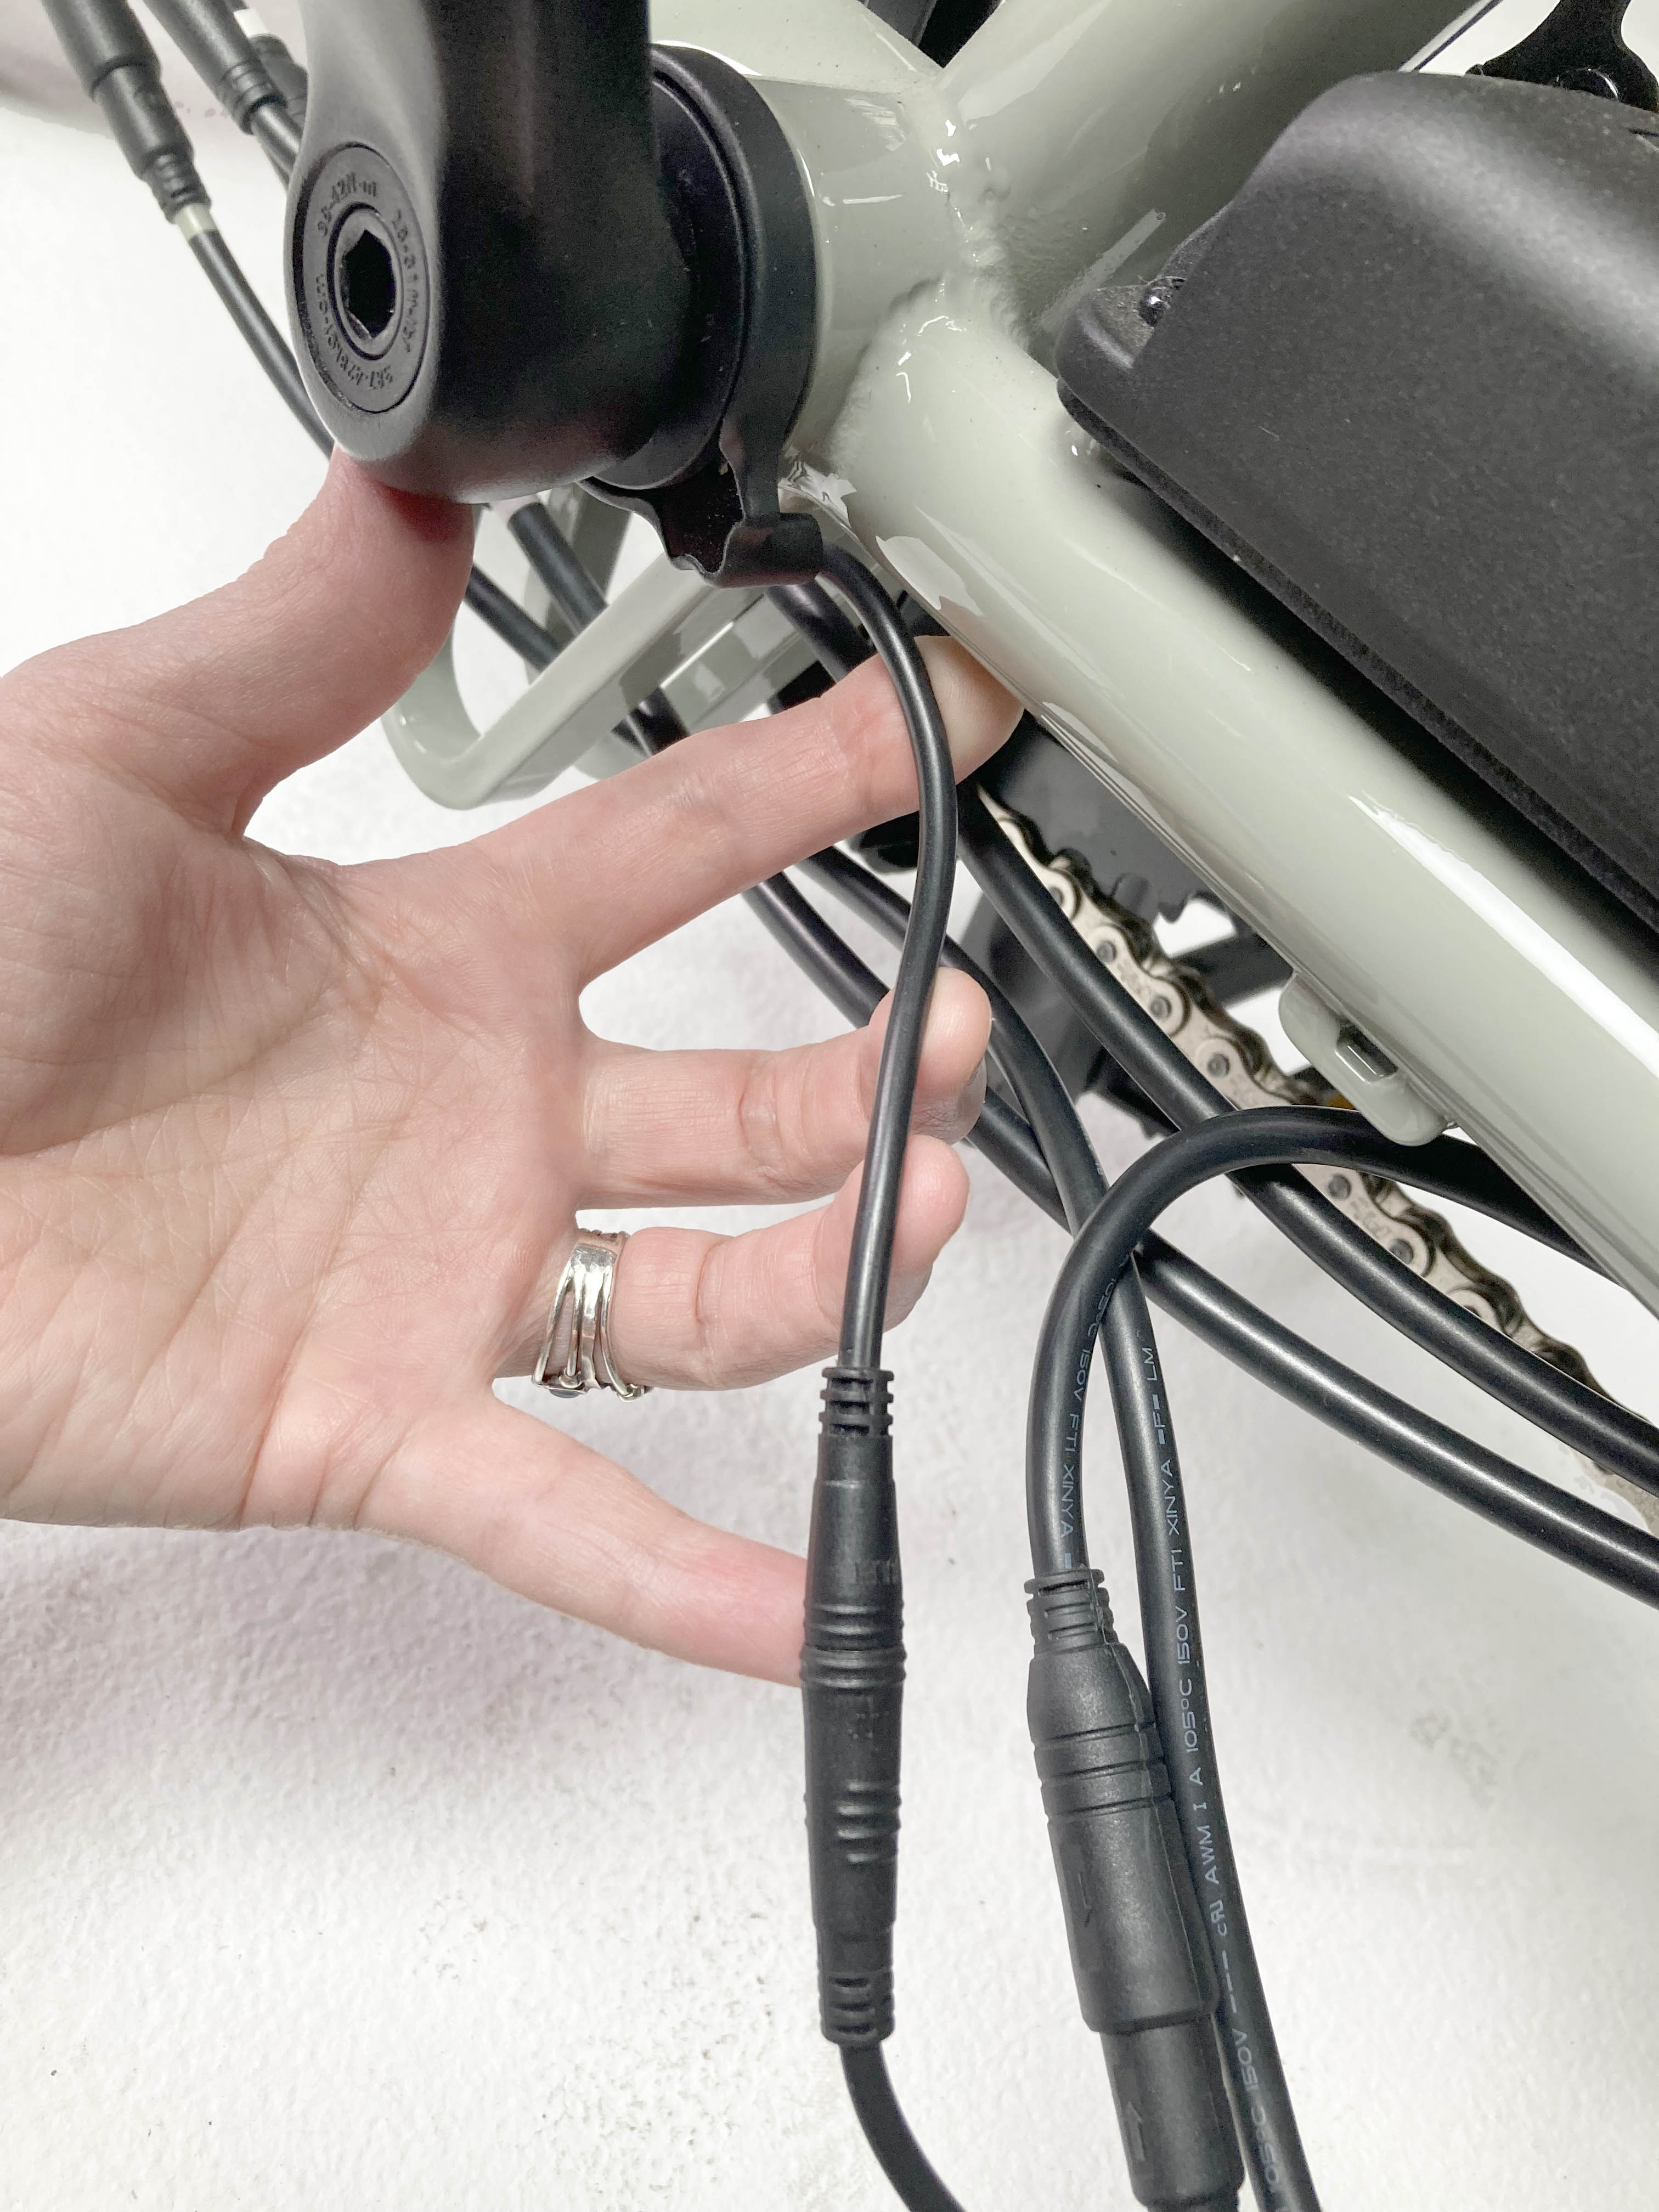
- Carefully snip the zip ties holding together the bundle of cables under your RadTrike frame. This is in the area between the bottom of the battery tray and the controller (the black box just behind your pedals).
- Locate the battery connector or connectors (there may be one or two). Trace the cable coming out of the bottom of the battery tray all the way under the Trike frame and into the rear side of the controller. Along this cable there will be one or two connectors that you need to check. If you have two connectors on this cable, that means your RadTrike came with a small extension for this cable.
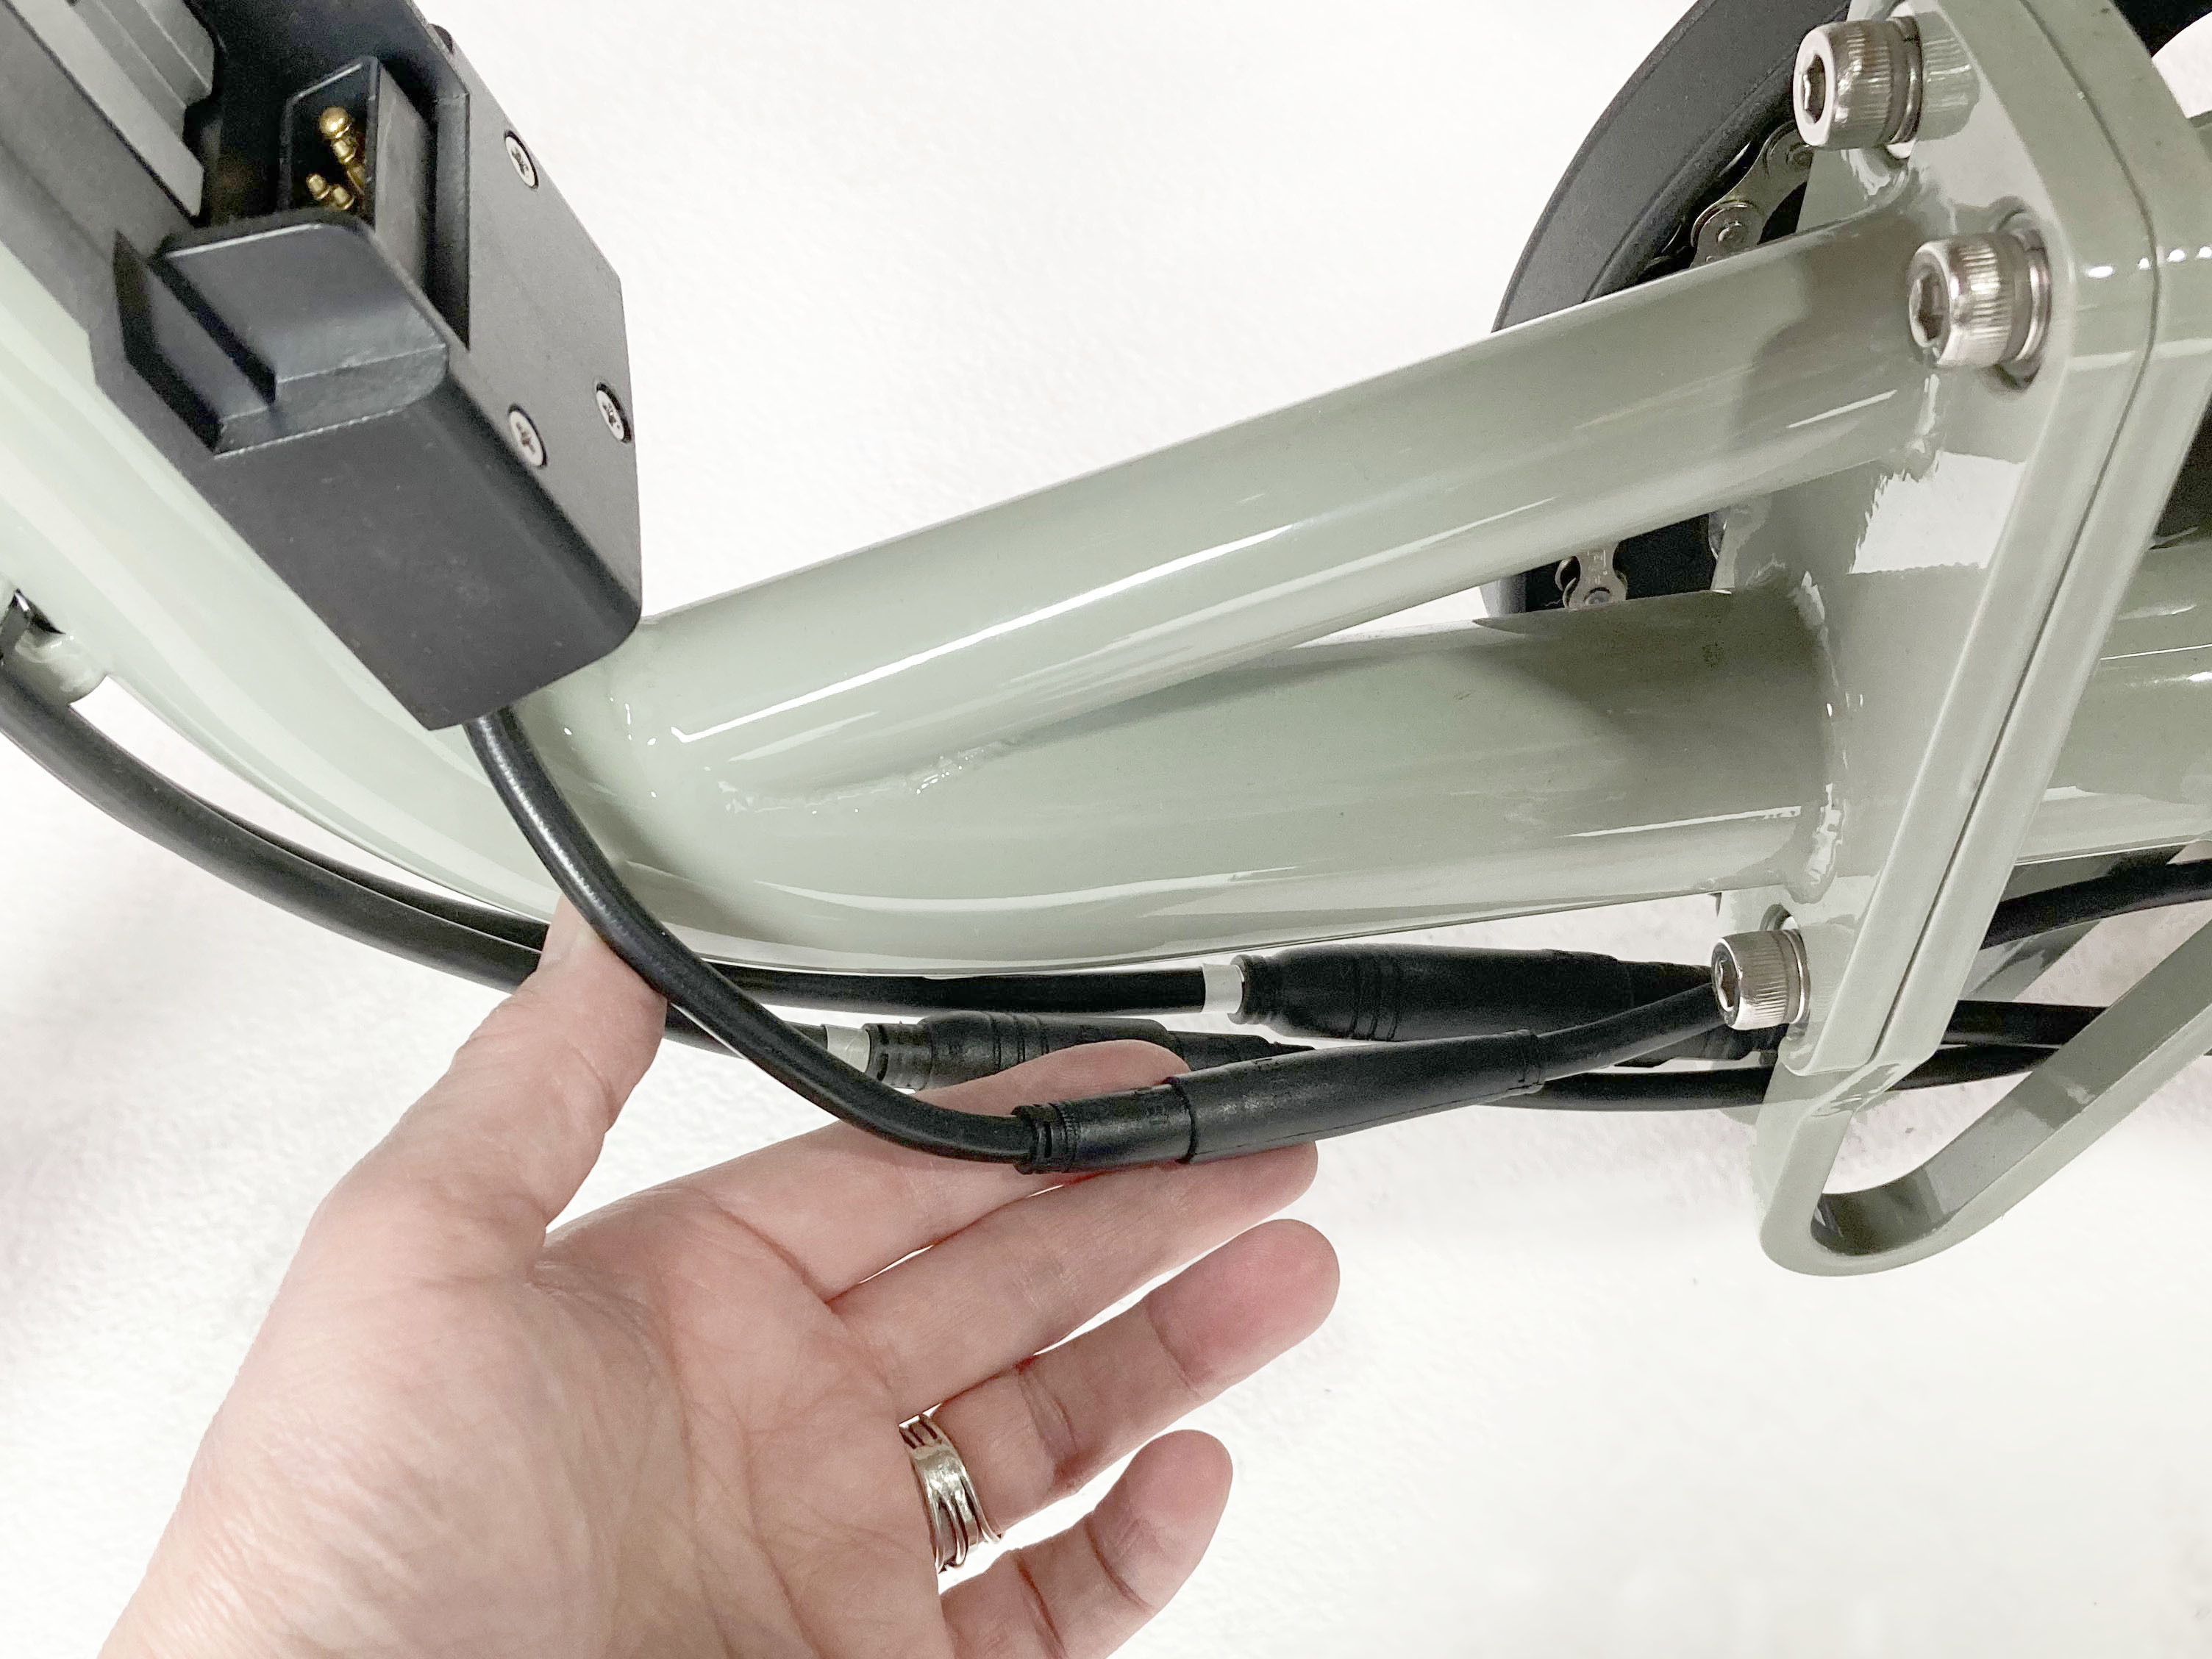
The battery connector
- Open the connector(s). Gently but firmly pull the two sides of the connector apart without twisting. The interior of the connector(s) will be black with two pins.
- Inspect the connector(s). If the interior is damaged, dirty, or wet, you may need to replace any components attached to the damaged side(s) of connector(s) (e.g., the battery tray, the extension cable if you have one, and/or the controller). Take a picture of the damage and contact Rad Power Bikes Product Support for advice.
- If you find no damage, reconnect the connector(s) and test the bike. Align the external arrows and internal pins on the connector(s), and push the connector halves together firmly without twisting. Reinstall the battery and turn on the bike.
- If the error stops displaying, you likely just fixed a loose connection. Re-secure all of your cables with new zip ties, making sure to not crimp any cables (if you need to bundle them, loop them gently). Perform a normal pre-ride safety check of your bike and ride Rad!
- If the error continues, move onto the next connector check.
- Turn the RadTrike off by pressing and holding the power button.
- Remove the battery.
- Press and hold the power button to discharge any remaining power.
- Remove the neoprene cover on the front cables by pulling apart the two velcro sides. Set the cover aside.
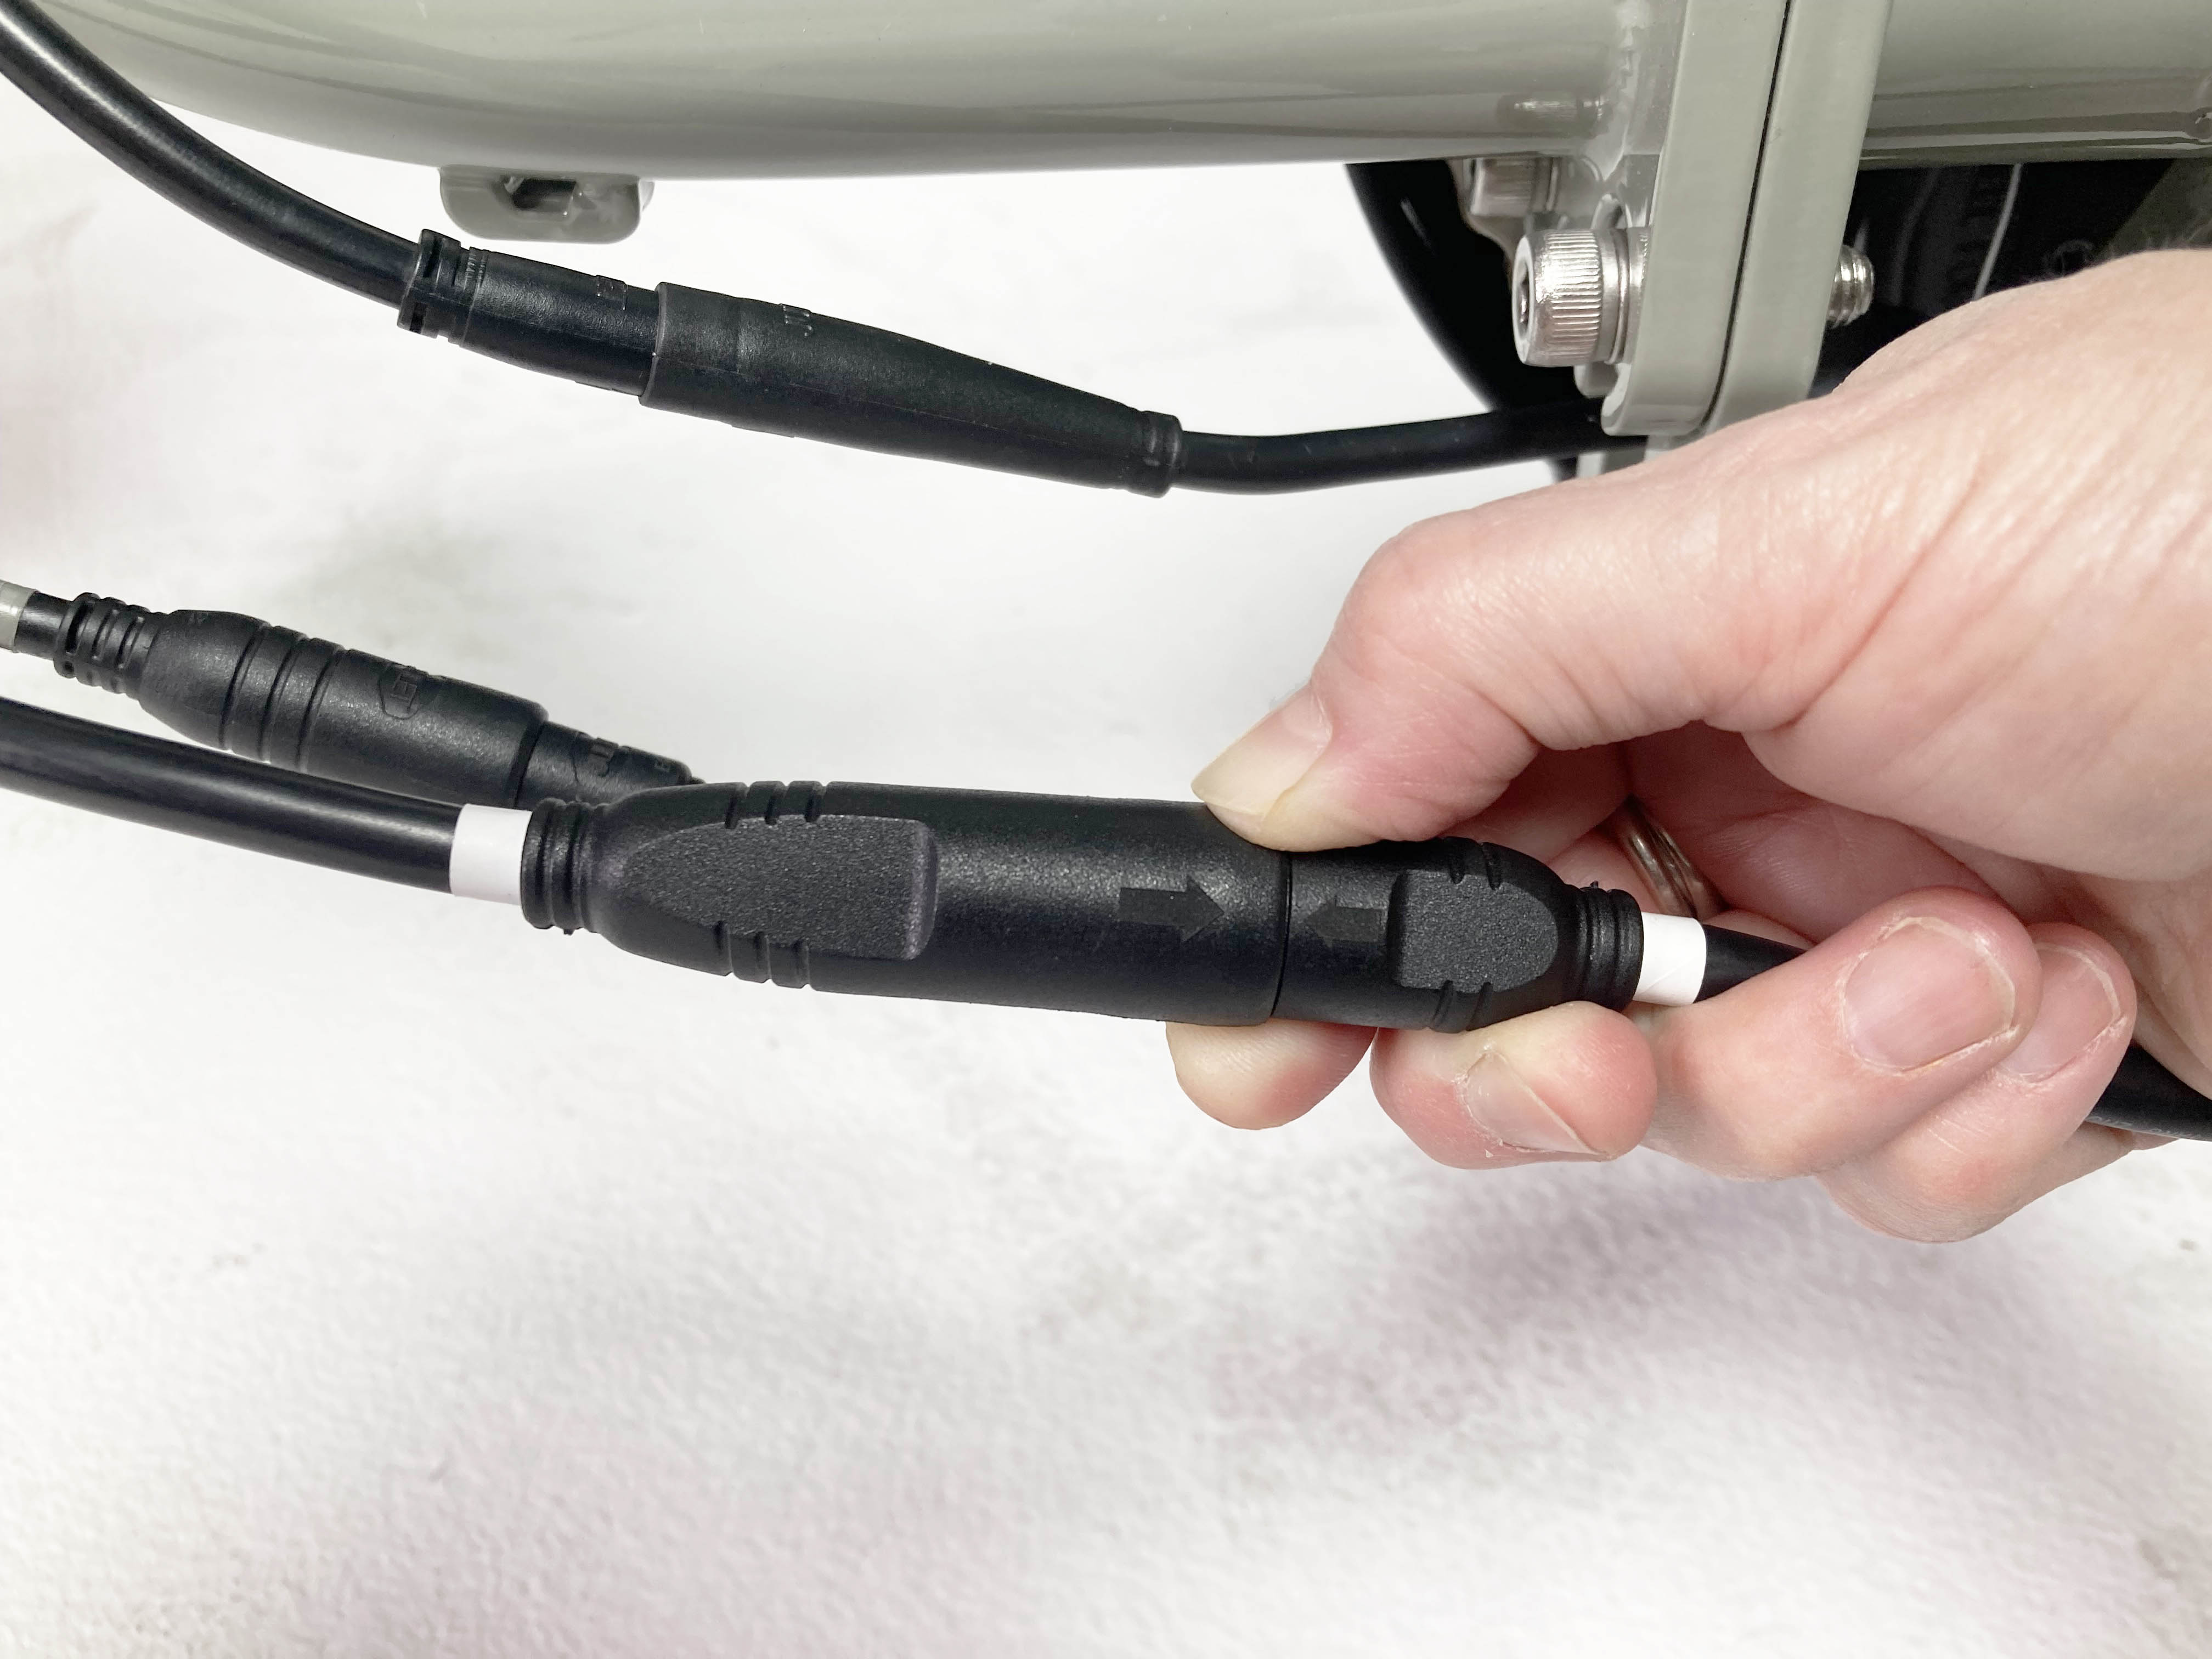
- Locate the front wiring harness connector. Find the small, black, rectangular, plastic junction at the front of the bike that several of the front cables feed into. There will be two cables coming out of the bottom of that junction: one that goes to the headlight, and one that is your wiring harness cable. Trace the wiring harness cable down to the bottom of your RadTrike and then backward where it will feed into the rear wiring harness junction (another small, black, rectangular junction) behind the seat tube. Somewhere along that cable you will find the front wiring harness connector.

If your wiring harness connector is not fully connected, you'll notice a gap where the two halves join.
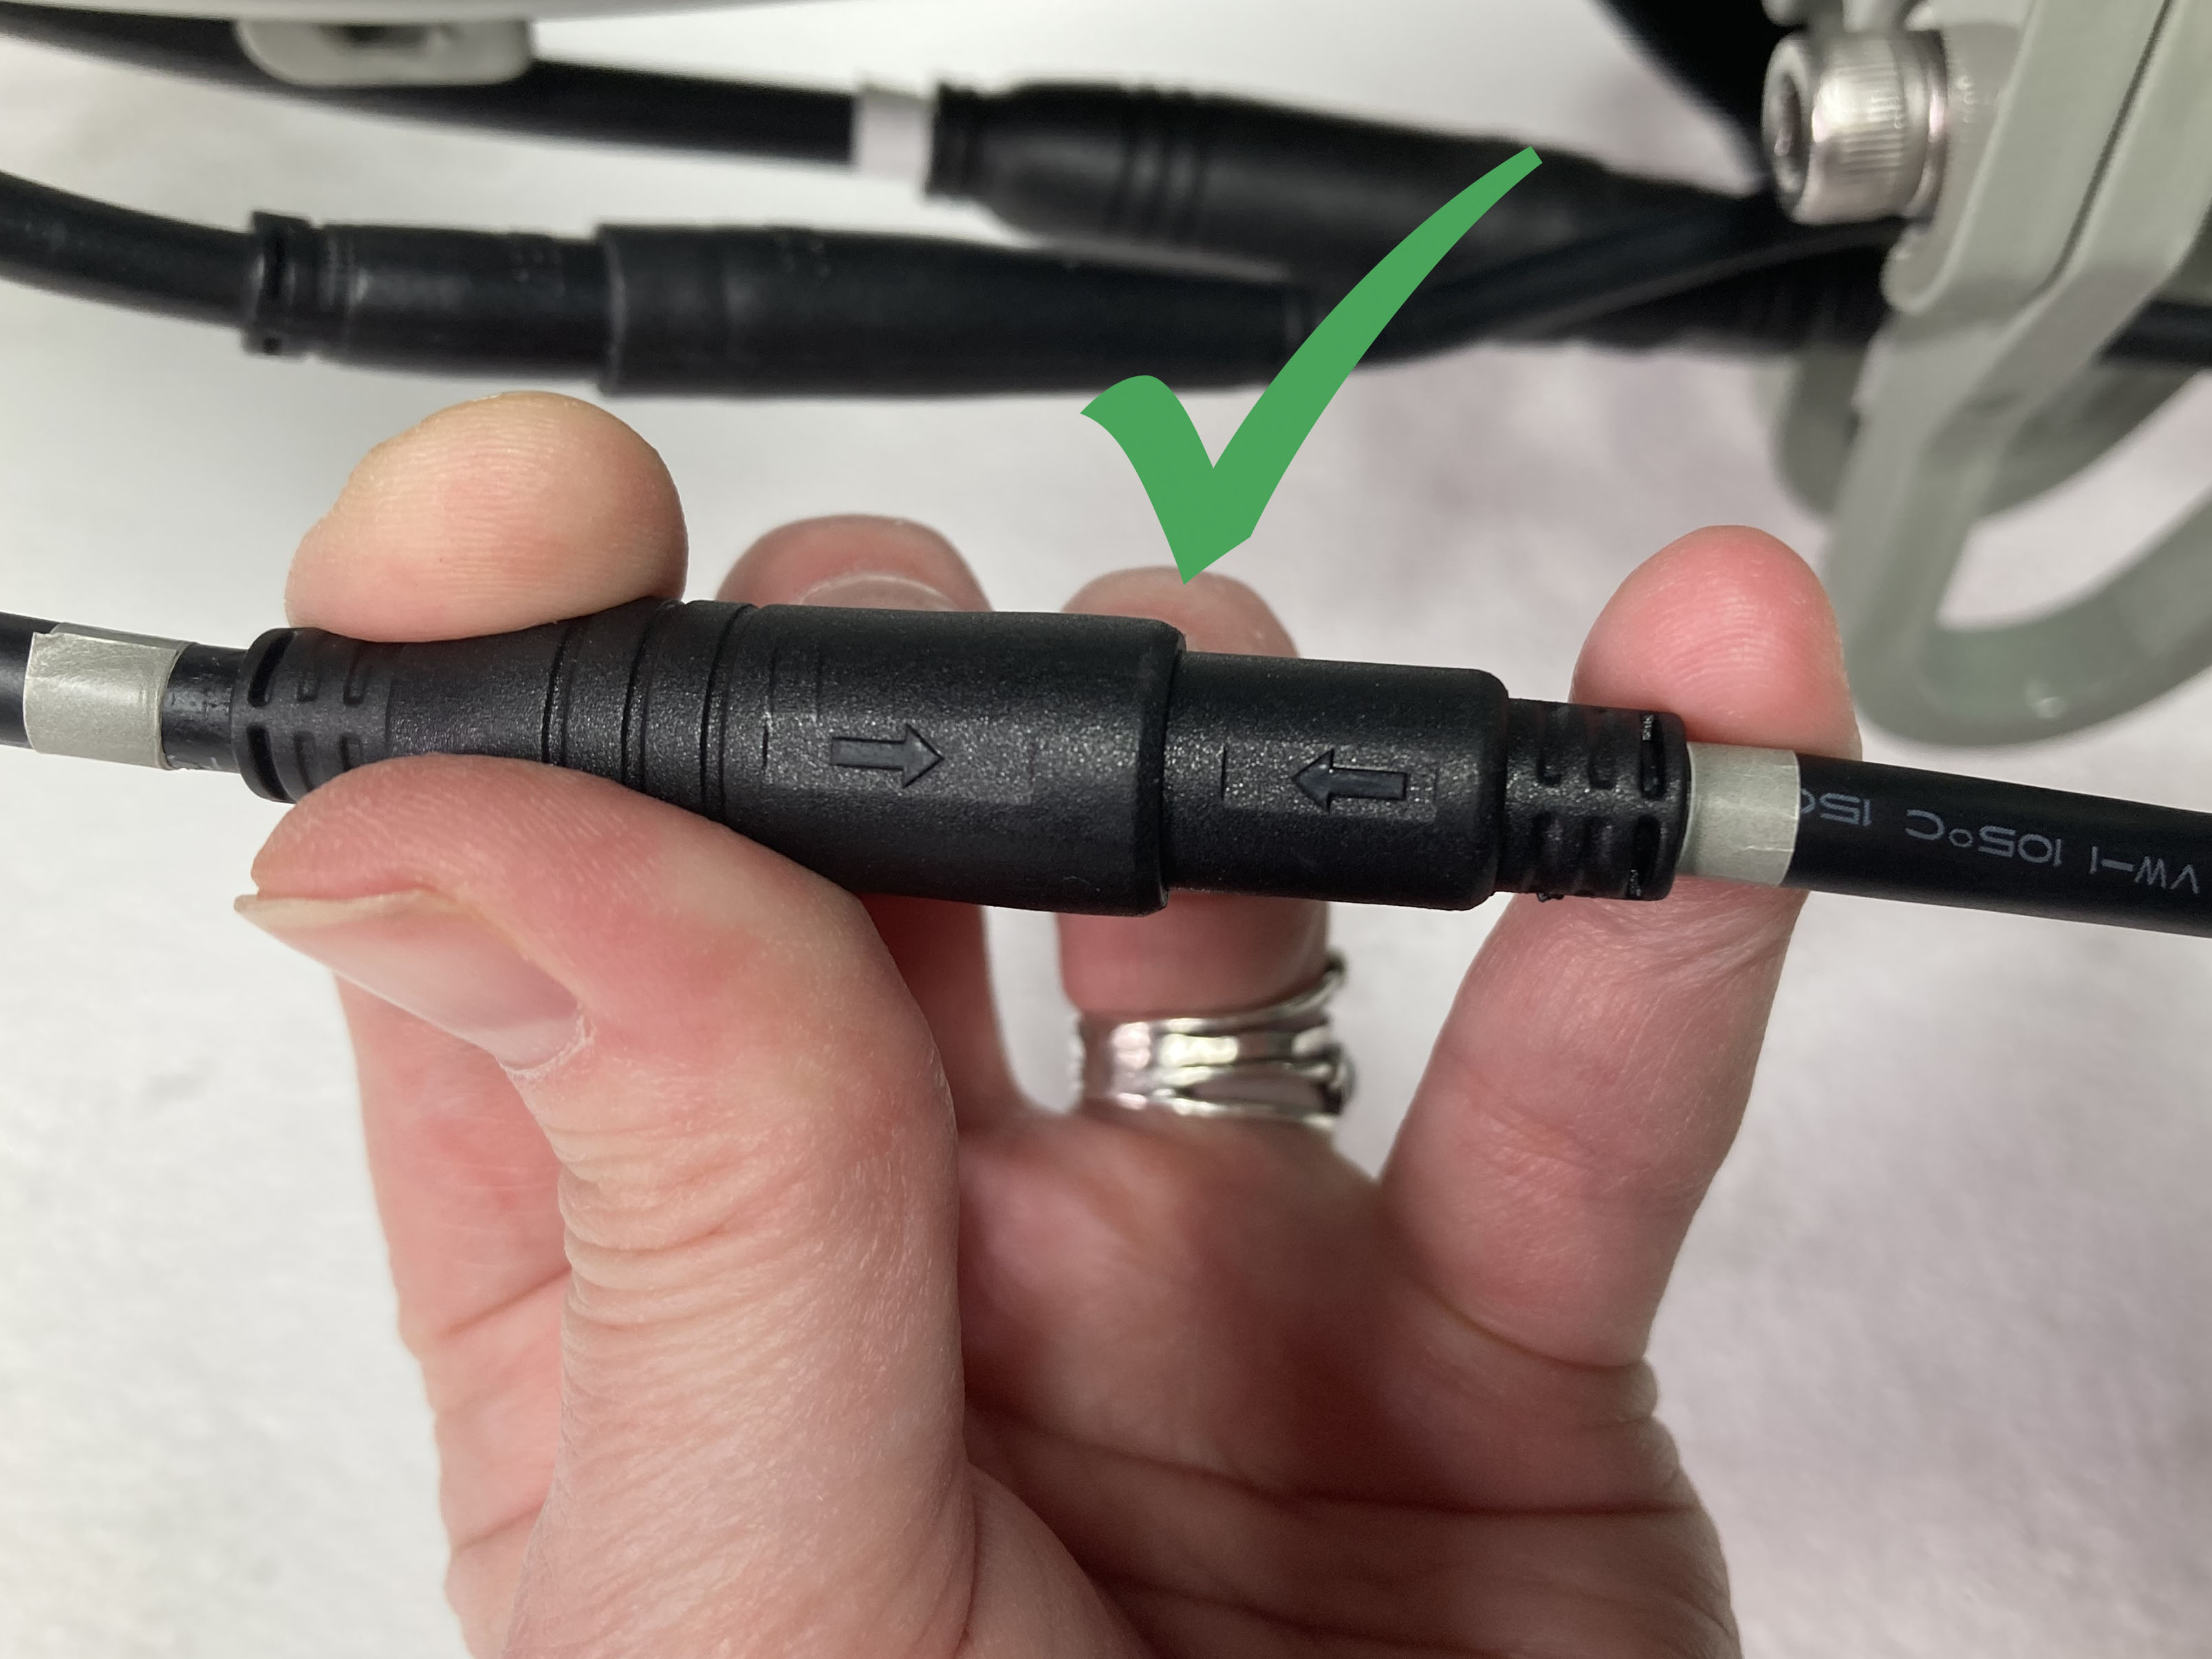
This is how a fully connected wiring harness looks.
-
Open that connector. Gently but firmly pull the two sides of the connector apart without twisting. The interior of the connector is black with ten pins.
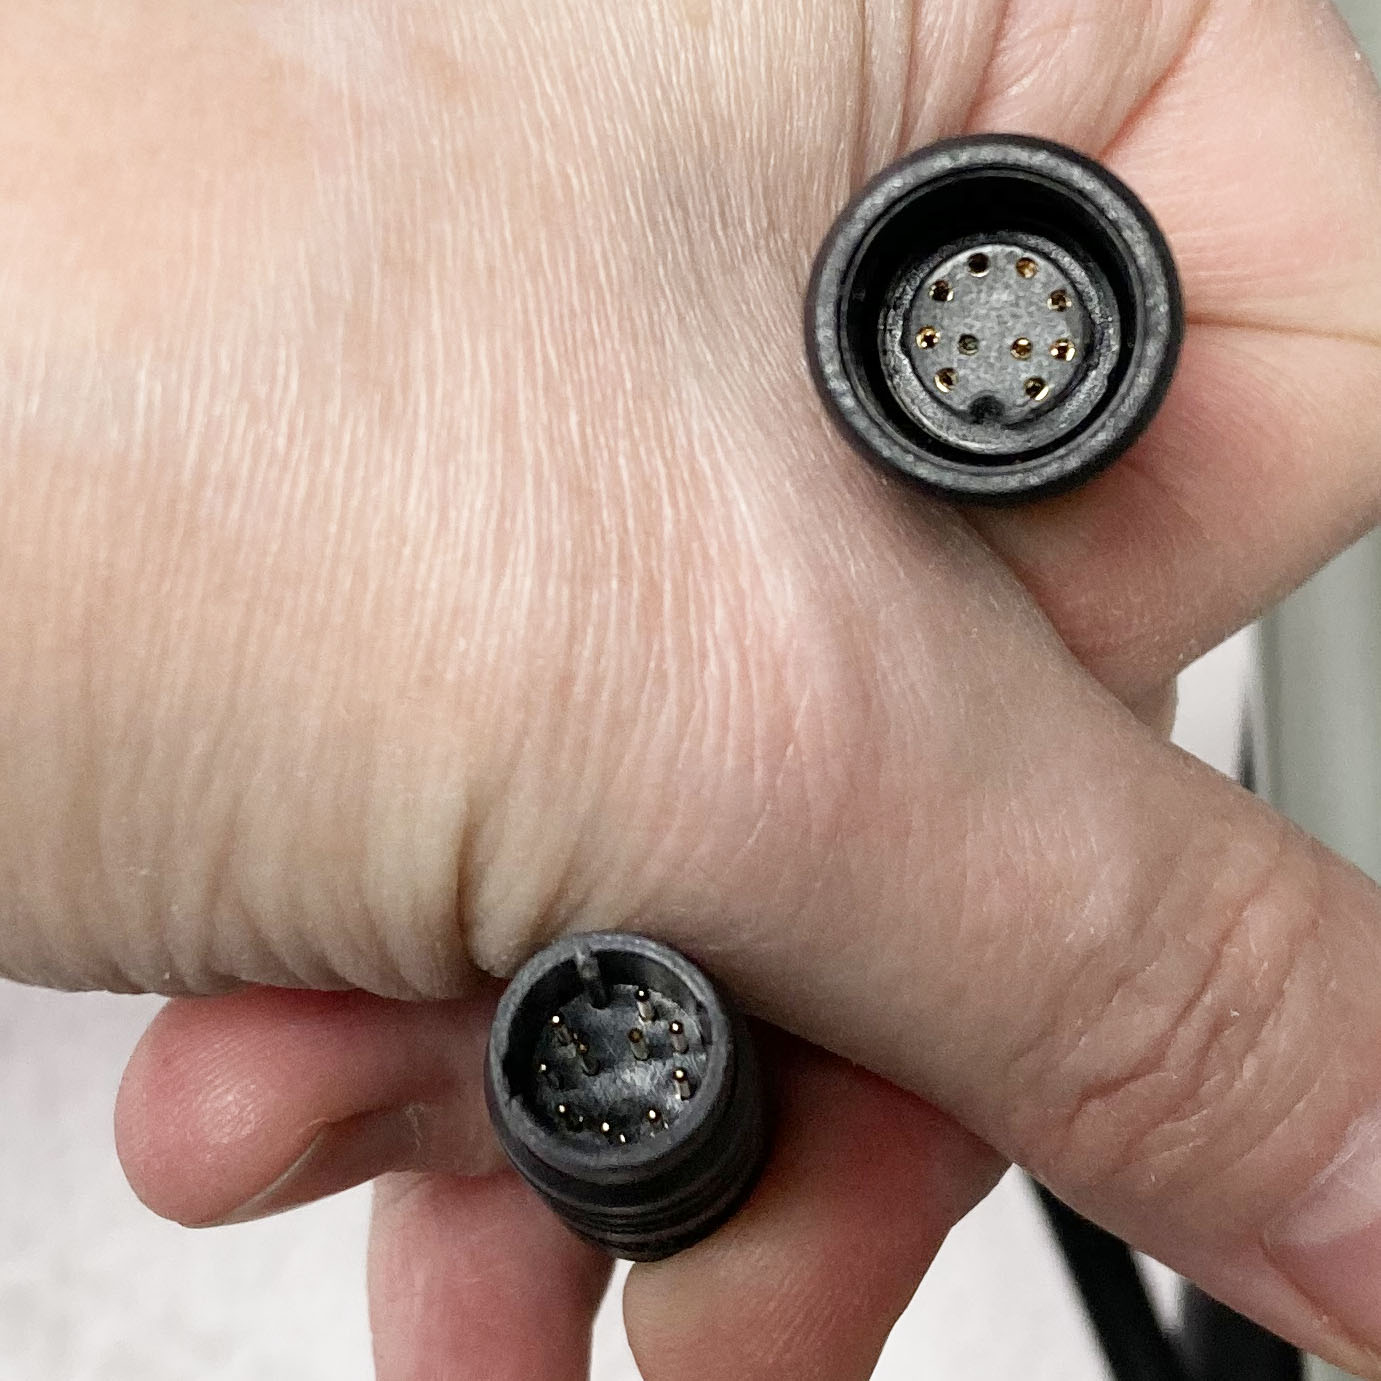
The interior of your wiring harness is black and has ten pins.
- Inspect the connector. If the interior is damaged, dirty, or wet, you may need to replace any components attached to the damaged side(s) of connector (e.g., your front wiring harness or the rear wiring harness). Take a picture of the damage and contact Rad Power Bikes Product Support for advice.
- Find the rear wiring harness connector. The rear wiring harness junction will have one cable that exits it and feeds into the controller. Along that cable you'll find the rear wiring harness connector.
- Open that connector. Gently but firmly pull the two sides of the connector apart without twisting. The interior of the connector is black with eleven pins.
- Inspect the connector. If the interior is damaged, dirty, or wet, you may need to replace any components attached to the damaged side(s) of connector (e.g., your front wiring harness or the rear wiring harness). Take a picture of the damage and contact Rad Power Bikes Product Support for advice.
- If you find no damage in either wiring harness connector, reconnect them. Align the external arrows and internal pins, and push the connector halves together firmly without twisting. Reinstall the battery and turn on the bike.
- If the error stops displaying, you likely just fixed a loose connection. Re-secure all of your cables with new zip ties, making sure to not crimp any cables (if you need to bundle them, loop them gently). Perform a normal pre-ride safety check of your bike and ride Rad!
- If the error continues, move onto the next connector check.
Additional connectors
Follow the steps below to check the remaining connectors, making sure to leave the connector unplugged when turning the bike back on. (This can help isolate a part that may be causing an error.)
- Locate and unplug the connector. Snip any nearby zip ties if you need cable slack, and pull each side of the connector apart, without twisting, to unplug.
- Inspect the inside of the connector. If the inside is damaged, dirty, or wet, the part may need to be replaced. Take a photo and contact Product Support for help.
- With the connector unplugged, reinstall the battery, turn the bike on, and check whether the error is resolved.
- If the error is resolved: The part that is unplugged may have caused the error. Make note of which part it is and contact Product Support for help.
- If the error continues: Turn off the bike, remove the battery, and discharge remaining power. Then carefully reconnect it.
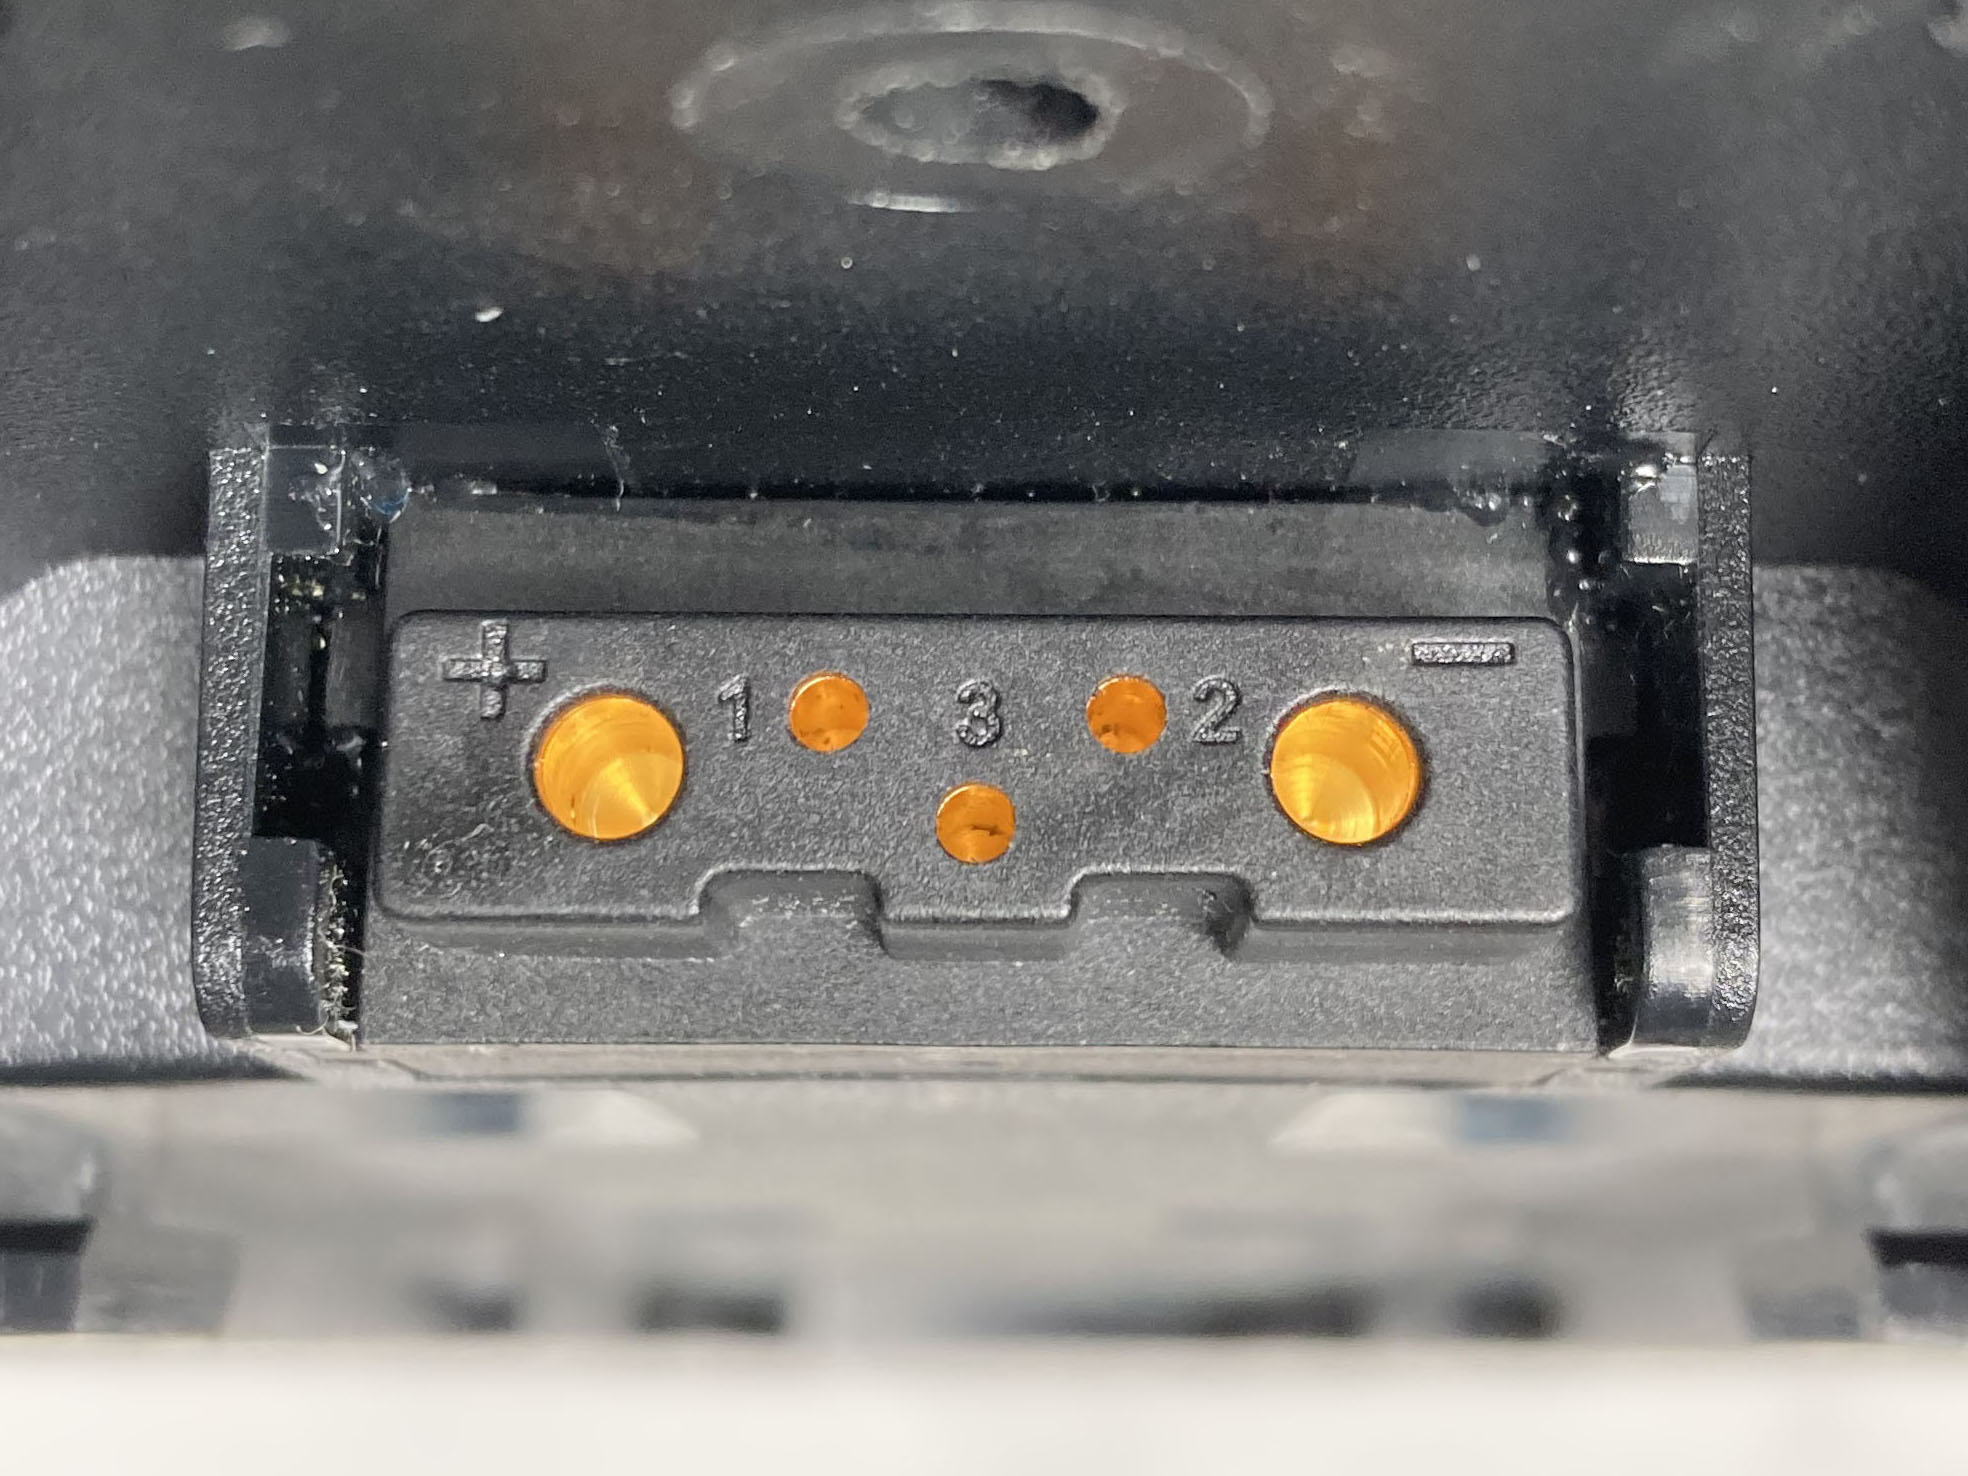
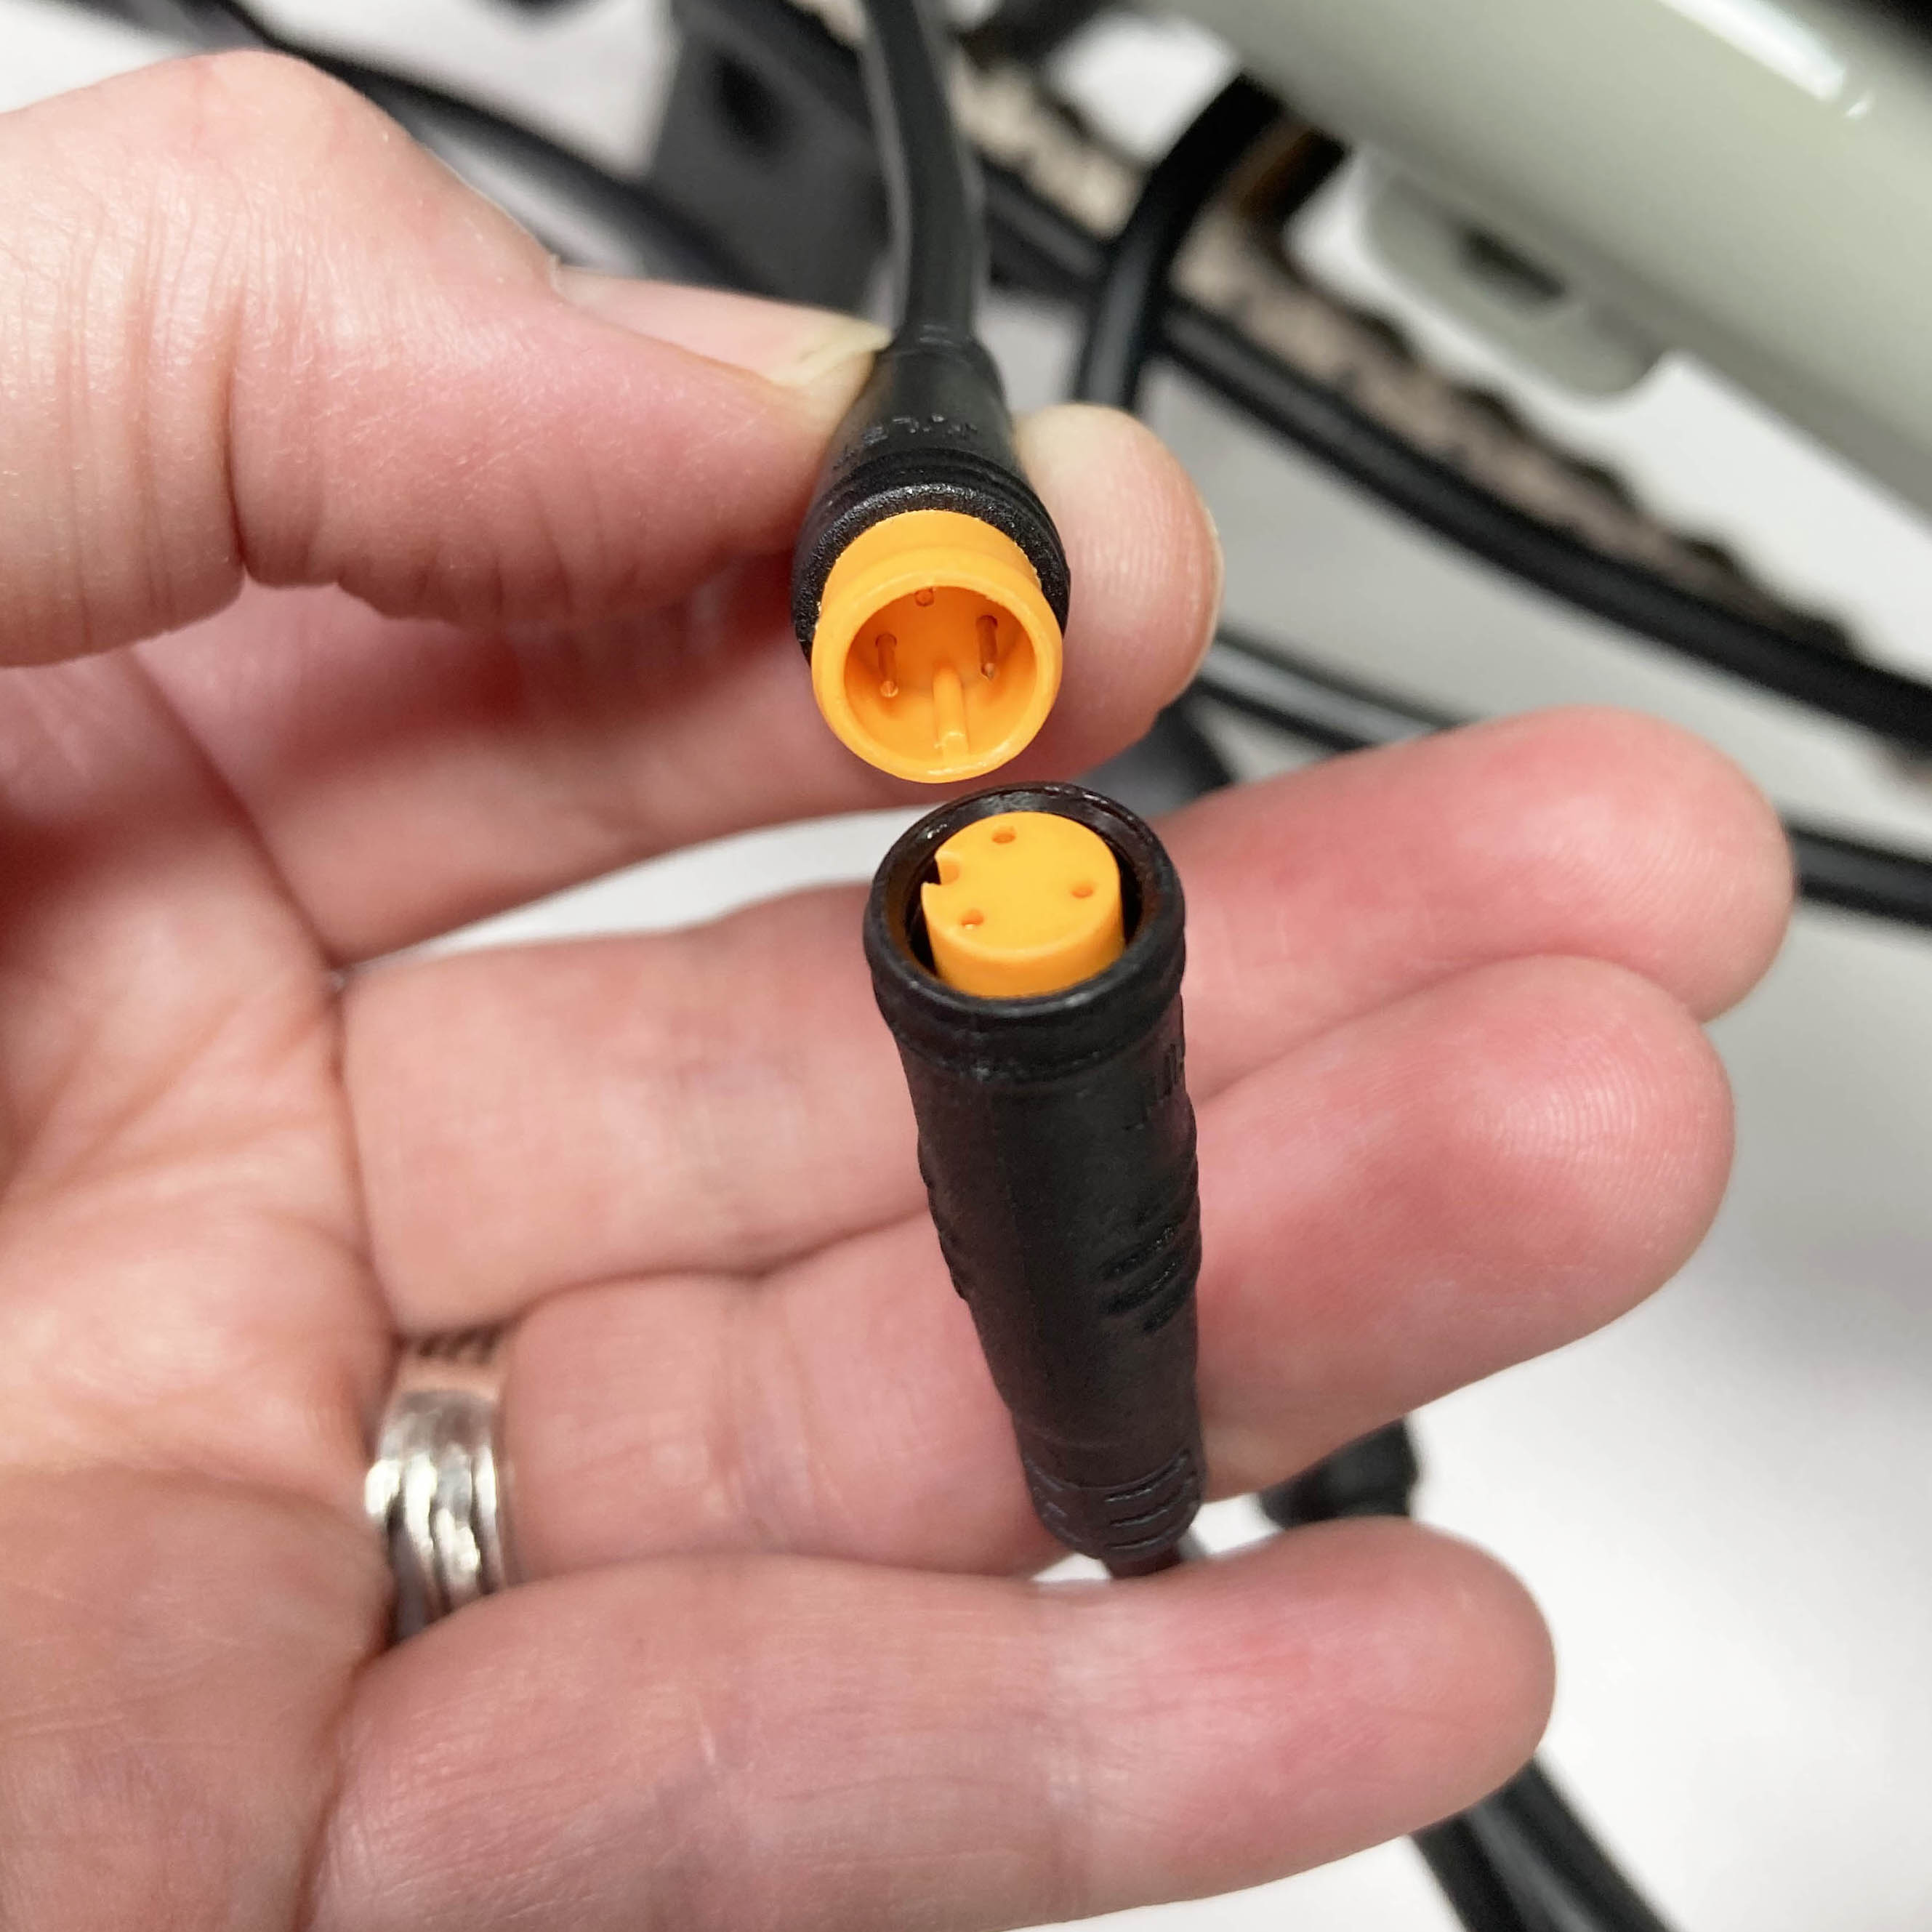
The pedal assist system connector is on a cable that exits the base of the rider's left pedal and extends backward until it feeds into the rear of the controller. The interior of that connector is yellow with three pins.
|
The PAS connector |
The PAS connector is yellow and has three pins. |
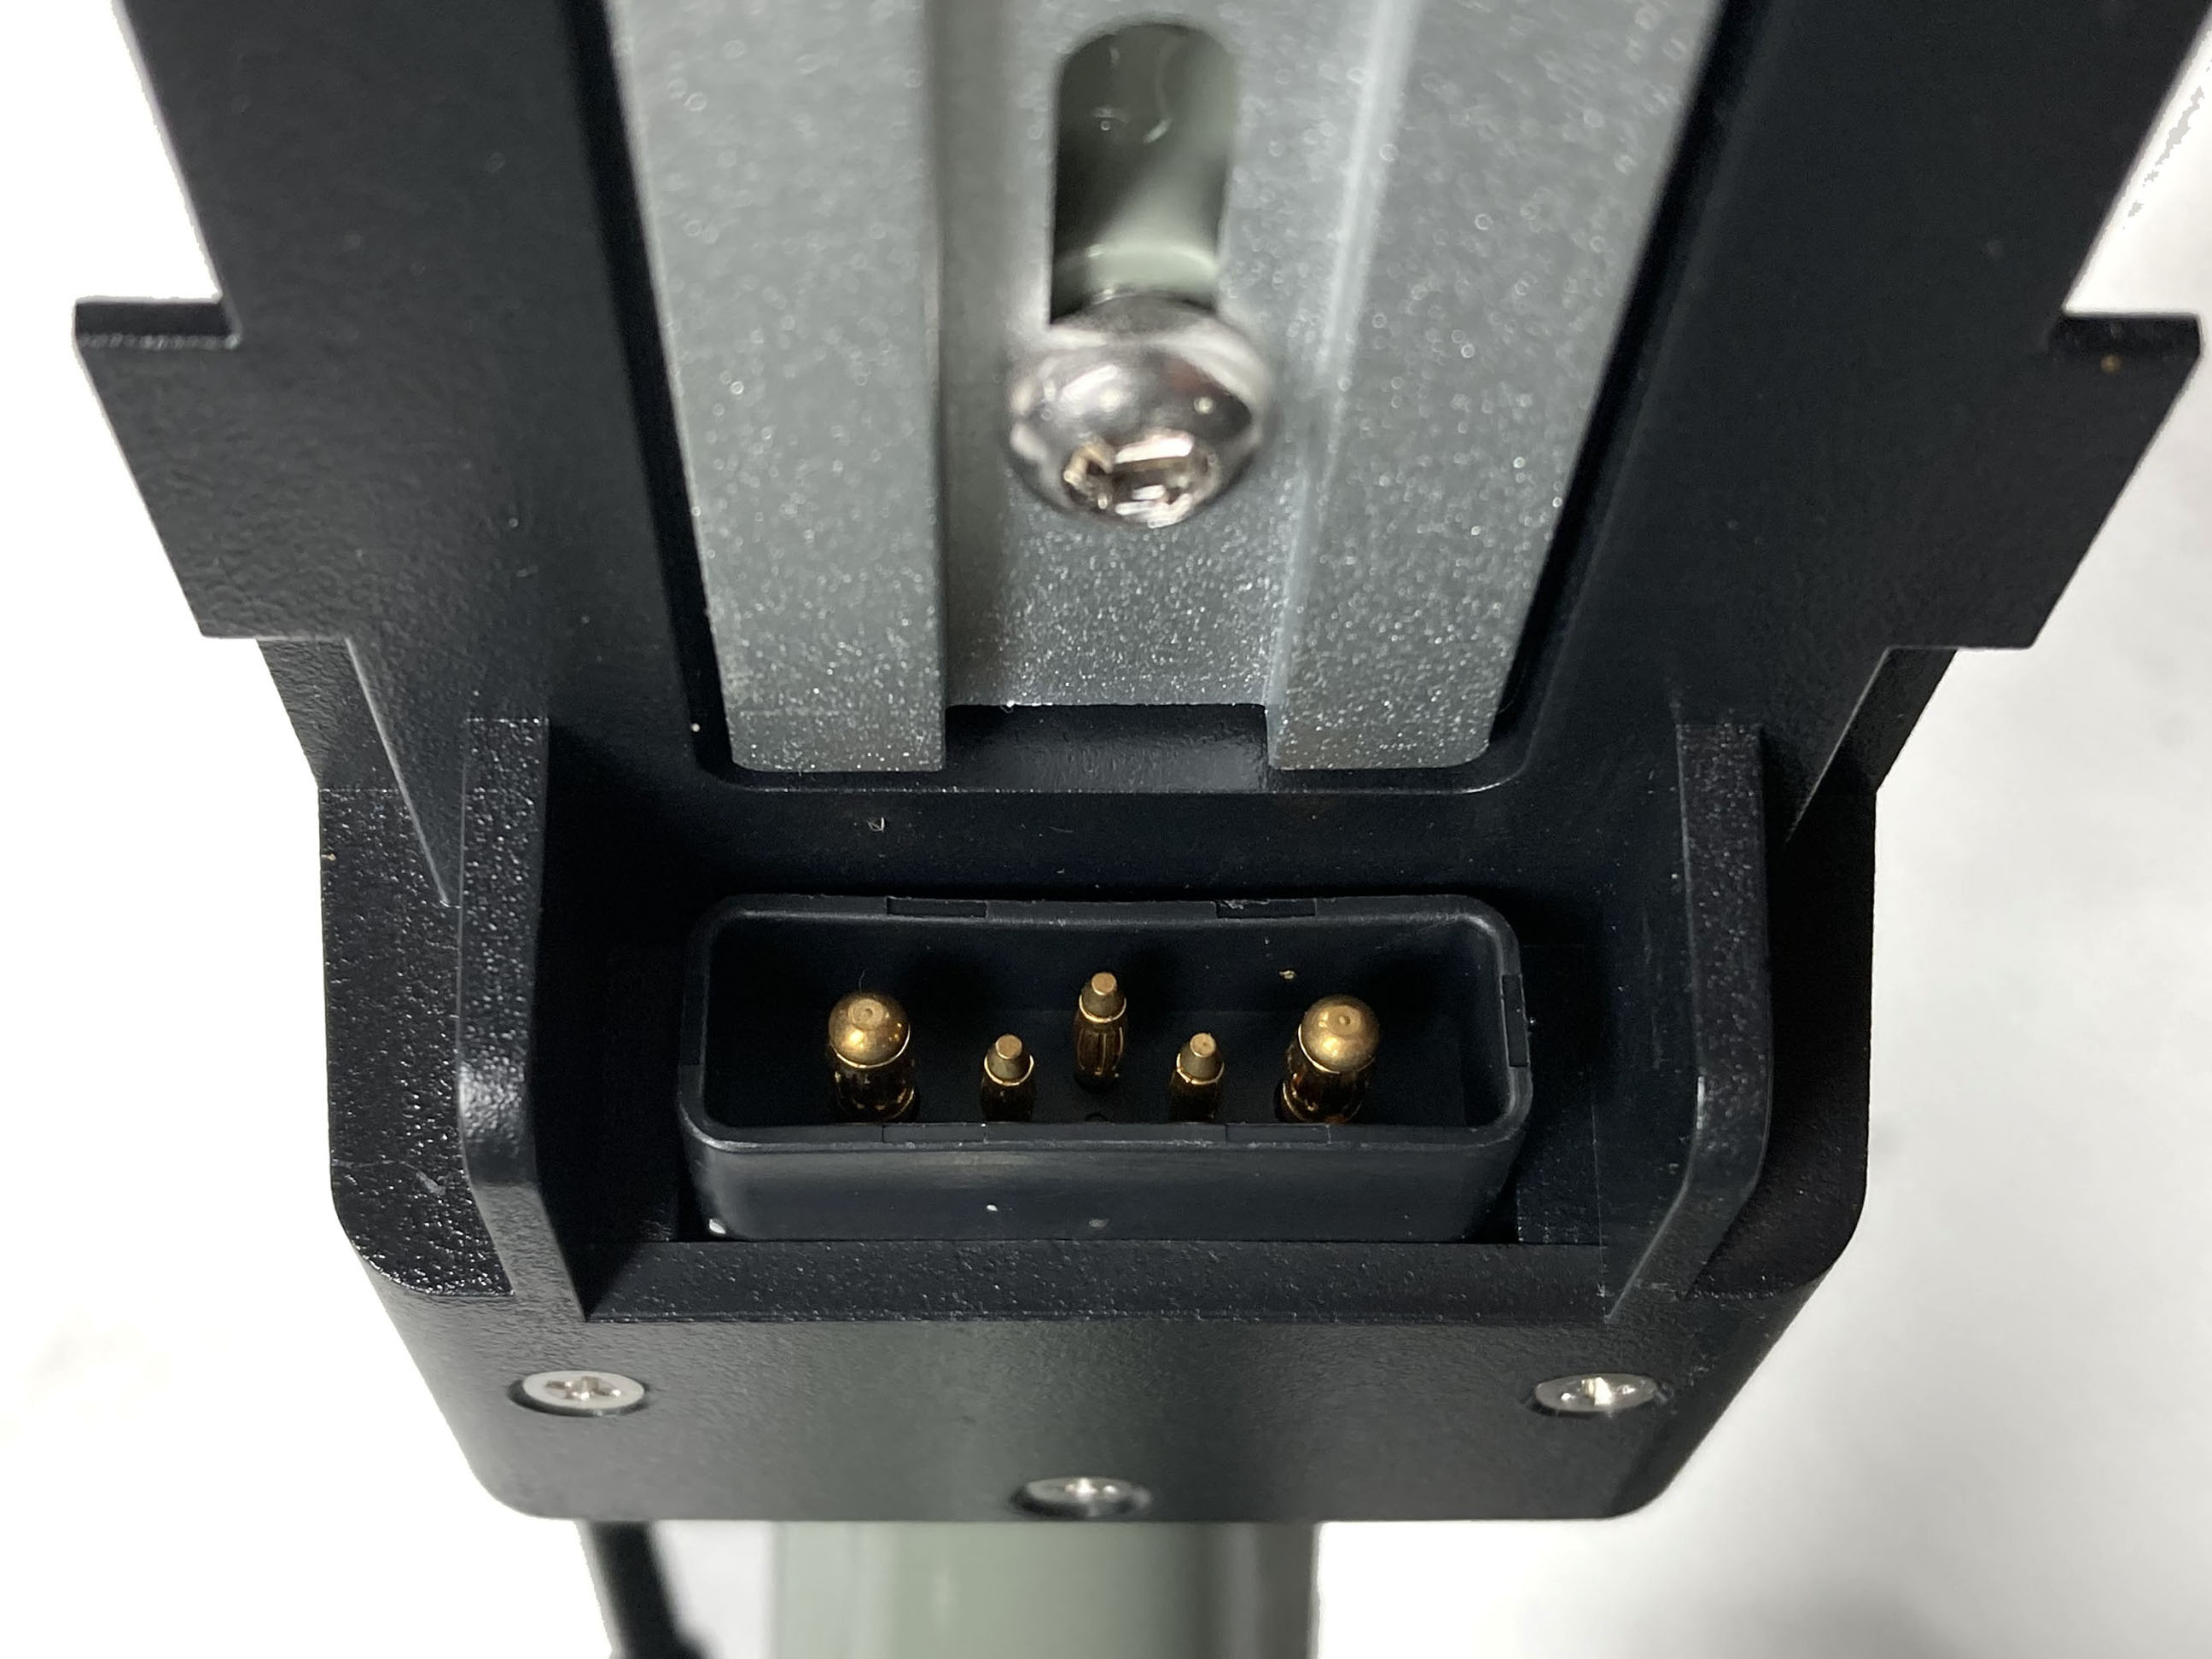
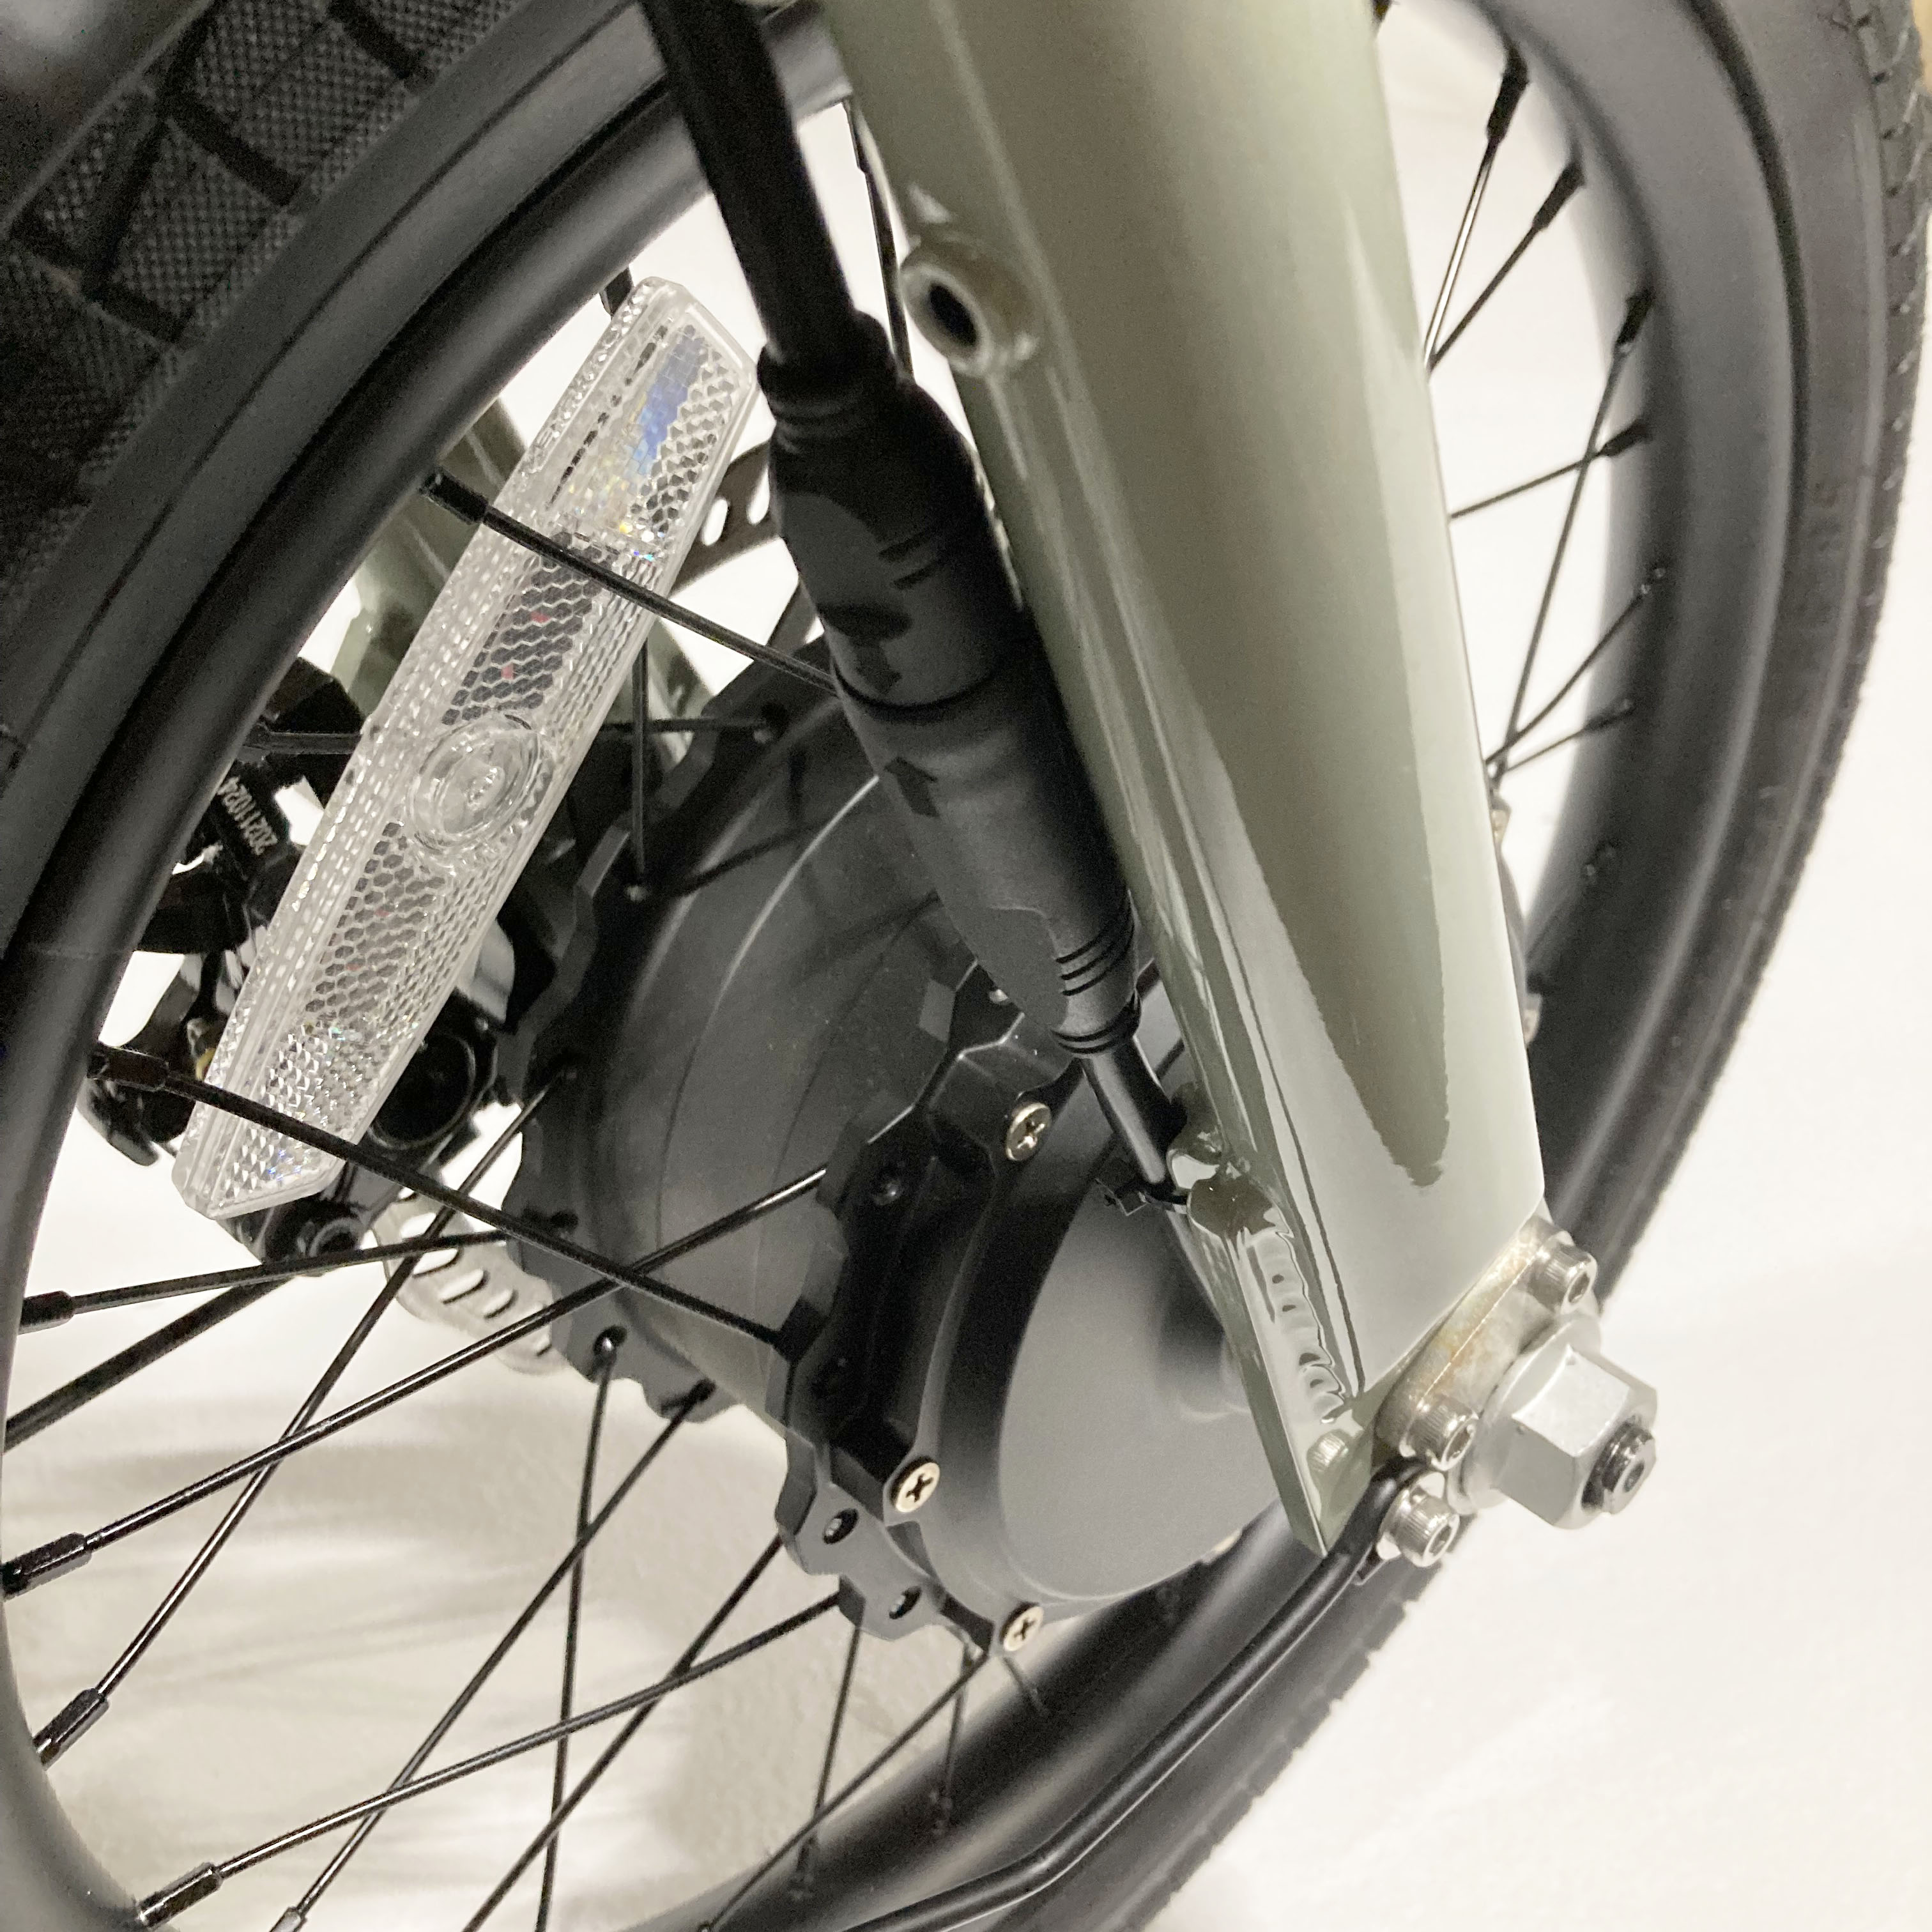
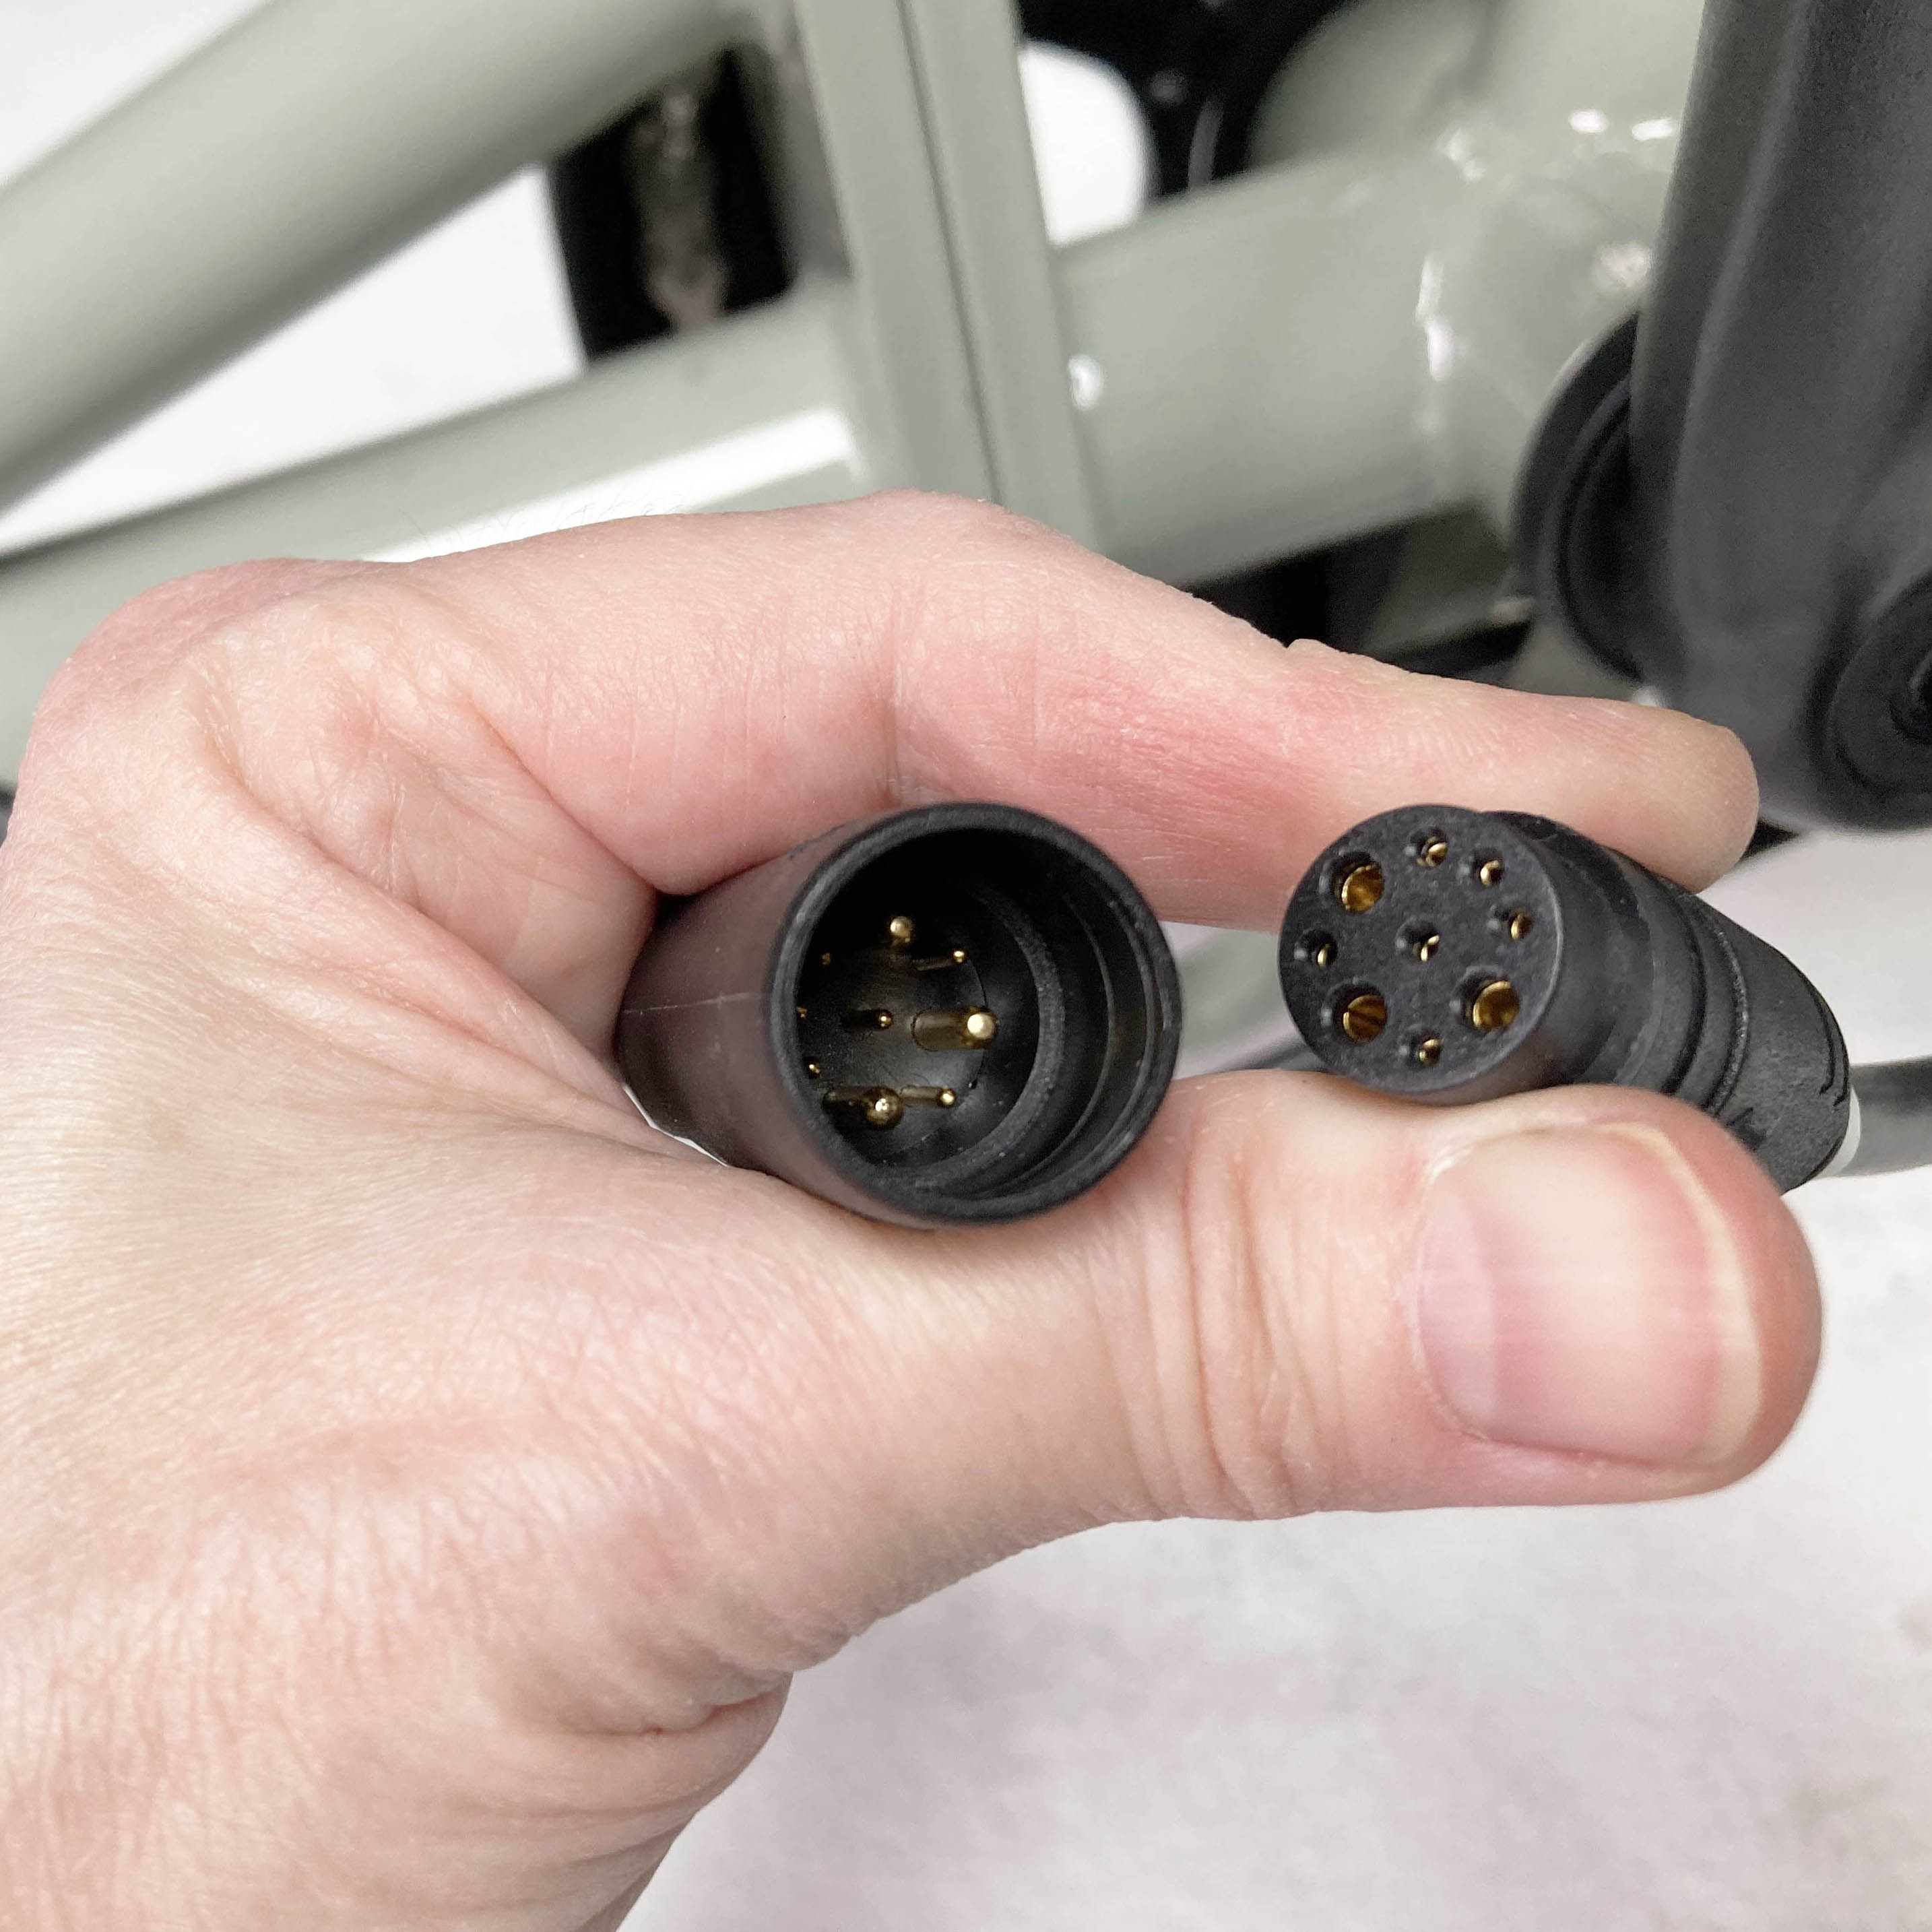
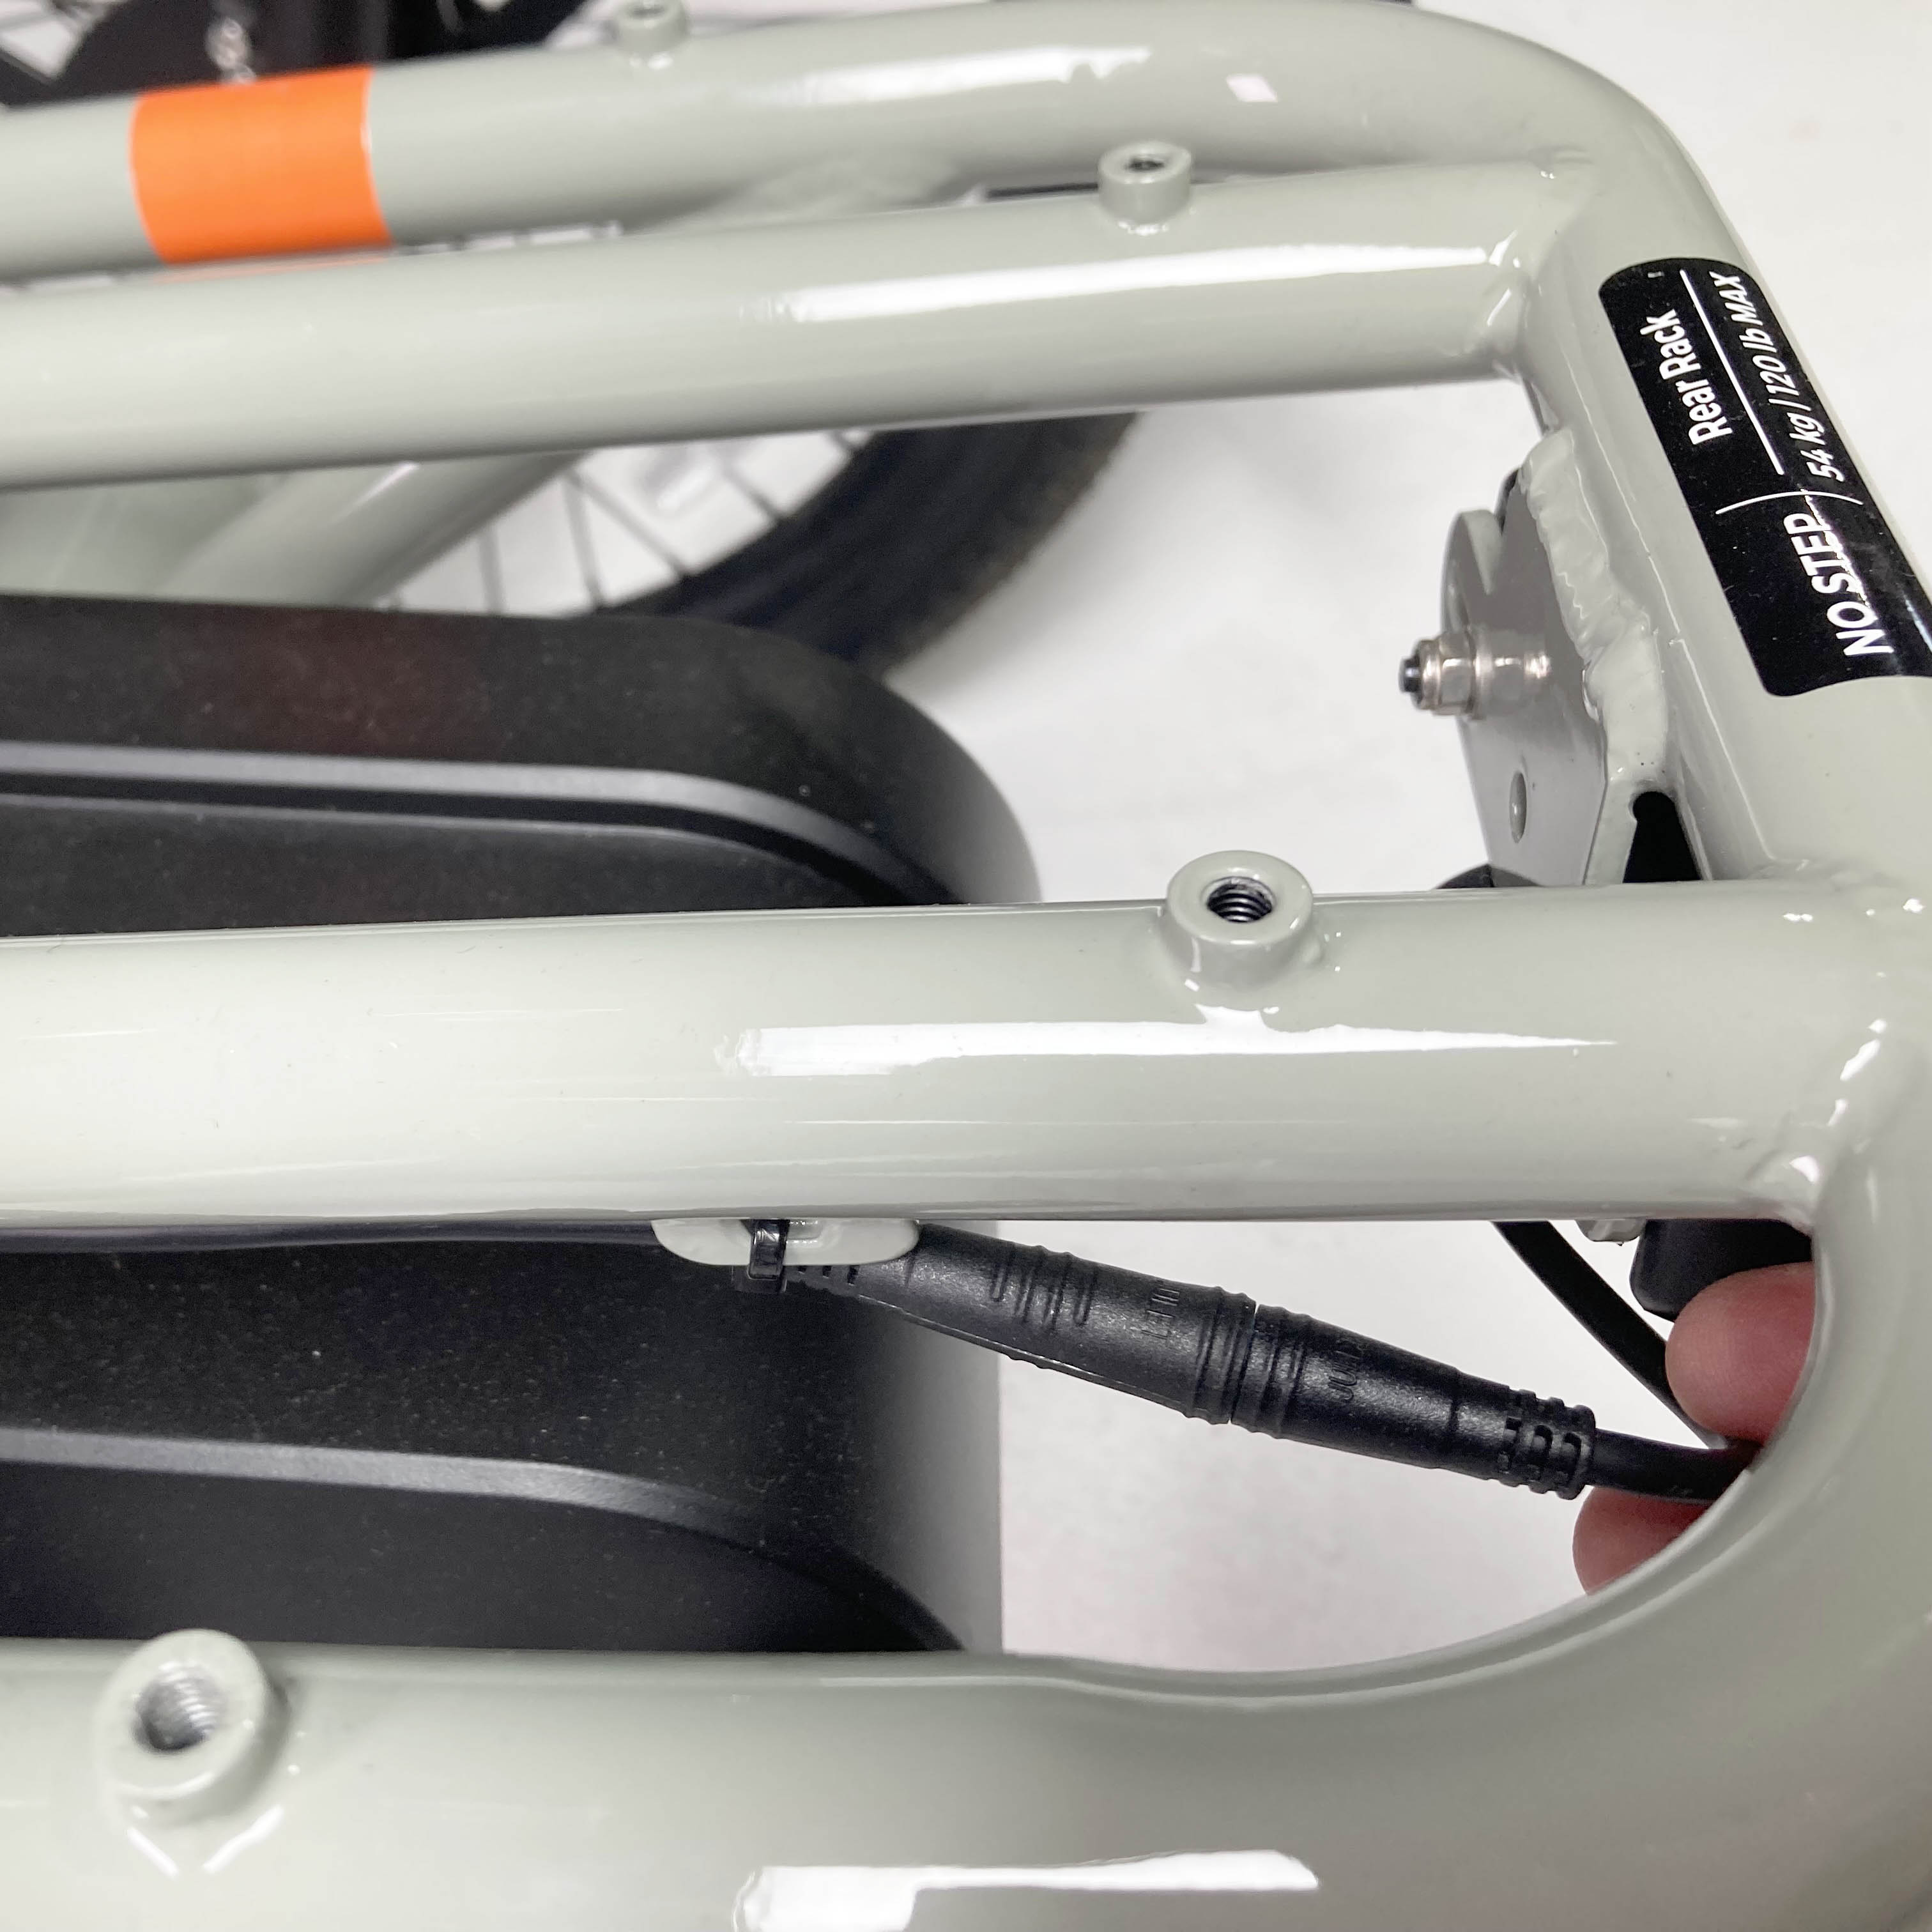
The motor connectors are on a cable that exits the motor on the front wheel and then routes along the front fork, down the downtube, and backward until it feeds into the controller. The first motor connector is just above the motor on the front wheel. The second connector is at the bottom of your RadTrike. The interior of the motor connectors is black with nine pins (three large pins and six small pins).
|
The motor connector near the bottom of your RadTrike frame |
The motor connector on the front wheel |
Interior of the motor connectors has nine pins: three large and six small. |
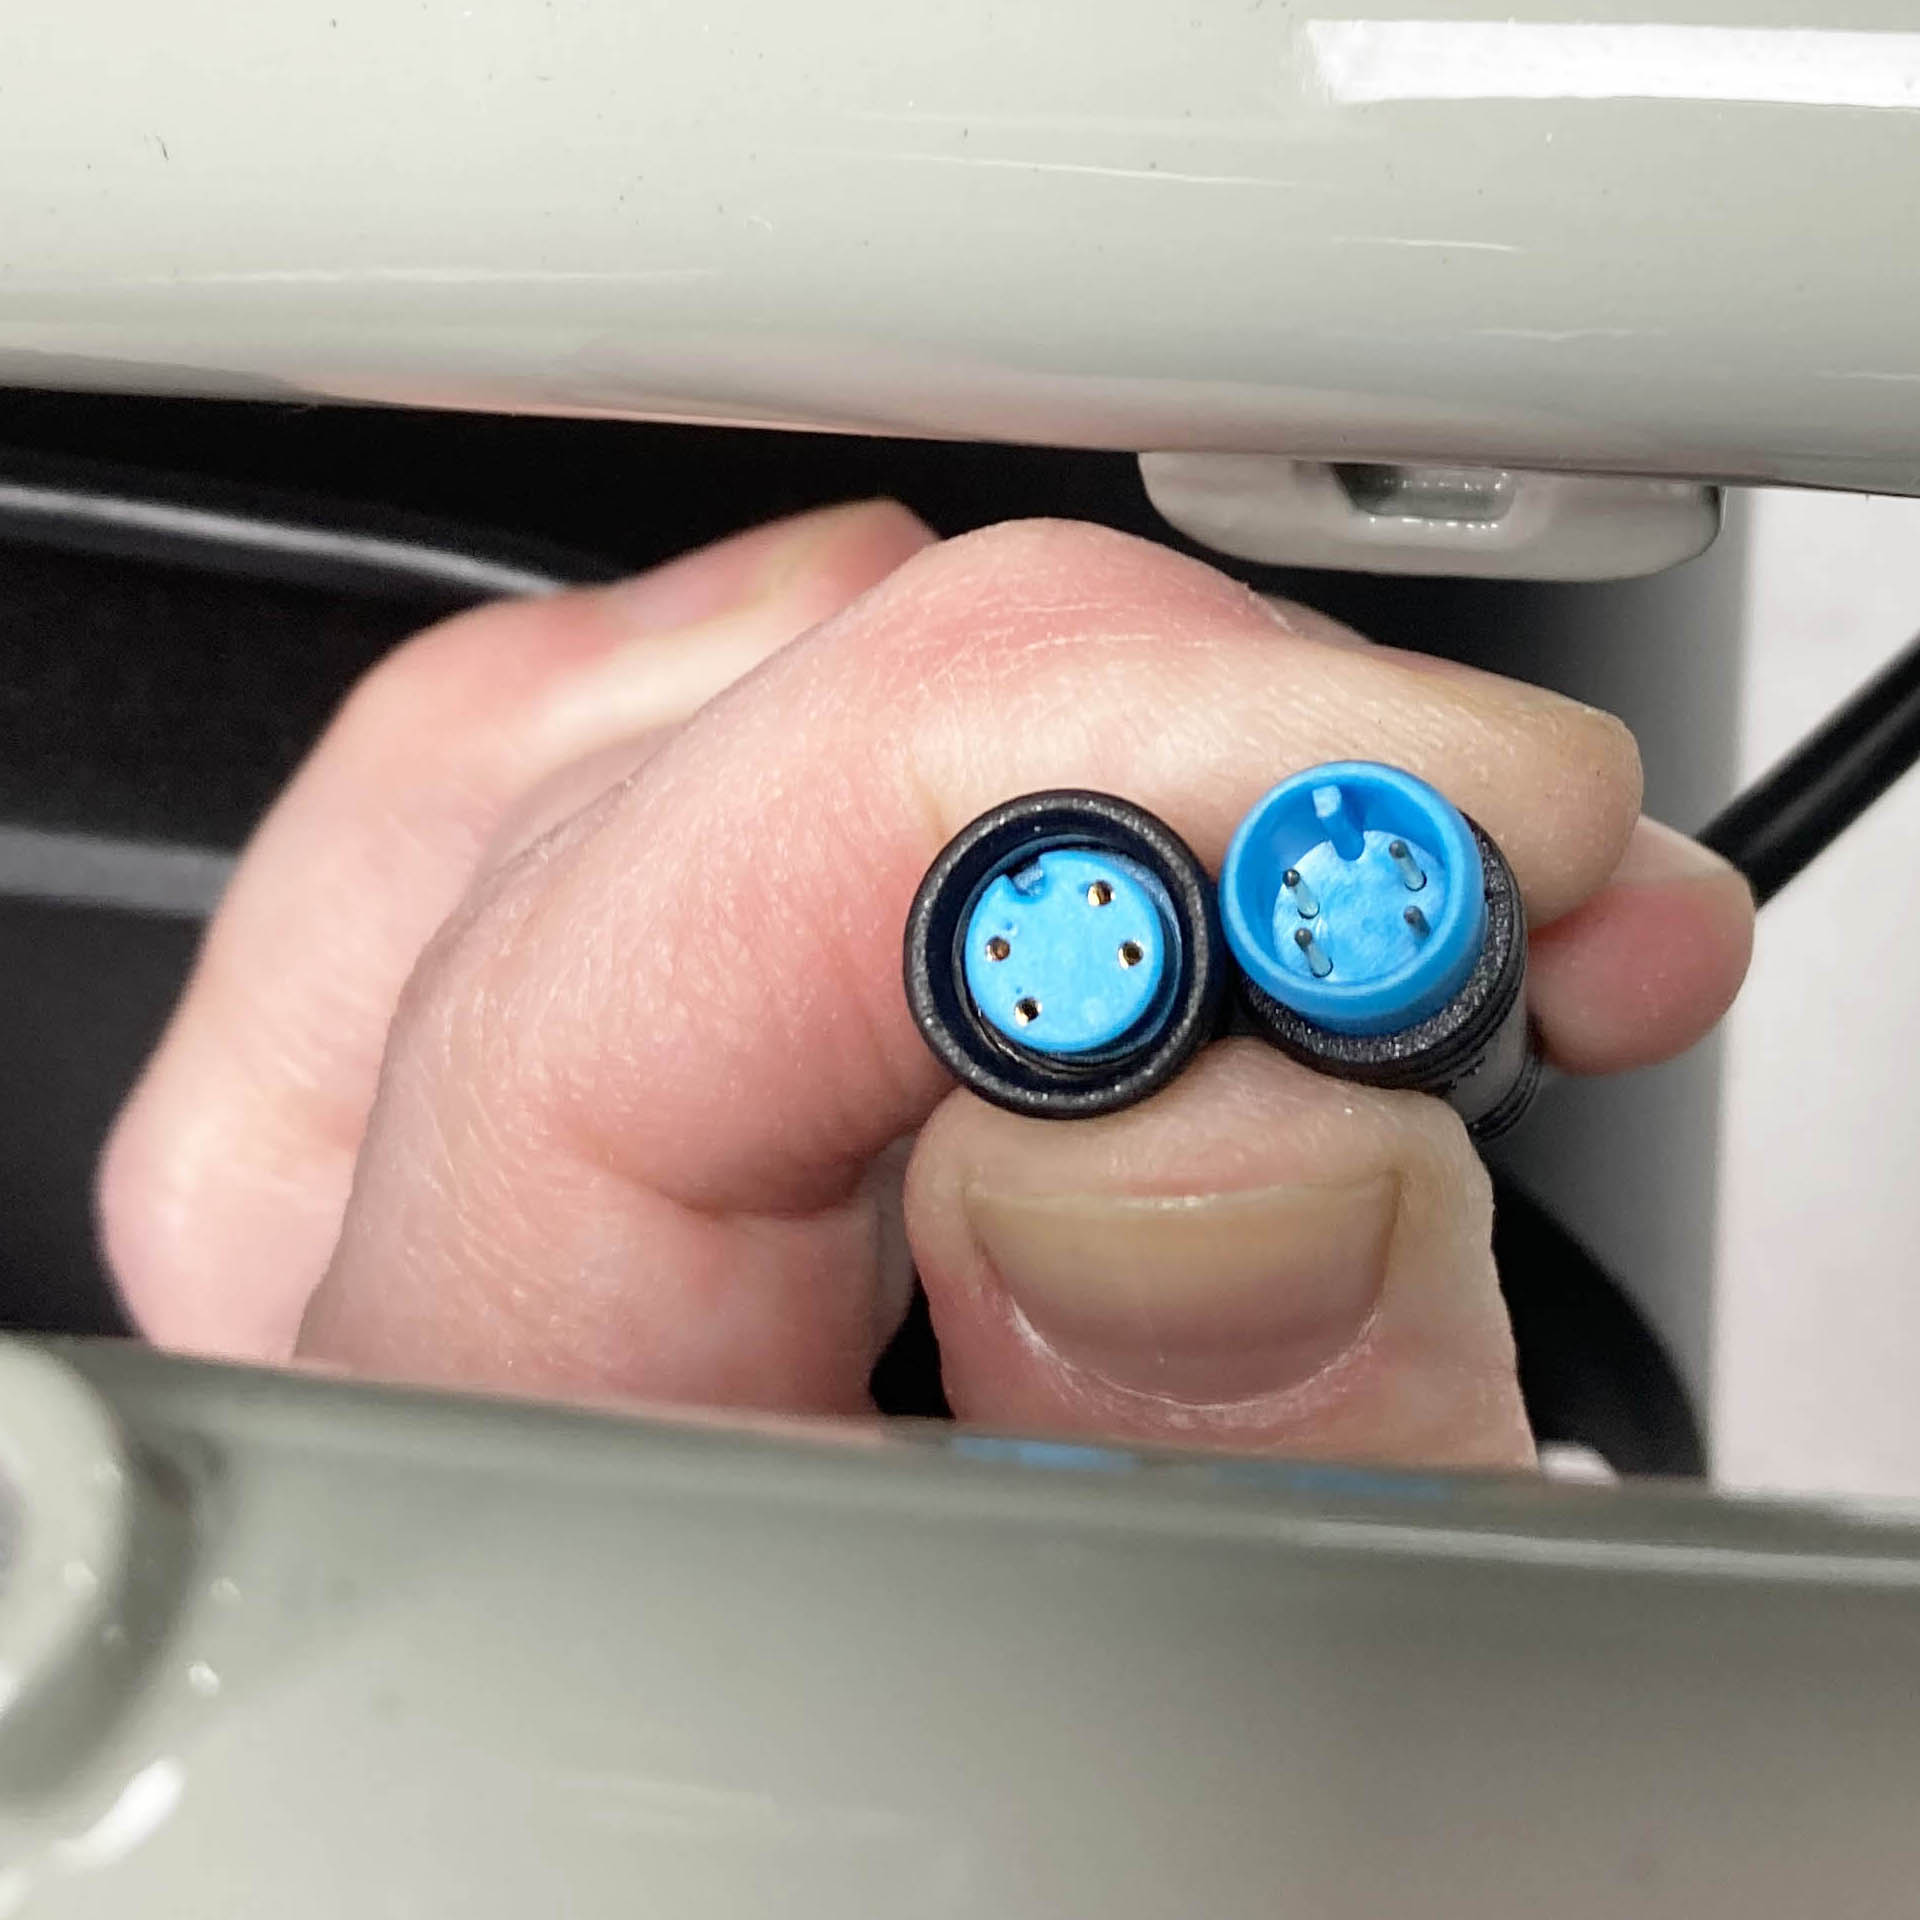
The taillight connector is on a cable that exits the rear wiring harness junction and feeds into the taillight. The interior of that connector is blue with two pins.
|
The taillight connector is beneath the rear rack near your taillight |
The taillight connector is blue and has four pins. |
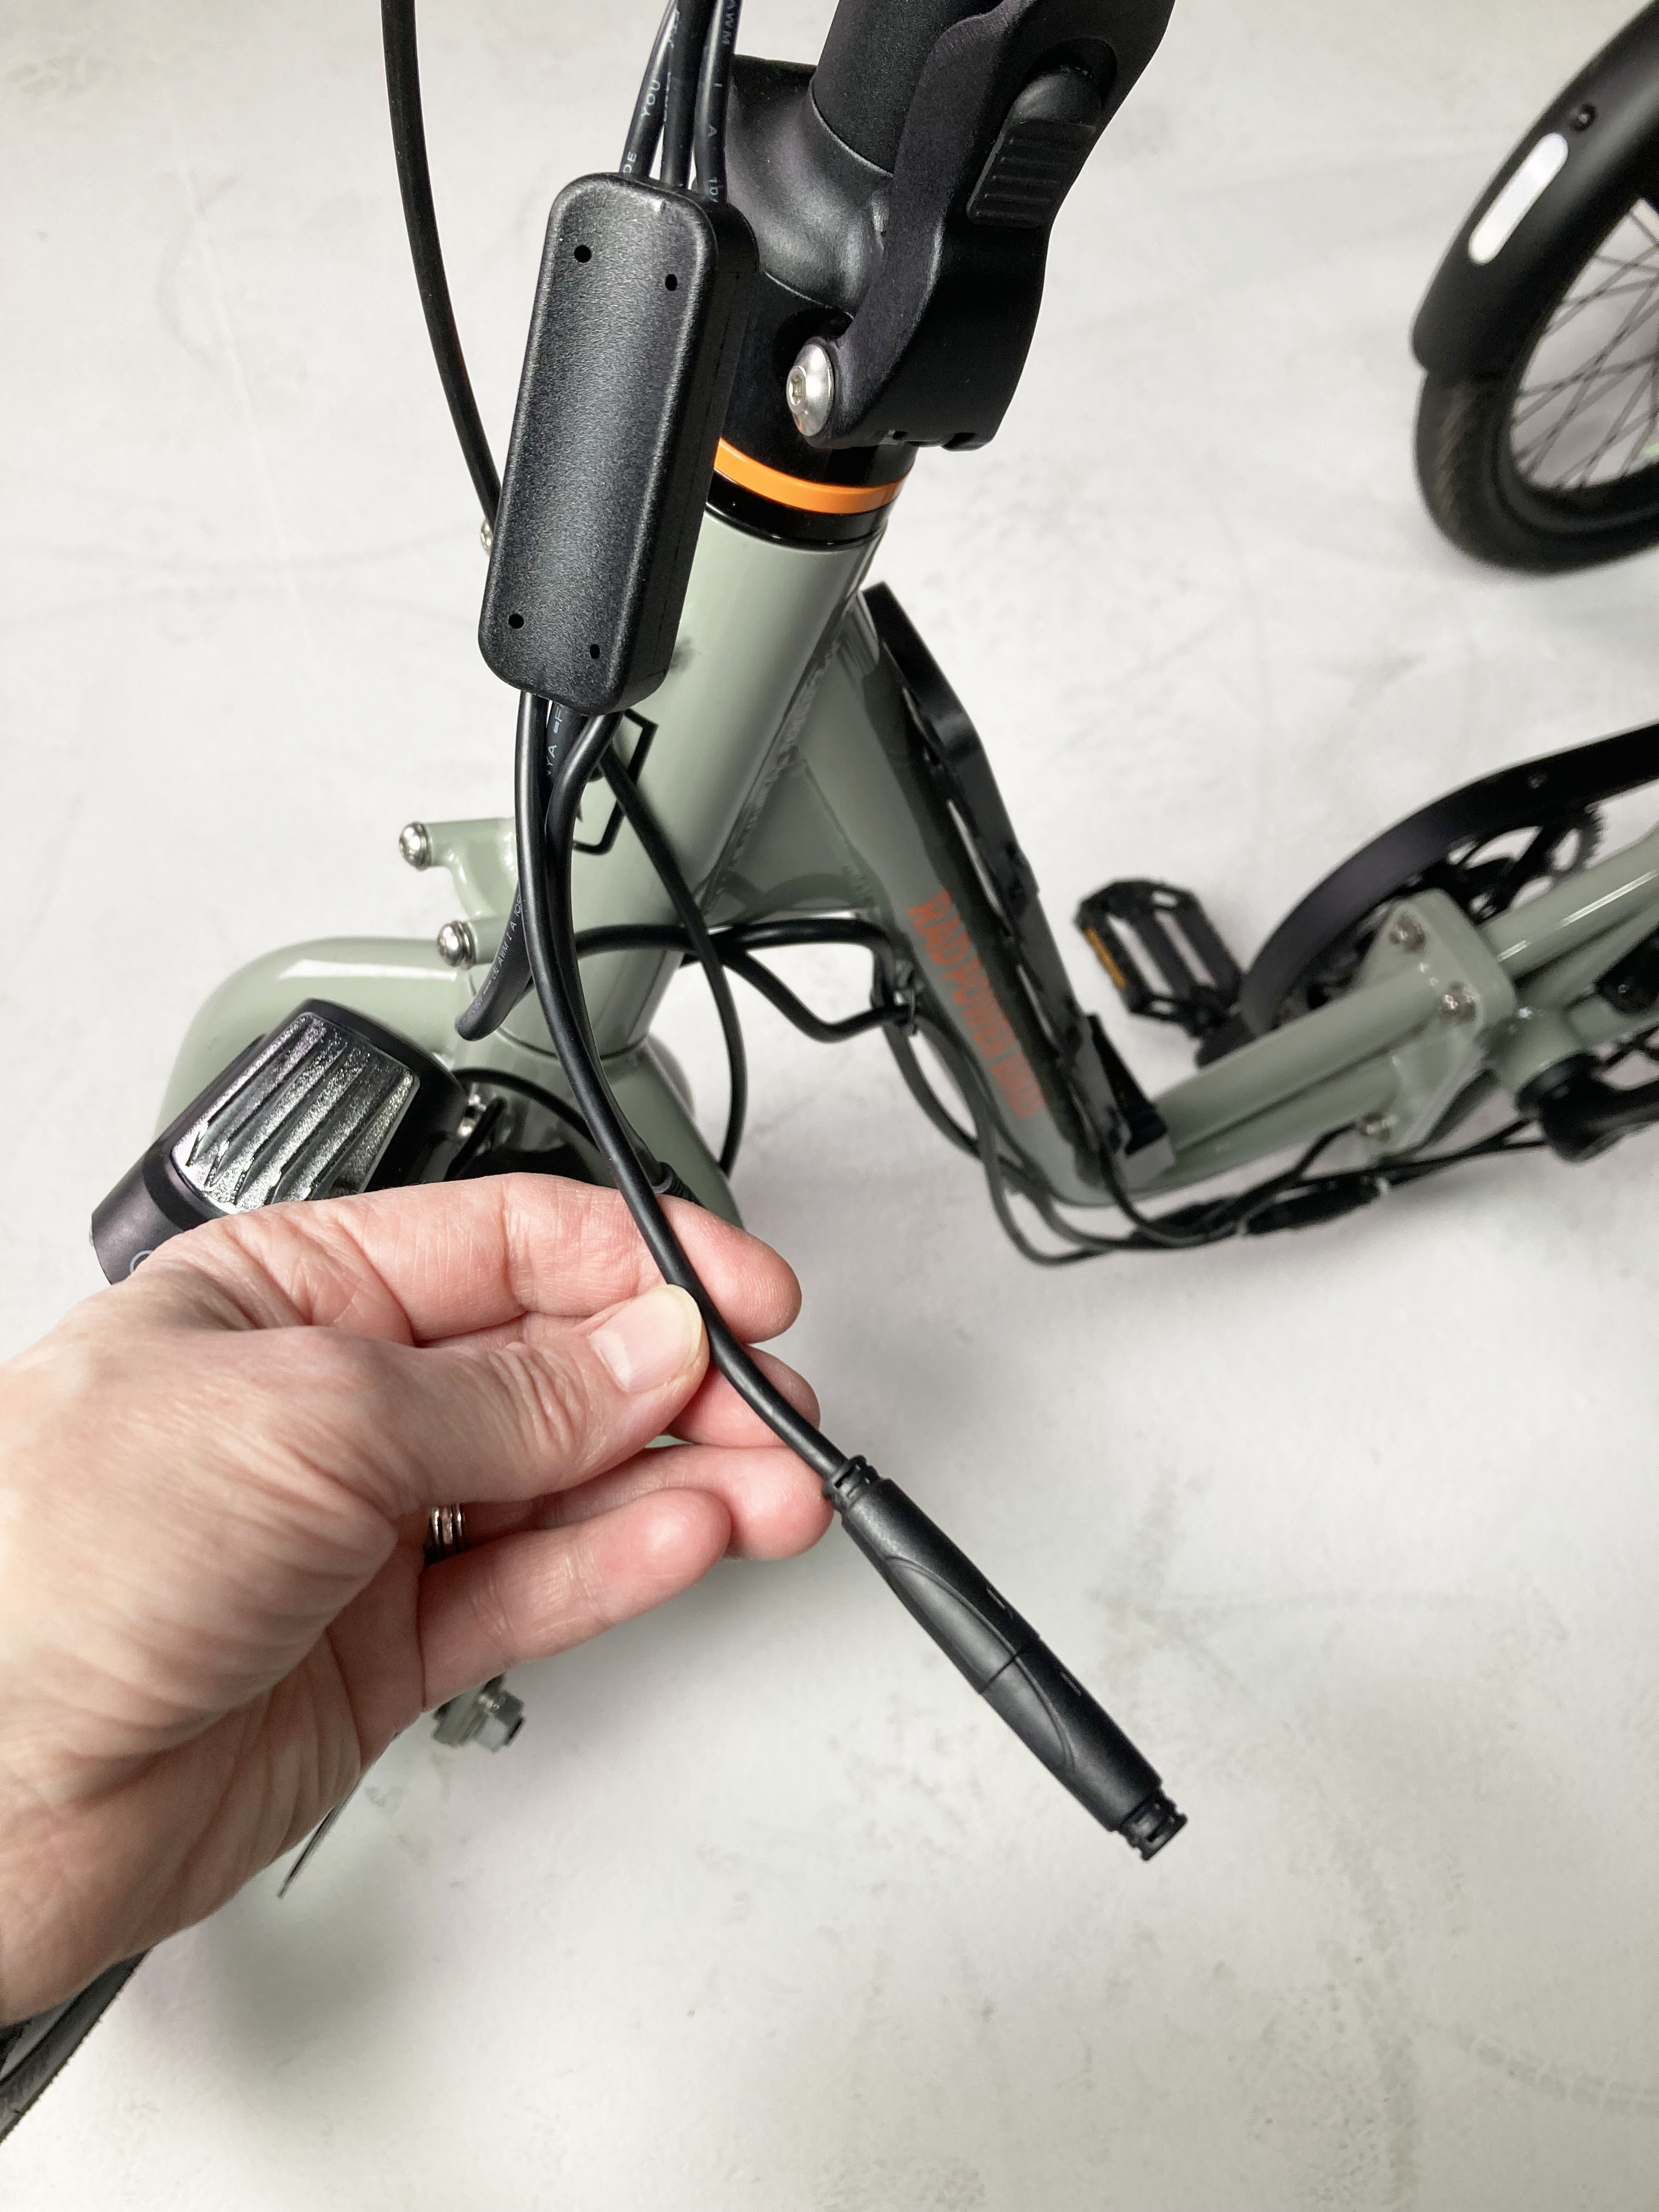
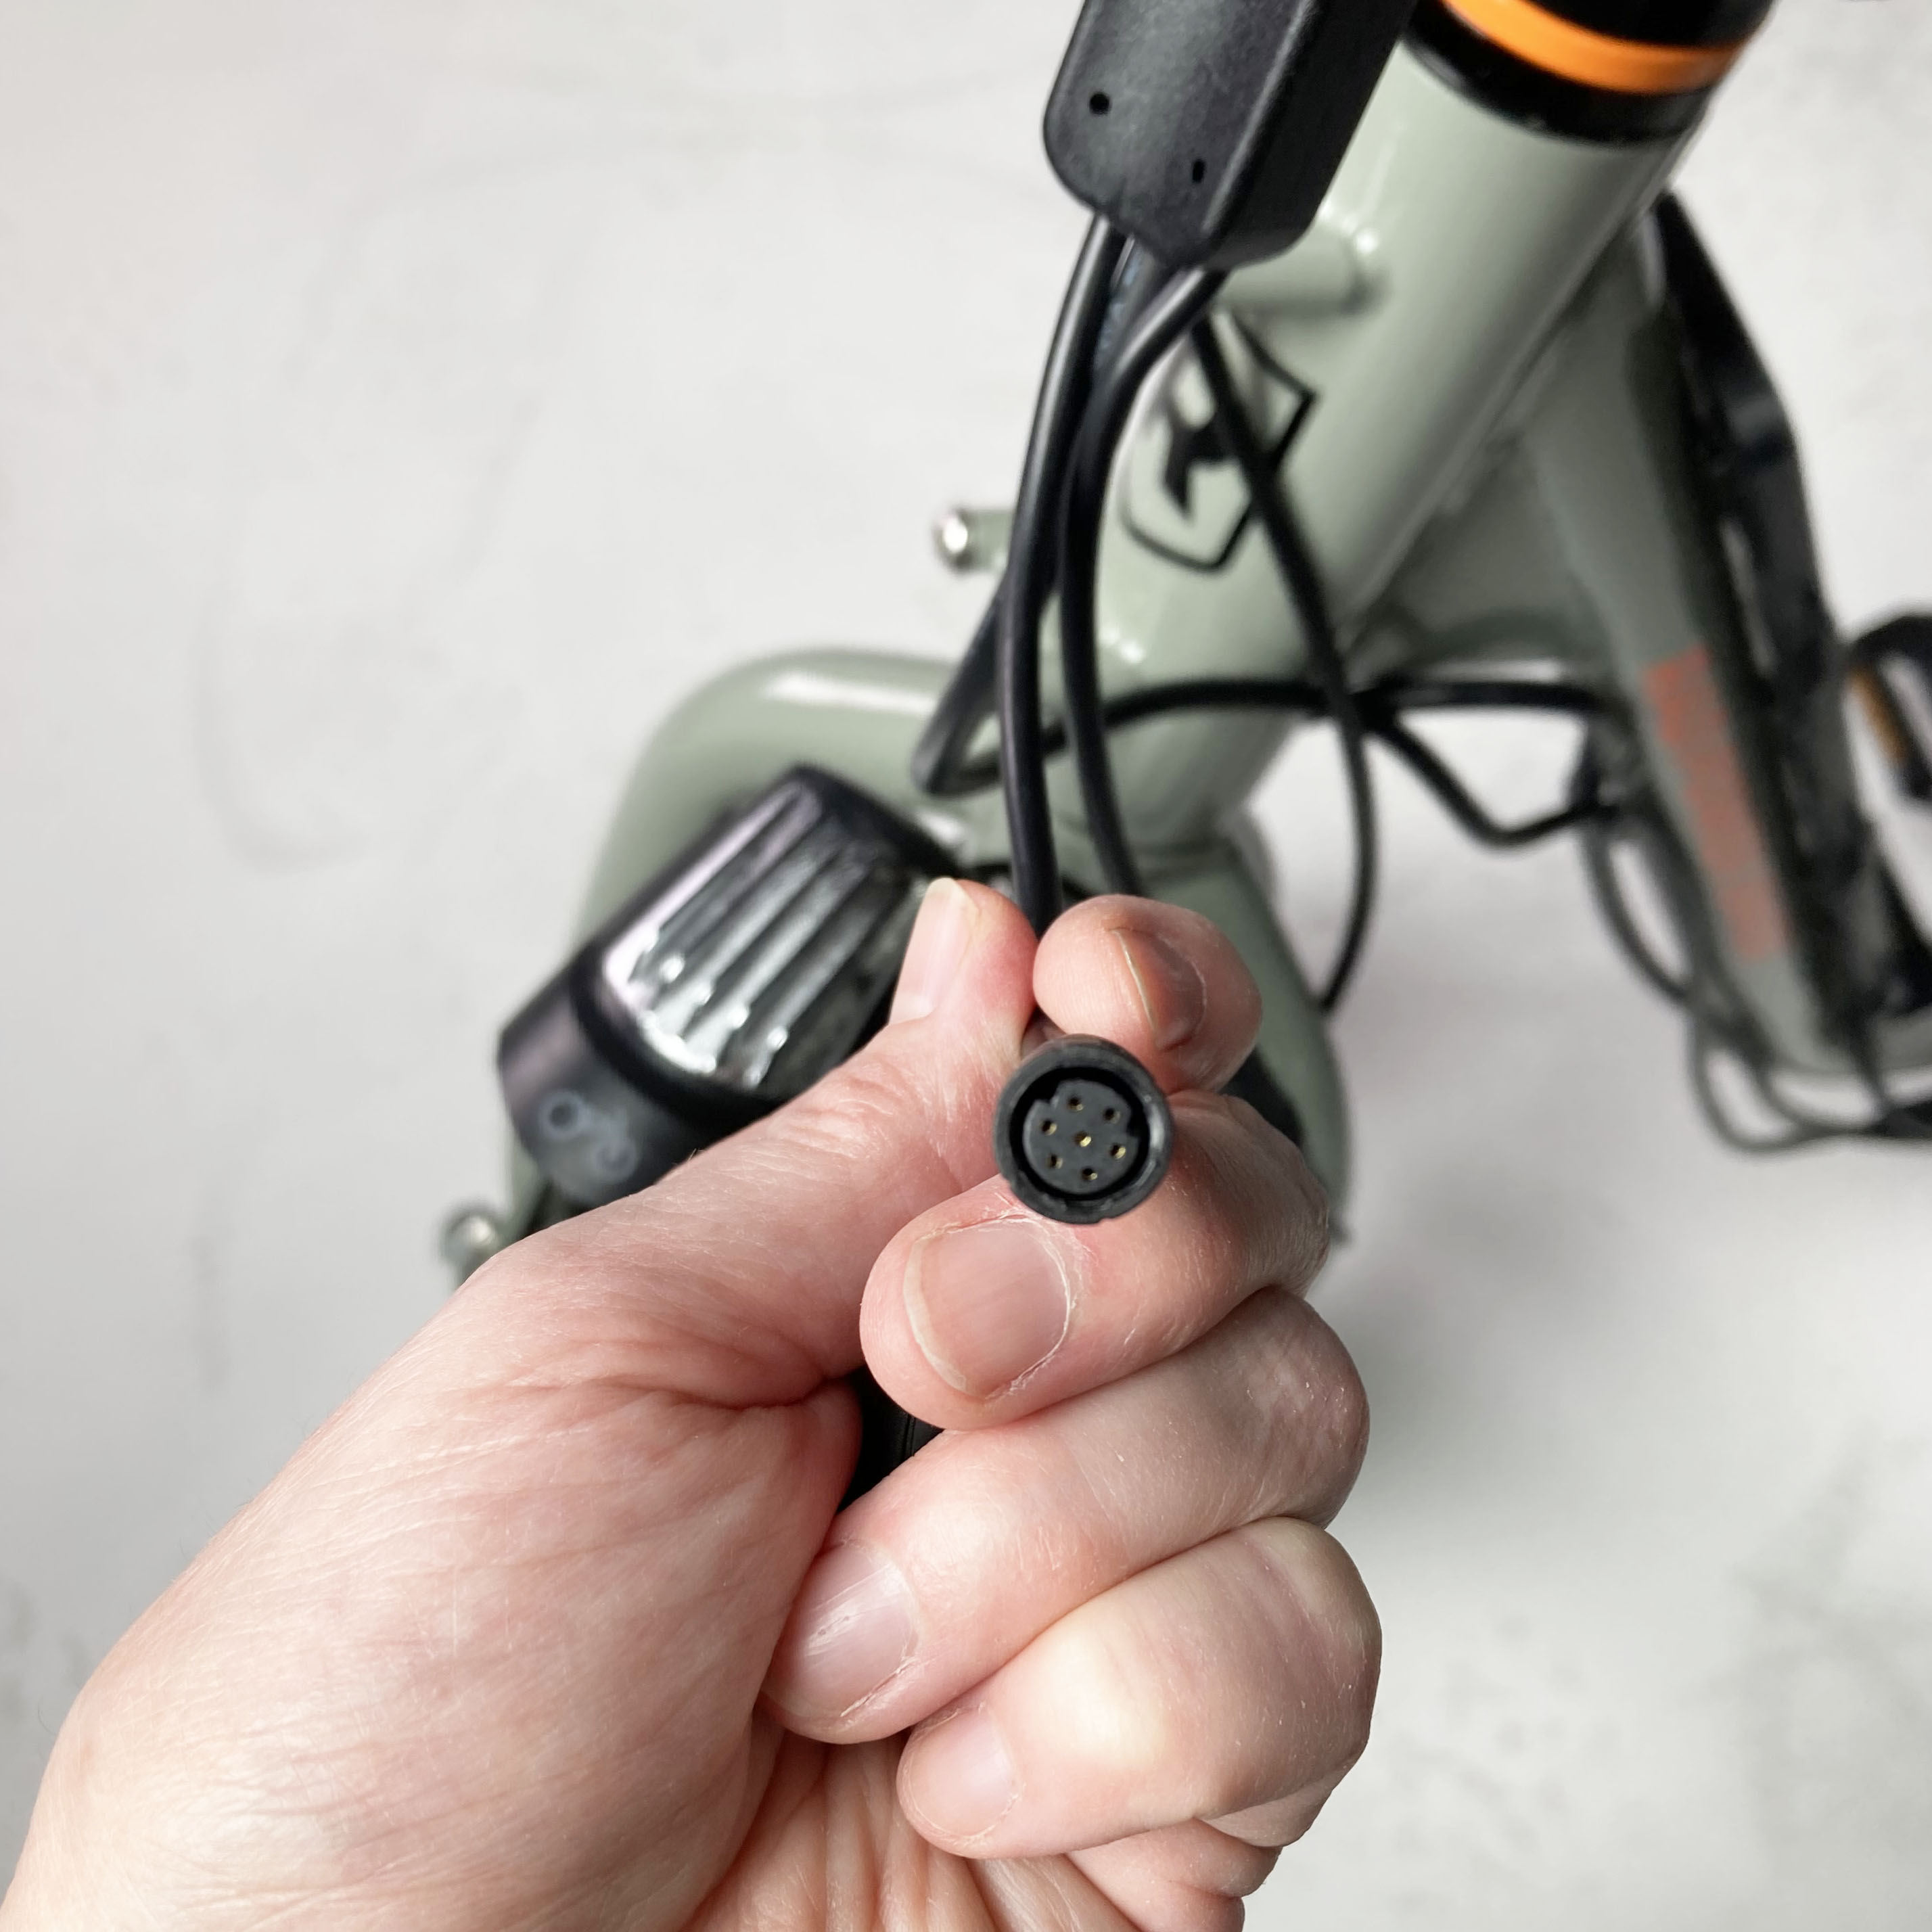
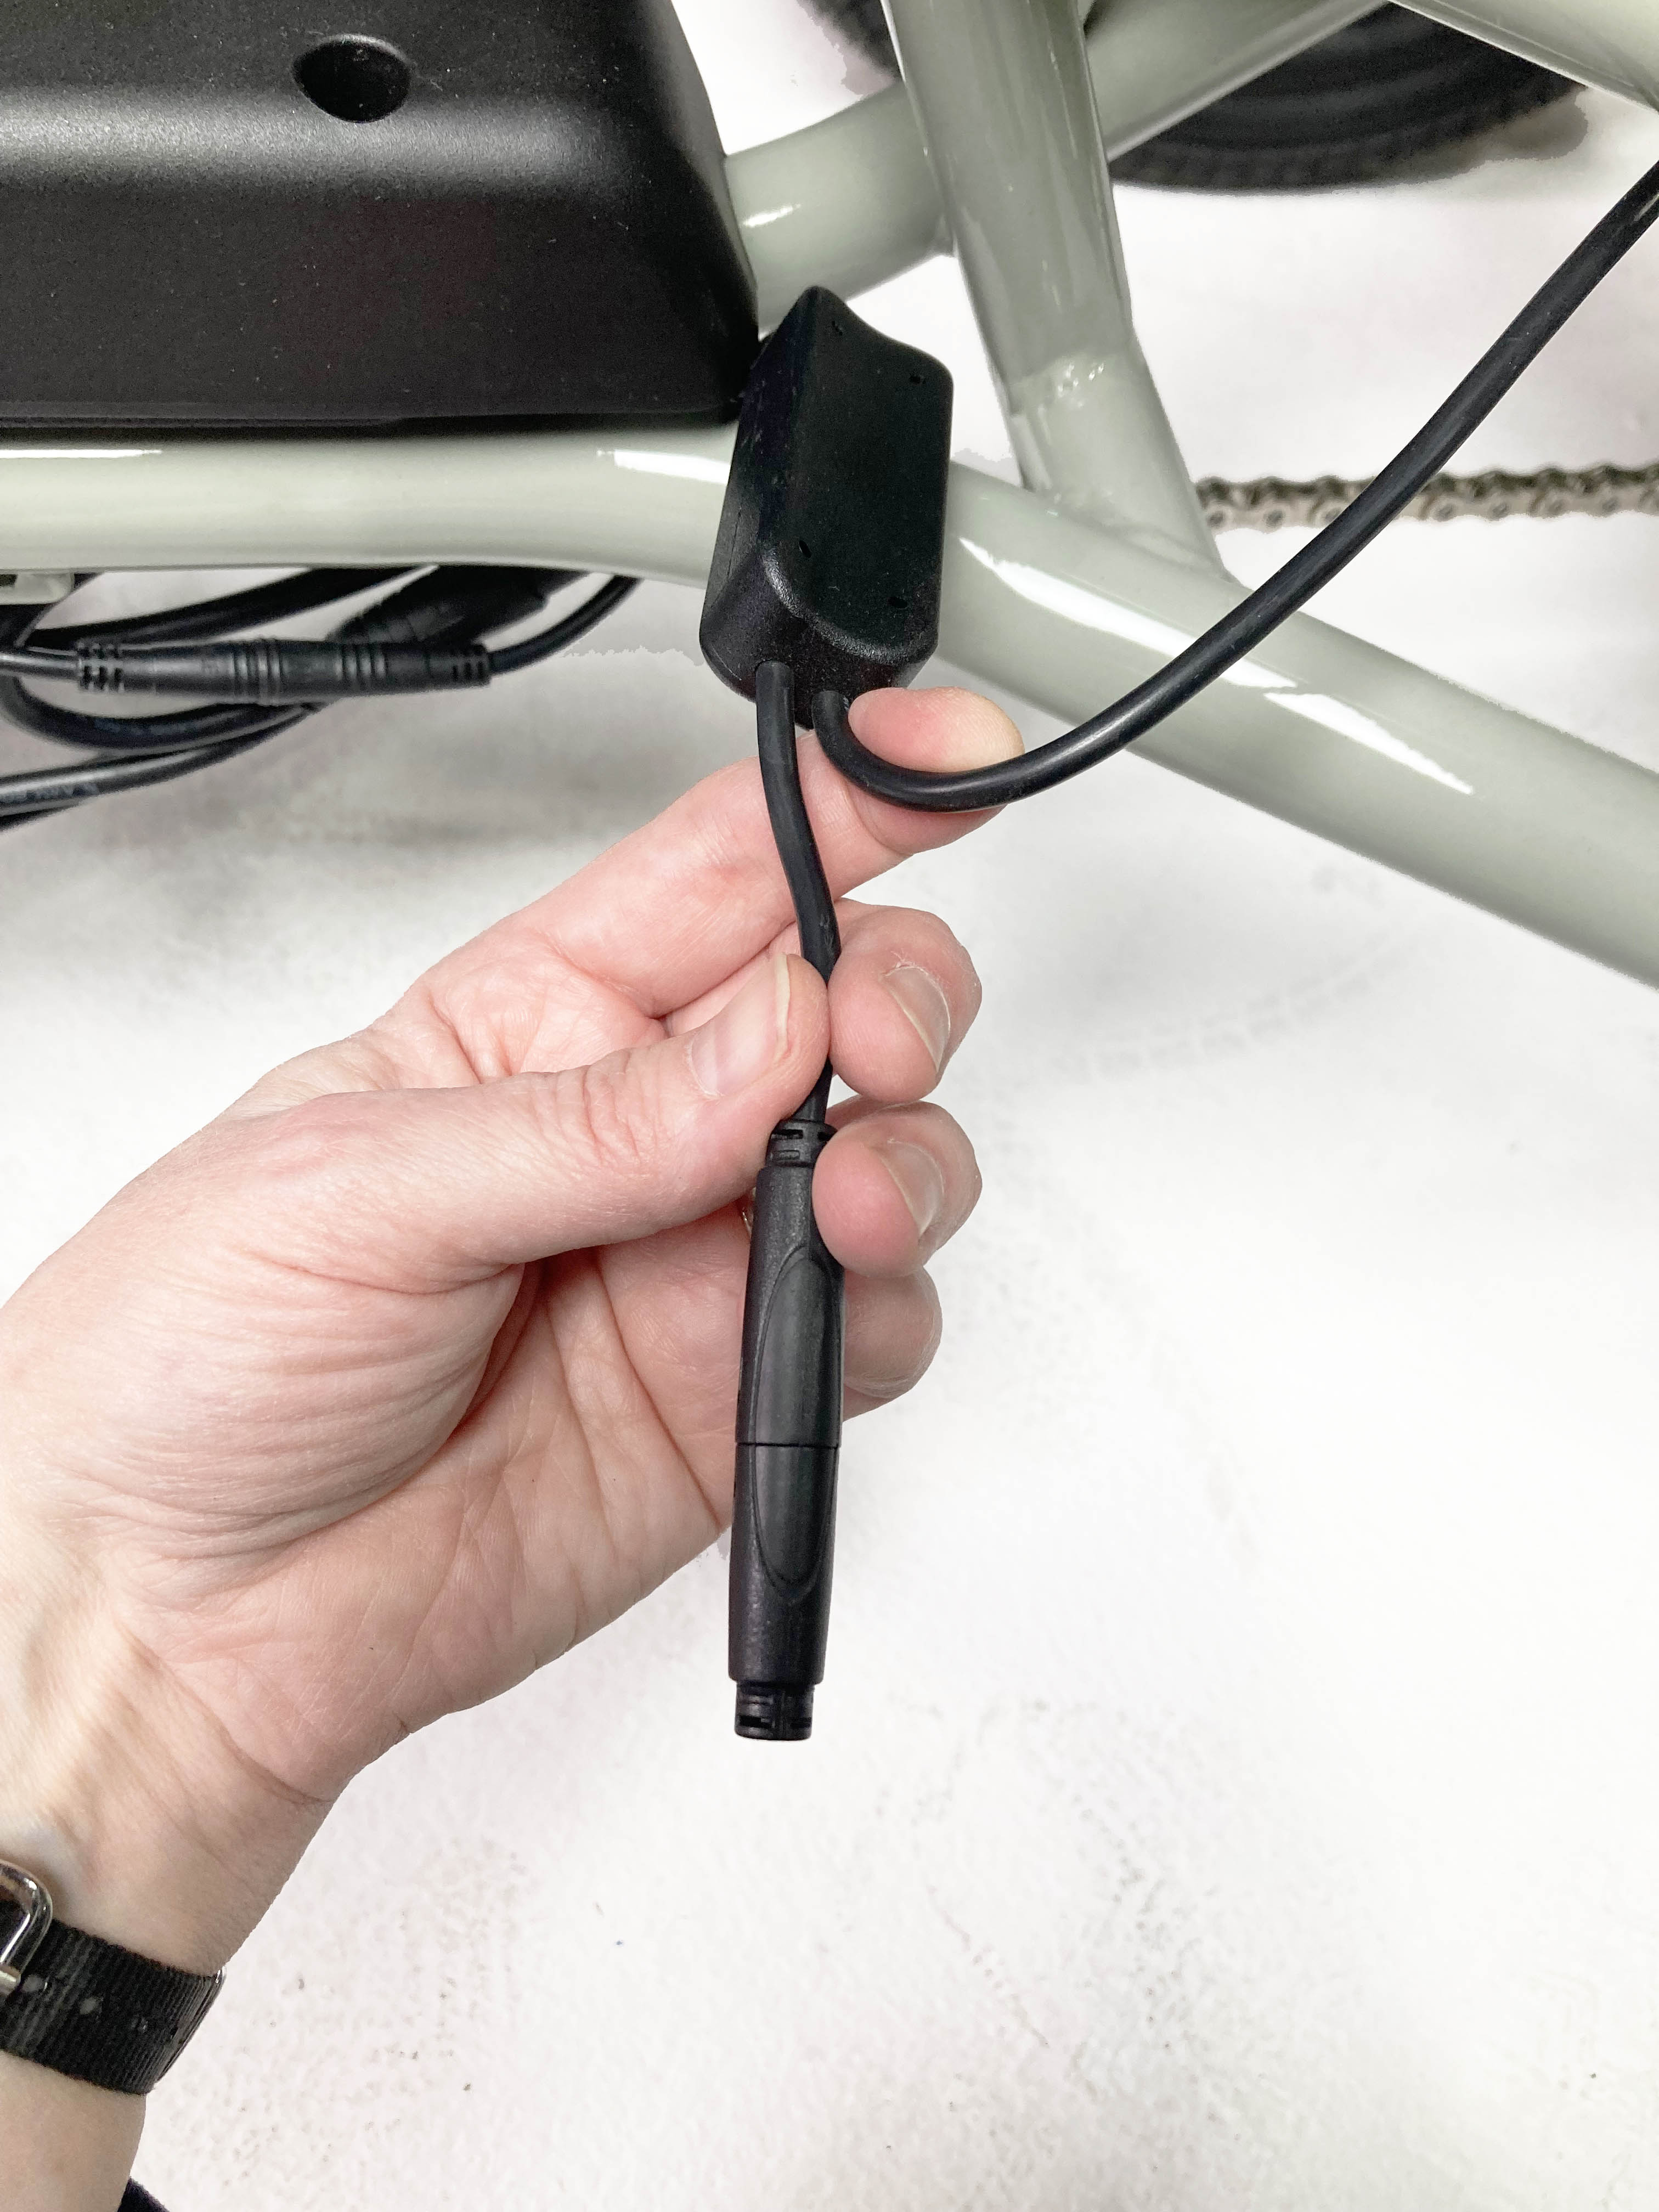
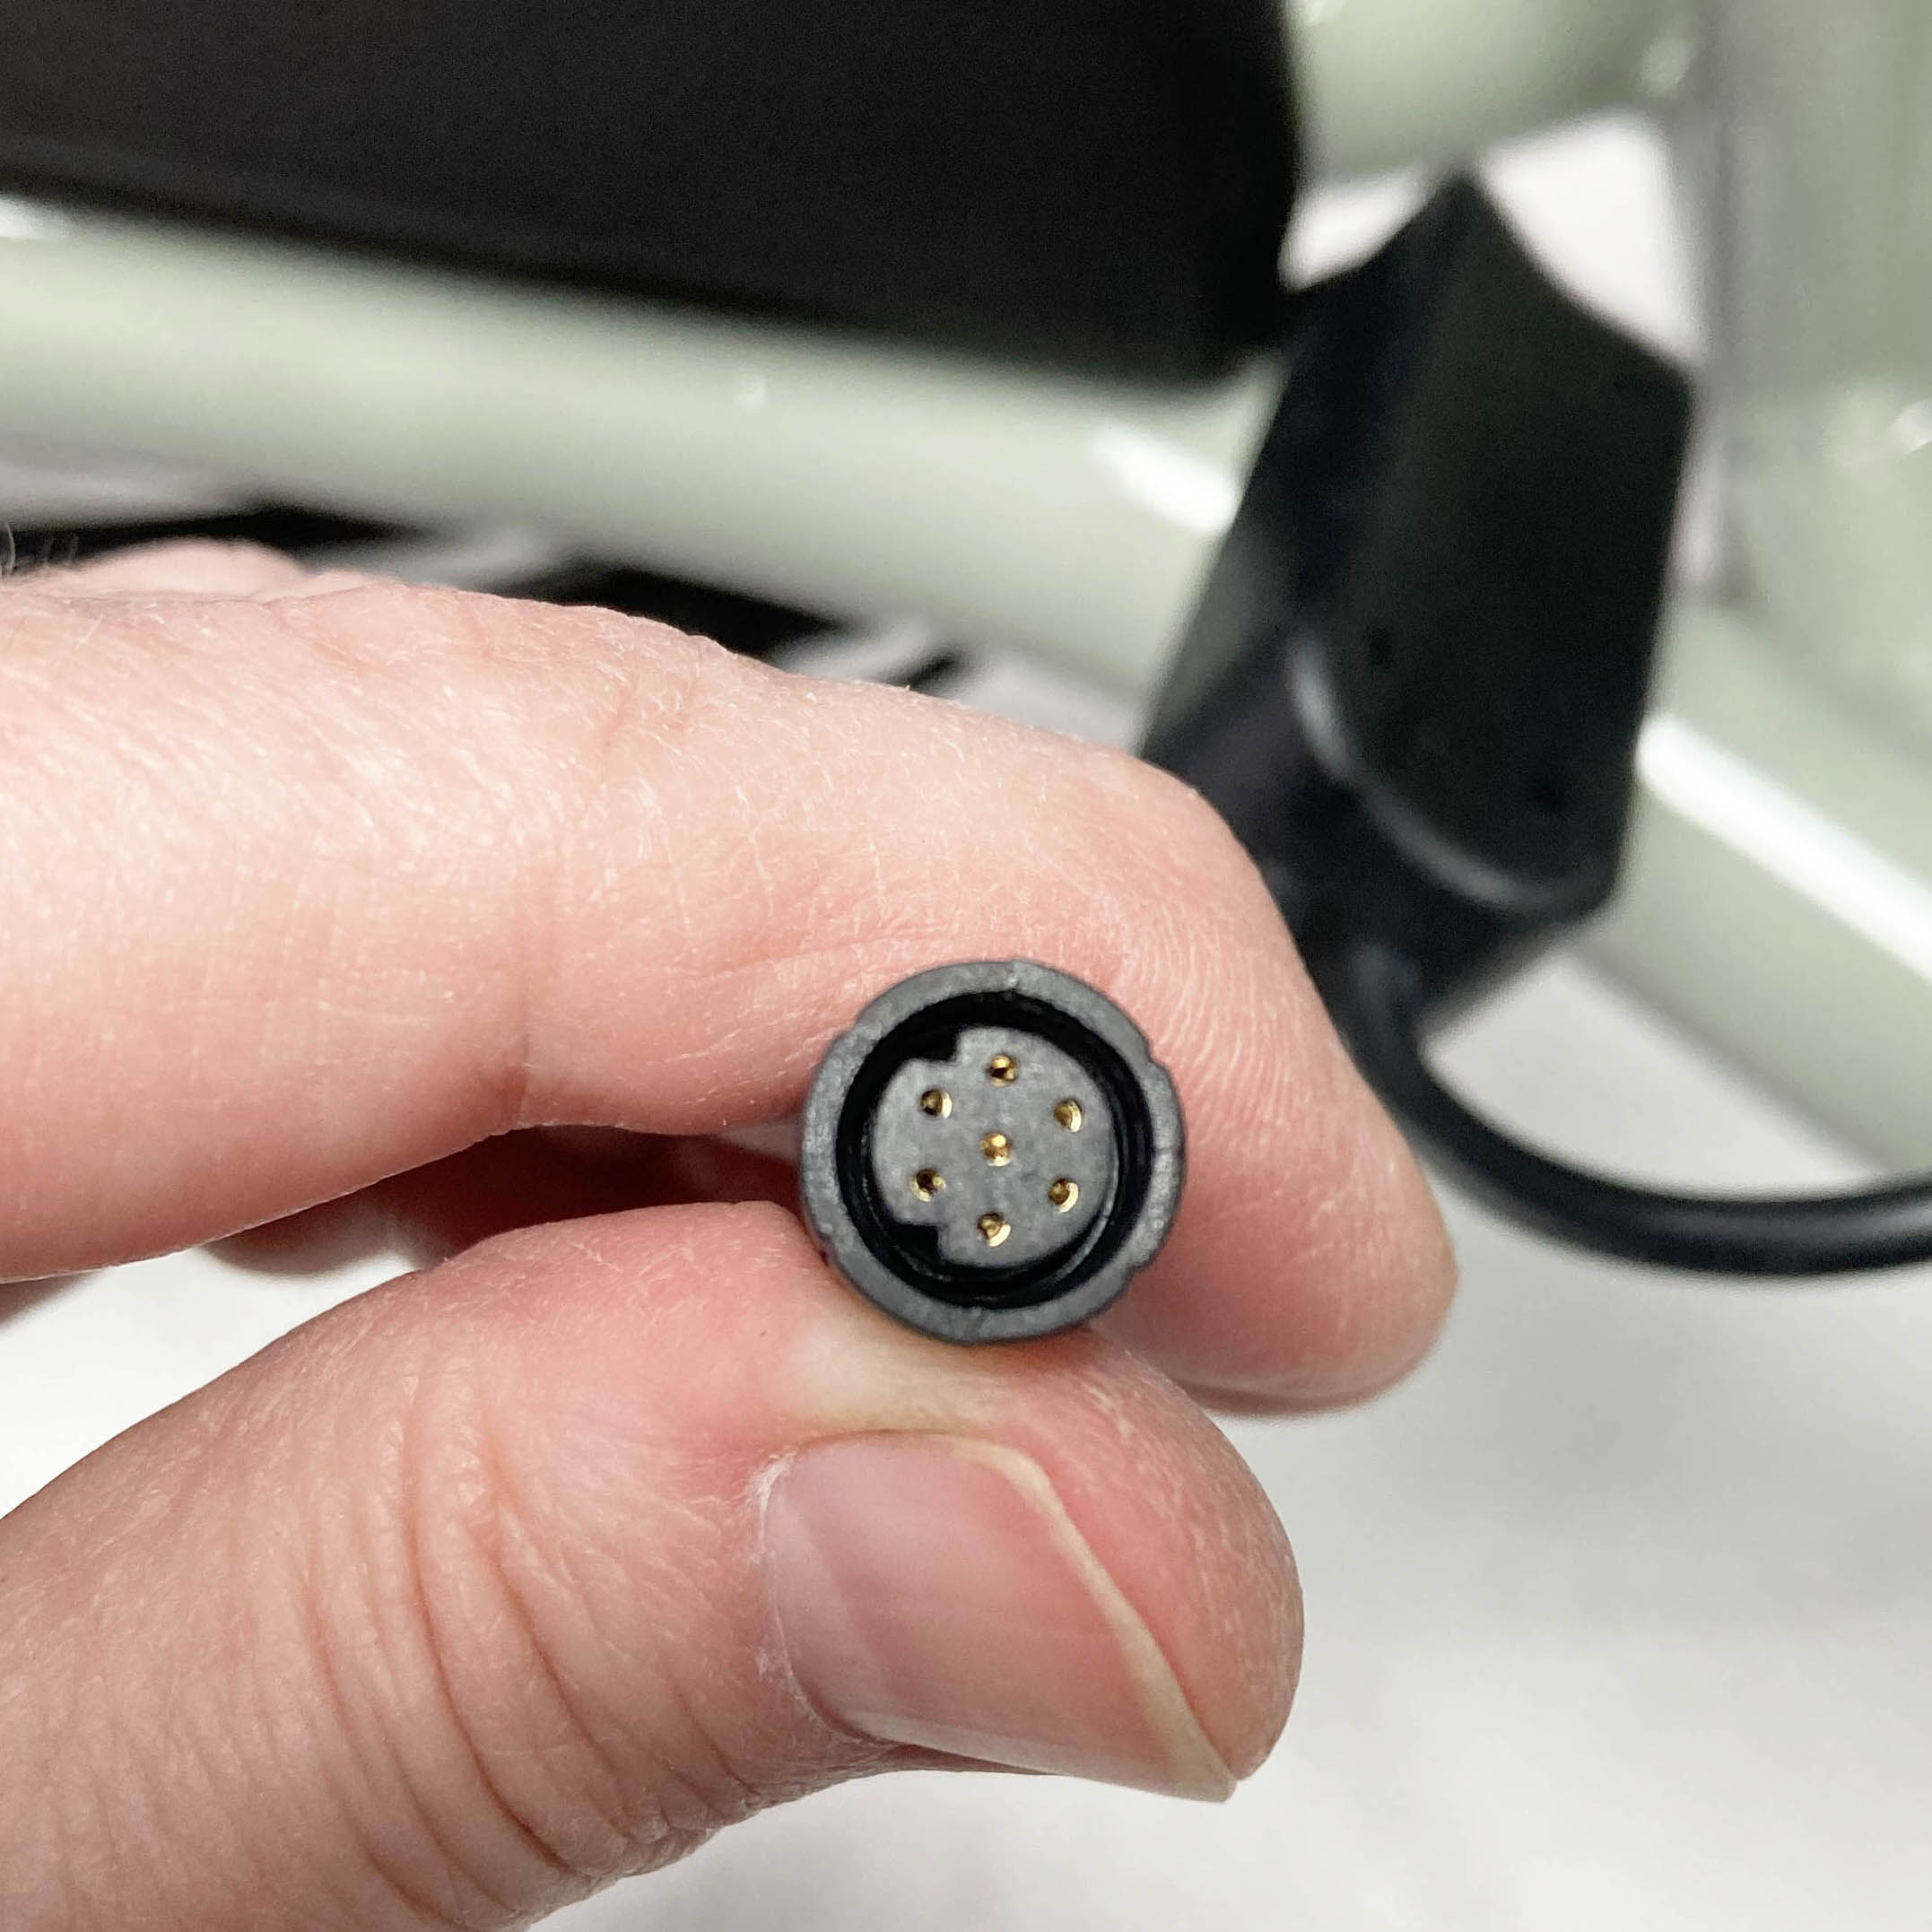
The rear accessory port connector is on a cable that exits the rear wiring harness junction. If it is not connected to an accessory, it will have a black cap on it to protect it from water, dirt, and damage. The interior of that connector is black with seven pins.
|
The rear accessory port |
The accessory port connector has a black interior and seven pins. |
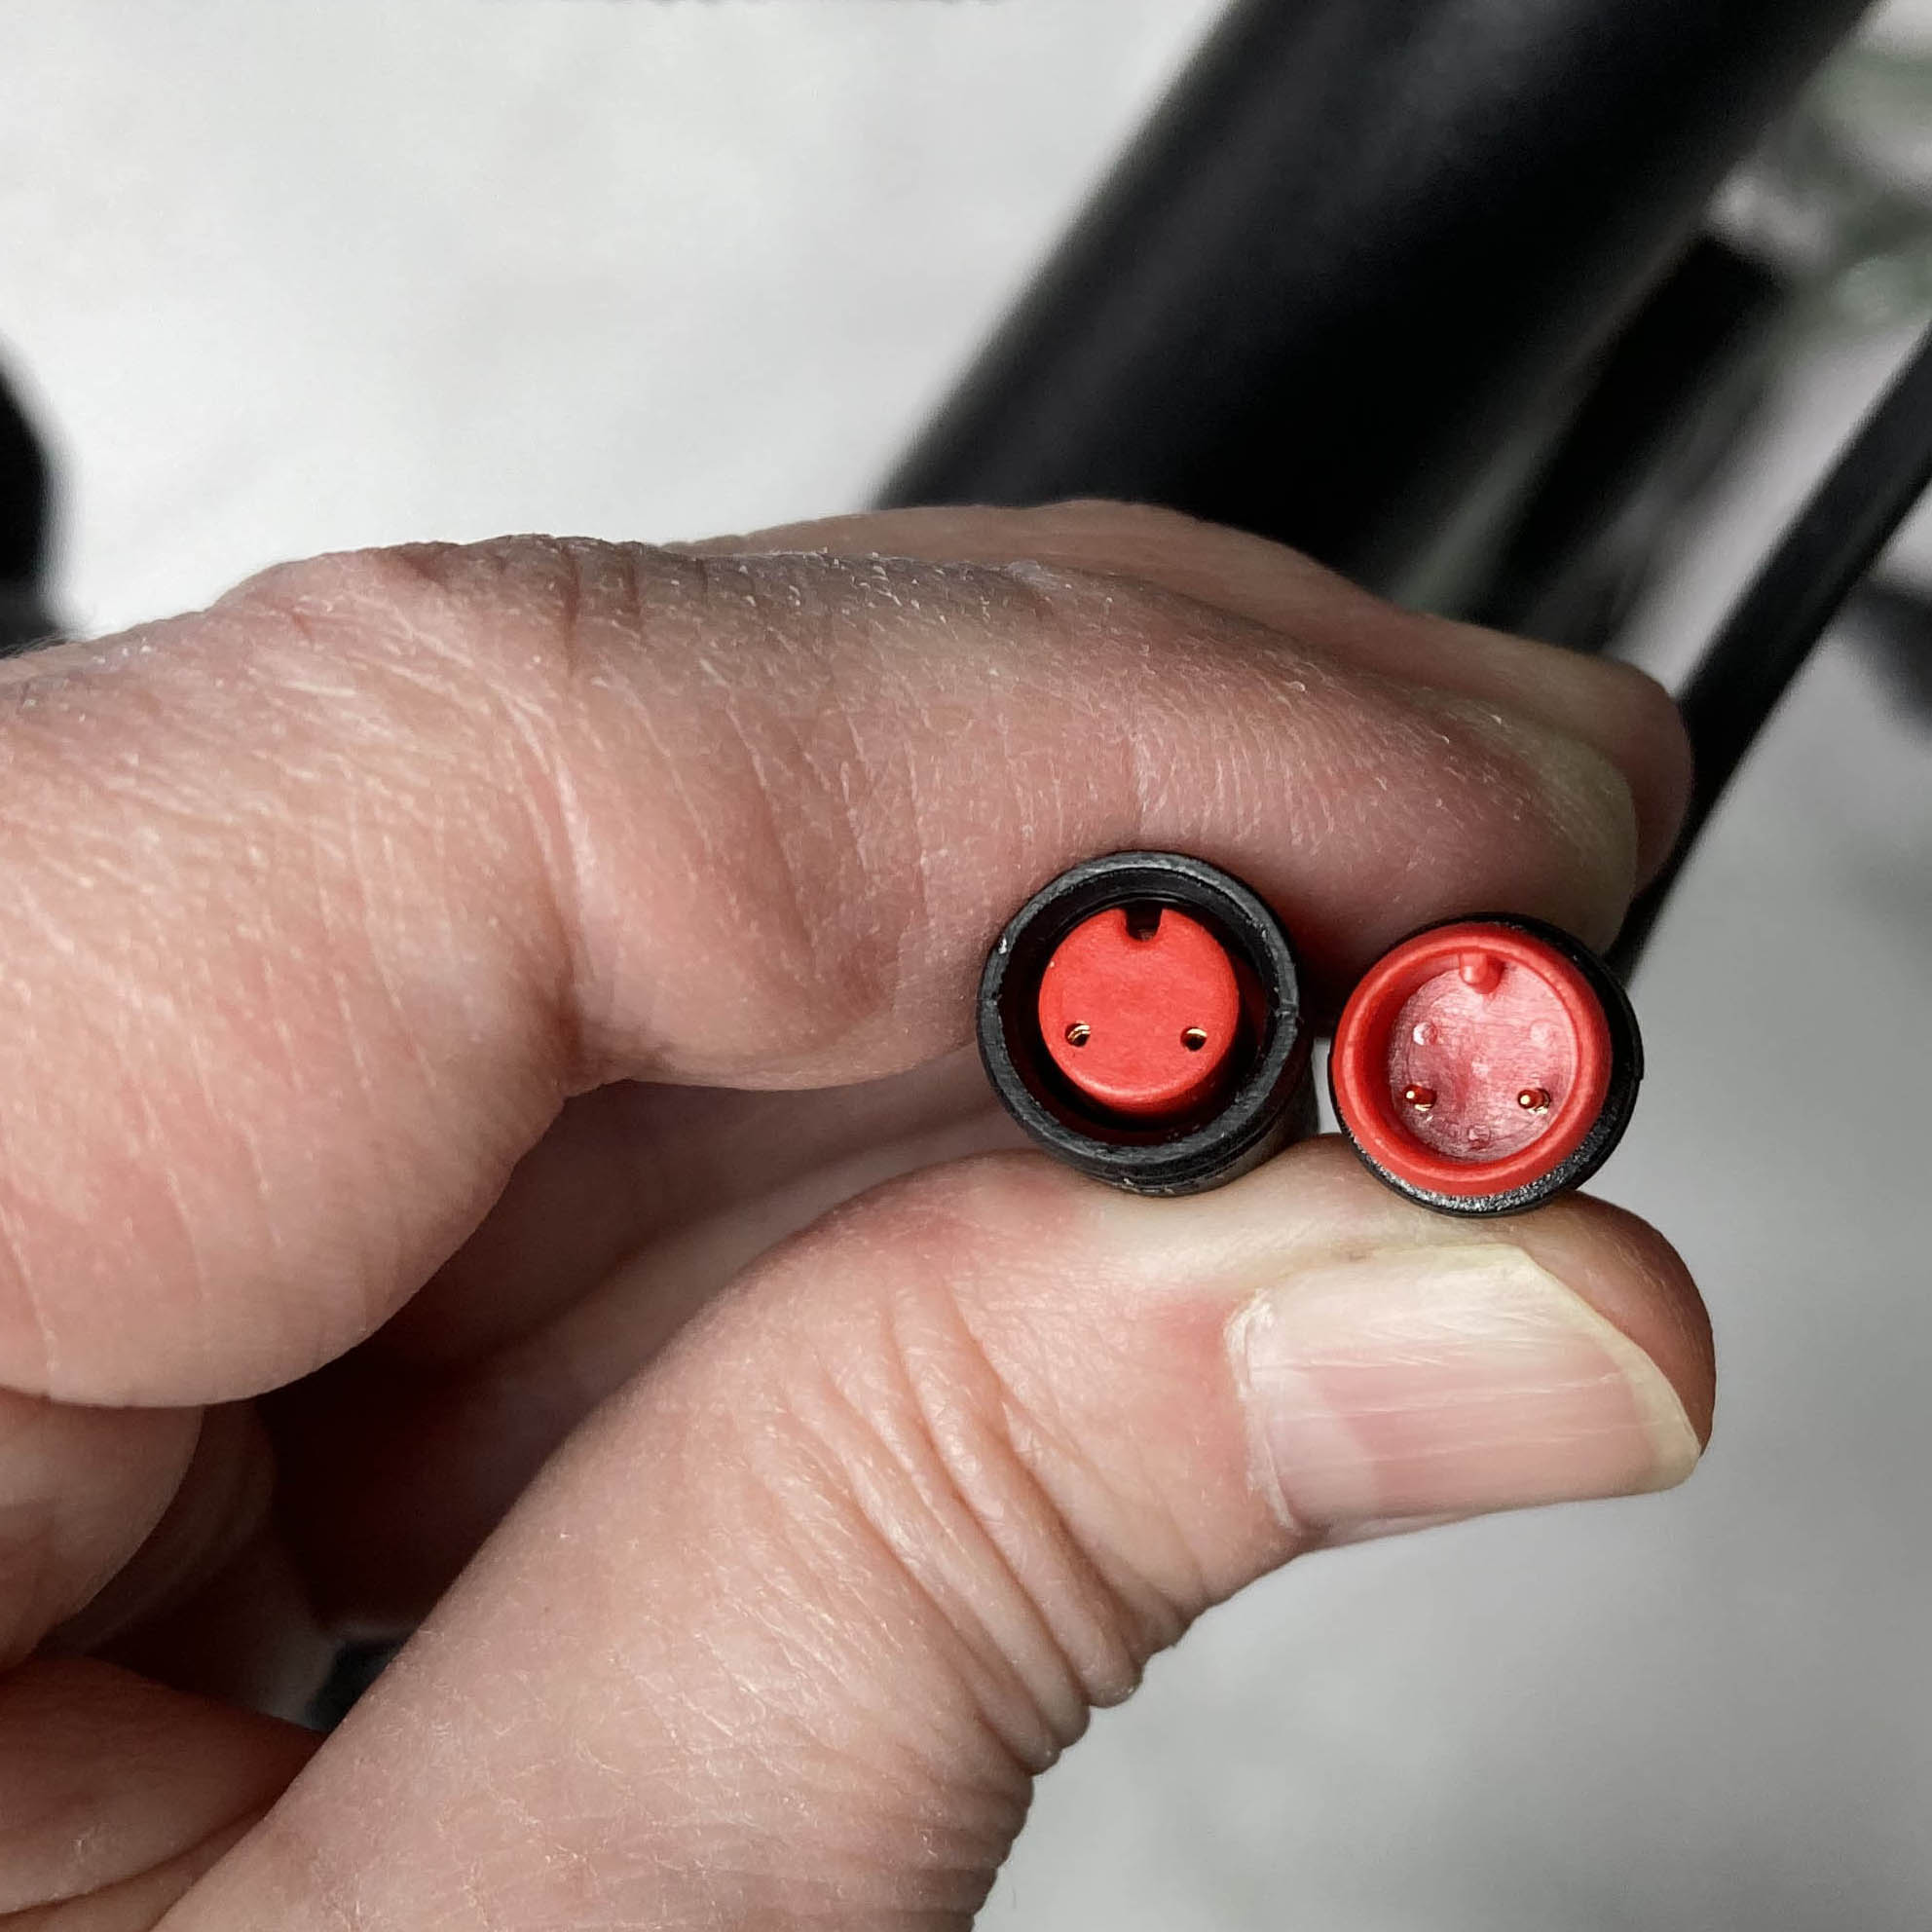
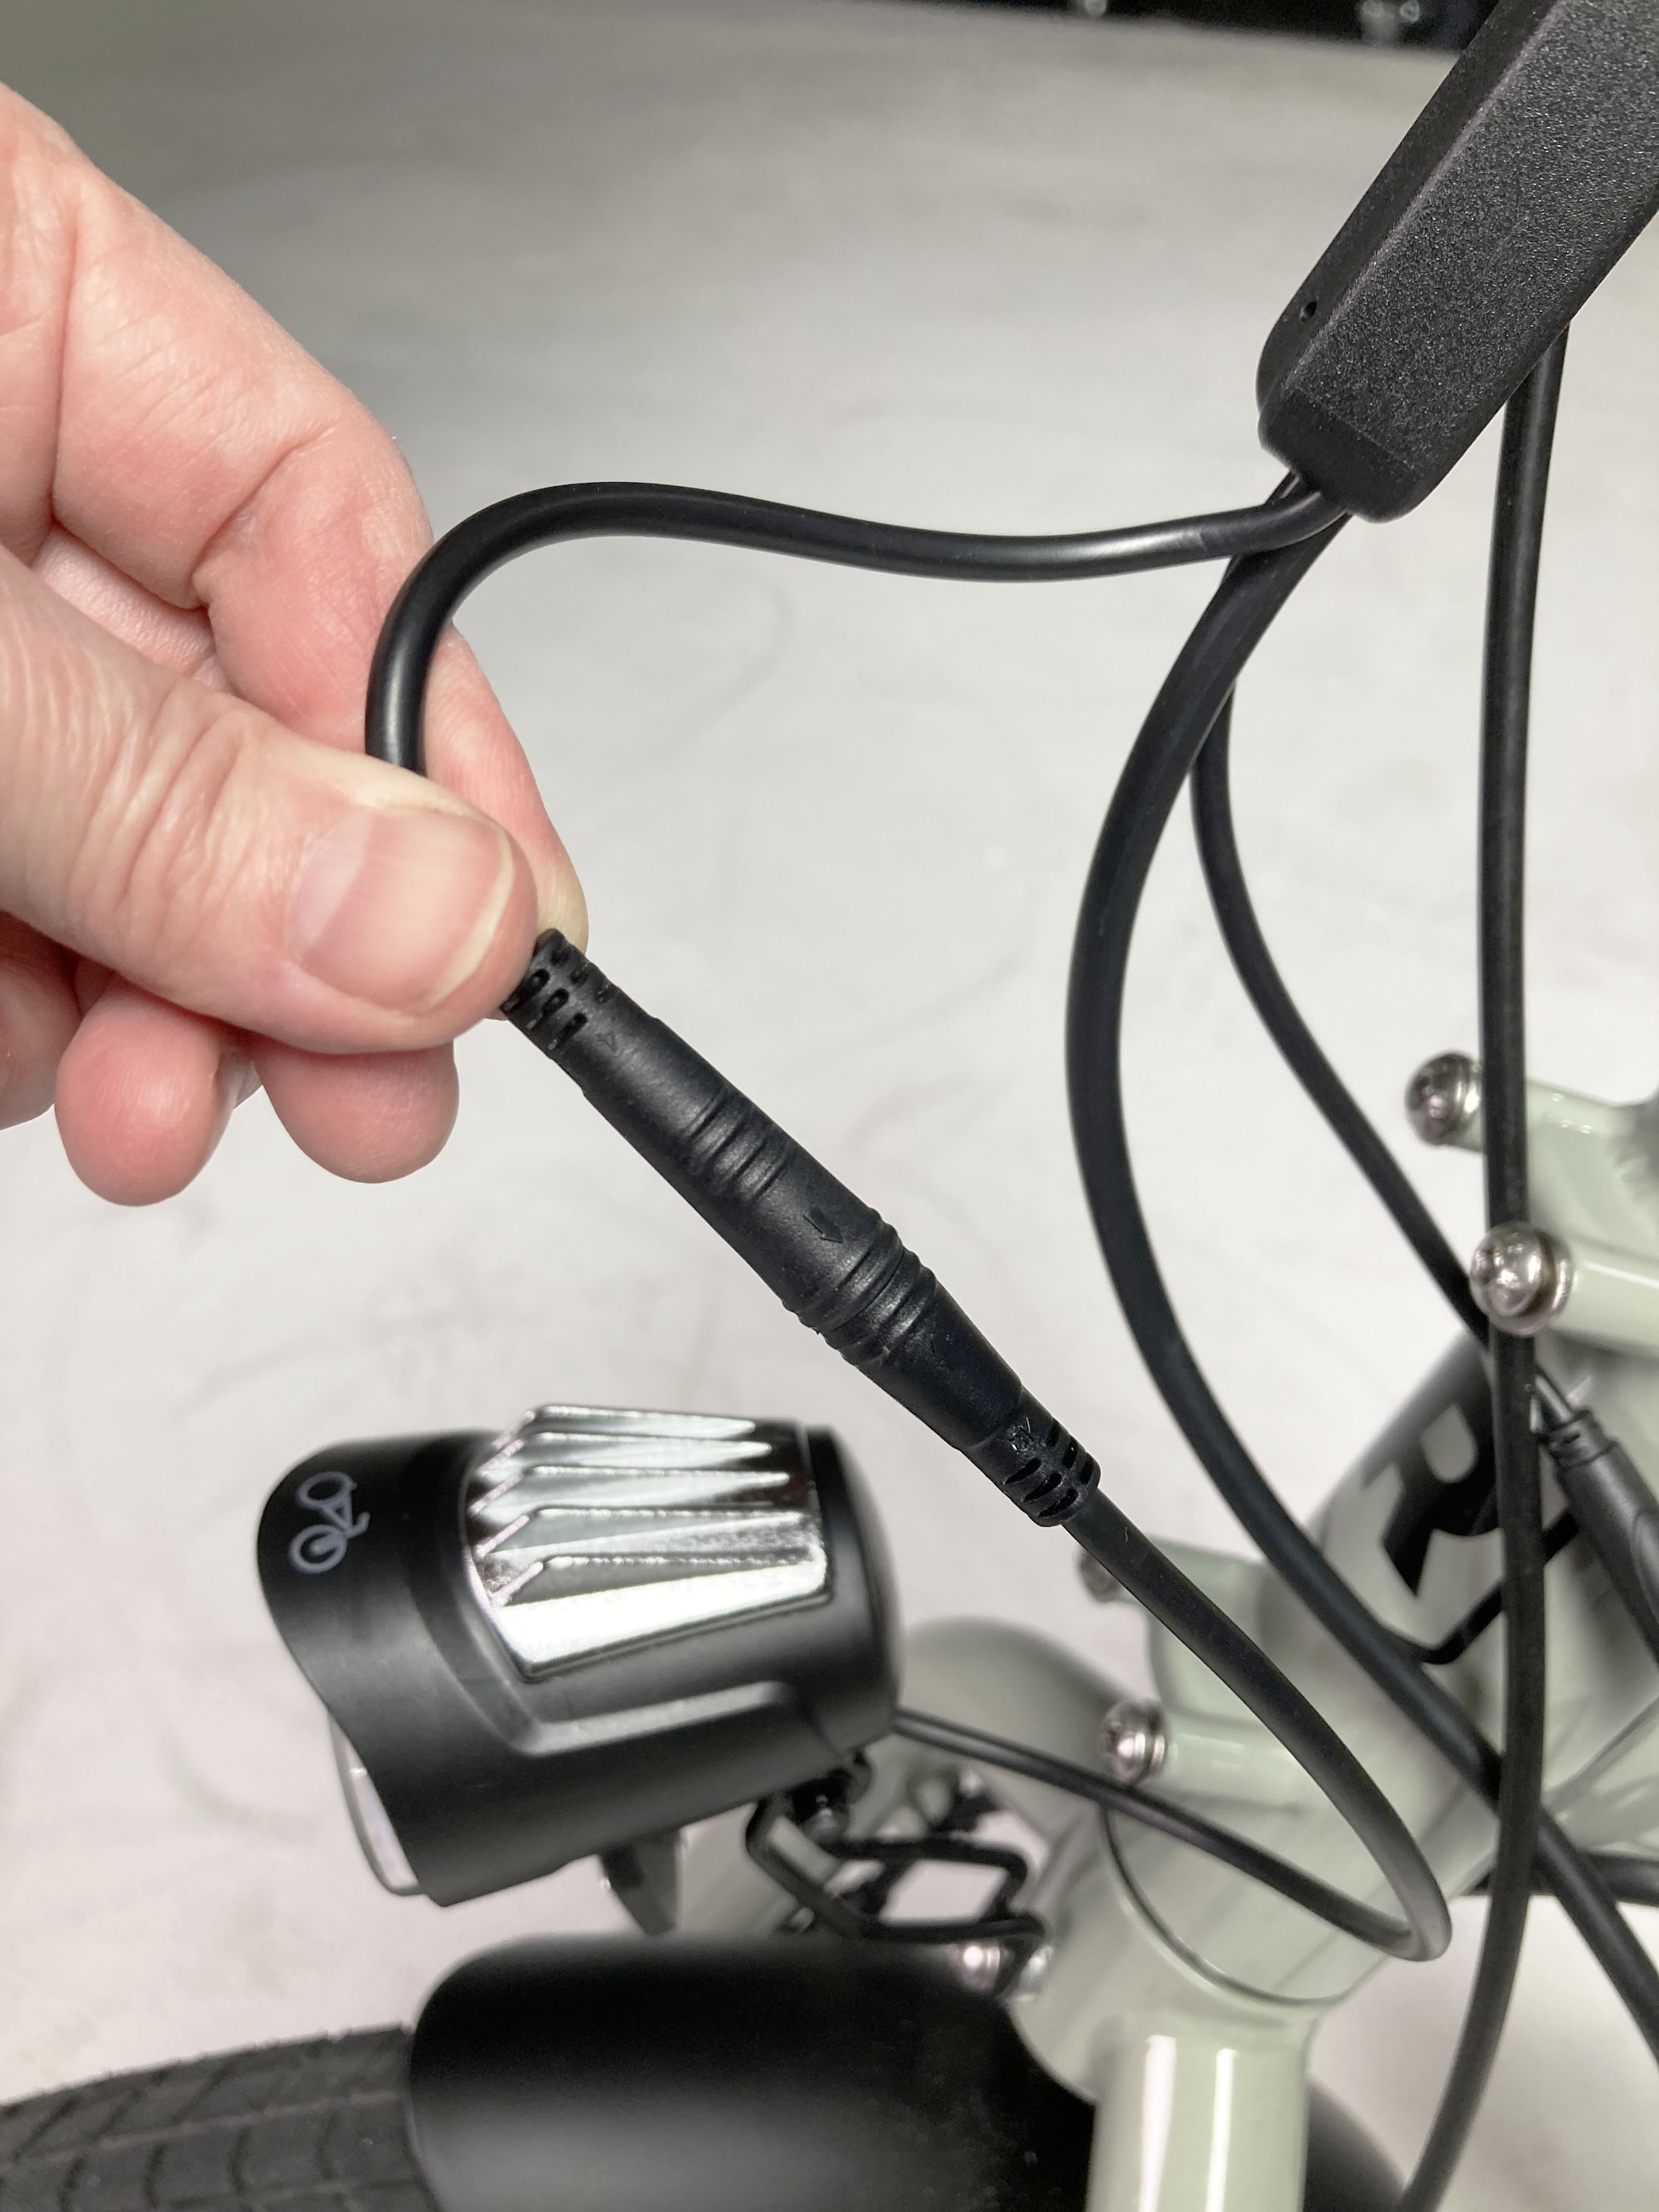
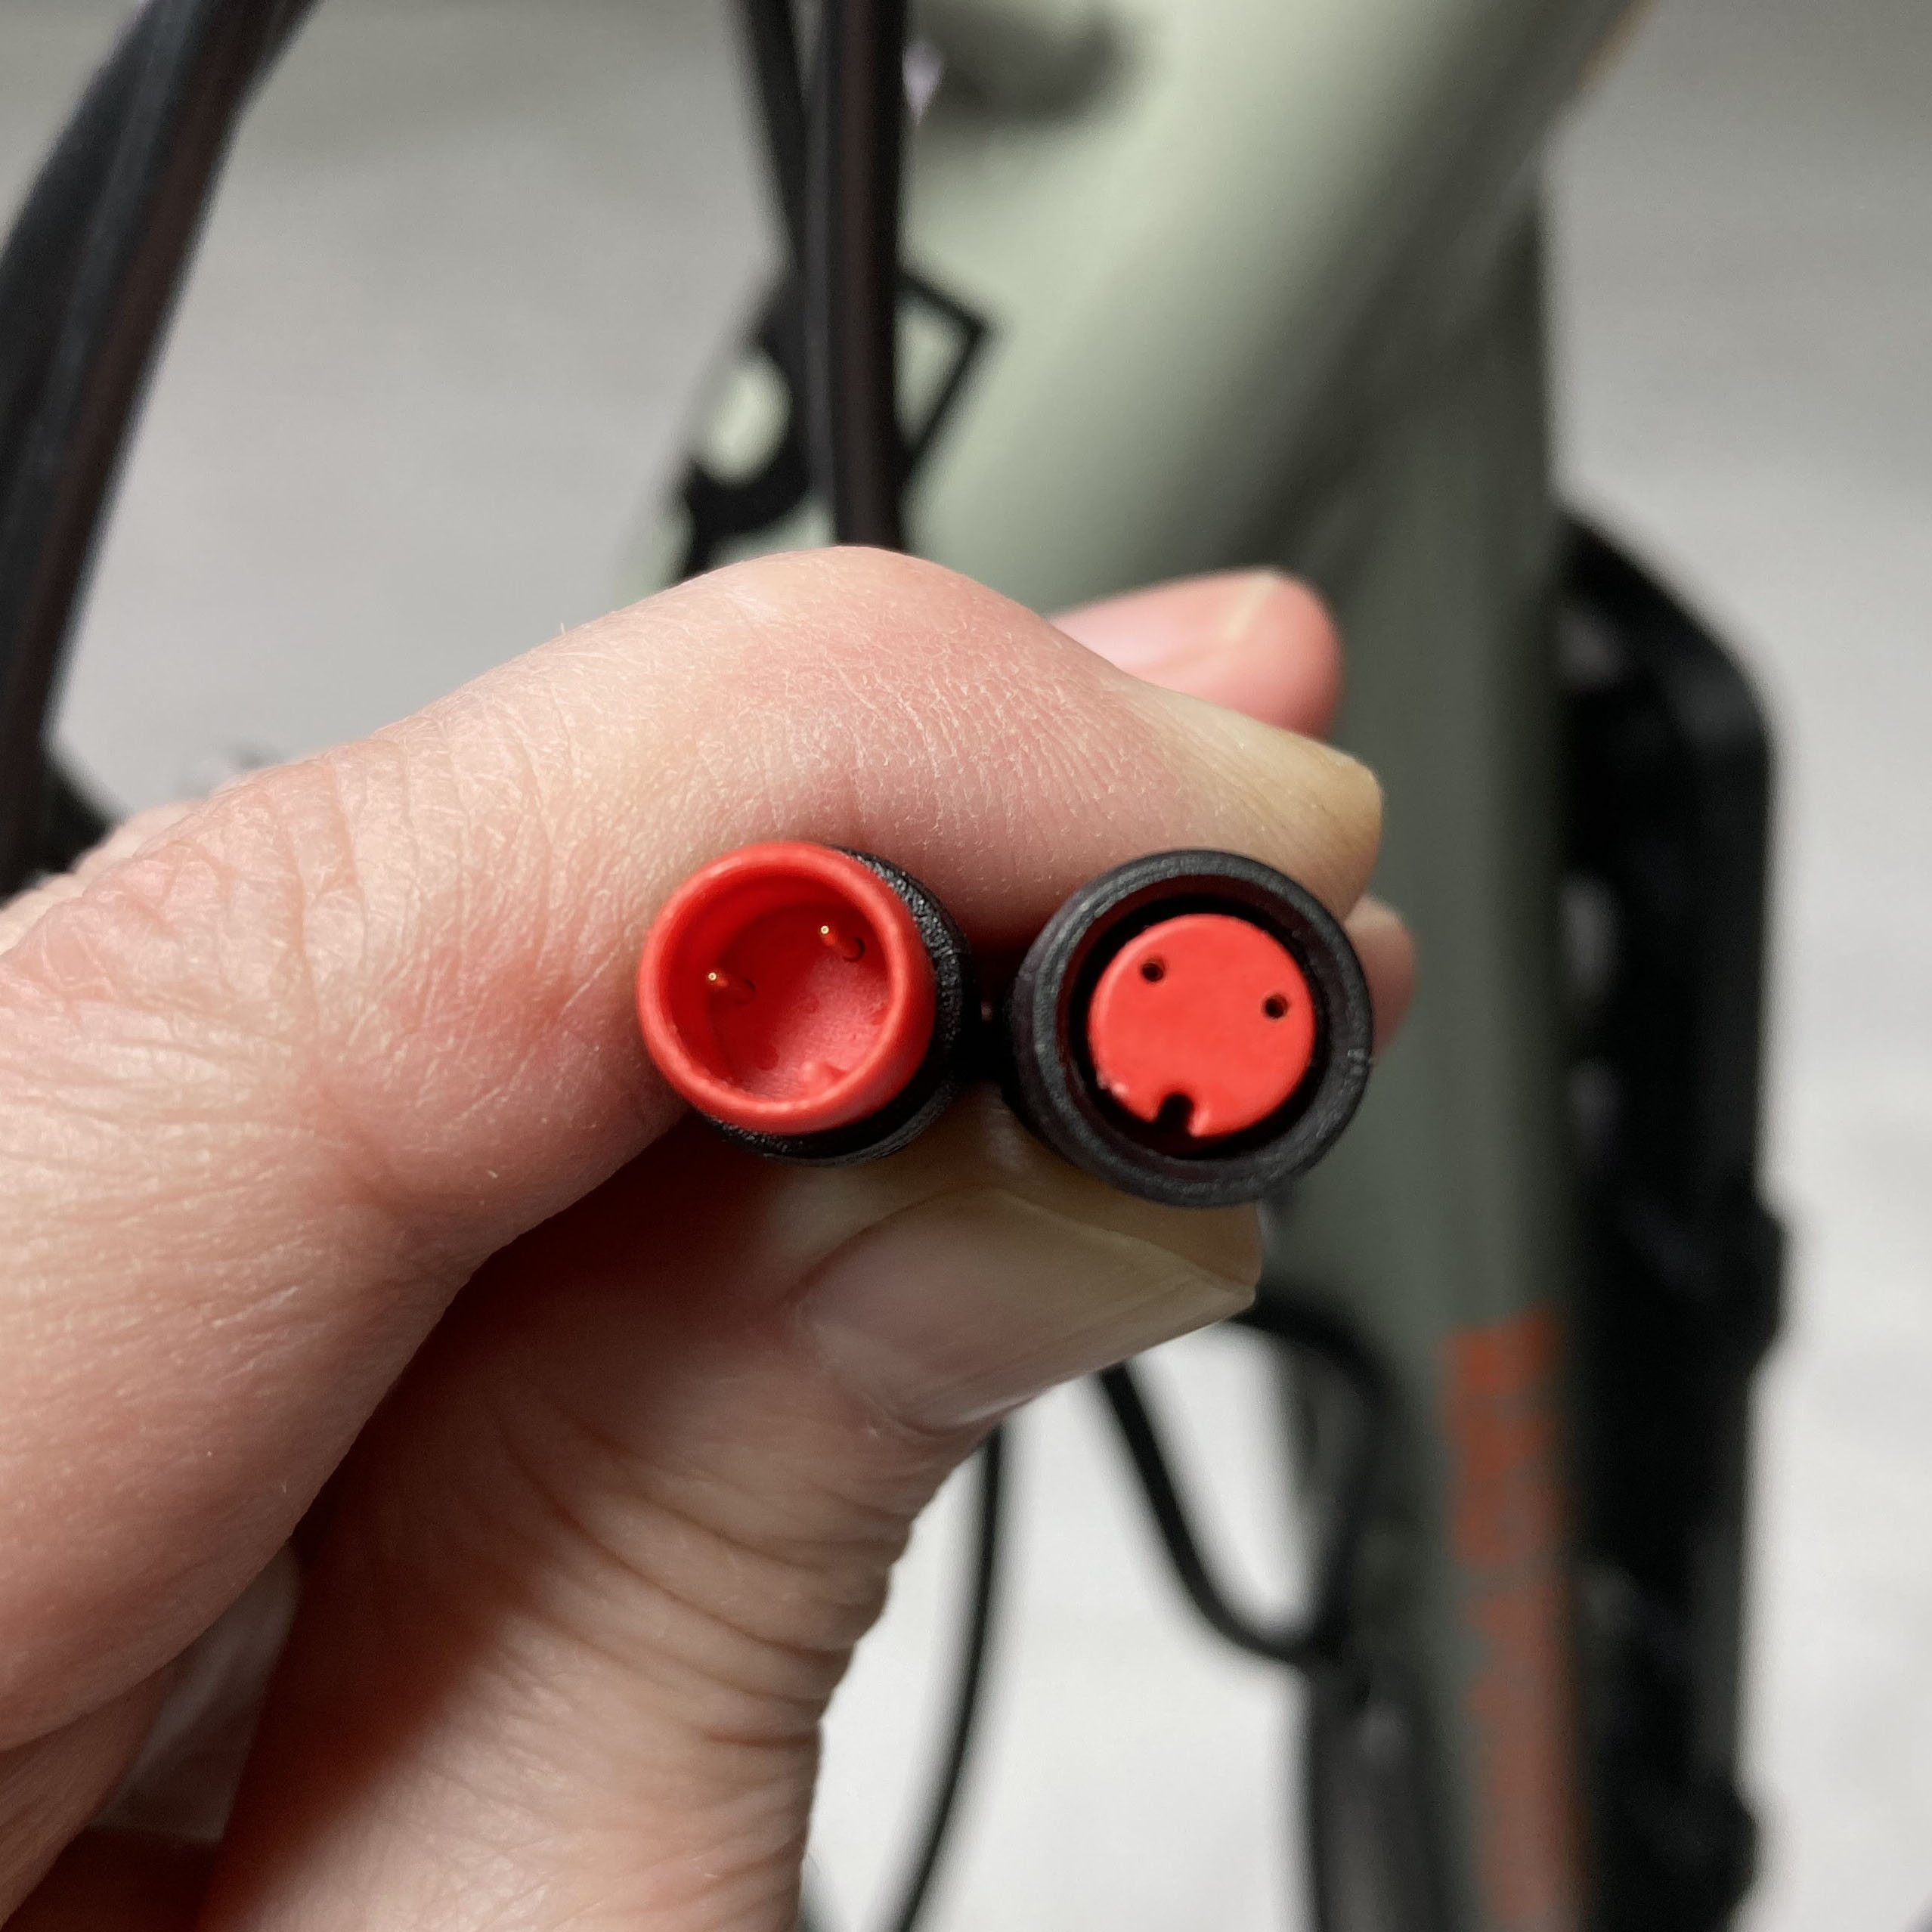
The motor cutoff connector is on a cable that exits the front hand brake and feeds into the front wiring harness junction. Do not confuse it with the mechanical brake cable that also exits from the front hand brake and extends to the front wheel's brake caliper. The connector on the motor cutoff switch cable is red and has two pins.
|
The motor cutoff connector (held between the thumb and index finger) |

|
The motor cutoff connector has a red interior and two pins. |
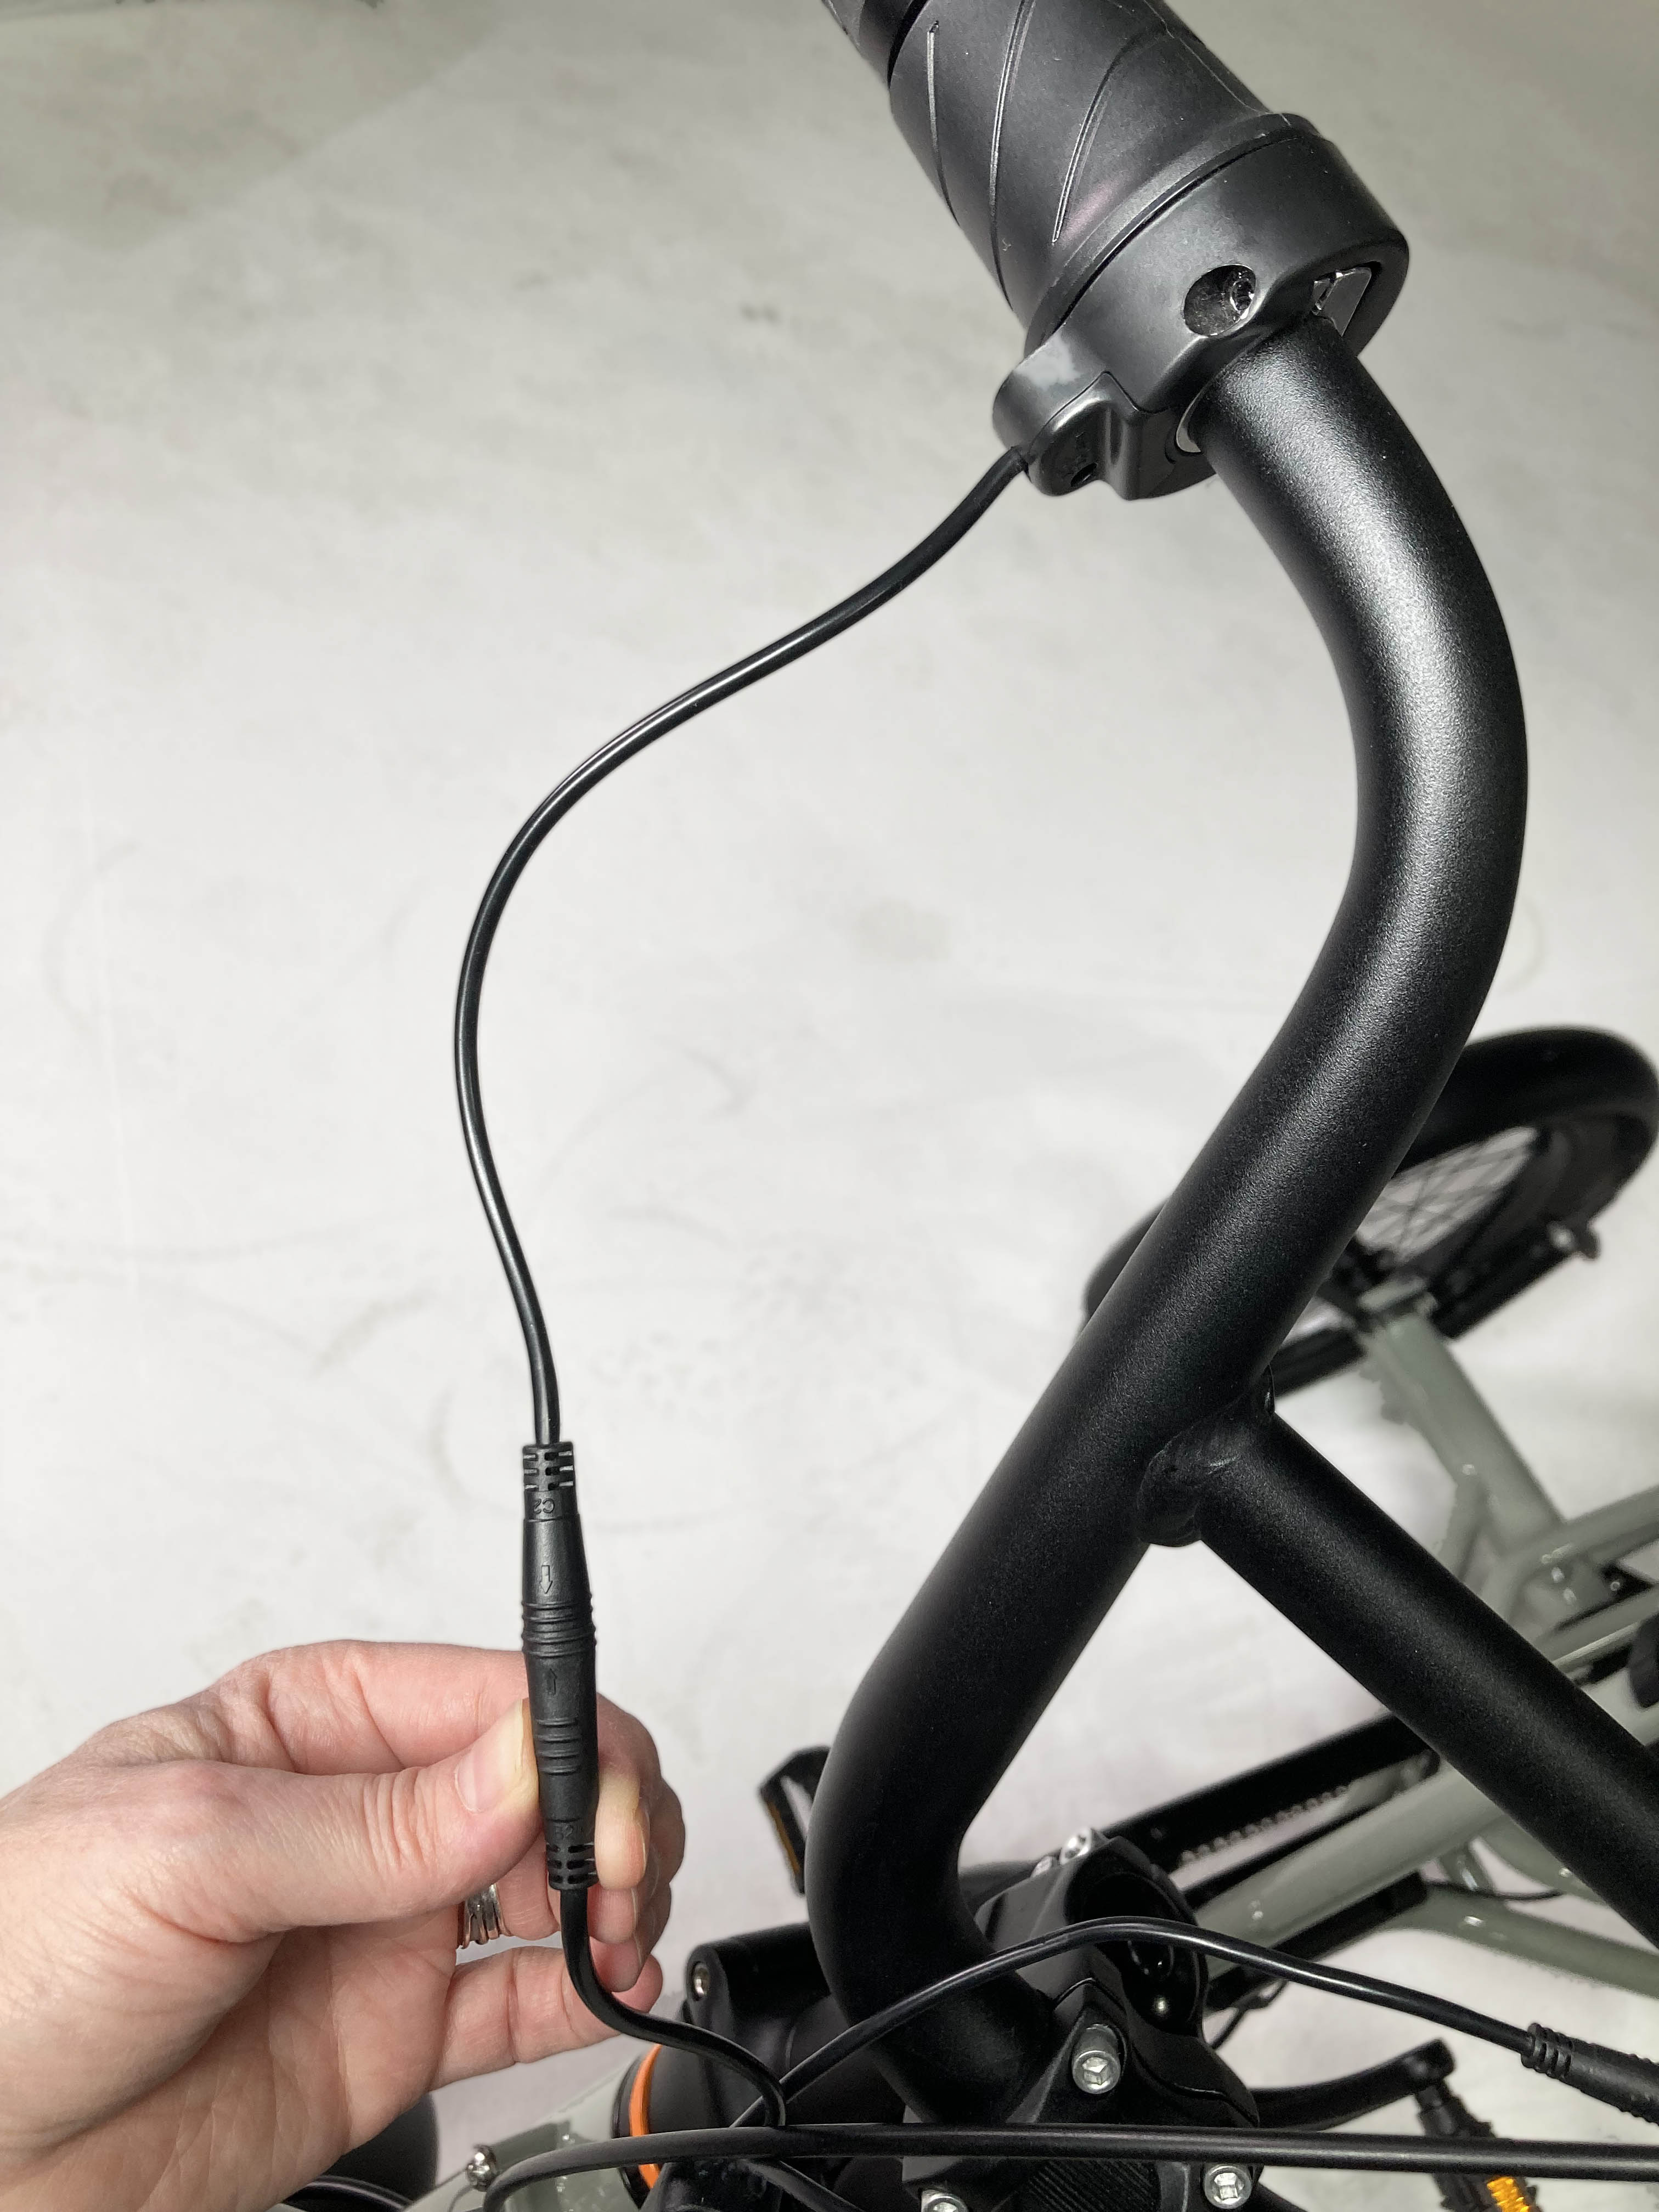
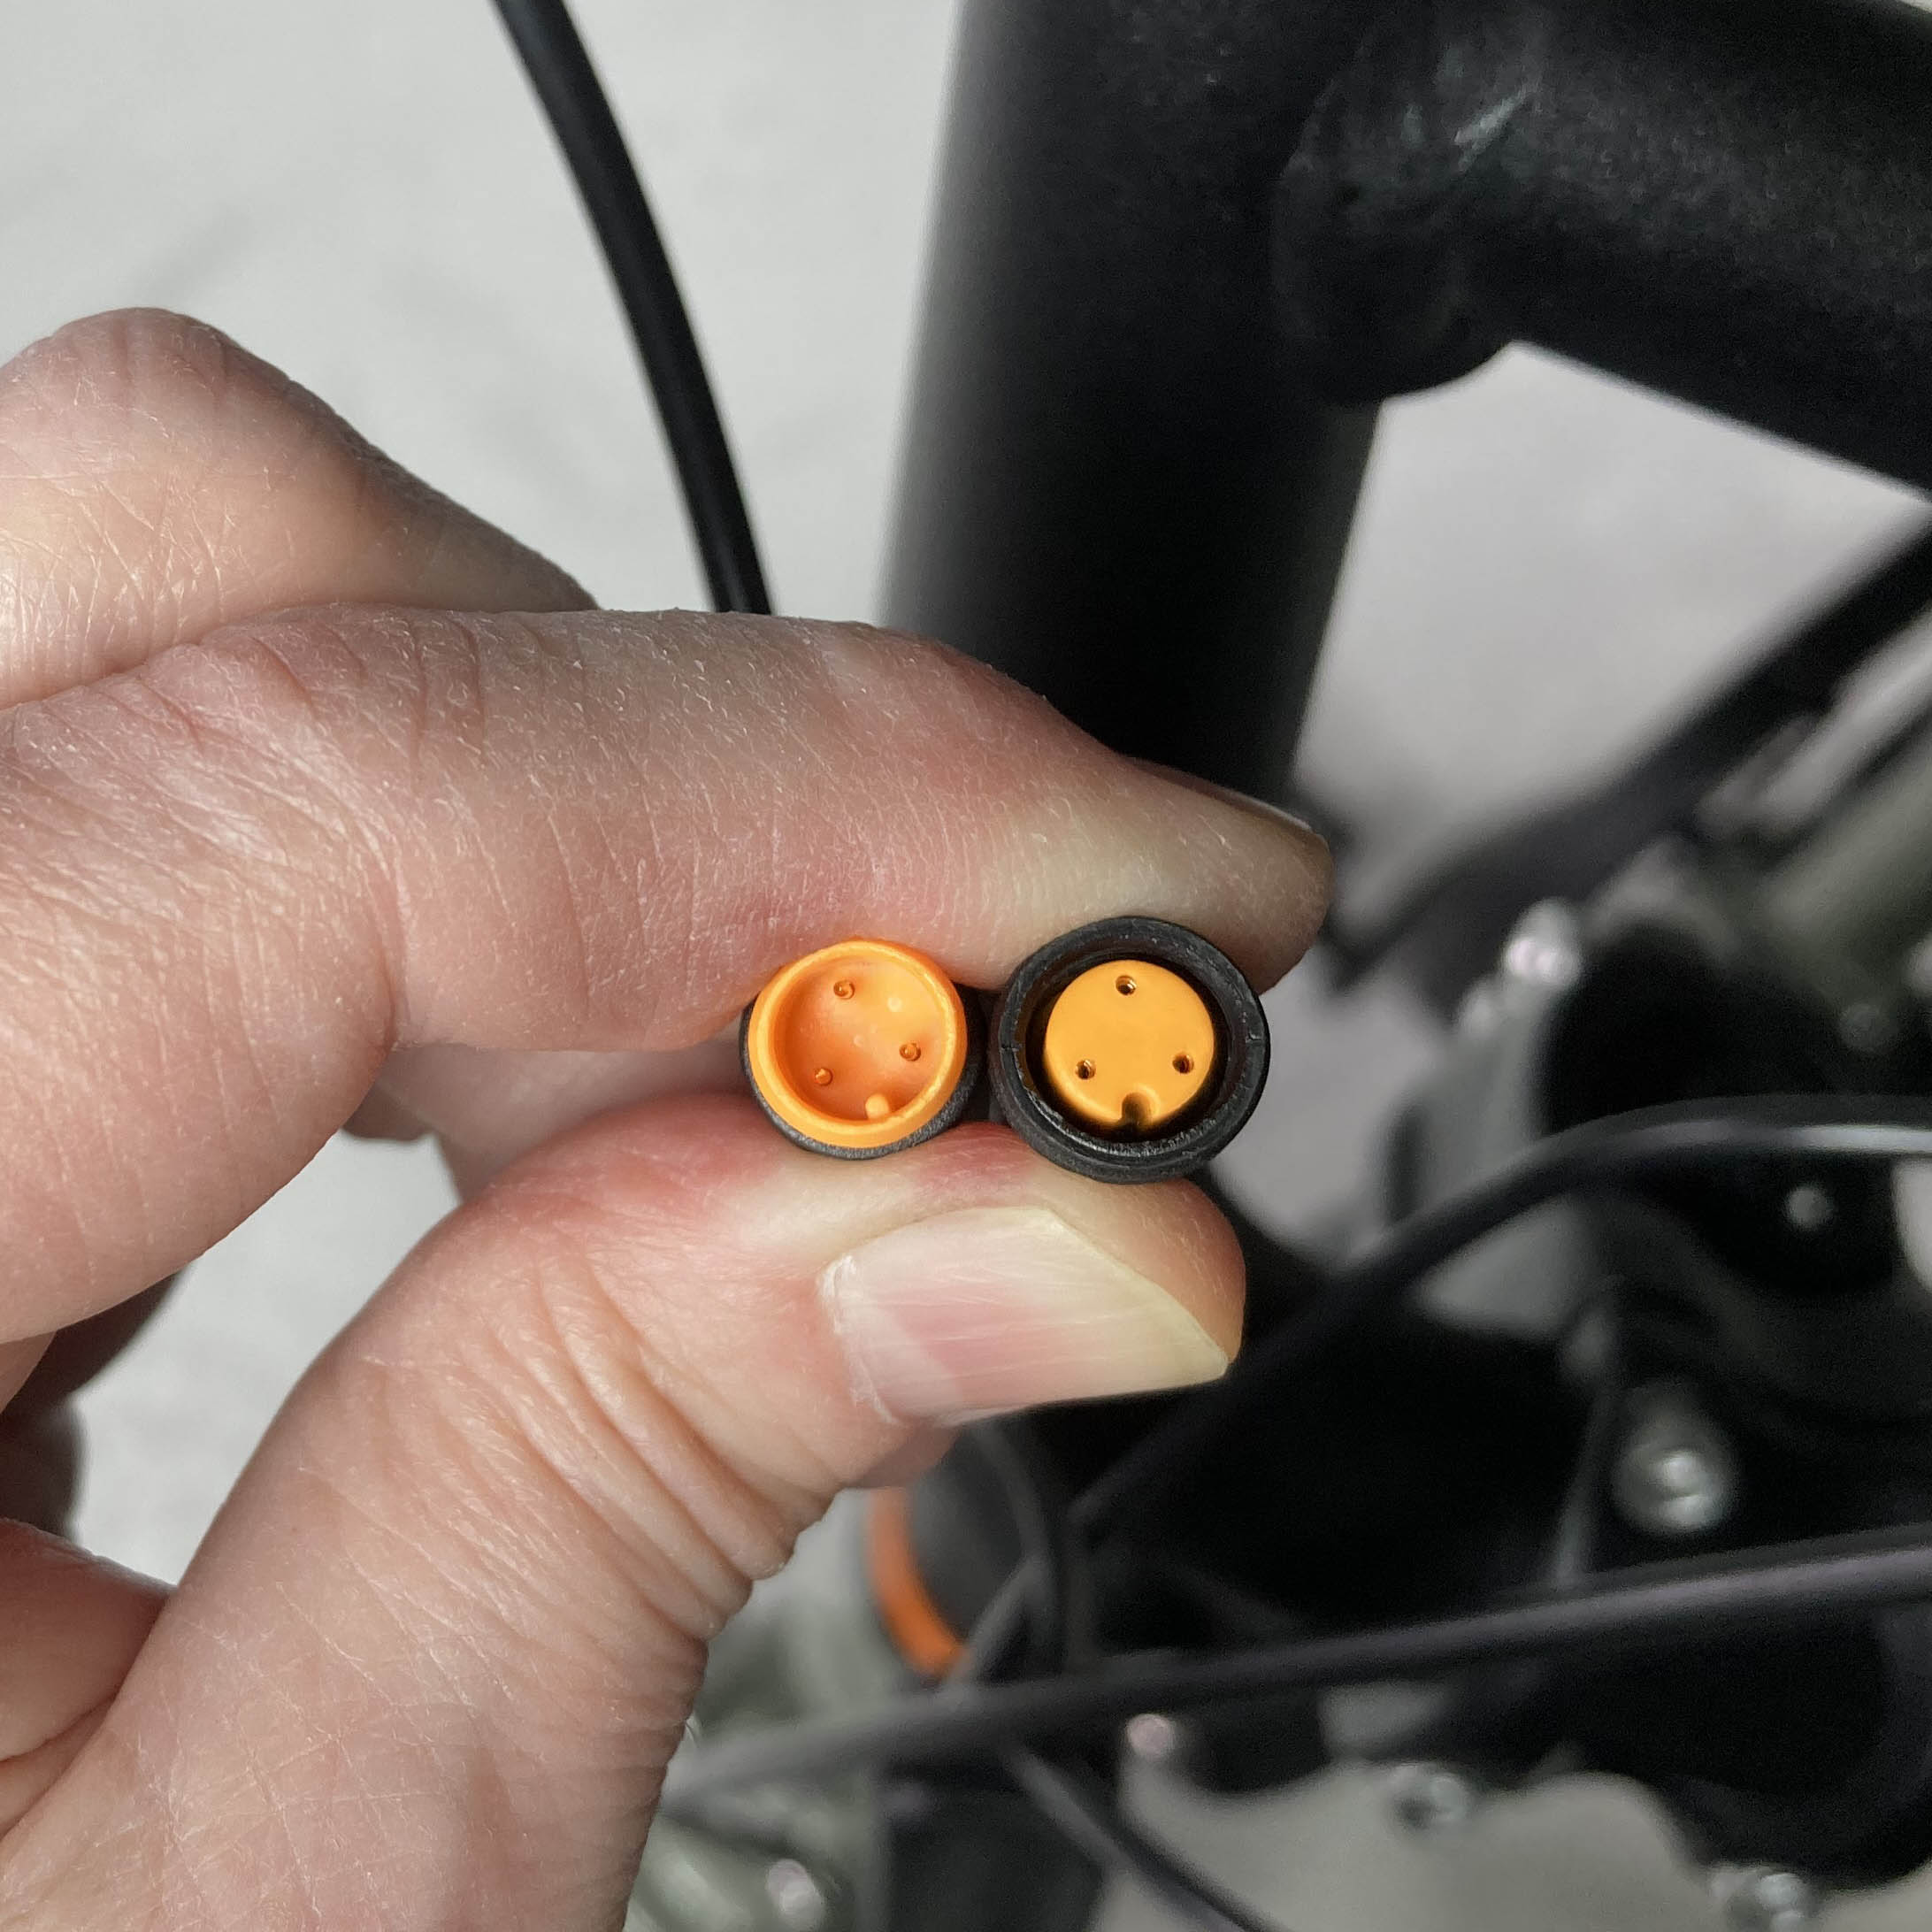
The throttle connector is on a cable that exits the twist throttle on the right handlebar and feeds into the front wiring harness junction. Its interior is yellow with three pins.
|
The throttle connector |
The throttle connector interior is orange and has three pins. |
The headlight connector is on a cable that exits the bottom of the front wiring harness junction and feeds into the headlight. Its interior is red with two pins.
|
The headlight connector |
The headlight connector interior is red and has two pins. |
The front accessory port connector exits the bottom of the front wiring harness junction. If it is not connected to an accessory, it will have a black cap on it to protect it from water, dirt, and damage. The interior of that connector is black with seven pins.
|
Your front accessory port connector |
The interior of your accessory port connector is black and has seven pins. |