Shifter replacement guide
The shifter can be replaced in the unlikely event it is damaged or determined to be non-functional by Rad Power Bikes Product Support. Follow the steps below to replace the shifter on your bike.
Most of the photos below feature a 2019 RadRover, but the steps will be the same for most models.
Tools Needed:
- Flat head screwdriver
- Phillips head screwdriver
- Isopropyl alcohol
- Paper towel
- Flat side cutters
- 3 mm, 4 mm and 5 mm Allen wrenches
- Torque wrench (with 3 mm, 4 mm, 5 mm Allen bits, and a flat head bit)
- Cable cutters or needle nose pliers
- Cable end crimps
- Zip ties
- The replacement shifter from Rad Power Bikes
The hardware or tools needed for your model may be slightly different. Make sure you use the correct tool and size for your bolts. Always make sure the tool is pressed firmly into the bolt head and turned slowly to prevent damaging the bolt.
- Get the bike ready for maintenance. Turn off the bike, remove the battery, and press and hold MODE to discharge remaining power.
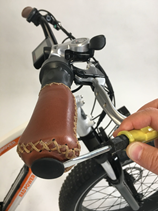
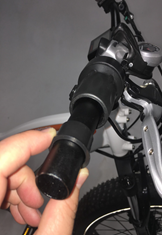
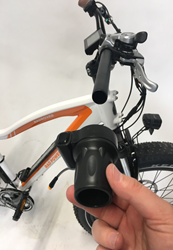
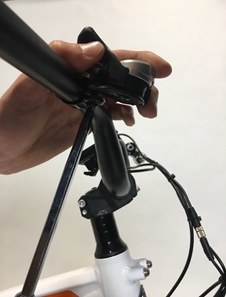
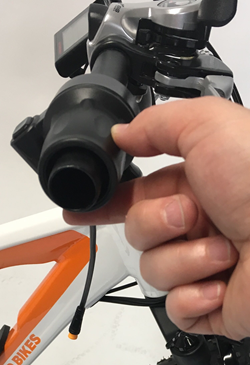
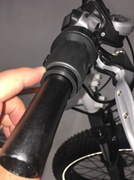
- Remove the handlebar grip.
- Remove the end cap. Use a flat head screwdriver to remove the grip end cap, and set it aside.
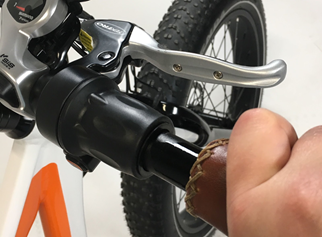
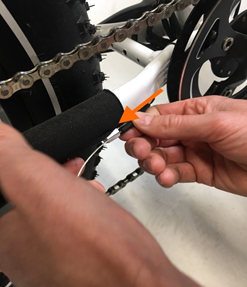
- Remove the grip. Carefully insert the screwdriver between the handlebar tubing and the grip and pry the grip away from the handlebar. Use a paper towel or squeeze bottle to apply a small amount of rubbing alcohol in between the grip and the handlebar as temporary lubrication. Twist and pull the grip off the handlebar end.
- Remove the end cap. Use a flat head screwdriver to remove the grip end cap, and set it aside.
- Remove the throttle.
- Unplug the throttle connector. Trace the cable from the throttle to the connector. Snip the zip tie and pull the connector directly apart, without twisting, to unplug.

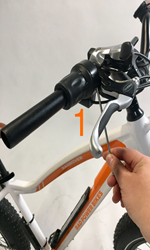
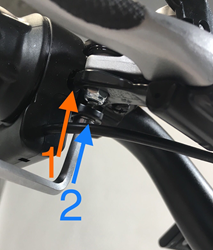
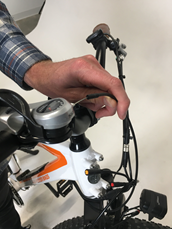
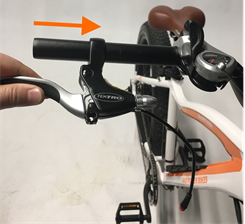
- Loosen the throttle clamp bolt. Use an Allen wrench to loosen the throttle clamp bolt (1, below). If needed, use an Allen wrench to loosen the brake lever clamp bolt (2, below) and move the brake lever out of the way.
- Remove the spacer and then the throttle. Slide the spacer and throttle off the handlebar end, making note of the spacer orientation, which is critical for reinstallation.
- Unplug the throttle connector. Trace the cable from the throttle to the connector. Snip the zip tie and pull the connector directly apart, without twisting, to unplug.
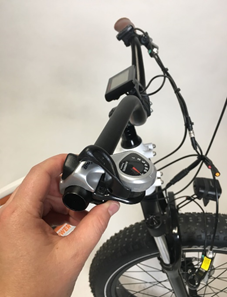
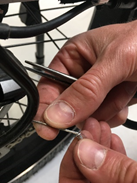
- Remove the brake lever.
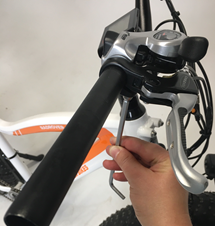
- Loosen the brake lever clamp bolt. Snip zip ties as needed and use a 5 mm Allen wrench to loosen the bolt.
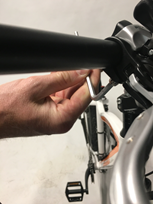
- Rotate the handlebar to the left, unplug the brake connector if more slack is needed, and slide the brake lever off the handlebar. Set aside for reinstallation.
If even more brake cable slack is needed, use a 5 mm Allen wrench to loosen (but not remove) the cable pinch bolt on the rear brake caliper and then slide the brake lever off the handlebar.
.png?revision=1)
- Loosen the brake lever clamp bolt. Snip zip ties as needed and use a 5 mm Allen wrench to loosen the bolt.
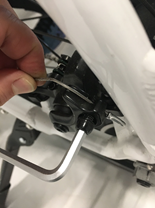
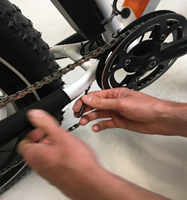
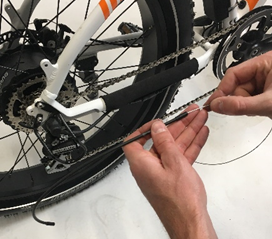
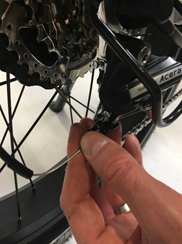
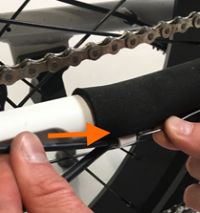
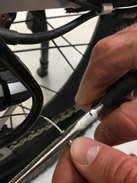
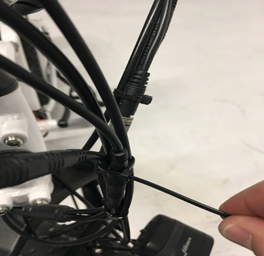
- Remove the shifter cable crimp. At the derailleur on the right side of the rear wheel, locate the shifter cable end cap. Use pliers to un-crimp and remove the cable crimp from the shifter end, and set aside.
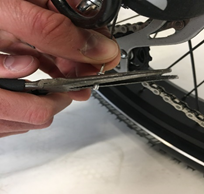
.png?revision=1)
Cable ends are extremely sharp, especially if the cable has frayed. Use caution to avoid sharp and frayed cable ends or injury could occur.
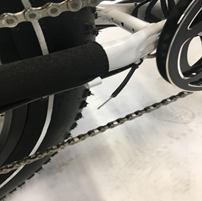
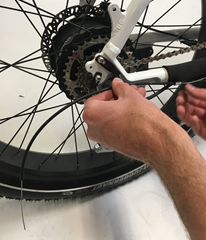
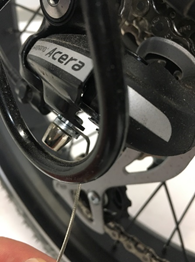
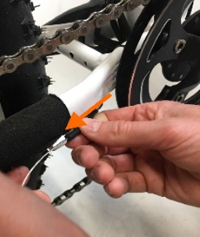
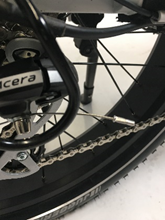
- Add shifter cable slack. Use a 5 mm Allen wrench to loosen the cable pinch bolt one turn at a time, just enough to slide the shifter cable end out of the pinch bolt, toward the back of the bike.
Do not allow the hardware to come fully off the derailleur. Contact Product Support if the hardware does accidentally come off.

.png?revision=1)
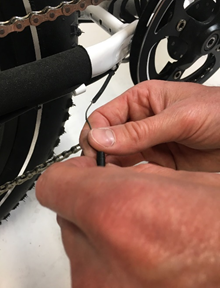
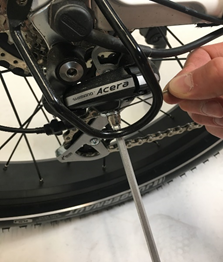
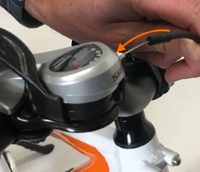
- Remove the shifter cable.
- Shift the bike into 7th gear.
.png?revision=1)
- Locate where the shifter cable meets the shifter. Pull the housing away from the shifter and toward the center of the bike to expose some of the cable near the shifter.
- Push the cable through the shifter and toward the handlebar end, then grab the shifter cable end and gently pull the cable all the way out of the cable housing and shifter.
- Shift the bike into 7th gear.
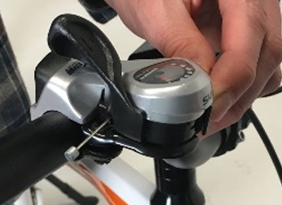
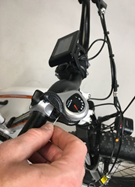
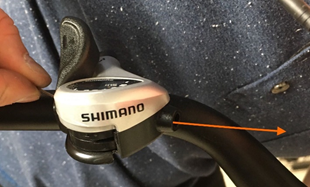
- Loosen the shifter clamp bolt and remove the old shifter. Use a Phillips or flat head screwdriver to apply firm and constant pressure to the shifter clamp bolt on the underside of the shifter. Slide the shifter off of the handlebar end and recycle it according to local rules.
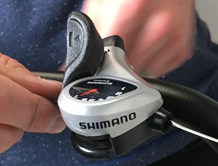
- Install the new shifter. Slide the new shifter onto the handlebar and adjust it so it is usable by the rider. Tighten the shifter clamp bolt and torque to 6 Nm.
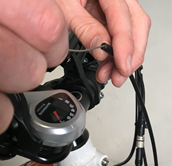
- Install the new shifter cable. With the shifter in 7th gear, insert the end of the cable into the cable opening (circled below) and carefully push the cable through the shifter body.
- Pass the cable through the cable housing. If needed, remove the end cap on the cable housing and pass it over the cable end, then insert the cable into the cable housing.
- Press the end of the housing into the opening at the shifter body. Then, push the rest of the cable through the cable housing.
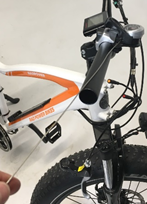
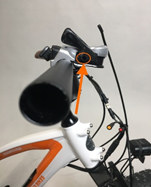
- Pass the cable through the first cable guide by the chainstay. Most of our bike models (except the 2019 RadWagon), have two sections of cable housing (highlighted in orange, below) and one section of exposed cable near the chainstay (in blue). Follow the next steps to ensure the cable passes through the bike frame fully.
- Locate the first cable guide near the chainstay.

- Remove the cable housing from the cable guide and pass the cable through the housing.
- Pass the cable through the cable stop and fully seat the cable stop in the cable guide.
- Remove the cable housing from the cable guide and pass the cable through the housing.
- Locate second cable guide.

- Remove the cable housing from the cable guide.
- Pass the cable through the housing and seat the housing in the cable guide.
- Remove the cable housing from the cable guide.
- Install the shifter cable at the derailleur.
- Ensure the chain is on the smallest cog and the shifter is in 7th gear.
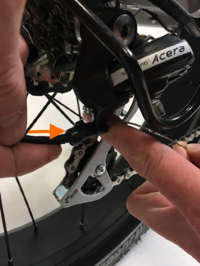
- Pass the cable end through the barrel adjuster and the small opening and notch between the cable pinch bolt and backing nut.
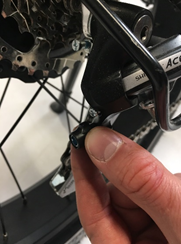
- Pull the cable so there is no slack, but not so tight that the cable moves the derailleur body in toward the wheel, and use a 5 mm Allen wrench to tighten the cable pinch bolt.
- Check that the cable housing is seated in the cable guides on the frame. Trace the shifter cable from the handlebar to the rear of the bike to make sure the cable housing ends are fully seated in the cable guides.
- Adjust the derailleur and take out cable slack if needed. With the rear wheel off the ground, rotate the pedals forward by hand and shift through the gears. Adjust the derailleur if needed.
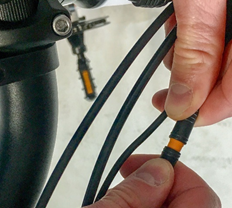
- Cut the cable to size. Once the cable housing is fully seated in the cable guides on the frame, and the derailleur is adjusted and shifting properly, use cable cutters to trim off excess shifter cable. Ensure there is around 3” of cable after the cable pinch bolt on the derailleur.
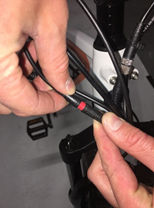
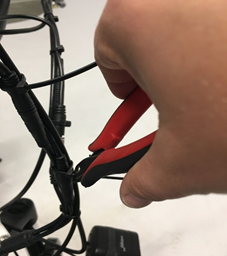
- Install the cable crimp. Pass a new cable crimp onto the cable end and use the crimp portion of the cable cutters or needle nose pliers to secure the crimp at the end of the cable.
- Reinstall the brake lever. Pass the brake lever onto the handlebar end and use a 5 mm Allen wrench to tighten the brake lever bolt. Torque to 6 Nm.
- Reinstall the throttle. Slide the throttle and then the spacer onto the handlebar end. If the throttle has a button, rotate the throttle to the button is easily accessible by the rider. Use a 3 mm Allen wrench to tighten the throttle bolt. Torque to 3 Nm.
The spacer must be properly installed between the throttle and the handlebar grip for the bike to operate safely.
- Reinstall the handlebar grip. Apply a small amount of isopropyl alcohol to the top of the handlebar end and then slide and twist the grip into place. Once the grip is flush with the handlebar end, reinstall the end cap. Once the alcohol dries, the handlebar grip will not move or twist easily.
- Plug in the brake connector and the throttle connector. Locate the matching connector ends, line up the internal notches and pins (and external arrows) and press directly together, without twisting, to reconnect.
Brake-wiring harness Throttle-wiring harness - Reinstall zip ties. Organize the cables and replace the zip ties. Snip zip ties so they are flush and smooth.
- Reinstall the battery and test the bike fully before riding.