RadMini full fenders installation guide
RadMini Full Fenders are compatible with the RadMini 4, RadMini Step-Thru 2, RadMini (2018, 2019 model years), RadMini Step-Thru (2019 model year), and 2019 RadMini Rear Rack.
Note: The RadMini 4 and RadMini Step-Thru 2 will come equipped with full fenders, and the rear fender will be pre-installed. Refer to the Owner's Manual for RadMini 4 and RadMini Step-Thru 2 front fender installation instructions and assembly videos.
RadMini fender kits include:
- The front fender with the mounting bracket installed
- The rear fender with the 2019 mounting bracket installed
- The 2018 rear fender mounting bracket.
- A bag of hardware including:
- 4 shorter bolts (rear fender bolts)
- 4 washers (for rear fender bolts)
- 2 longer bolts (front fender bolts)
- 1 very long bolt (optional replacement headlight bolt)
- 1 locknut (optional replacement for headlight bolt)
Tools needed:
- 4 mm Allen wrench
- 5 mm Allen wrench
- 10 mm wrench
- 18 mm wrench
- A torque wrench with 4 mm and 5 mm Allen heads, and an 18 mm wrench
- Flat side cutters
- A replacement zip tie
2019/2018 RadMini Front Fender Installation Instructions:
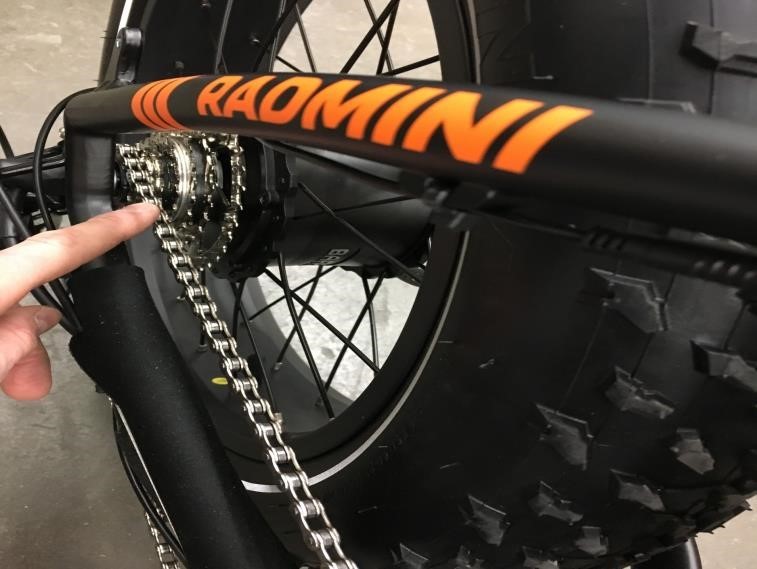
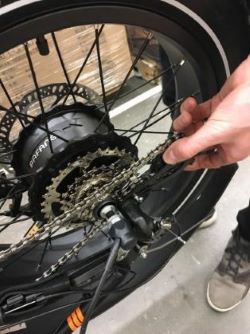
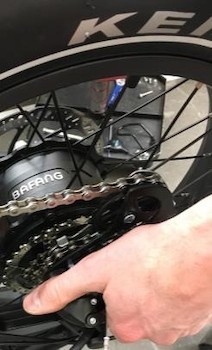
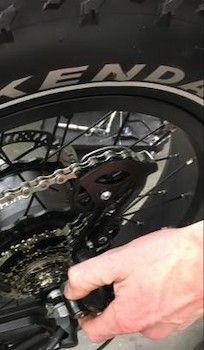
- Shift the bike into gear 7, which will make several steps easier (by moving the chain onto the smallest cog of the freewheel).
- Power off the bike. Ensure the bike is in the off position and use the key to remove the battery. Once removed, press and hold the “MODE” button on the LCD Display Remote until the display remains off for about two seconds (it may flash on briefly). This ensures the power is fully discharged from the bike and it is safe to work on.
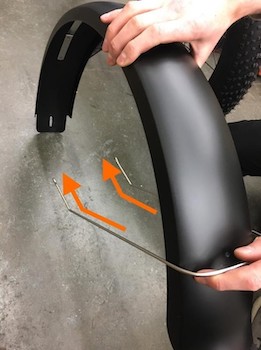
- Install the front fender, which is shorter than the rear fender:
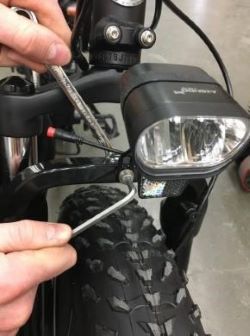
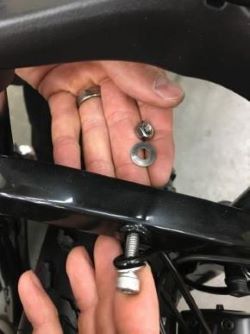
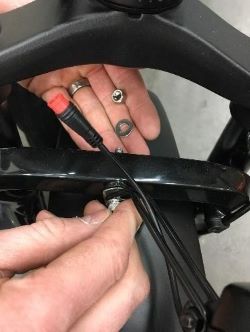
- Remove the headlight. Unplug the headlight connector by pulling each side of the connector directly apart. Use a 5 mm Allen wrench and a 10 mm wrench to remove the headlight bolt, front washer, rear washer, and lock nut. Set this hardware aside for reinstalling the headlight.
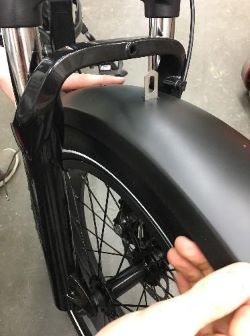
- Move the fender into position. From the back of the front wheel, pass the front of the fender between the tire and the front fork arch so the U-shaped metal bracket on the fender is just in front of the light mount on the fork arch (below, right).
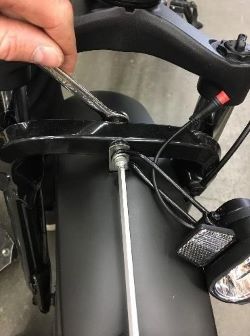
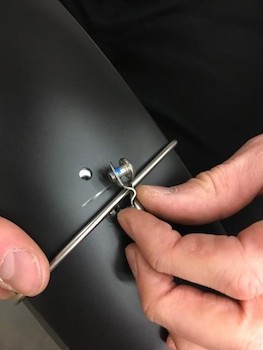
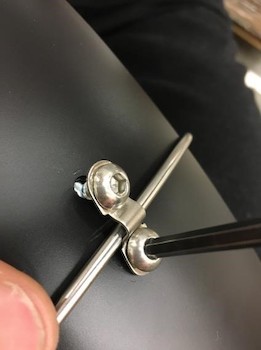
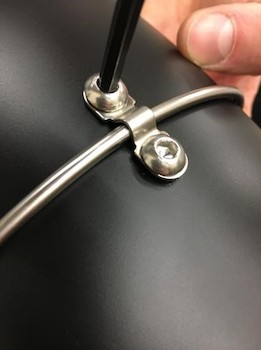
- Bolt the fender and headlight to the front fork arch. Pass the headlight bolt through one washer, the headlight mount, the U-shaped metal bracket on the fender, and into the mounting point on the front fork arch. On the back of the bolt, install a washer and then the locknut (above, middle). Use a 10 mm wrench and 5 mm Allen wrench and torque to 6 Nm (above, right).
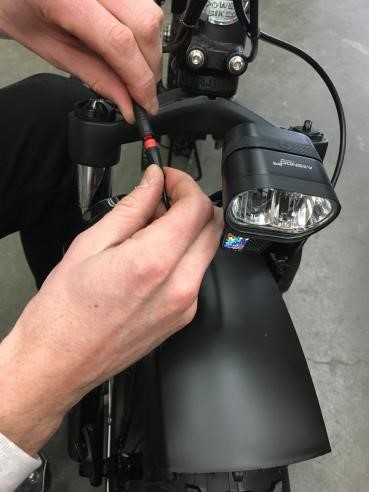
- Reconnect the headlight. Align the notches and pins on the inside of the connector, and the arrows on the outside, and press the two sides of the connector together without twisting to fully seat the connection.
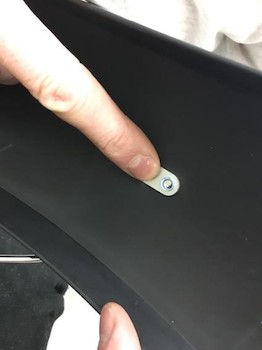
- Bolt the fender mounting bracket to the front fork dropouts. Insert one of the 2 longer bolts through one of the metal eyelets on the metal mounting bracket and thread into the bolt connection on the front fork dropout. Repeat on the other side and use a 4 mm Allen wrench to torque both bolts to 6 Nm.
- Remove the headlight. Unplug the headlight connector by pulling each side of the connector directly apart. Use a 5 mm Allen wrench and a 10 mm wrench to remove the headlight bolt, front washer, rear washer, and lock nut. Set this hardware aside for reinstalling the headlight.
- Identify the model year of the bike (2018 or 2019). The 2018 RadMini (below, left) has “radpowerbikes.com” printed on the seatstay, while the 2019 RadMini (below, right) has three parallel orange lines and “RADMINI” painted on the seatstay. Contact Rad Power Bikes if you need assistance identifying the model year of the bike.
- Install the rear fender per the steps unique to the bike model year.
2019 RadMini Rear Fender Installation Instructions:
- Remove the 2019 rear tire assembly to allow adequate wrenching angle for threaded mounting points:
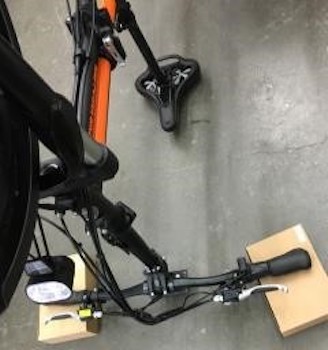
- Flip the bike upside down. Reinstall the seat, set up blocks on which the handlebar grips will rest (to prevent damage to the controls and LCD display), and flip the bike upside down resting the bike on the handlebar grips on blocks and the seat.

- Remove the bash guard. Use a 4 mm Allen wrench to remove the two bolts holding the derailleur bashguard. Set the bolts aside for reinstallation.
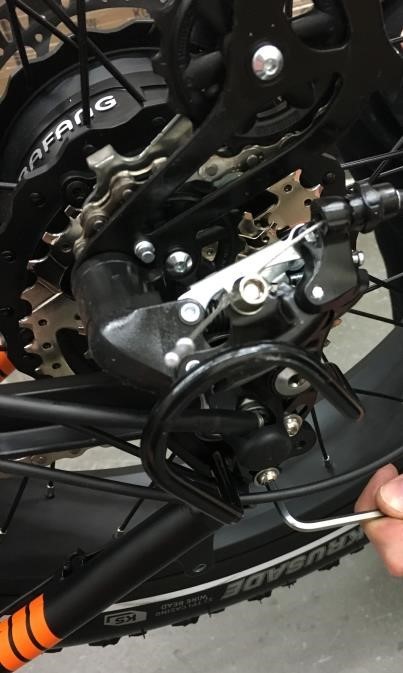
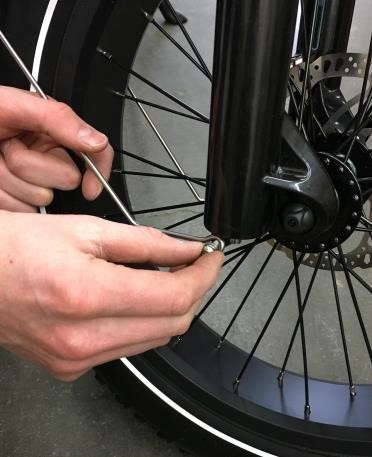
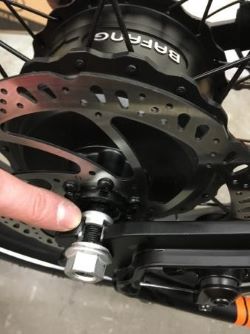
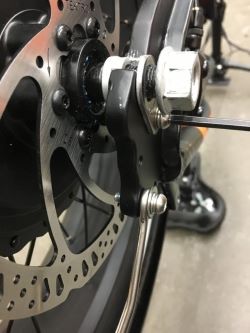
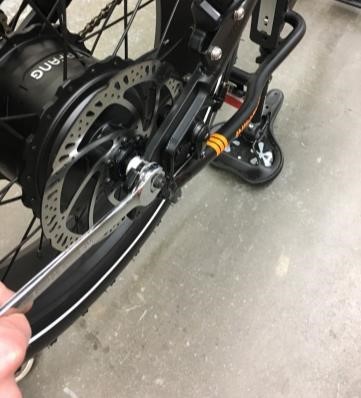
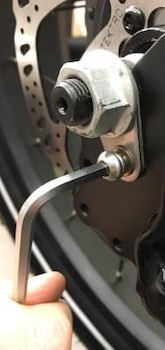
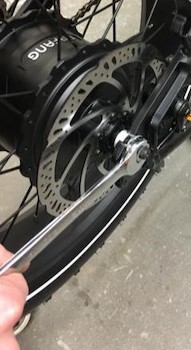
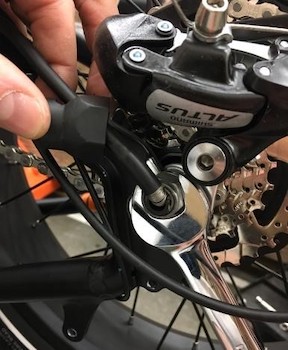
- Remove the torque arm bolt. On the brake disc side of the wheel, use a 4 mm Allen wrench to remove the torque arm bolt, next to the axle nut, and set aside for reinstallation.
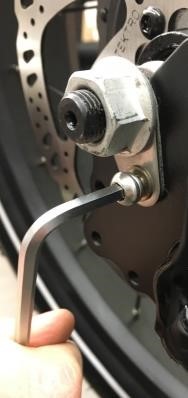
- Loosen axle nuts. Use an 18 mm wrench to loosen the axle nuts enough to allow the rear wheel assembly to be lifted out of the rear dropouts, but keep the nuts and hardware installed (the orientation of this hardware must remain the same). Set aside for reinstallation.


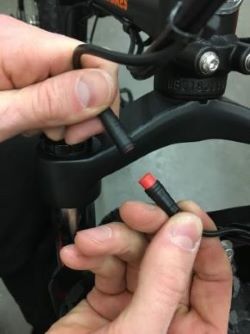
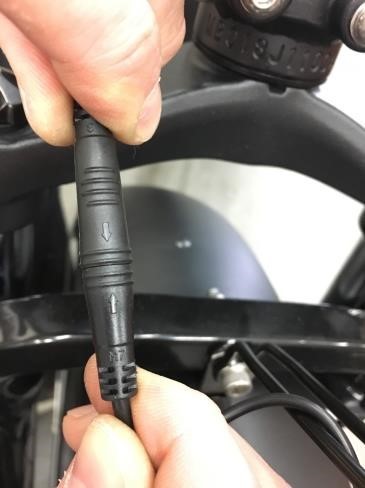
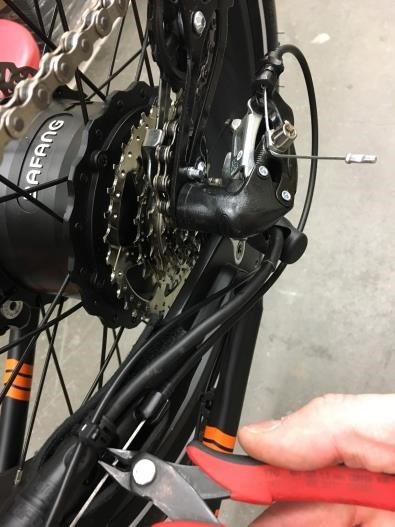
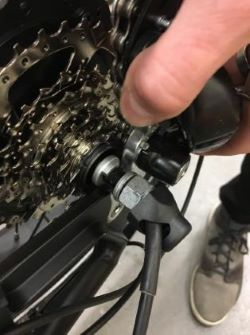
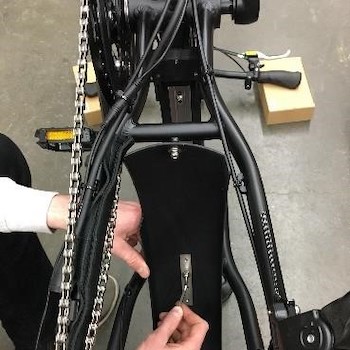
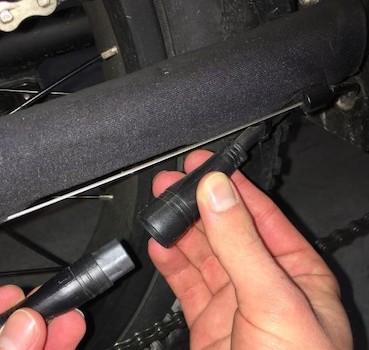
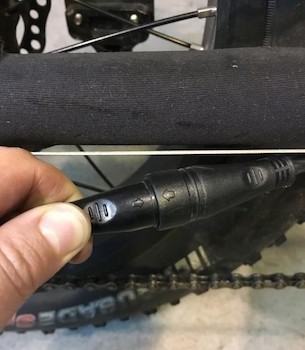
- Unplug the motor connector. Use flat side cutters to snip the zip tie holding the motor connector cable to the frame taking care to not damage to the cable housing or wires and pull the connector directly apart without twisting.
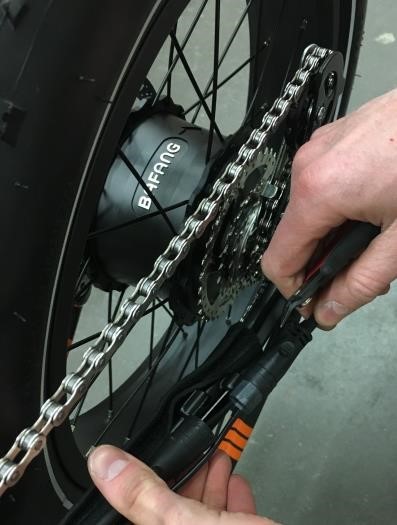
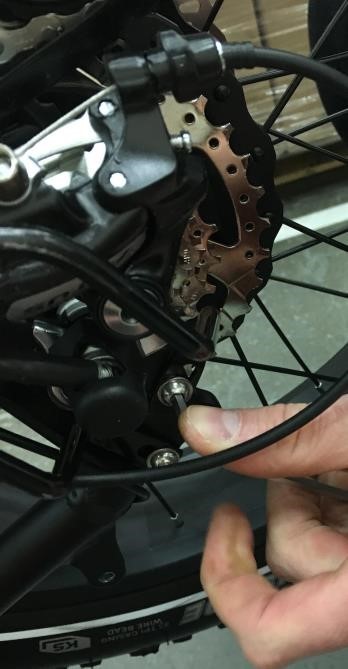
- Remove the rear wheel. Take care to not touch the metal brake disc and lift the rear wheel assembly out of the dropouts. Note the orientation of the washers on the motor axle for reinstallation. Note: Shifting into gear 7 moves the chain down onto the smallest cog on the freewheel and will create enough slack to pull the derailleur and slide the axle out of the dropouts. Set the wheel aside.
- Flip the bike upside down. Reinstall the seat, set up blocks on which the handlebar grips will rest (to prevent damage to the controls and LCD display), and flip the bike upside down resting the bike on the handlebar grips on blocks and the seat.
- Install the rear fender on a 2019 RadMini:
- Move the fender into position with the flared end/mounting bracket clamp near the back of the bike and the flat end near the chainstay.
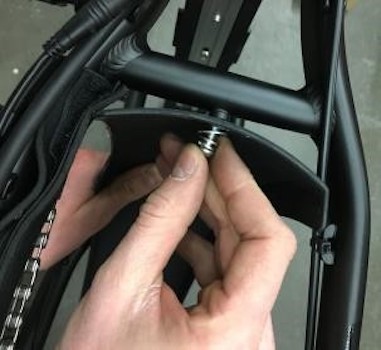
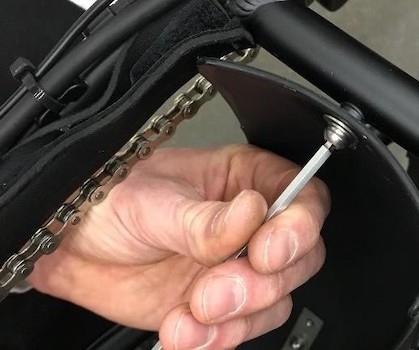
- Attach the fender at the chainstay arch. Pass one of the four smaller bolts through a washer and then into the mounting point on the chainstay arch. Carefully thread the bolt by hand and use a 4 mm Allen wrench to tighten part way.

- Attach the fender at the seatstay arch. Pass another of the smaller bolts through a washer and then into the mounting point on the seatstay arch. Carefully thread the bolt by hand. Use a 4 mm Allen wrench to torque to 6 Nm.

- Torque the chainstay bolt to 6 Nm.
- Attach the mounting bracket to the rear dropouts. Use the other two smaller bolts and washers to connect the eyelet connection point on the fender mounting bracket to the mounting point farthest back on the dropouts of the frame.
- Install the rear wheel on a 2019 RadMini:
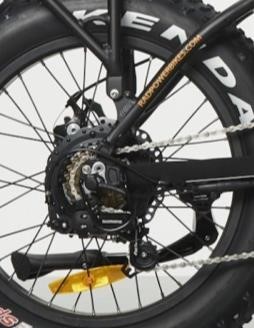
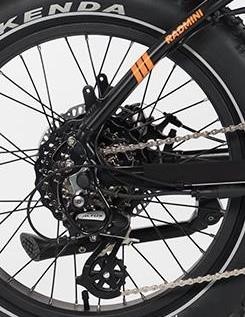
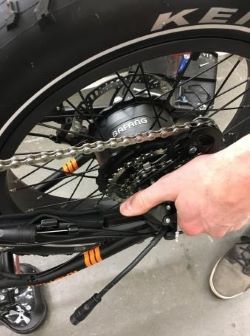
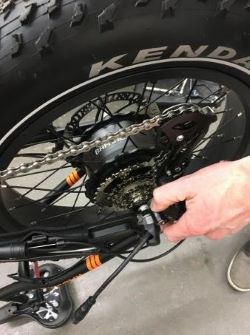
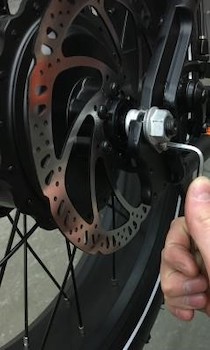
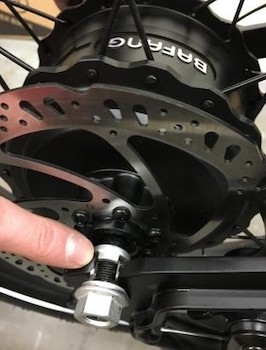
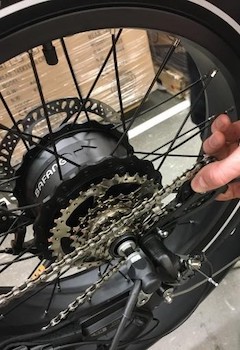
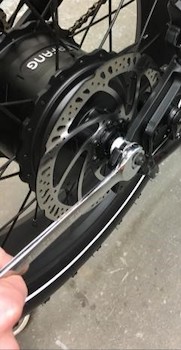
- Move the rear wheel into position in the rear dropouts taking care to not touch the metal brake disc. Place motor washers back into their original orientation, ensure the brake disc slides in between the brake pads in the brake caliper (1, below), and the axle is fully seated in the dropouts (2, below). Note: Aligning the chain on the smallest cog of the freewheel will create enough slack to pull the derailleur back and slide the axle into place.

- Install the torque arm bolt. On the brake disc side of the wheel, thread the torque arm bolt through the torque arm and into the mounting point on the dropout. Use a 4 mm Allen wrench and torque to 5 Nm.
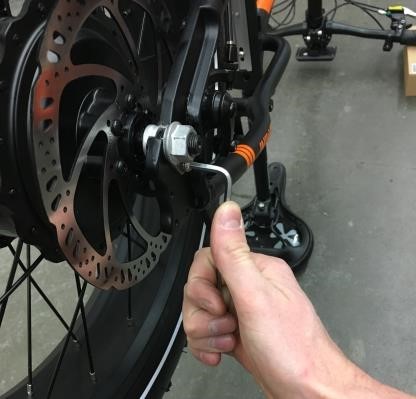
- Tighten the axle nuts. To ensure the axle is fully seated in the dropouts, hand tighten the axle nut on the brake disc side, then check that the derailleur side of the axle is fully seated in the dropout and use an 18 mm wrench to torque both axle nuts to 40 Nm.
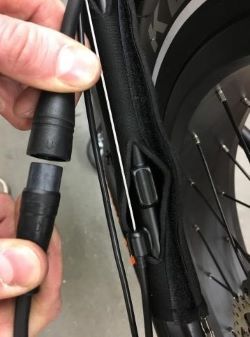
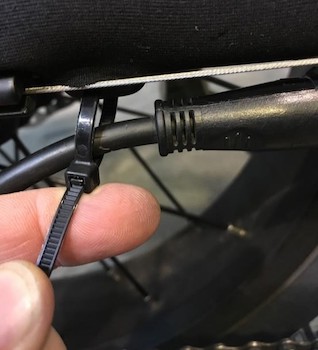
- Plug in the motor connector. Carefully align the pins inside the connector and arrows on the connector housing and press the two sides directly together without twisting to ensure proper connection (below, left).
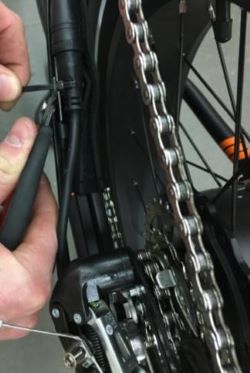
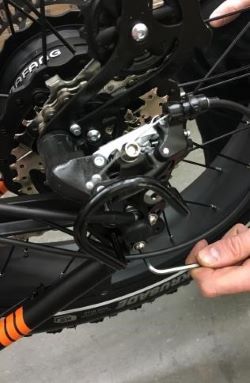
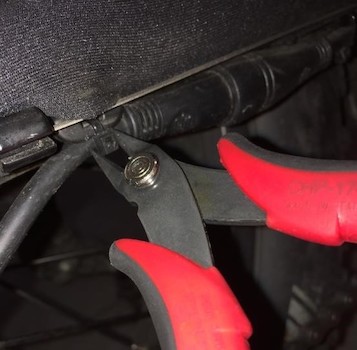
- Zip tie the motor connector cable to the cable guide on the chainstay. Use flat side cutters to trim the excess zip tie.
- Reinstall the derailleur bashguard. Place the bashguard in position, ensuring the tail light cable runs outside of the bashguard. Pass one bolt through the washer, into the bash guard mounting point, and thread the bolt into the mounting point on the dropout (above, right). Repeat with the other bolt and use a 4 mm Allen wrench to tighten both bolts securely.
- Move the rear wheel into position in the rear dropouts taking care to not touch the metal brake disc. Place motor washers back into their original orientation, ensure the brake disc slides in between the brake pads in the brake caliper (1, below), and the axle is fully seated in the dropouts (2, below). Note: Aligning the chain on the smallest cog of the freewheel will create enough slack to pull the derailleur back and slide the axle into place.
- Flip the bike right side up, reinstall the battery, test the 2019 RadMini fully and have your work inspected by a certified, reputable bike mechanic before continuing to Ride Rad!
2018 RadMini Rear Fender Installation Instructions:
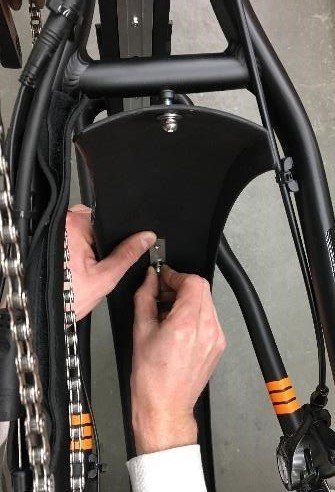
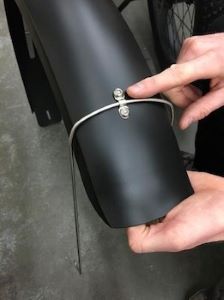
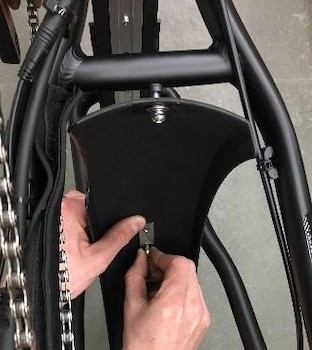
- The rear fender ships with the 2019 mounting bracket installed. Before attaching the fender, swap out the metal mounting bracket attached to the rear fender (2019) with the mounting bracket included in the box (2018):
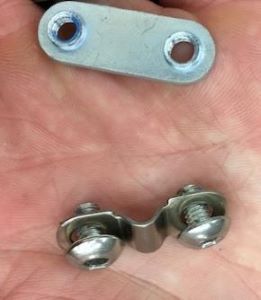
- Remove the 2019 mounting bracket from the fender. Use a 4 mm Allen wrench to remove the two bolts holding together the mounting bracket clamp (consisting of an exterior metal piece and a threaded backing plate on the fender’s interior). Remove the 2019 bracket and recycle where possible. Set the hardware aside for reinstallation.
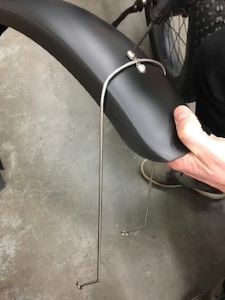
- Install the 2018 mounting bracket:
- Orient the 2018 mounting bracket so the eyelets at the end of the mounting bracket bend up towards the top of the fender.
- Holding the backing plate in place on the inside of fender, place the exterior piece of the mounting bracket clamp so the holes are aligned, and the mounting bracket is centered in the clamp.
- Thread the mounting bracket clamp bolts through the exterior piece of the clamp, the fender, and into the backing plate. Tighten securely.
- Orient the 2018 mounting bracket so the eyelets at the end of the mounting bracket bend up towards the top of the fender.
- Remove the 2019 mounting bracket from the fender. Use a 4 mm Allen wrench to remove the two bolts holding together the mounting bracket clamp (consisting of an exterior metal piece and a threaded backing plate on the fender’s interior). Remove the 2019 bracket and recycle where possible. Set the hardware aside for reinstallation.
- Remove the 2018 rear tire assembly to allow adequate wrenching angle for threaded mounting points:
- Flip the bike upside down. Set up blocks on which the handlebar grips will rest (to prevent damage to the controls and LCD display) and flip the bike upside down resting on the handlebar grips on blocks and the seat.
- Remove the torque arm bolt. On the brake disc side of the wheel, use a 4 mm Allen wrench to remove the torque arm bolt, next to the axle nut, and set aside for reinstallation.
- Loosen the axle nuts. Use an 18 mm wrench to loosen the axle nuts enough to allow the rear wheel assembly to be lifted out of the rear dropouts and set aside for reinstallation.
- Unplug the motor connector. Use flat side cutters to snip the zip tie holding the motor connector cable to the frame taking care to not damage to the cable housing or wires and pull the connector directly apart without twisting.
- Remove the rear wheel. Take care to not touch the metal brake disc and lift the rear wheel assembly out of the dropouts. Note the orientation of the washers on the motor axle for reinstallation. Set the wheel aside. (Shifting the chain down into the smallest cog of the freewheel will create enough slack to pull the derailleur out of the way and slide the axle out of the dropouts.)
- Flip the bike upside down. Set up blocks on which the handlebar grips will rest (to prevent damage to the controls and LCD display) and flip the bike upside down resting on the handlebar grips on blocks and the seat.
- Install the rear fender on a 2018 RadMini:
- Move the fender into position with the flared end/mounting bracket clamp near the back of the bike and the flat end near the chainstay.
- Attach the fender at the chainstay arch. Pass one of the four smaller bolts through a washer and then into the mounting point on the chainstay arch. Carefully thread the bolt by hand and use a 4 mm Allen wrench to tighten part way.
- Attach the fender at the seatstay arch. Pass another of the smaller bolts through a washer and then into the mounting point on the seatstay arch. Carefully thread the bolt by hand. Use a 4 mm Allen wrench to torque to 6 Nm.
- Torque the chainstay bolt to 6 Nm using a 4 mm Allen wrench.
- Install the rear wheel on a 2018 RadMini:
- Move the rear wheel into position in the rear dropouts taking care to not touch the metal brake disc. Place motor washers back into their original orientation, ensure the brake disc slides in between the brake pads in the brake caliper (1, below), and the axle is fully seated in the dropouts (2, below). Note: Aligning the chain on the smallest cog of the freewheel will create enough slack to pull the derailleur back and slide the axle into place.

- Tighten the axle nuts. Ensure the axle is fully seated in the dropouts and use an 18 mm wrench to torque the axle nuts to 40 Nm. Note: leave the torque arm bolt uninstalled for now.
- Plug in the motor connector. Carefully align the pins inside the connector and arrows on the connector housing and press the two sides directly together without twisting to ensure proper connection (below, left).
- Zip tie the motor connector cable to the cable guide on the chainstay (above, right). Use flat side cutters to trim the excess zip tie.
- Move the rear wheel into position in the rear dropouts taking care to not touch the metal brake disc. Place motor washers back into their original orientation, ensure the brake disc slides in between the brake pads in the brake caliper (1, below), and the axle is fully seated in the dropouts (2, below). Note: Aligning the chain on the smallest cog of the freewheel will create enough slack to pull the derailleur back and slide the axle into place.
- Attach the mounting bracket to the 2018 rear dropouts:
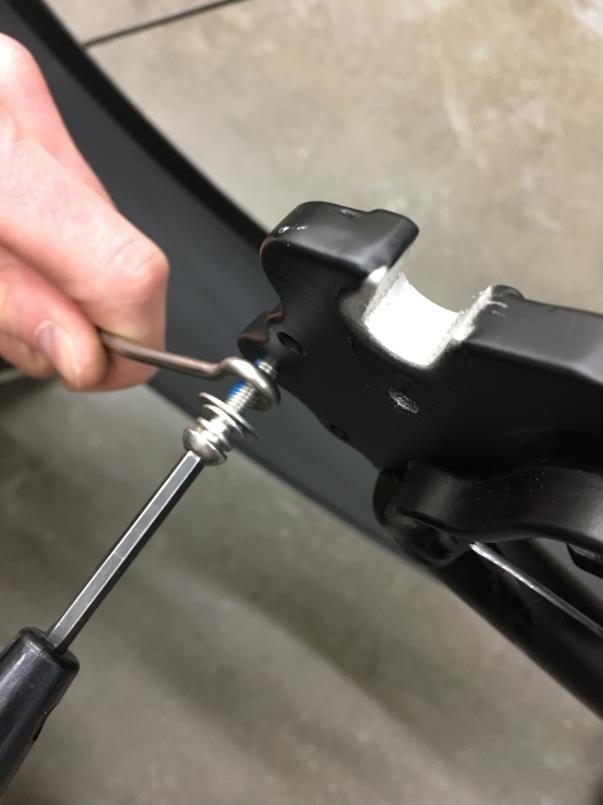
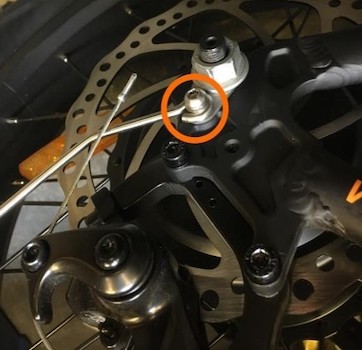
- On the torque arm bolt side of the bike, pass the torque arm bolt through a washer, the fender mounting bracket eyelet, the torque arm hole, and thread into the mounting point on the dropout. Use a 4 mm Allen wrench to torque to 5 Nm.
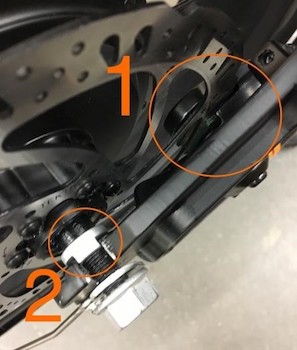
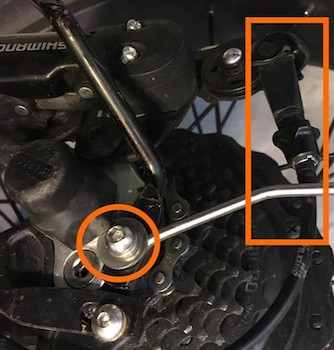
- On the derailleur side of the bike, use a 4 mm Allen wrench to remove the bolt on the derailleur bashguard that is closest to the derailleur. Ensure the fender mounting bracket runs on the outside of the shifter cable (as shown in the rectangle below). Pass the bolt through the washer, mounting bracket eyelet, the bashguard eyelet, and thread into the mounting point (circled below). Torque to 5 Nm.
- On the torque arm bolt side of the bike, pass the torque arm bolt through a washer, the fender mounting bracket eyelet, the torque arm hole, and thread into the mounting point on the dropout. Use a 4 mm Allen wrench to torque to 5 Nm.
- Flip the bike right side up, reinstall the battery, test the bike fully, and have your work inspected by a certified, reputable bike mechanic. Ride Rad!