Change a flat
We have worked hard to provide Rad riders with high quality puncture resistant tires. Any bike tire, including those with built-in puncture resistance, can go flat under the right (or wrong!) conditions.
Watch the video and follow the instructions below to learn how to change a flat tire so you can get back to riding Rad!
Check out the article HERE to learn about the tire and tube compatibility. Replacement tires and tubes can be found HERE.
To change a flat on a front wheel, click HERE to learn how to remove the front wheel.
Tools Needed:
- Wooden blocks to prop up the bike
- Flat side cutters
- 15 mm, 18 mm or 21 mm wrench to remove rear wheel axle nuts
- 3 mm or 4 mm Allen wrench (required for most models)
- Phillips head screwdriver (required for some models)
- A camera
- Tire levers
- Bike pump with a Schrader valve
- The replacement inner tube or tire
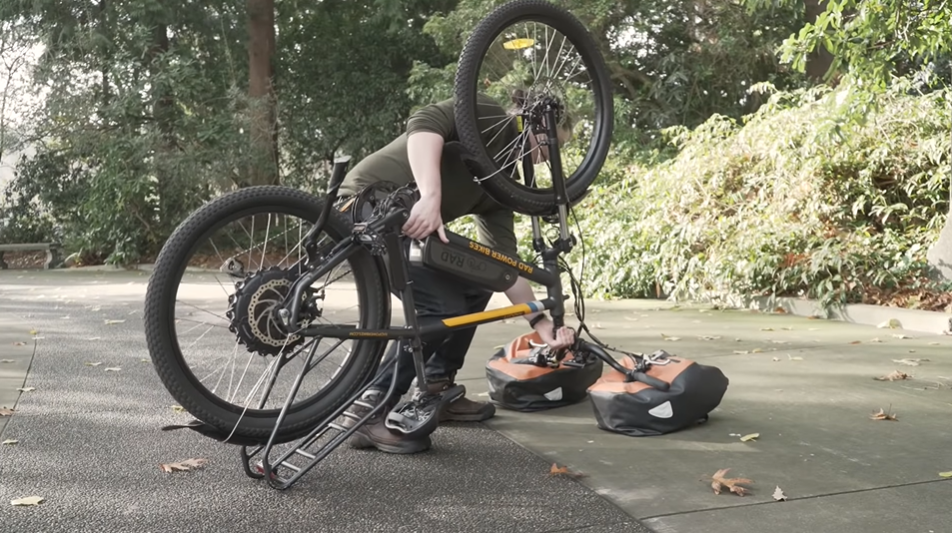
- Get the bike ready for maintenance. Turn off the bike, remove the battery, and press and hold MODE or the power button to discharge remaining power.
- Shift to the highest gear. Put the kickstand down, lift the rear wheel, and rotate the pedals forward to shift to the highest gear. This will make it easier to remove the rear wheel from the derailleur.
- Flip over the bike. Set the handlebar grips on the blocks to protect the LCD display from damage while performing maintenance.
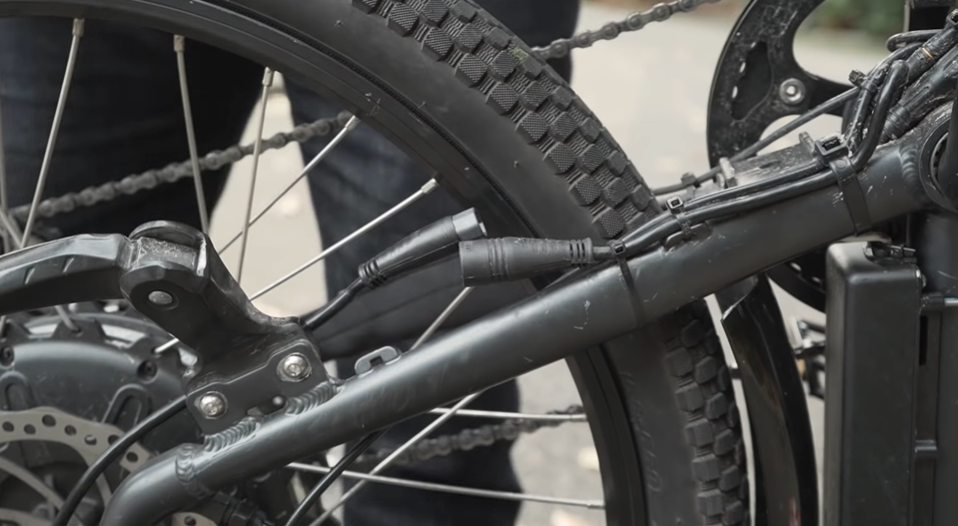
- Locate and unplug the motor cable. The motor cable is located by the chainstay. Snip zip ties as needed and pull the connector directly apart, without twisting, to unplug.
- Remove both axle nuts. Use an 18 mm or 21 mm wrench to remove both axle nuts. Some early models may have smaller rear axle that require a 15 mm wrench.
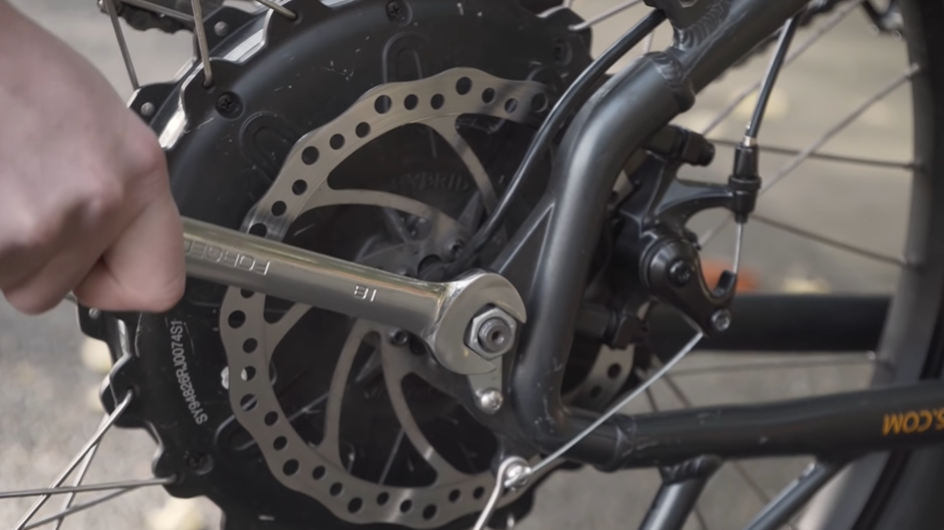
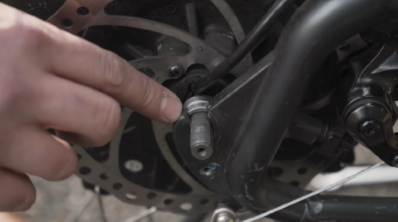
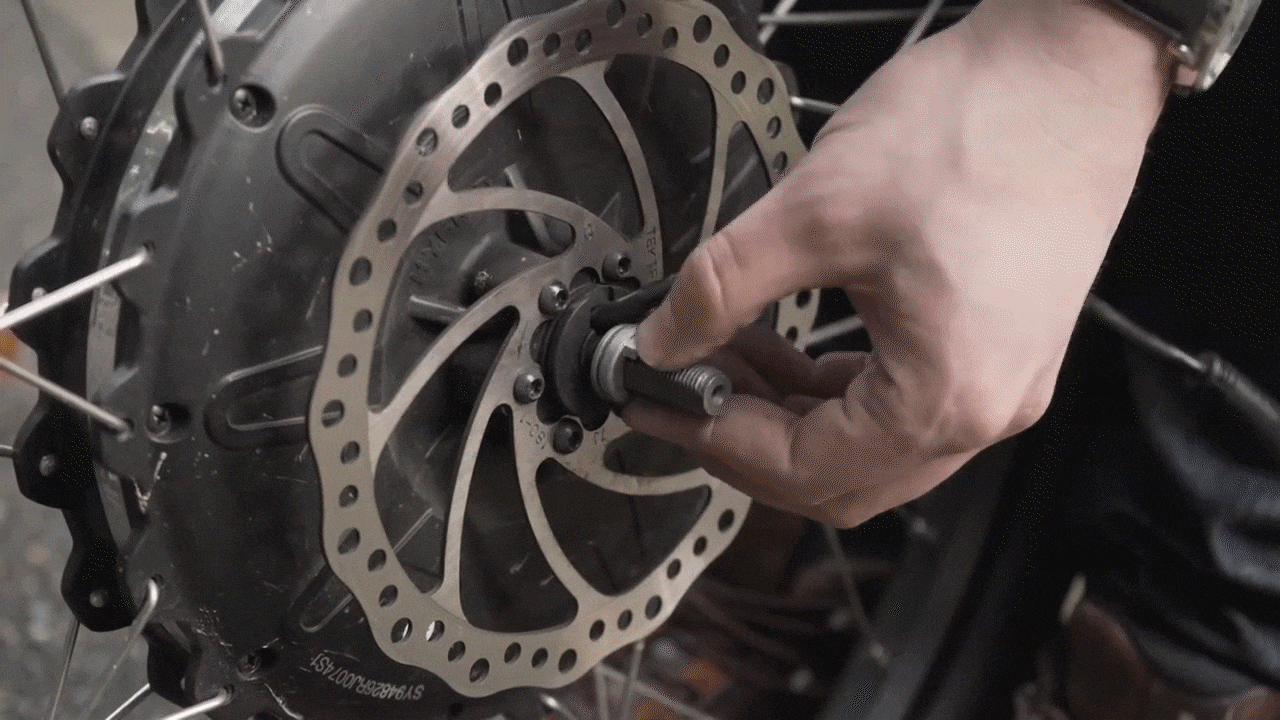
- Remove the torque arm bolt. Use a 4 mm Allen wrench (or a Phillips head screwdriver if needed) to remove the torque arm bolt and washers. Some early models may have a 3 mm torque arm bolt instead.

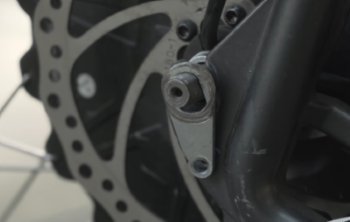
- Take a picture of the torque arm and washer alignment, which is important for reinstallation and safety. On the bike we're using for this tutorial, the torque arm will be placed on the outside of the rear dropout and the washer will be on the inside of the frame, with the tab protruding into the rear dropout.
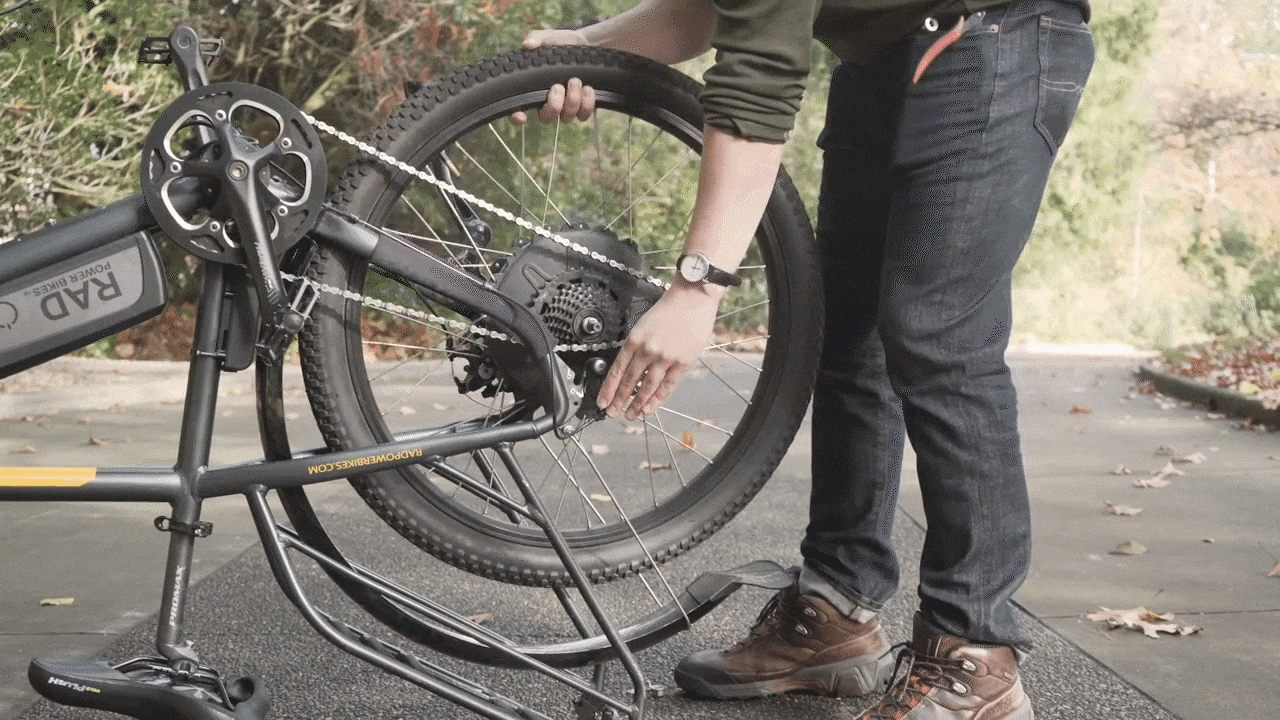
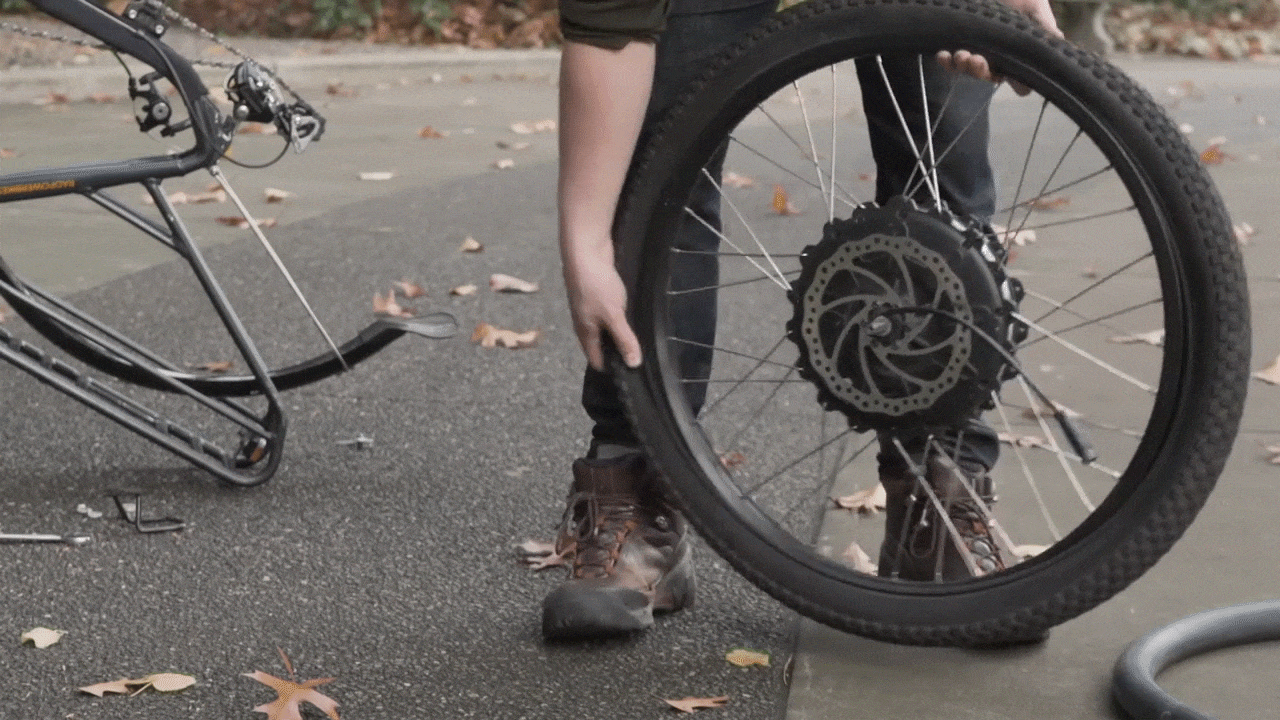
- Pull the derailleur body back and remove the wheel. If the rear wheel is difficult to remove, rock the wheel back and forth while lifting. Lift the chain off of the cog.
- Remove air from the inner tube. Press down on the valve with the Allen wrench to remove any remaining air.
Ensure that all air pressure has been removed from the inner tube prior to removing the tire from the rim. Failure to remove all air pressure from the inner tube could result in serious injury.
- Carefully lift the tire bead off of the rim. Use the tire levers to lift the tire bead off of the rim, starting anywhere but the valve and taking care to not damage the tire. Slide the tire lever down the rim to remove the tire bead from the rim. Move the tire bead off and over the rim, using tire levers.
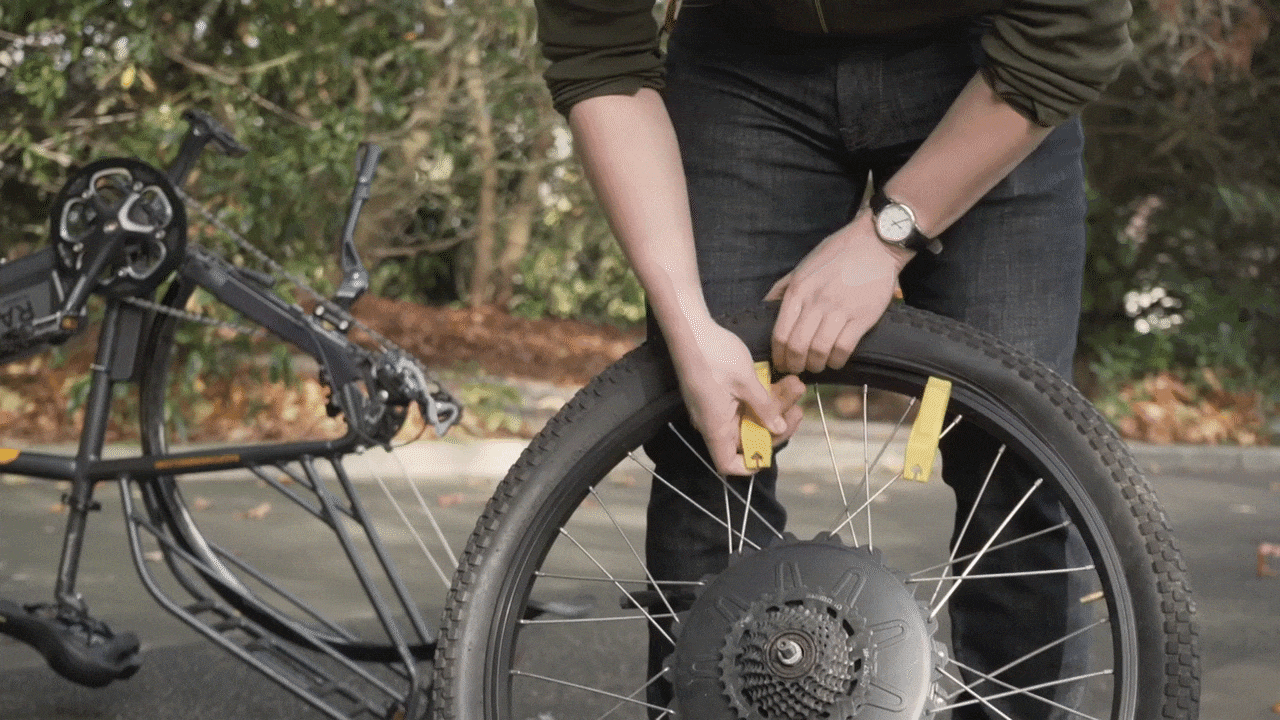
- Remove the tube from the rim and tire. Push the tube's valve stem out of the rim and pull the tube off the rim and out of the tire.
- Inspect the tube, tire, and rim. Inflate the tube to identify where the leak took place.
- If there is a single hole on the tube, the tube was likely punctured. Inspect the tire to make sure the object that punctured the tube is gone. Inspect the rim for any damage, as well.
- If there are two holes close together, it is likely a pinch flat. This can occur when the wheel hits an object (like a curb or rock) and the inner tube is pinched between the tire and the rim.
- Locate and partially inflate the replacement (or patched) tube. Inflate the tube just enough so the tube takes shape.
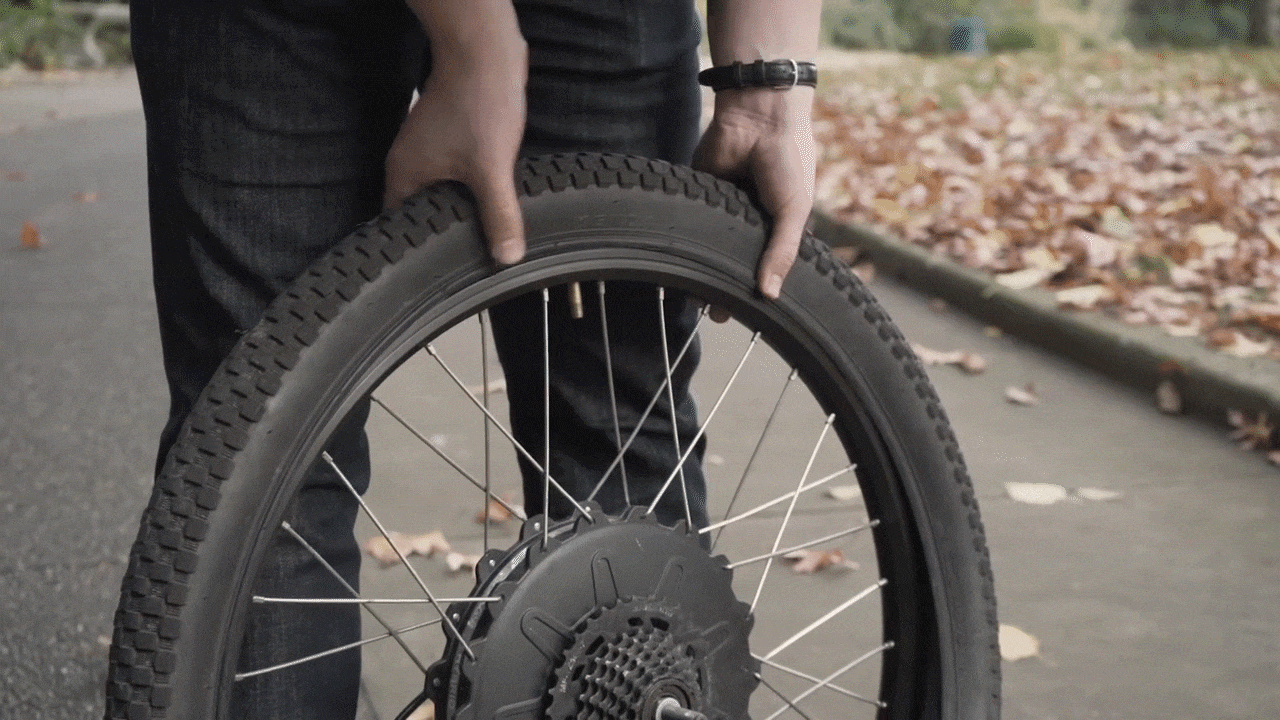
- Install the tire and inner tube on the rim. Seat one side of the tire bead on the rim and work the inner tube into the tire. Then, insert the valve into the rim. Seat the second bead of the tire onto the rim.
- Seat the bead and inspect the wheel. Starting at the valve, check the inner tube to make sure it is not being pinched between the tire and the rim. Use tire levers, if needed, to fully seat the tire bead on the rim. Use caution to not pinch the inner tube. Check that the inner tube is not sticking out from under the tire and that the tire bead is fully seated on the rim.
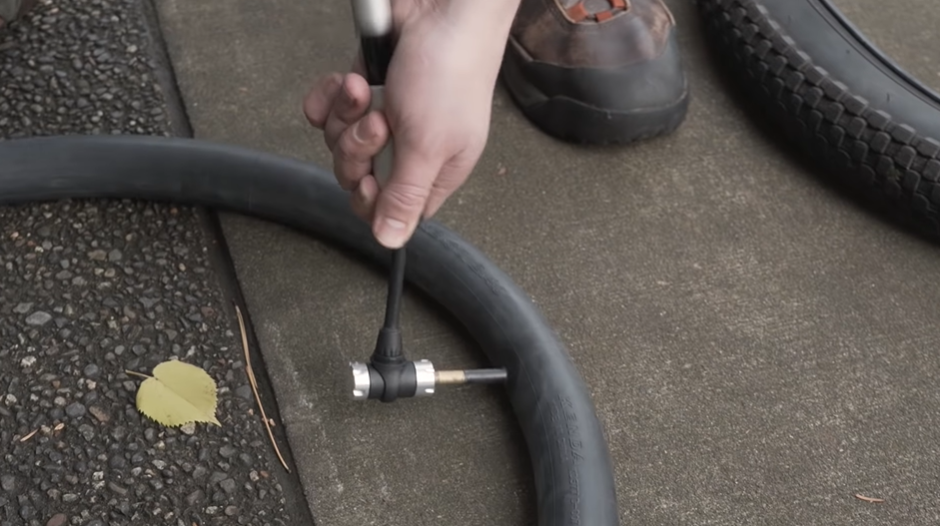
- Partially inflate the tube. Inflate the tube and perform a final inspection.
It is critically important that proper air pressure is always maintained in pneumatic tires. Do not underinflate or overinflate your tires. Low pressure may result in loss of control, and overinflated tires may burst. Failure to always maintain the air pressure rating indicated on pneumatic tires may result in tire and/or wheel failure. Inflate your tires from a regulated air source with an available pressure gauge. Inflating your tires from an unregulated air source could overinflate them, resulting in a burst tire.
- Reinstall the wheel. Install the torque washers on the axle so the tabs protrude outward. Use the photo taken for reference, if needed. Pull back on the derailleur body and route the chain onto the smallest cog. Line up the brake rotor so it slides in between the brake pads in the brake caliper, and place the wheel in the dropouts. Install the torque arm exactly as it was and secure it in place with the torque arm bolt. Reinstall the axle nuts and torque to the value listed in your owner's manual.
- Plug in the motor connector. Line up the internal pins, and external arrows, and press each side directly together, without twisting, to reconnect. Replace the zip tie and trim it to be flush and smooth.
- Flip the bike over and inflate the tire. Inflate the tire to the recommended PSI on the tire sidewall.
- Reinstall the battery and test the bike fully before riding.