RadWagon 5 Lock Mount installation guide
Use this accessory to mount the Rad Fat Tire Wheel Lock (sold separately) to the front wheel on a RadWagon 5 ebike.
Tools needed:
- 4 mm and 5 mm Allen wrenches
- 8 mm and 10 mm wrenches
- Torque wrench with 4 mm and 5 mm socket heads
|
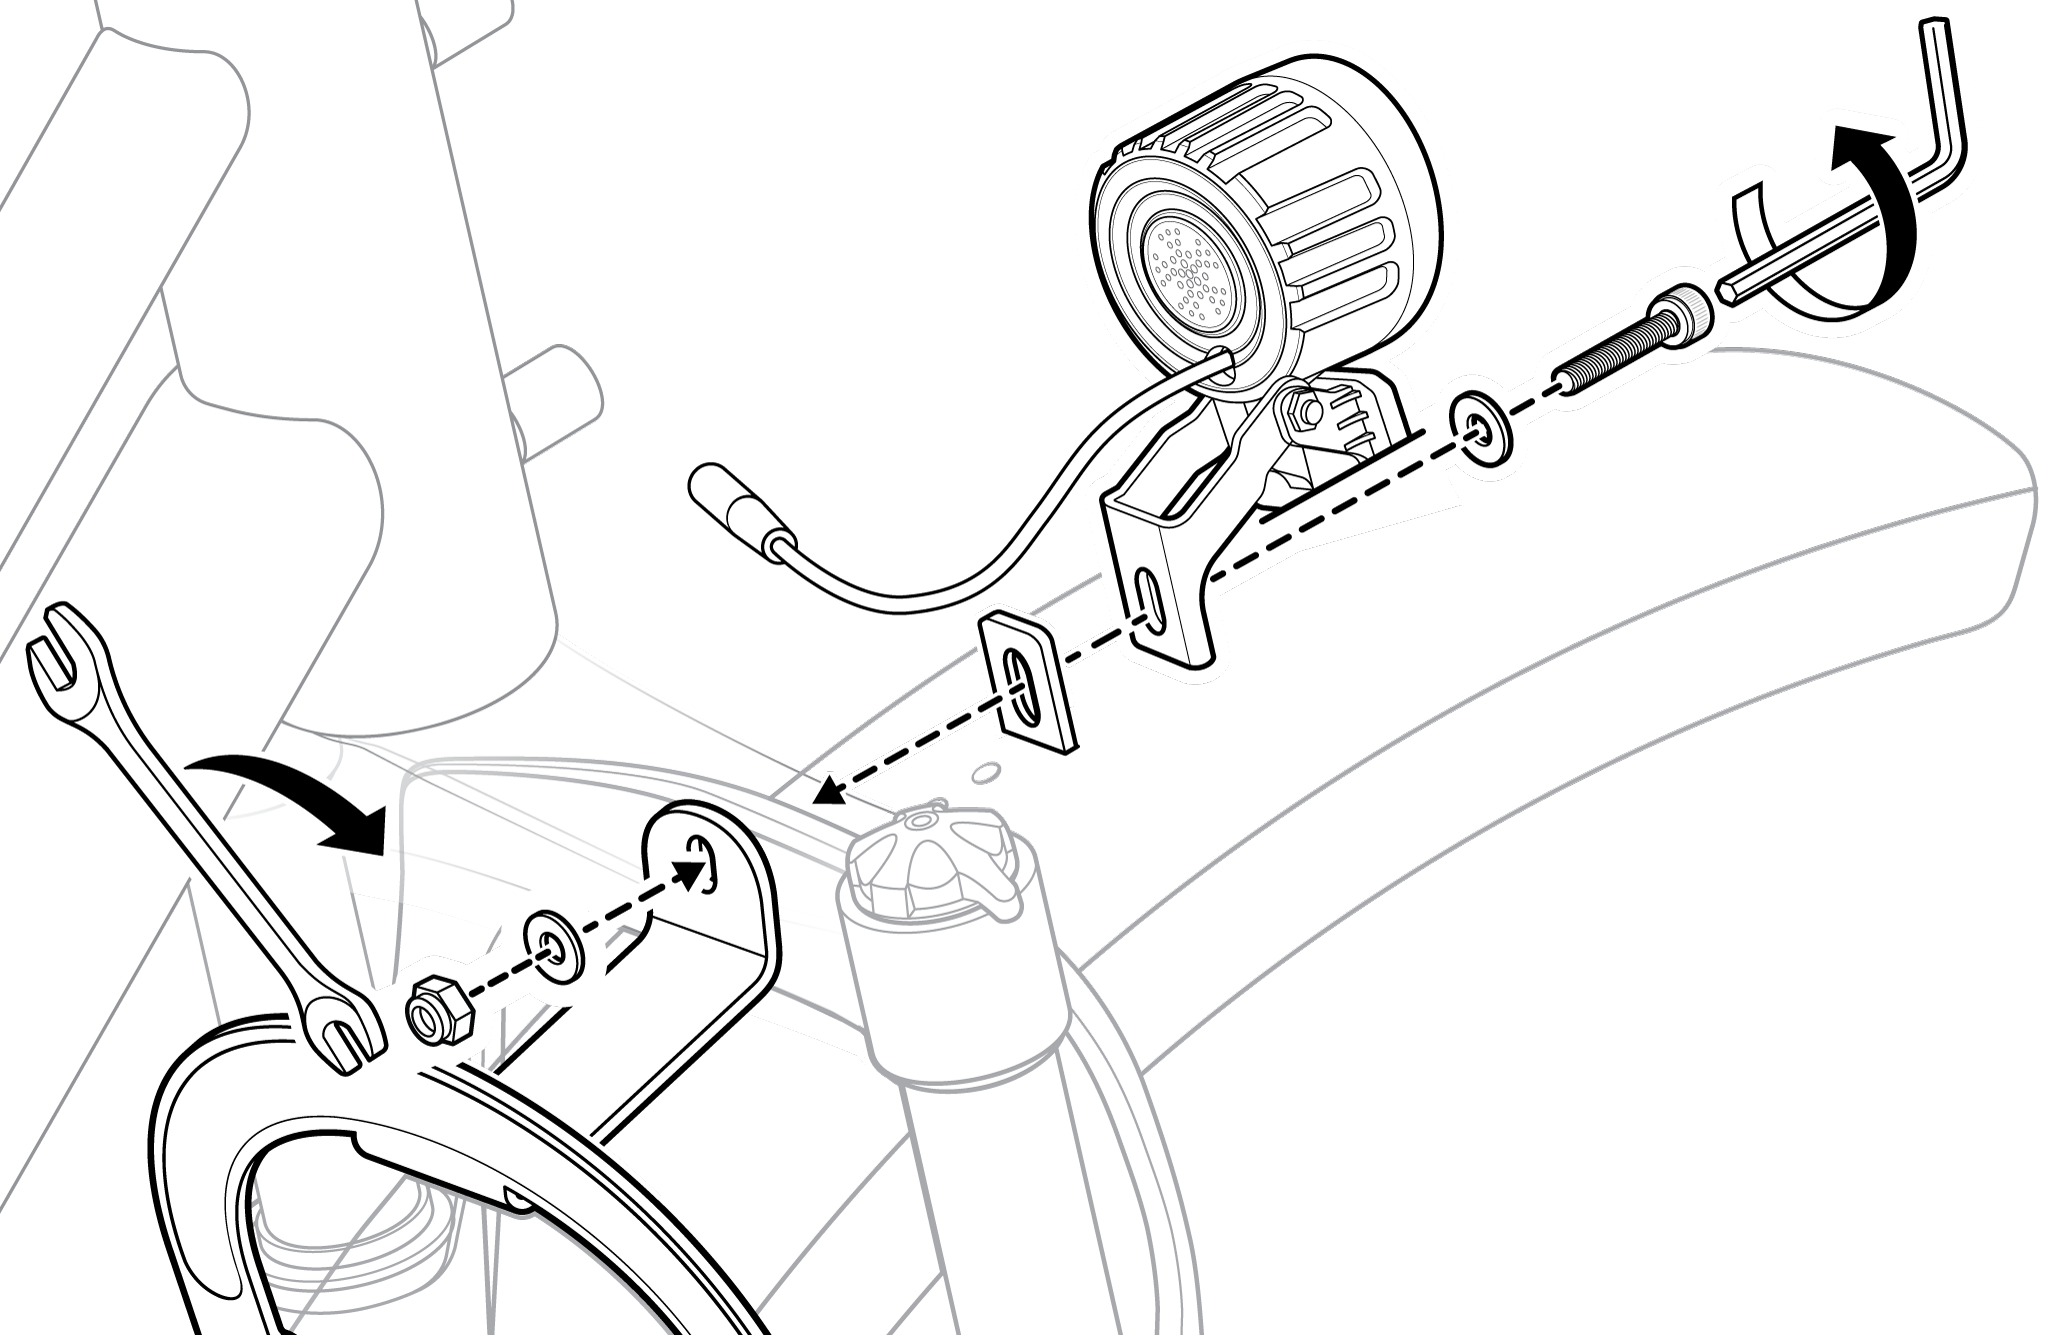
Figure 1: Install lock mount. |
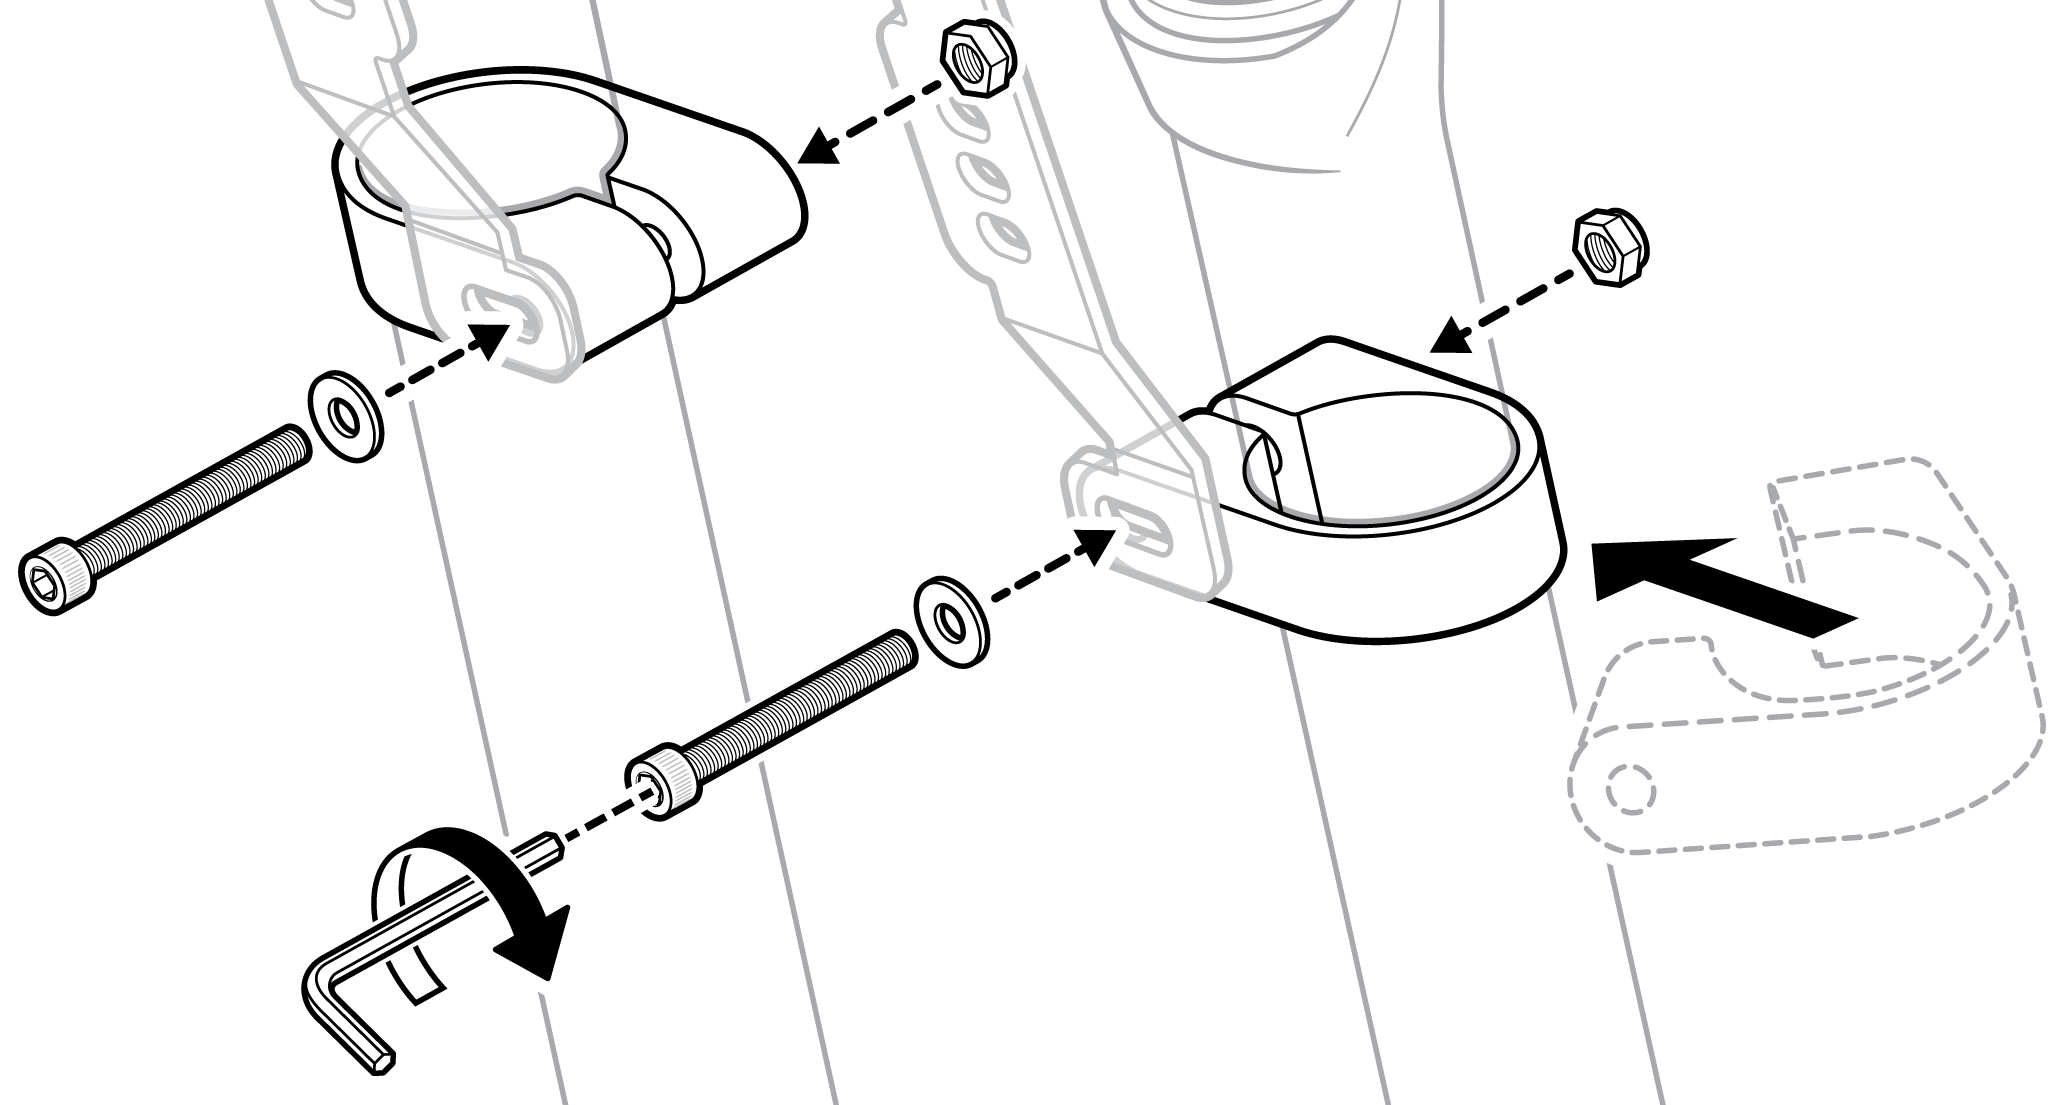
Figure 2: Install fork arm clamps. |
- Get the ebike ready for maintenance. Turn off the ebike, remove the battery, and press the on/off button on the remote to discharge remaining power.
- Remove the headlight and front fender. Use a 5 mm Allen wrench and 10 mm wrench to remove the mounting bolt that holds the headlight and front fender to the fork, and set aside. You will use the longer replacement bolt to install the lock mount in the next step.
- Install the lock mount.
- Place a flat washer on the 38 mm replacement bolt and pass through the headlight, front fender mounting point, and the fork bridge (see Figure 1).
- Position the lock mount’s mounting tab over the other end of the bolt and use the flat washer and nut to secure by hand.
- Use the 5 mm Allen wrench and 10 mm wrench to tighten the bolt until secure.
- Use a torque wrench with a 5 mm bit to torque the mounting bolt to 8 Nm.
- Install the fork arm clamps.
- Position the fork arm clamps on the fork with the openings facing toward the center, and the mounting points aligned with the lock mount arms (see Figure 2). The nut pockets on the clamps should face the front of the bike.
- Position a nut inside the nut pocket.
- Place a flat washer on a 50 mm bolt and pass through the lock mount arm and fork arm clamp opening, and thread into the nut by hand.
- Squeeze the clamp with one hand and use a 5 mm Allen wrench to tighten the bolt until secure.
- Use a torque wrench with a 5 mm bit to torque the bolt to 4-5 Nm.
- Repeat the process on the other fork arm.
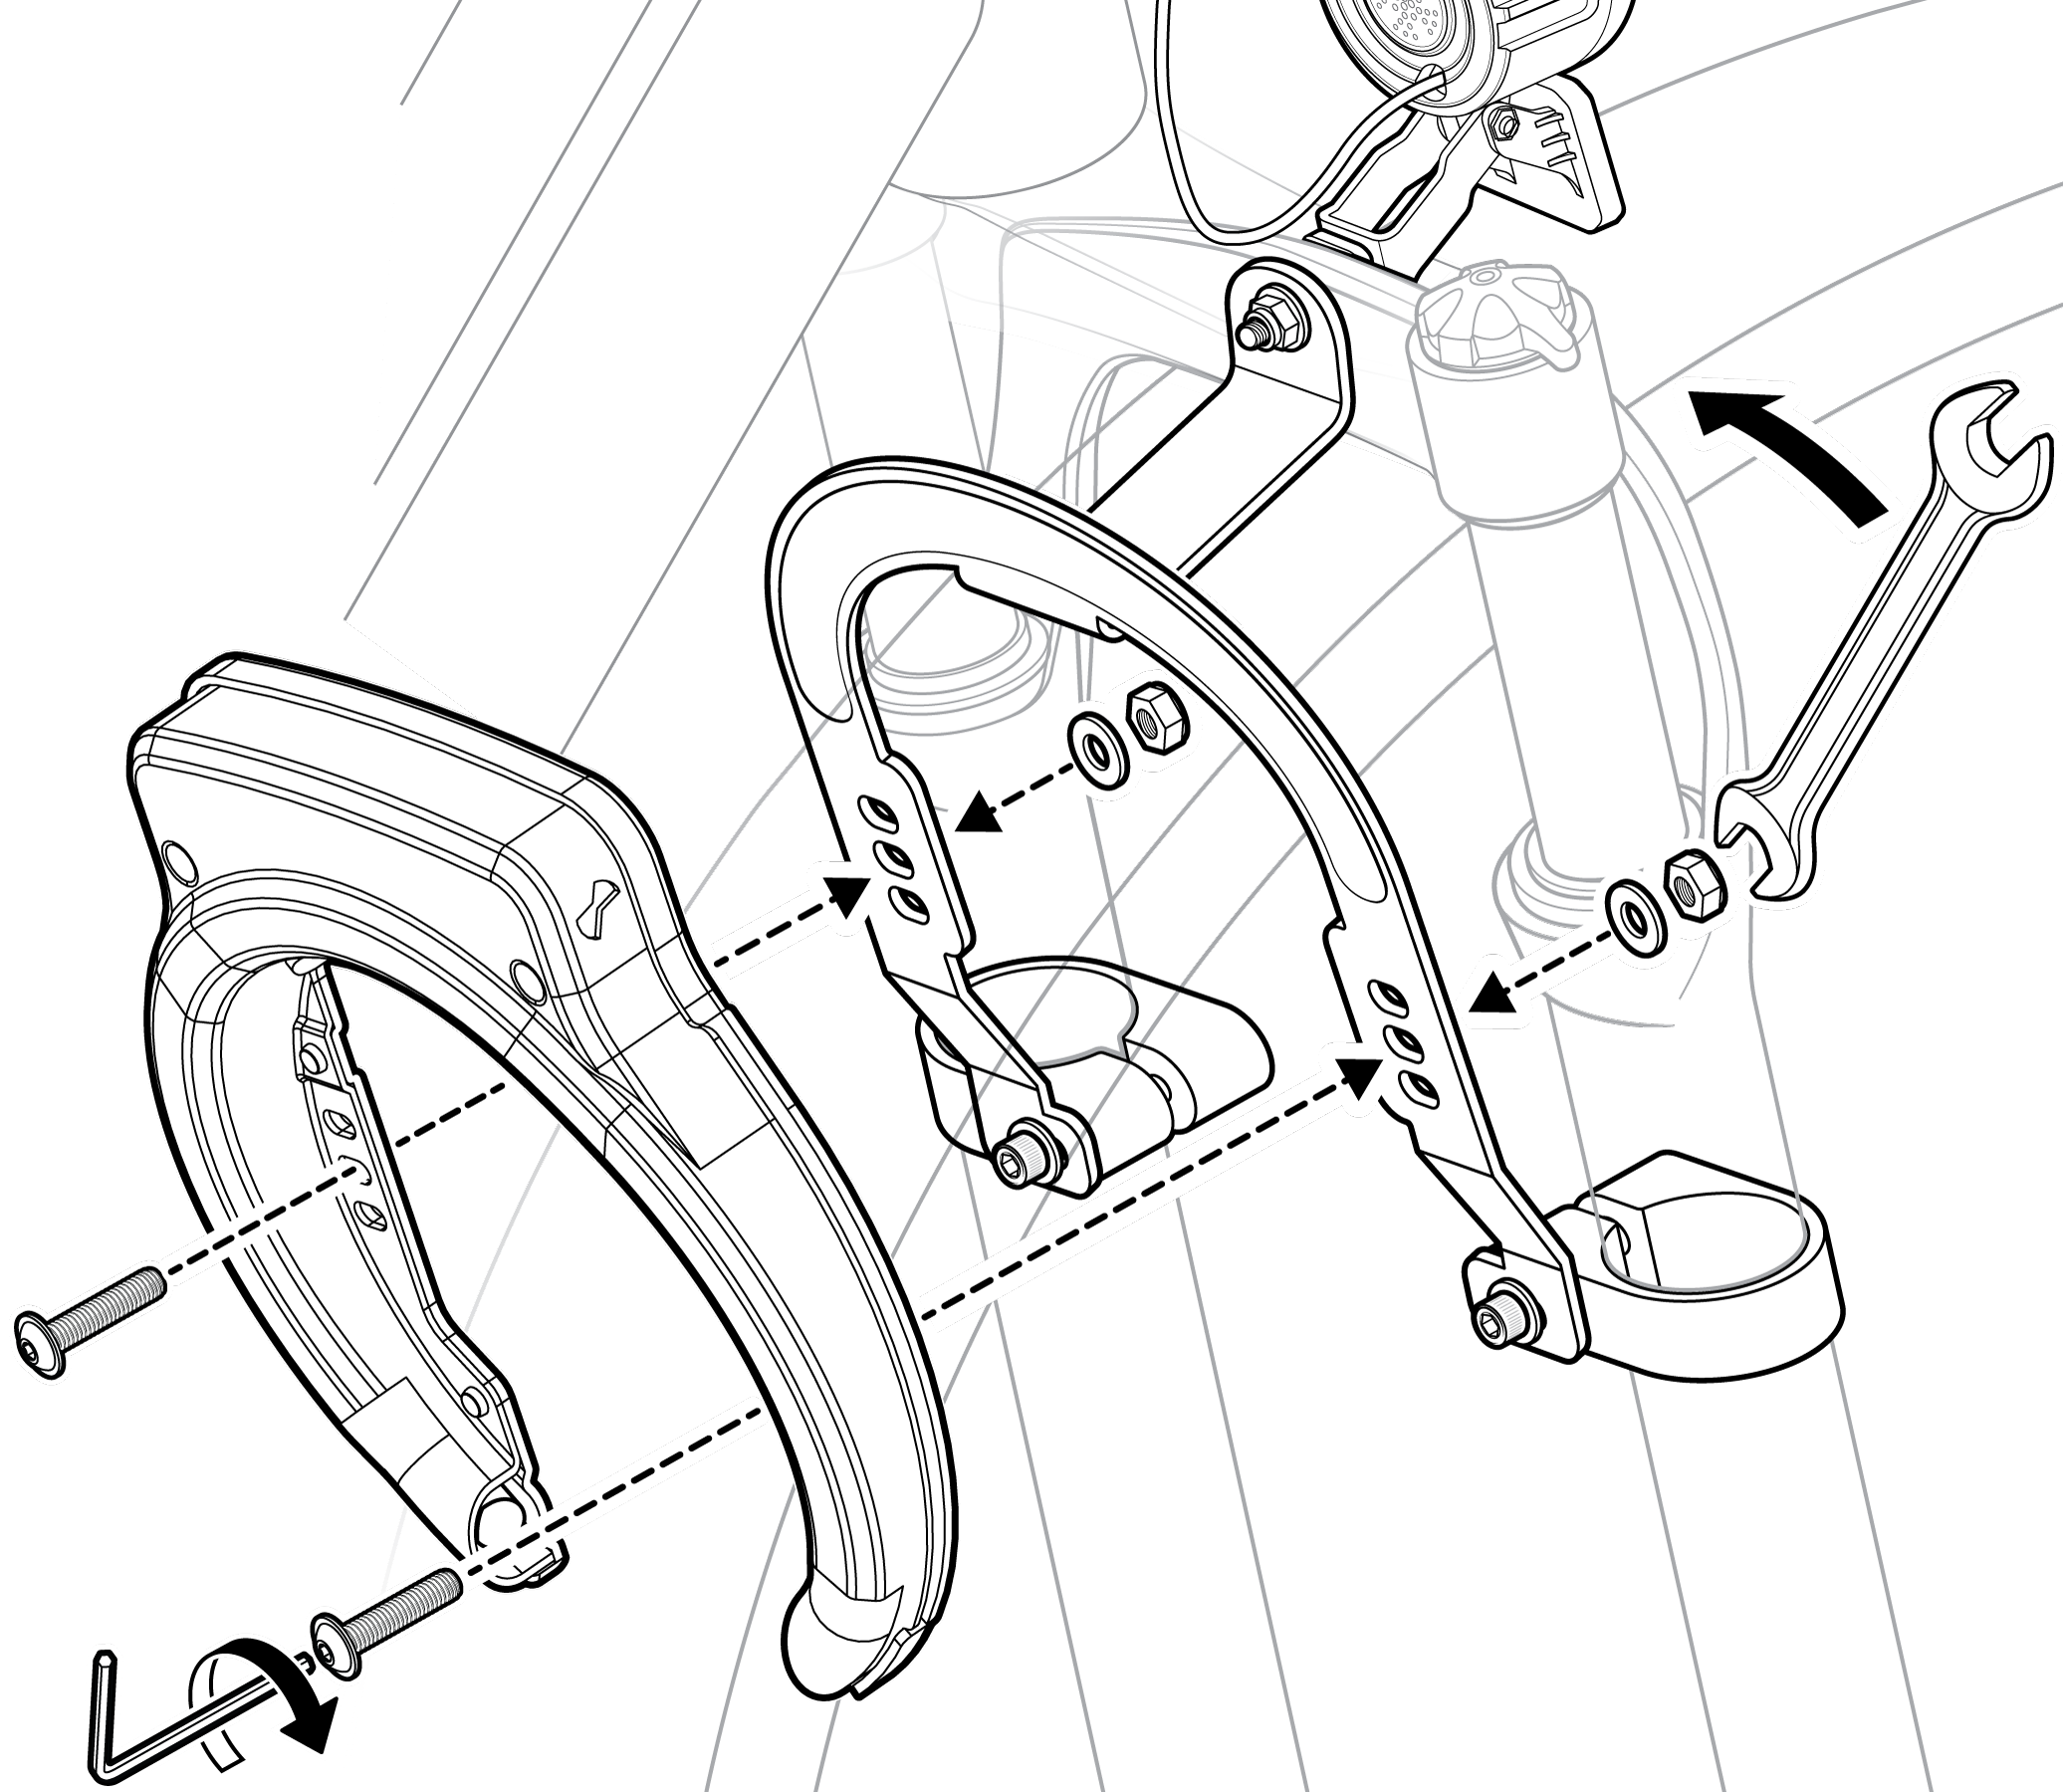
- Mount the fat tire wheel lock.
- Position the fat tire wheel lock against the lock mount so that the middle mounting points are lined up (see Figure 3). If you have a larger tire and need more clearance, you can use a different mounting position as needed. Make sure the wheel lock sits flat against the lock mount.
- Pass one of the 15 mm bolts through the mounting points, place a flat washer and nut on the other side, and then thread into place by hand. Repeat on the other side of the wheel lock.
- Use a 4 mm Allen wrench and a 8 mm wrench to tighten the bolt until secure. Repeat for the second bolt.
- Use a torque wrench to torque the mounting bolts to 5 Nm.
|
Figure 3: Install fat tire wheel lock. |
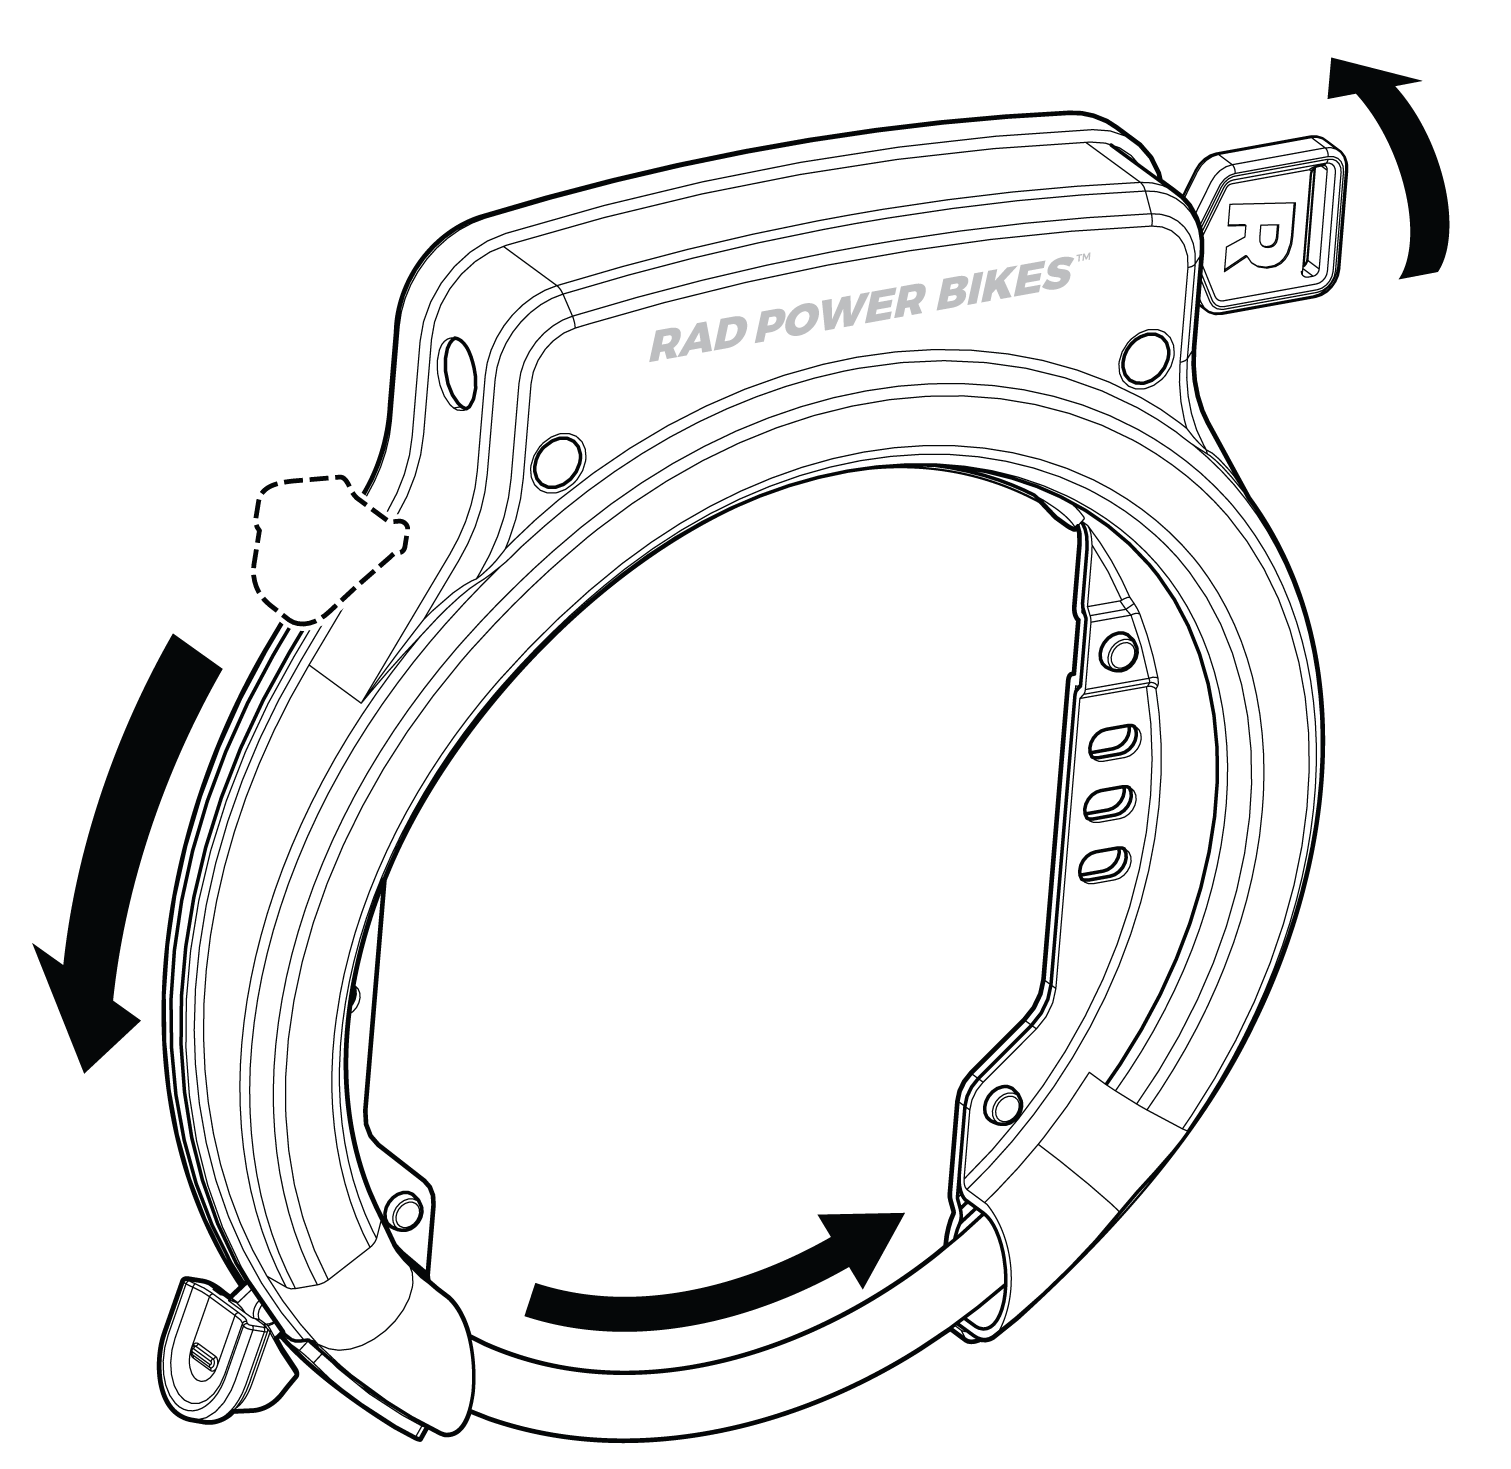
Figure 4: Lock the wheel lock. |
Do not overtighten the bolts. Overtightening the bolts will prevent the thumb lever from operating smoothly and can damage the bolt and lock.
- Test the lock.
- To lock the wheel, turn the key clockwise and slide the thumb lever toward the wheel lock opening until the shackle locks in the fully closed position. Then turn the key counterclockwise to lock the shackle in this position (see Figure 4). Make sure the shackle does not interfere with any spokes or the rim of the wheel.
- To unlock the wheel, turn the key clockwise to retract the thumb lever and shackle. The thumb lever will retract very quickly upon unlocking, so be extremely careful that your hands and fingers are clear of the thumb lever’s retraction path before unlocking the wheel lock. Always unlock the wheel before riding.
Pinch Hazard. Do not place fingers or any other objects near the path of the retracting thumb lever when unlocking the wheel lock. Doing so can cause injury.
- Remove the key. Remove the key from the lock before riding your bike. Take a photo or record the 4-digit key code engraved on the key in the event that you need to order a new key.
- Reinstall the battery, test the ebike fully, and have your work inspected by a local, professional, reputable bike mechanic.