2018 RadWagon Controller Replacement Guide
The RadWagon controller can be replaced in the unlikely event it is damaged or determined to be non-functional by Rad Power Bikes Product Support. The video and steps below use the original RadWagon 1, but the process will be similar for most RadWagon models.
Tools Needed:
- Phillips head screwdriver
- Flat side cutters
- Zip ties
- The replacement controller
- Get the bike ready for maintenance. Turn off the bike, remove the battery, and press and hold MODE to discharge remaining power.
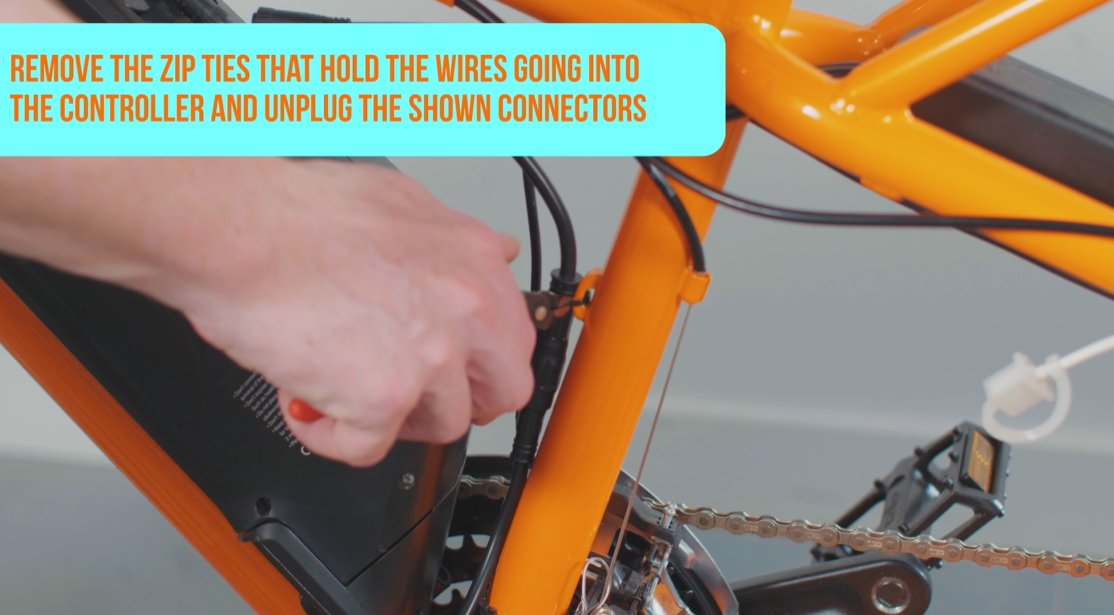
- Unplug the cables connected to the controller. Locate the controller and trace all cables connected to the controller. Carefully snip the zip ties holding the cables to the bike frame. Pull each side of the connectors directly apart, without twisting, to unplug.
- Remove the controller. Use a Phillips head screwdriver to remove the four bolts holding the controller to the frame. Recycle the controller where possible.

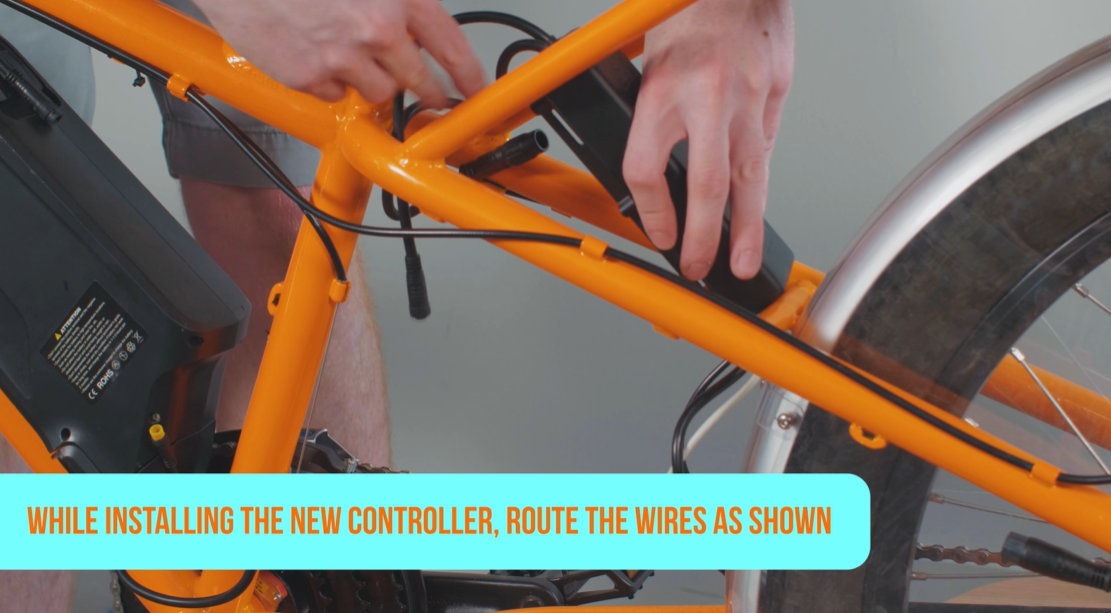
- Install the new controller. Place the new controller in place, ensuring the cables are routing as shown. Install the bolts by hand and use a Phillips head screwdriver to secure the bolts.
- Plug in all connectors. Locate a connector and its matching end. Line up the internal notches and pins (and external arrows) and press both sides directly together, without twisting, to reconnect. Repeat with the remaining connectors.
- Replace zip ties. Secure all cables to keep them out of the way of moving parts and snip the zip ties so they are flush and smooth.
- Reinstall the battery and test the bike fully before riding.