The 2017 and 2018 RadWagon cargo bikes feature a front derailleur. If the chain is making excessive noise, shifting poorly, or falling off the chain ring (at the center of the pedal cranks), the front derailleur likely needs to be adjusted.
There are three adjustments to get the derailleur in working order: adjusting the high limit screw, the low limit screw, and the cable tension. The derailleur and shifter that come on the RadWagon are the same components that come on standard, non-electric pedal bikes, so the parts and procedure to tune them will be very familiar to any reputable bike mechanic.
Tools needed:
- Phillips head screwdriver
- A friend to hold the bike
- Get the bike ready for maintenance. Turn off the bike, remove the battery, and press and hold MODE to discharge remaining power.
- Shift the bike into 1st gear. Prop the bike on the kickstand so the rear wheel is off the ground. Use one hand to revolve the pedals while shifting the bike into 1st gear, "1" on the shifter on the handlebar. This will set the chain onto the smallest chain ring in the front.
- Locate the limit screws on the top of the derailleur body. There are two screws, one to define the high limit of the derailleur arm and one to define the low limit of the derailleur arm. Setting these limits properly will prevent the chain from falling off of the chainring in the front (by going outside of 1st or 3rd gear). Once those high/low limits have been set using the limit screws, the cable tension needs to be adjusted so that the bike will shift smoothly.
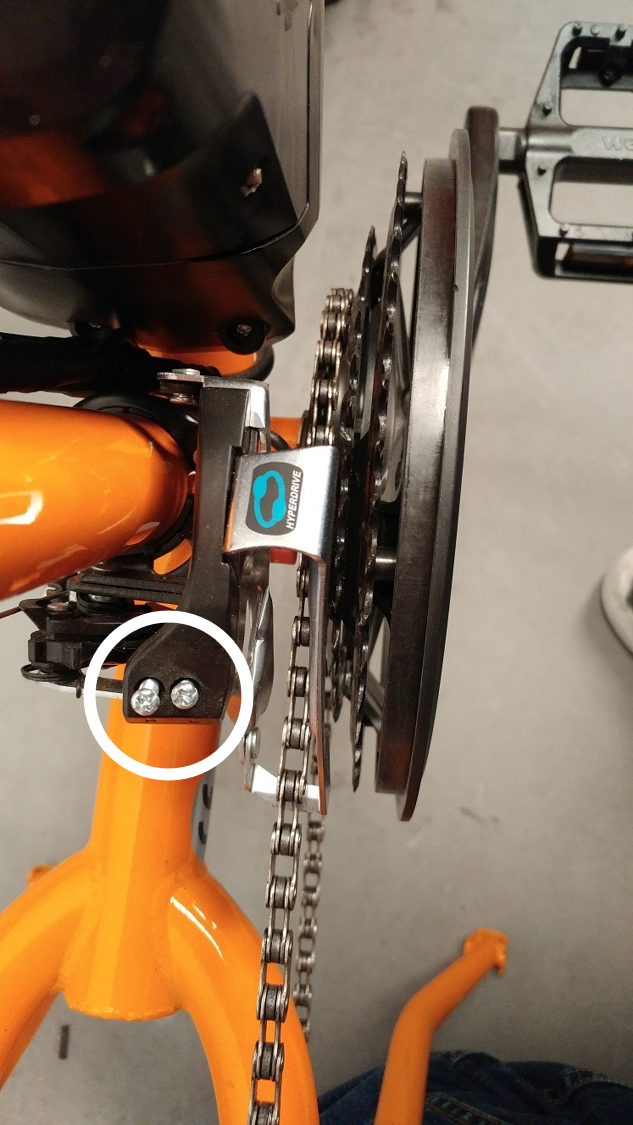
- Adjust the lower limit screw. Keeping your fingers clear of the chain, chainring, and other moving parts/pinch-points.
- Push the derailleur arm towards the frame of the bike, looking inline at the gears from the back of the bike.
- Use a Phillips head to adjust the lower limit screw (the right screw, marked with a small "L" imprinted in the plastic). Loosening this screw by turning it counterclockwise will allow the derailleur arm to travel closer to the frame. Tightening the lower-limit screw by turning clockwise will make the derailleur arm stop farther away from the frame. Adjust the lower limit screw so the derailleur arm is centered on the smallest gear as shown below.
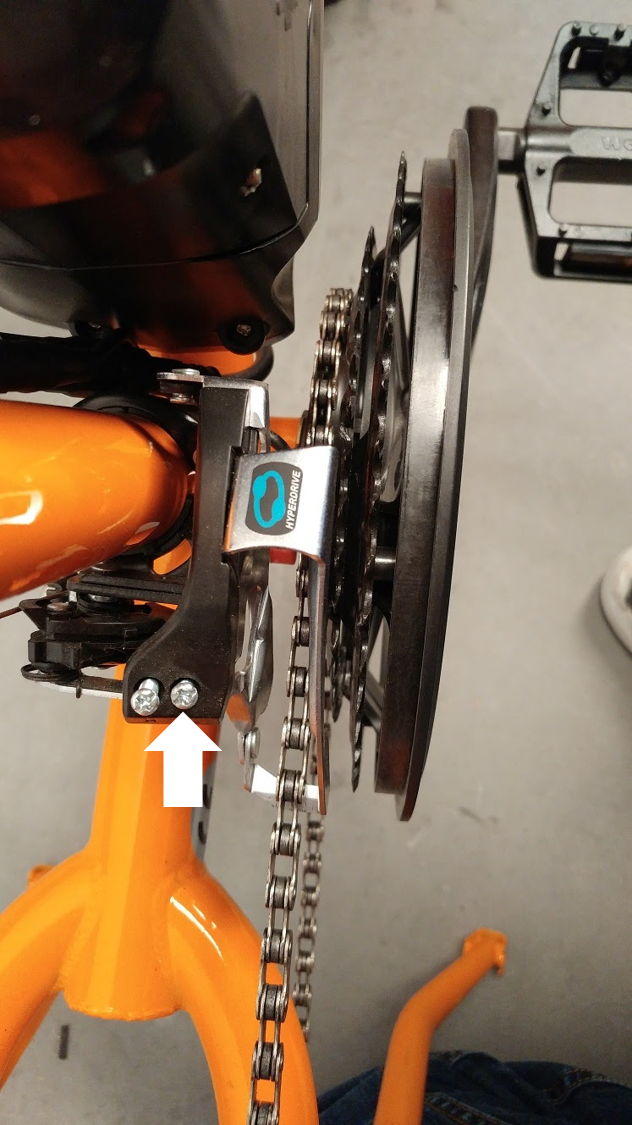
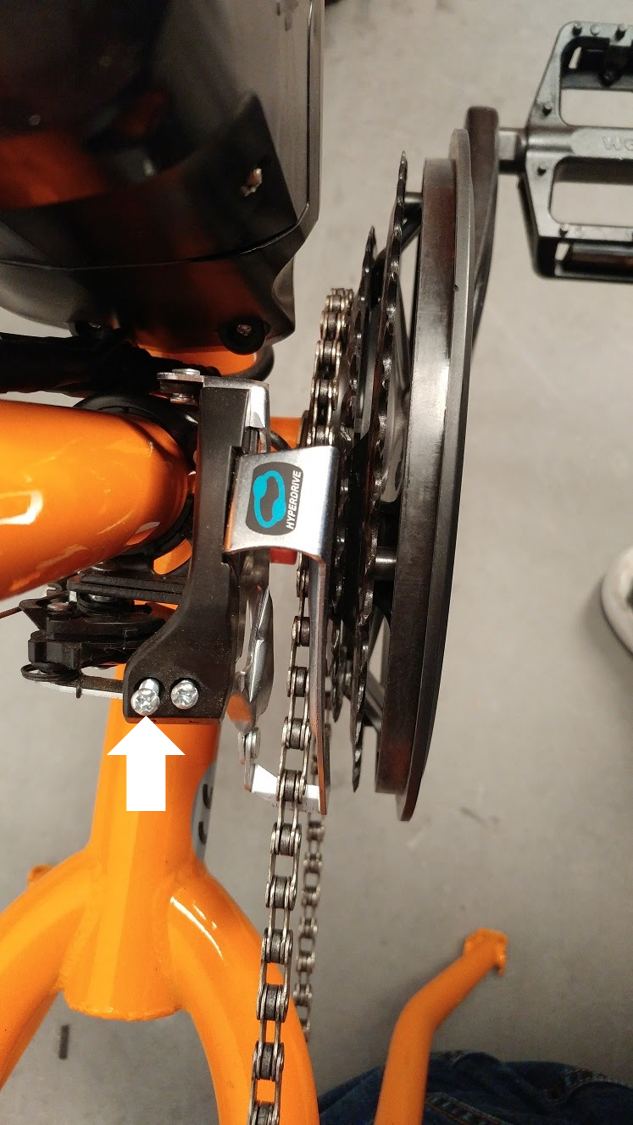
- Shift the bike so that the chain is on the largest front chain ring, and the shifter on the handlebars is in 3rd gear. Prop the bike on the kickstand so the rear wheel is off the ground and use one hand to revolve the pedals while shifting the bike into 3rd gear, "3" on the shifter on the handlebar. This will set the chain onto the largest chain ring in the front.
- Adjust the higher limit screw. Use a Phillips head to adjust the higher limit screw (the left screw, marked with a small "H" imprinted in the plastic). Loosen or tighten the higher limit screw so the derailleur arm is centered on the largest gear as shown below.
- Test the derailleur limits and shifting. Lean the bike forward on the kickstand so that the rear wheel is off the ground. Spin the pedals, and shift through gears 1-3, one gear at a time.
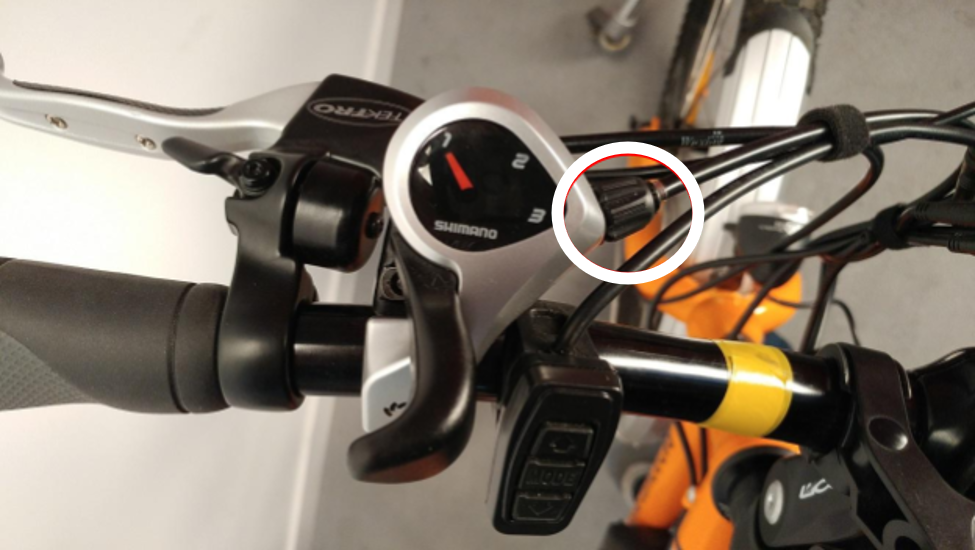
- Adjust cable tension. If the bike has trouble climbing into the next highest gear, stand at the front of the bike and twist the barrel adjuster at the shifter (circled, below) half of a turn clockwise. If it is having trouble downshifting, from 3 through to 1, turn the barrel adjuster counterclockwise by half a turn at a time. After each half turn, shift through the gears again to test if the bike shifts smoothly.
- Reinstall the battery, test the bike before riding, and ride Rad!