Adjust your bike for comfort and safety
All ebikes by Rad Power Bikes are equipped with an adjustable seatpost, and most models come with an adjustable seat, handlebar and suspension fork. It's important to adjust these bike components to the rider's comfort and proportions to ensure a comfortable and safe ride.
Follow the steps below to adjust your bike for comfort and safety. The steps below will work for most models. For specific information related to your bike model, click HERE to download the latest version of your bike's owner's manual.
If you've added additional accessories to your ebike (mirrors, cell phone mounts, etc.), refer to the installation instructions for the specific accessory to make adjustments.
Tools needed:
- A set of Allen wrenches ranging from 3-6 mm
- A torque wrench with a set of Allen bits
Hardware may vary (bolt head style) and/or require different tools. Use the appropriate head size and type of tool for your bolts. Ensure the tool is pressed firmly into the bolt head and turn slowly to prevent stripping.
The following steps are critical for your comfort and safety, and must be performed before your first bike ride. We recommend that you consult a bike fitting professional such as a certified, reputable bike mechanic who specializes in bike fit.
Many riders prefer the seat to be roughly parallel to the ground, with its horizontal position in the middle of the range marked on the seat rails.
To change the angle and horizontal position of the seat:
- Loosen the seat adjustment bolt beneath the seat. Use an Allen wrench that fits the bolt on your bike. Do not remove the bolt fully.
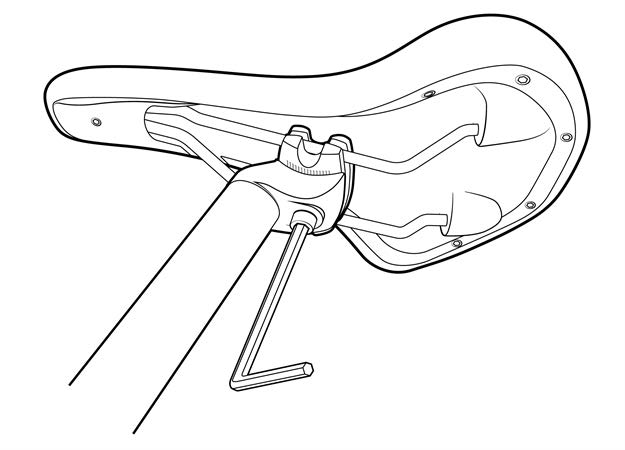
- Adjust the seat. Move the seat backward or forward and tilt to adjust the angle within the limit markings on the seat rail. Do not exceed the limit markings etched into the seat rail.
- Tighten the seat adjustment bolt. Ensure the top of the seat rail clamp is aligned directly over the bottom of the clamp so that the seat adjustment bolt will clamp the seat rails properly. Then, while holding the seat in the desired position (or having a friend help you hold it in place), use an Allen wrench to tighten the seat adjustment bolt securely to the required torque value listed in your owner's manual.
The stock seat that comes with RadRunner and RadRunner Plus models has a fixed connection between the seatpost and seat, which is therefore not adjustable in the ways described above.
A loose seat clamp or seat adjustment bolt can cause loss of control leading to an accident, bike/property damage, serious injury, or death. Prior to first use, be sure to tighten the seat clamp via the seat adjustment bolt properly. Regularly check to make sure that the seat adjustment bolt is properly tightened and the clamp is secure on the seat rails.
An ideal seat height for most riders allows them to be comfortable and get the best pedaling efficiency. When the rider is seated, they must be able to place the ball of their foot on the pedal at its lowest position while their leg is almost fully extended, with the knee slightly bent. The seat must not be so high that the rider must fully straighten their legs or rock their hips from side to side while pedaling to reach the bottom of the pedal stroke.
Depending on a rider’s preference, ability, and amount of experience with bike and ebike riding, lowering the seat so the rider can put one or both feet on the ground without dismounting from the seat may offer a safer and more comfortable experience while operating the bike.
To adjust the seat height:
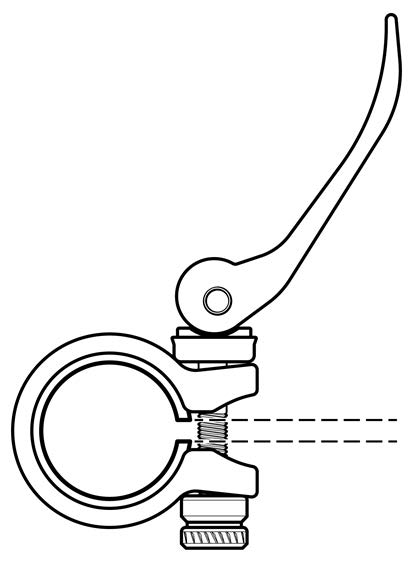
- Open the seatpost quick release lever. Align the seatpost clamp with the notch in the seat tube, as shown in the top-down view of the seatpost clamp below.
- Adjust the seatpost height. Slide the seatpost in or out of the seat tube to a height appropriate for your leg length and preference. Do not extend the seatpost beyond the minimum insertion marking etched onto the seatpost.
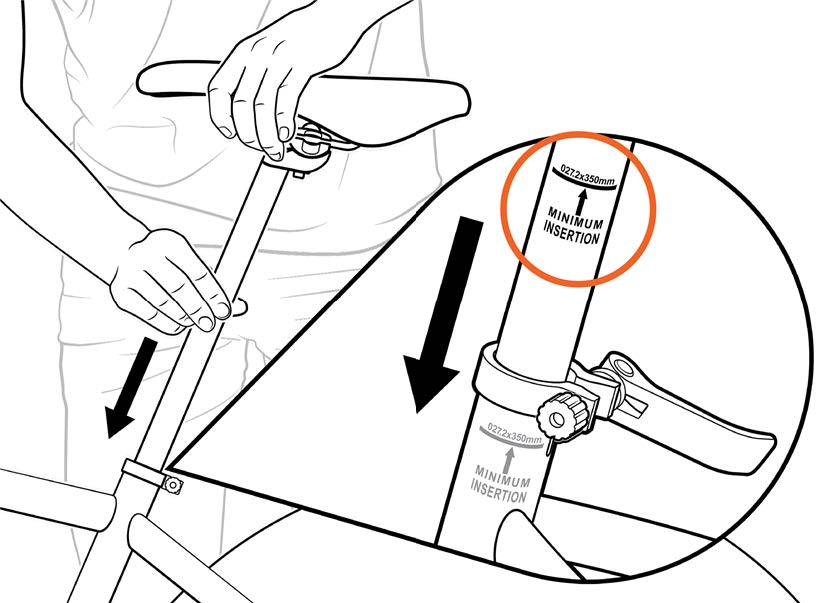
Overextending the seatpost can cause it to break or fall off your bike, which will put you at very high risk of serious injury or death. Avoid this danger by inserting your seatpost into the seat tube far enough that the minimum insertion point is no longer visible.
- Adjust the seatpost clamp quick release lever. With the lever open, adjust the lever tension by turning the adjustment nut opposite the quick release lever. Test the lever to ensure it has enough tension, and adjust tension if needed.
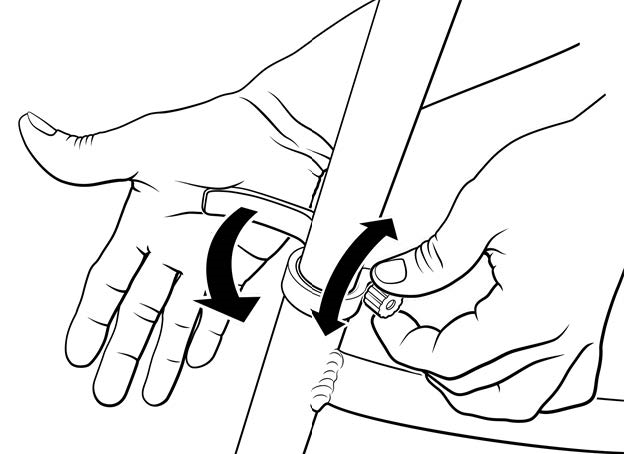
- Close the quick release lever fully. This will require enough pressure that it leaves an imprint in your hand. When closed, the seat must not move up, down, left, or right. Repeat step 3 to add more tension if needed. The clamp keeps the seatpost secure and must be very tightly closed.
- Try out your seat fit. Repeat steps 1–4 to adjust the seatpost further, if needed.
Most riders will be comfortable with the handlebar angled so that the handlebar grips and brake levers are roughly parallel with the ground. Others may have a preference for the handlebar grips and brake levers to be angled slightly downward. Regardless of your preference, always make sure you can easily squeeze the brake levers whenever needed while riding. And if you've adjusted the handlebar angle, you may also need to adjust the angle of the the display and remote to ensure they are easy to view while riding.
To adjust the angle of the handlebar:
- Locate and loosen the stem faceplate bolts. Use an Allen wrench that fits the faceplate bolts on your bike. Do not remove the bolts fully.
- Adjust the angle of the handlebar to a comfortable level and position, making sure to stay within the markings on the handlebar, if applicable. Ensure the handlebar is centered on the stem and the display is easily accessible to the rider. Hold the handlebar in place.

- Tighten the stem faceplate bolts evenly 1/4 turn at a time, in an "X" pattern. Torque the bolts to the required torque values listed in your owner's manual.
To adjust the angle of the brake levers:
- Locate and loosen the brake lever clamp bolt on the handlebar. Use an Allen wrench that fits the bolt on your bike. Do not remove the bolt fully.
- Adjust the angle of the brake lever and ensure the lever is easily accessible to the rider. Hold the brake lever in place.
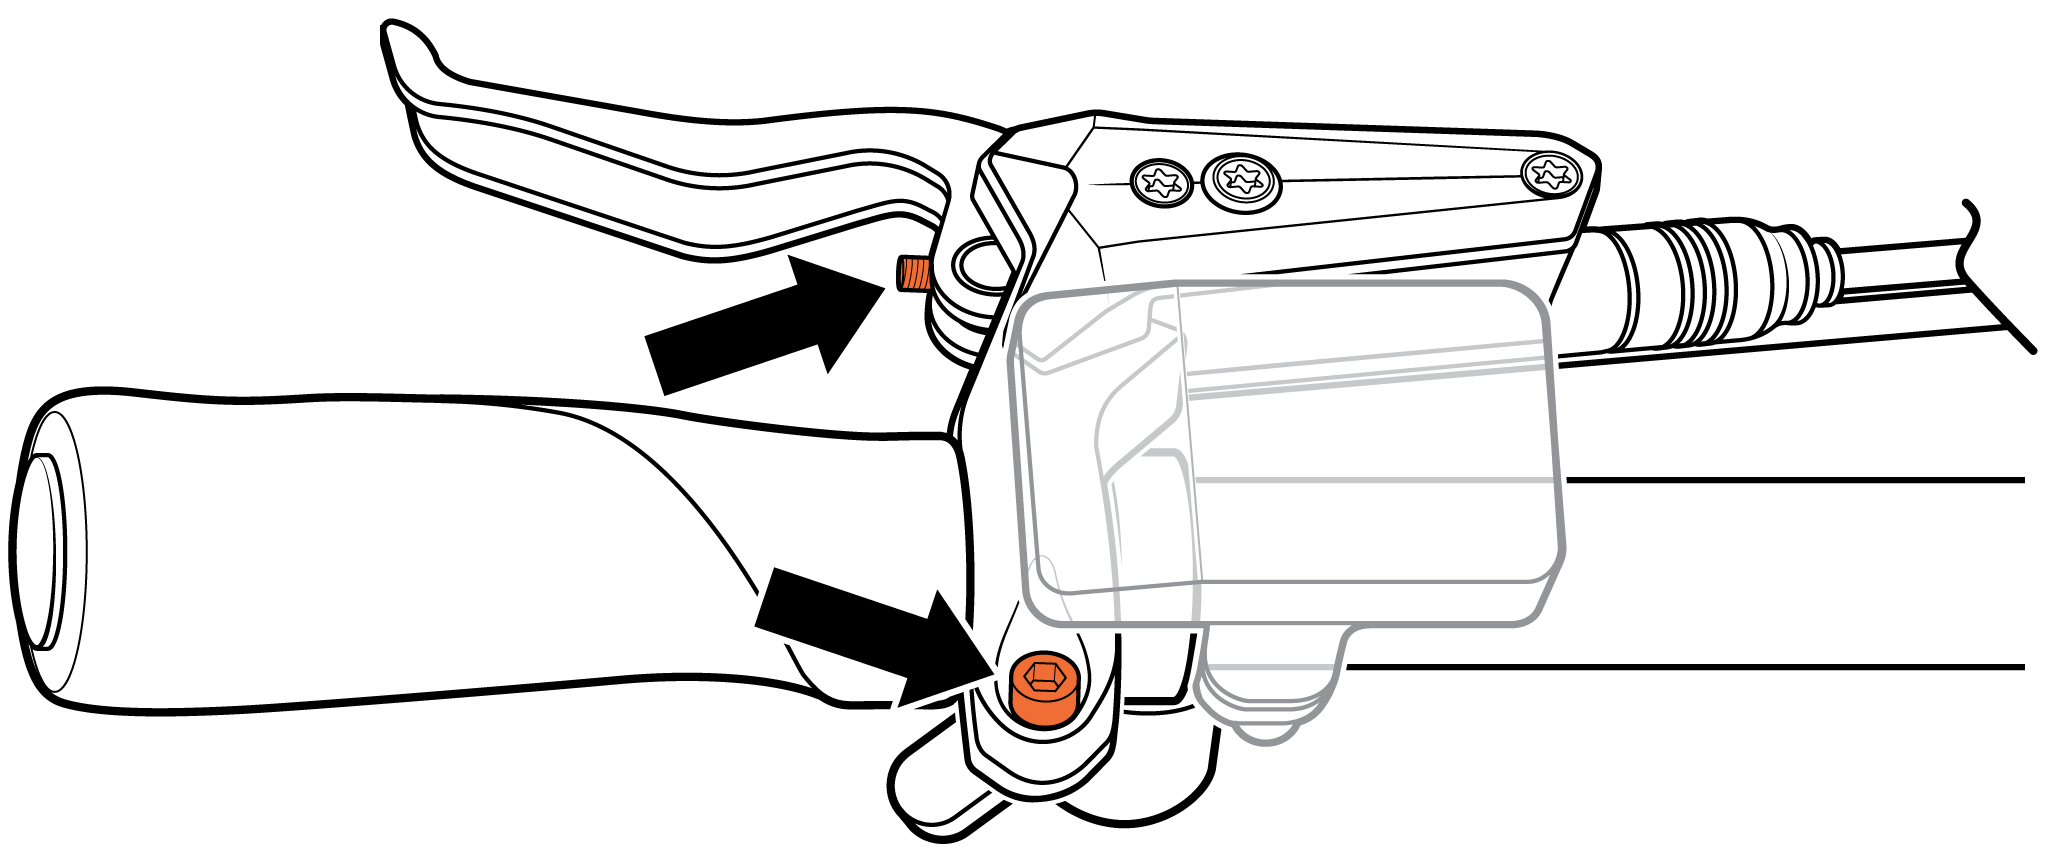
- Tighten the brake lever clamp bolt. Torque the bolt to the required torque value listed in your owner's manual.
- Repeat steps 1-3 with the other brake lever.
- Turn the handlebar from side to side to ensure there is enough cable slack. The handlebar must turn fully to each side without pulling cables taut.
To adjust the angle of the display and remote:
- Locate and loosen the clamp bolts on the underside of the display. Use an Allen wrench that fits the bolt on your bike. Loosen just until you can rotate the display on the handlebar, but do not remove the bolts.
- Adjust the angle of the display to ensure you'll be able to view it while riding. The angle that will minimize glare and optimize visibility of the screen will depend on your height and sitting position.
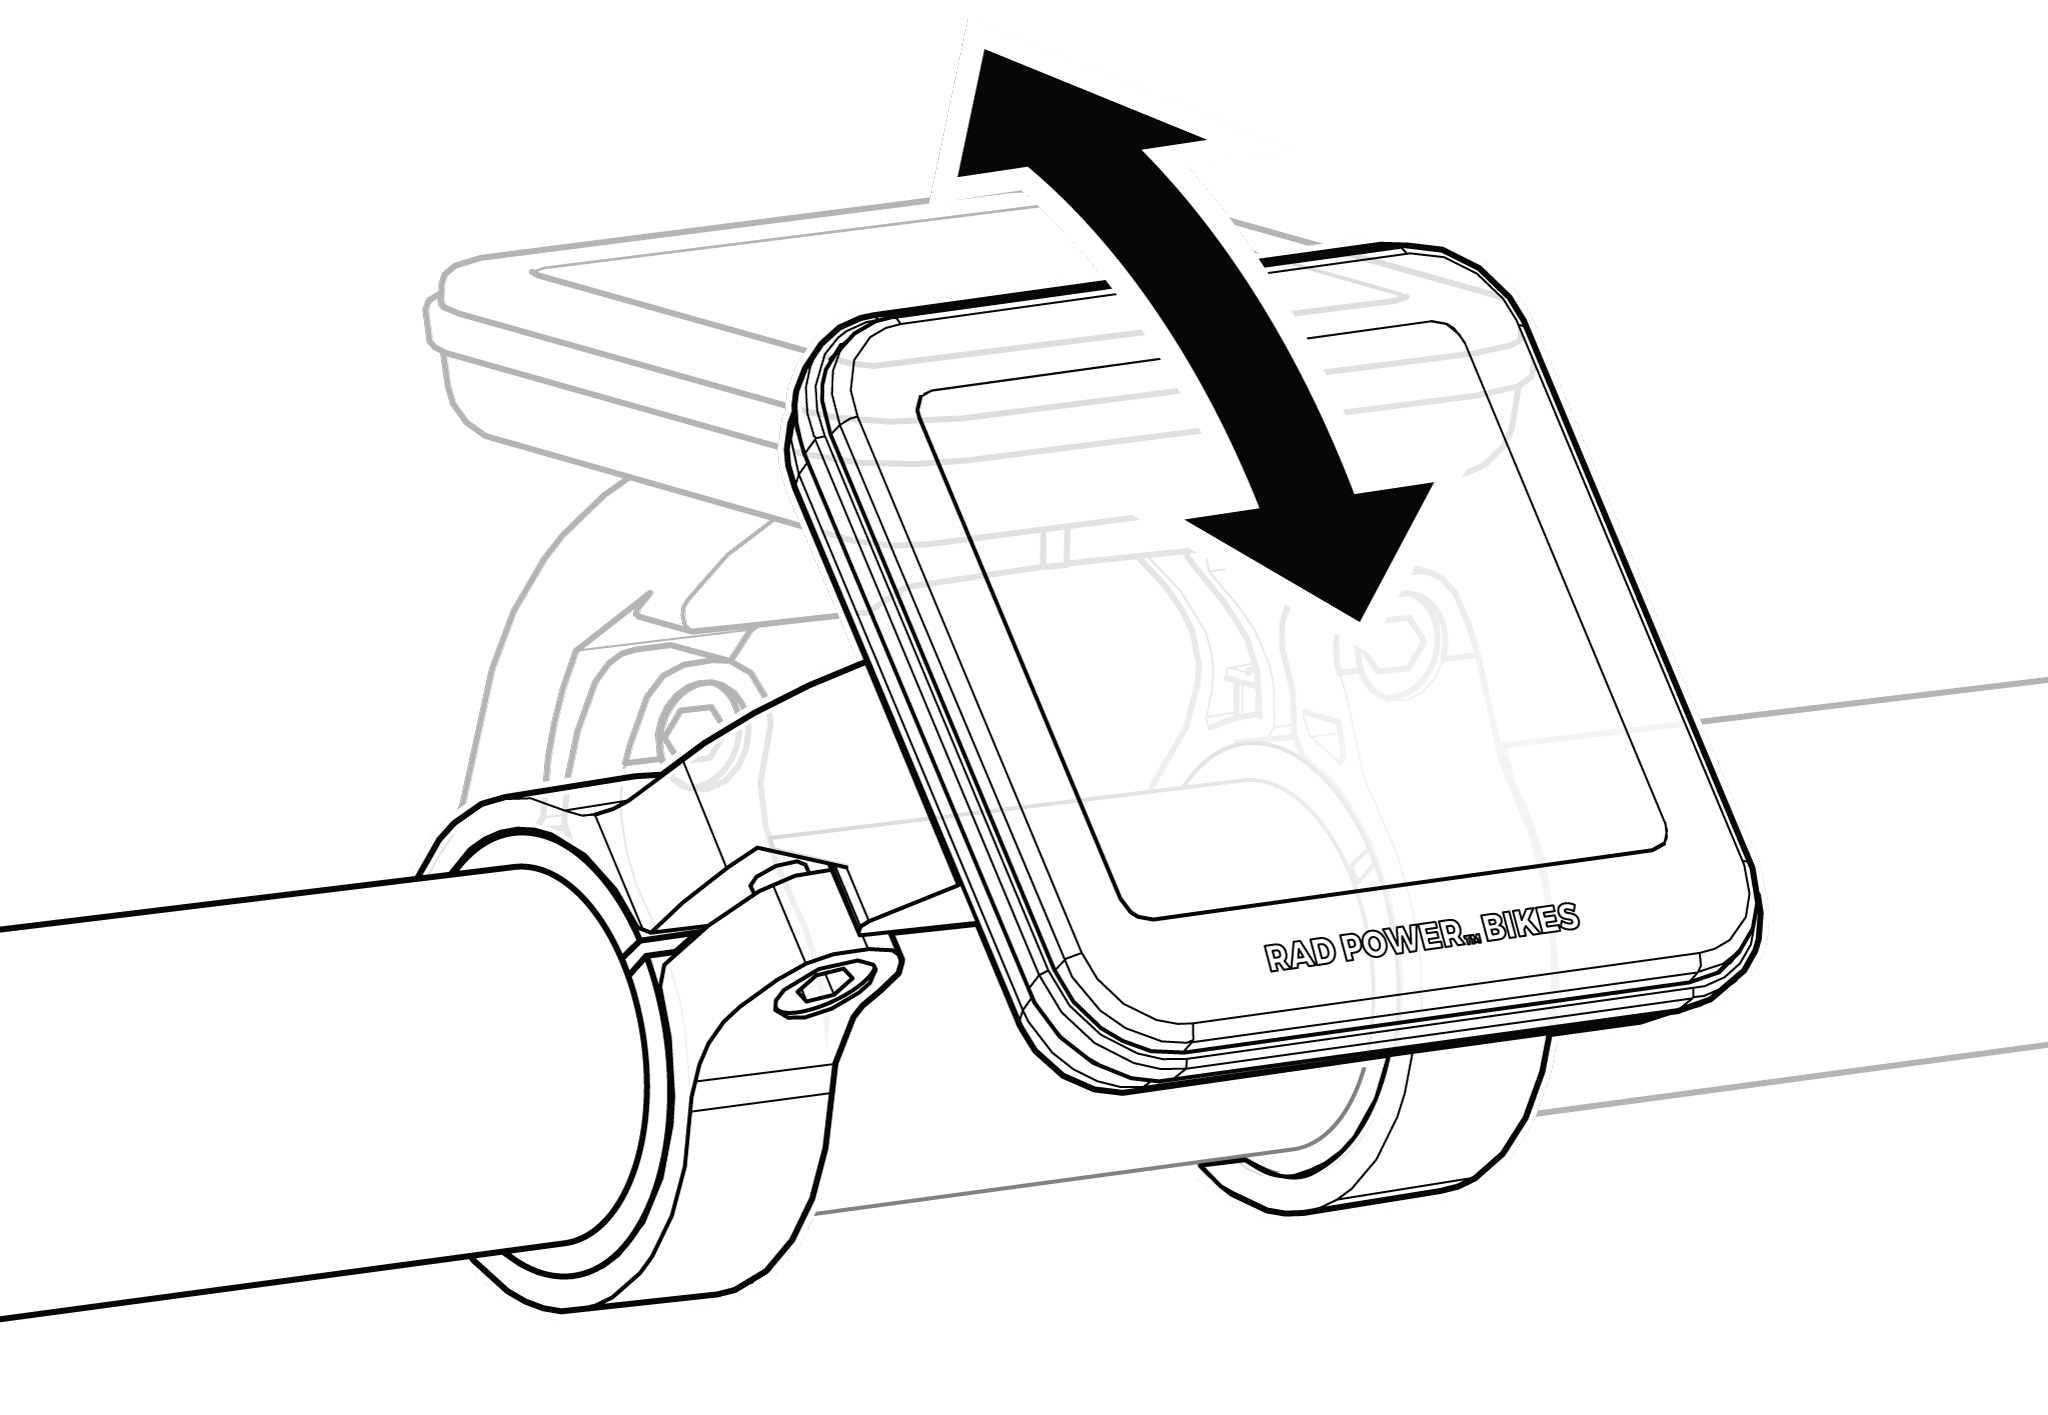
- Tighten the display clamp bolts. Torque the bolt to the required torque value listed in your owner's manual.
- Adjust the angle of the remote. If you have an ebike with the Rad UI remote, repeat steps 1-3 to adjust the remote, if desired.
Ensure all hardware is tightened properly according to the torque values in your owner's manual. This is a critical safety step that you must not skip. If you do not own a torque wrench or don’t have the skills to check the tightness of your hardware, consult a local, certified, reputable bike mechanic for help.
Most Rad Power Bikes models have a suspension fork on the front of the ebike, which comes equipped with preload adjustment and lockout mechanisms on the top of the fork. These controls allow riders to choose the "ride feel" they like best.
- Locking out the suspension fork (right) creates a rigid front fork, which can yield higher efficiency while pedaling and a more predictable ride, depending on conditions such as terrain and cargo load.
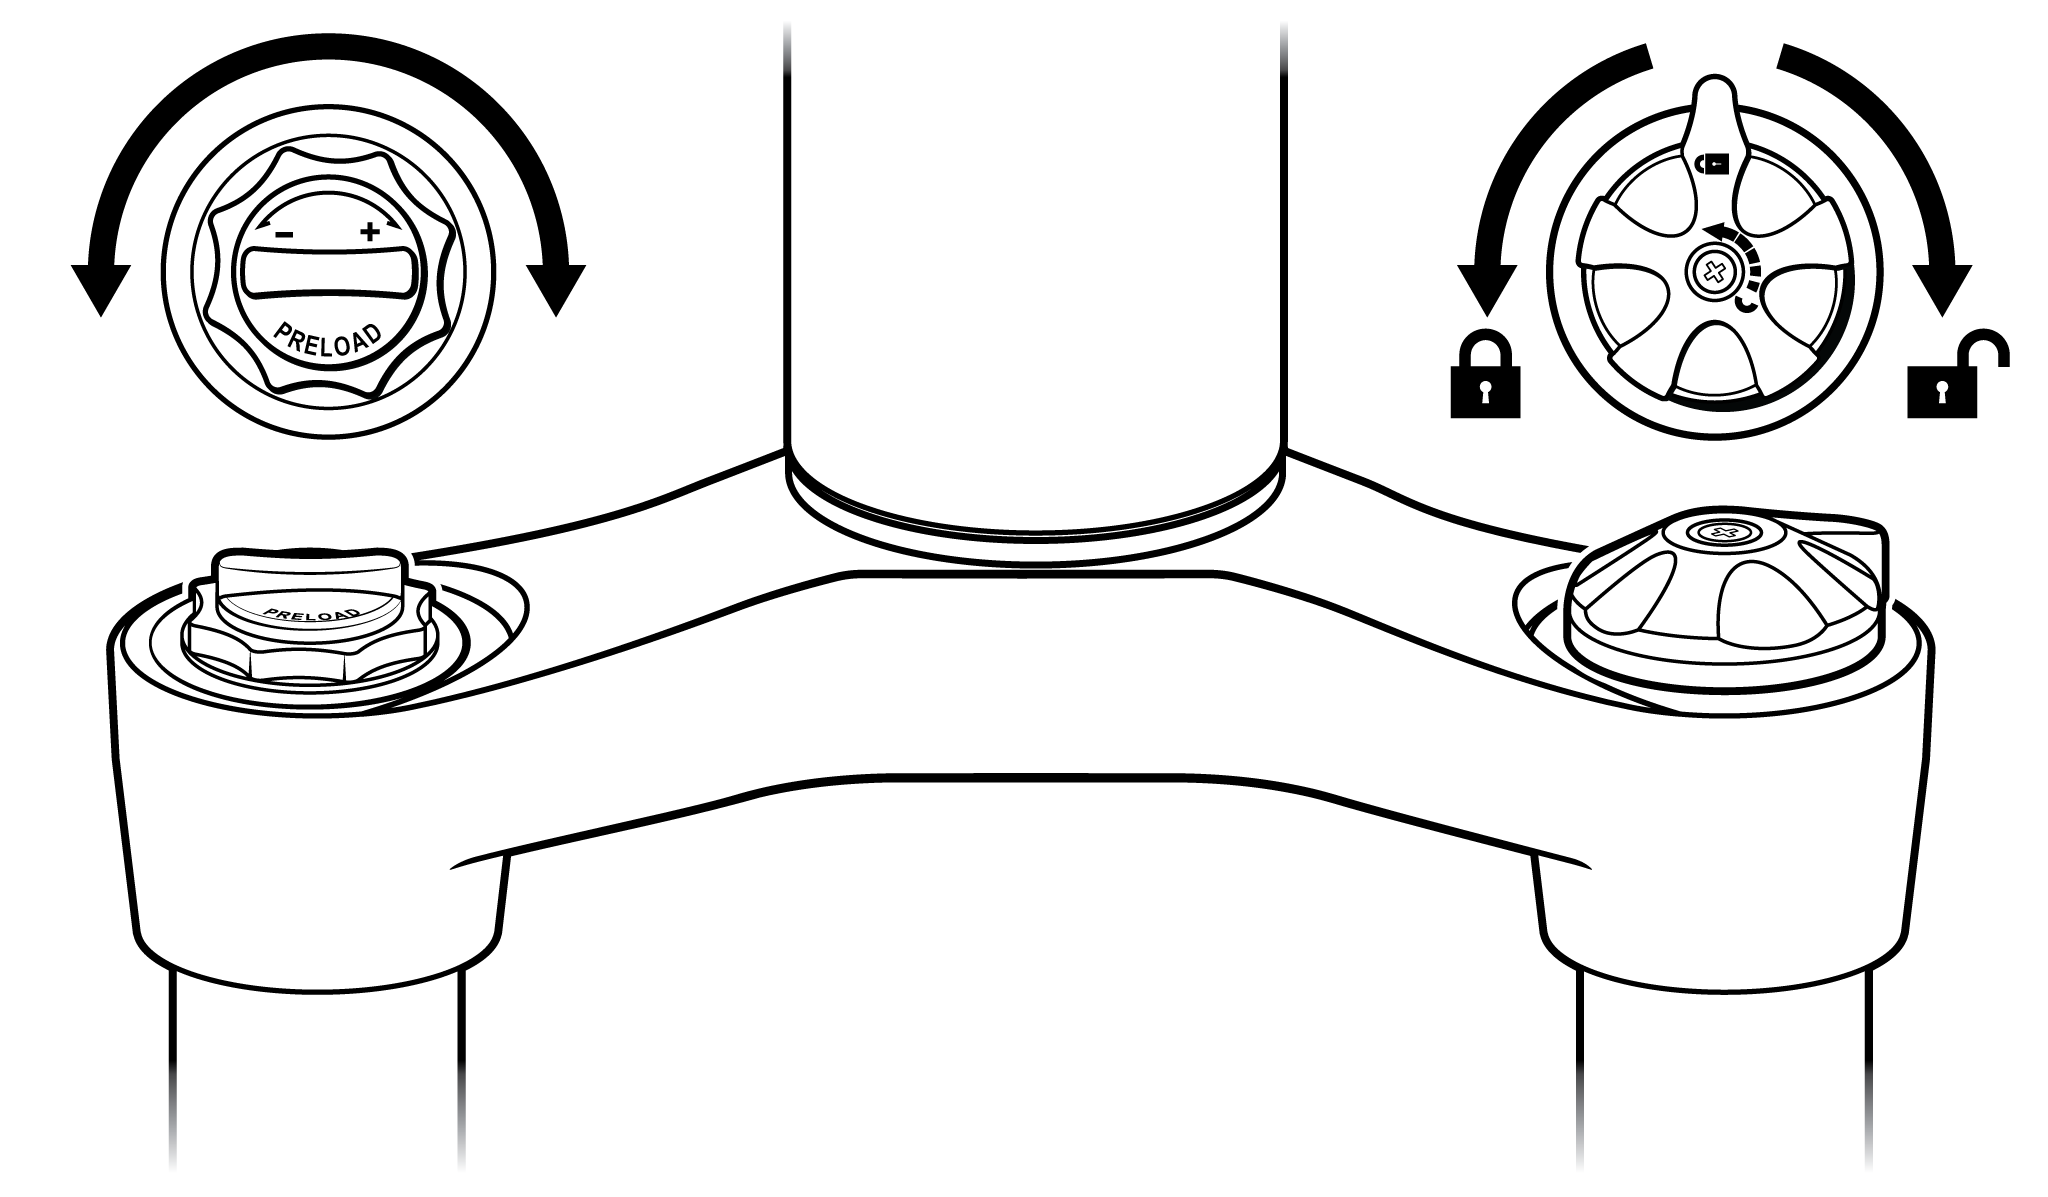
- Adjusting the preload (left) can dial in more suspension fork travel, making the fork squishier and riding on a rough road or trail surface feel smoother and more comfortable.
Watch the video below to learn how to adjust the suspension fork on your ebike.