RadMission rear wheel removal guide
This article will show you how to remove and install a rear wheel on a RadMission.
Tools needed:
- 4 mm Allen wrench
- 18 mm wrench
- Flat side cutters
- Clean shop or paper towel
- Torque wrench (capable of torquing between 6 Nm - 40 Nm)
- Wood blocks (to protect the display when the bike is upside down)
- Zip ties
- Nitrile gloves (optional)
Hardware may vary (bolt head style) and/or require different tools. Use the appropriate head size and type of tool for your bolts. Ensure the tool is pressed firmly into the bolt head and turn slowly to prevent stripping.
Remove the Rear Wheel
- Get the bike ready for installation. Turn off the bike, remove the battery, and press and hold the power button to discharge remaining power.
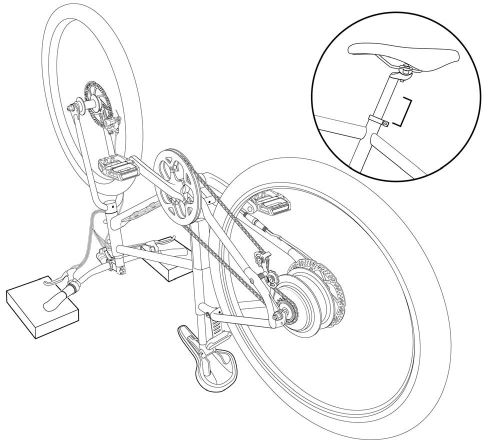
- Carefully flip the bike upside down and prop the handlebar grips on blocks to protect the display.
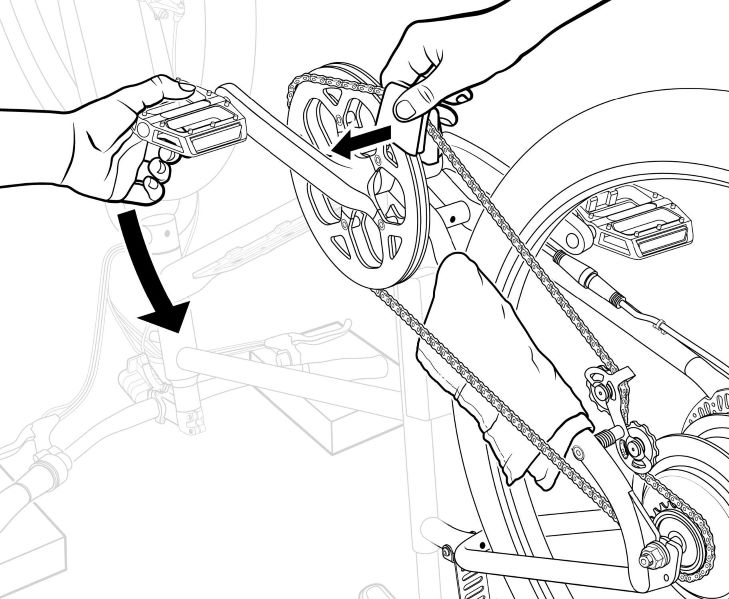
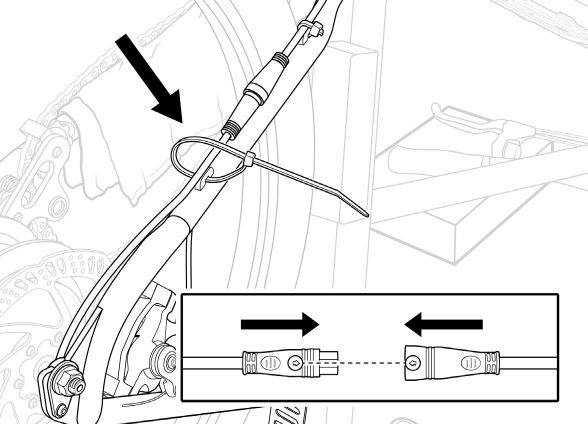
- Unplug the motor cable. Snip the zip tie at the motor cable. Pull the connector directly apart without twisting to unplug.

- Remove the chain from the front chainring: Place a paper towel over the chainstay to protect the chainstay paint. Rotate the right crank counterclockwise until the pedal is forward. Grab the chain with a second paper towel, pull the chain away from the bike, then rotate the crank counterclockwise to remove the chain. Use caution to avoid getting pinched between the chainring and the chain. If needed, add slack by pushing the chain tensioner forward.
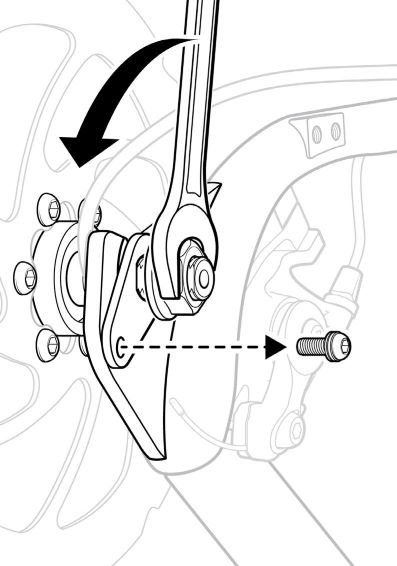
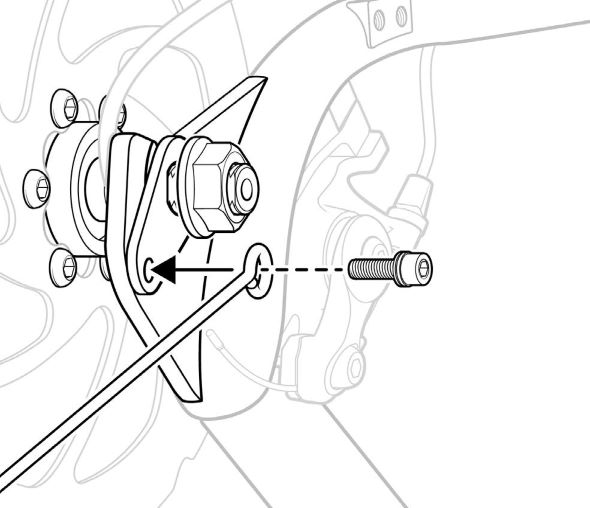
- Remove the torque arm bolt and loosen (but don't remove) the rear wheel axle nuts. Use a 4 mm Allen wrench to remove the torque arm bolt. Use an 18 mm wrench to loosen the rear wheel axle nuts on both sides of the wheel.
- Remove the wheel. Lift the wheel up and out of dropouts and remove the chain from the rear cog.
- Perform maintenance as needed. Once the rear wheel is removed, change the tube or tire, swap in a new wheel, etc
Install the Rear Wheel
- Orient the rear wheel so it is in line with the brake rotor and dropouts.
- Align the brake rotor with the caliper so the brake rotor will easily enter the caliper. Do not pinch the motor cable or touch the brake rotor.
- Reinstall the chain on the rear cog, then align the chain and rotate the crank counterclockwise to install the chain on the front chainring.
- Align the axle in the dropouts with the torque arm on the outside of the frame.
- Lower the wheel and ensure the axle is fully seated in both dropouts.
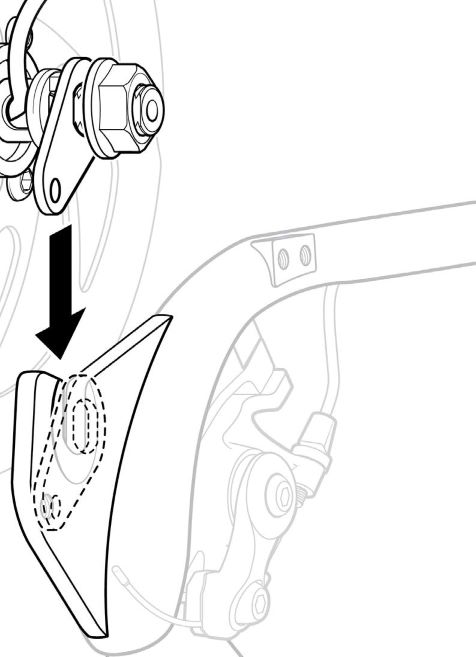
- Install the torque arm bolt on the brake rotor side of the wheel. If a fender is installed, ensure the bolt passes through the fender mounting arm eyelet. Use a 4 mm Allen wrench to tighten. Torque the bolt to 5 Nm.
- Use an 18 mm wrench to tighten the rear wheel axle nuts evenly. Alternate between sides while tightening to ensure the axle remains level and fully seated in the dropouts. Use a torque wrench with a crowfoot bit to torque to 40 Nm.
An improperly secured front or rear wheel can cause loss of control, accidents, serious injury, or death. Check that both wheels are properly secured during assembly, reassembly, and before each ride.
- Ensure the fender (if installed) is centered and has clearance around the wheel.
- Plug in the motor cable. Line up the internal and external markings and press together, without twisting, to connect. Use zip ties to secure the cable away from moving parts. Snip zip tie excess until flush and smooth.
- Stand the bike upright, reinstall the battery, and test the bike fully before riding. Ride Rad!