Reinstall the battery, test the bike fully, and ride Rad!
RadMini High-Step frame hinge adjustment guide
Over time and with normal use, the RadMini frame hinge quick release lever may loosen and need to be tightened or adjusted.
The frame hinge quick release lever may need to be adjusted if:
- The quick release lever is loose and does not close properly
- It is too easy to close the quick release lever
- The bike makes a creaking noise when you sit on it or ride the bike
This article applies to the RadMini high-step model. Follow the instructions below to adjust the frame hinge quick release lever on your RadMini.
Tools needed:
- 10 mm wrench
- Get the bike ready for maintenance. Turn off the bike, remove the battery, and press and hold MODE to discharge remaining power.
- Open the quick release lever.
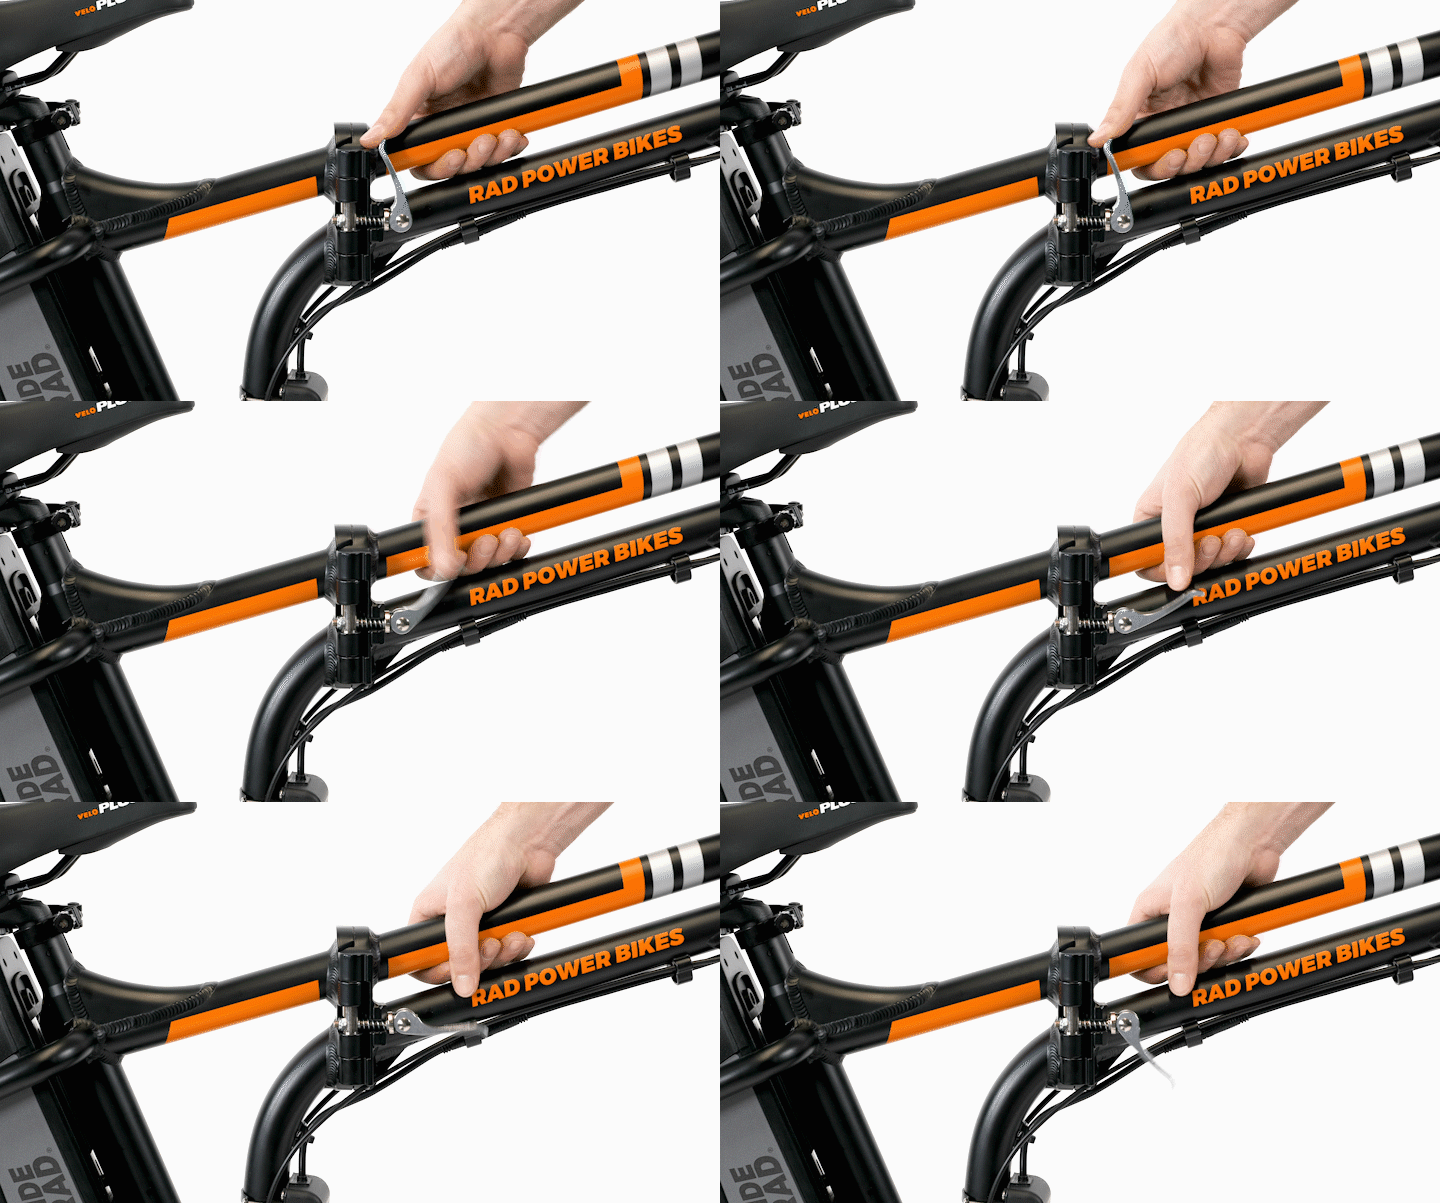
When opening or closing the quick release lever, use caution to keep fingers, clothing, etc. away from folding parts and potential pinch points to avoid injury. Ensure the frame is properly aligned and hardware is secured before riding.
- Locate the quick release lever adjustment nut.
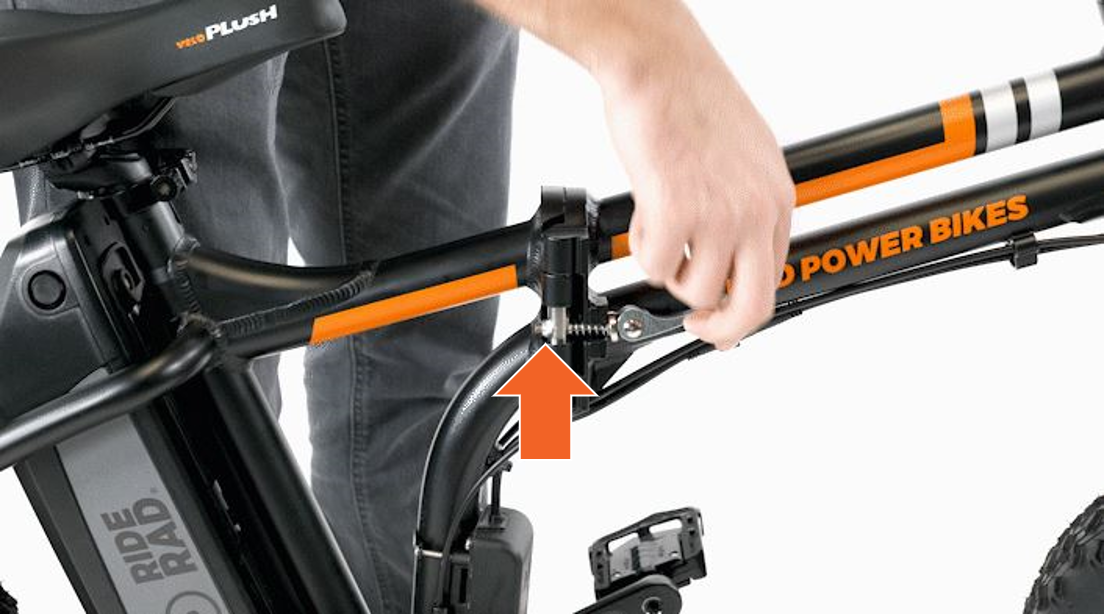
- Tighten the quick release lever adjustment nut.
- Place a 10 mm wrench over the nut to keep it in place. Rotate the quick release lever clockwise (toward the bike) one full turn to tighten the quick release lever.
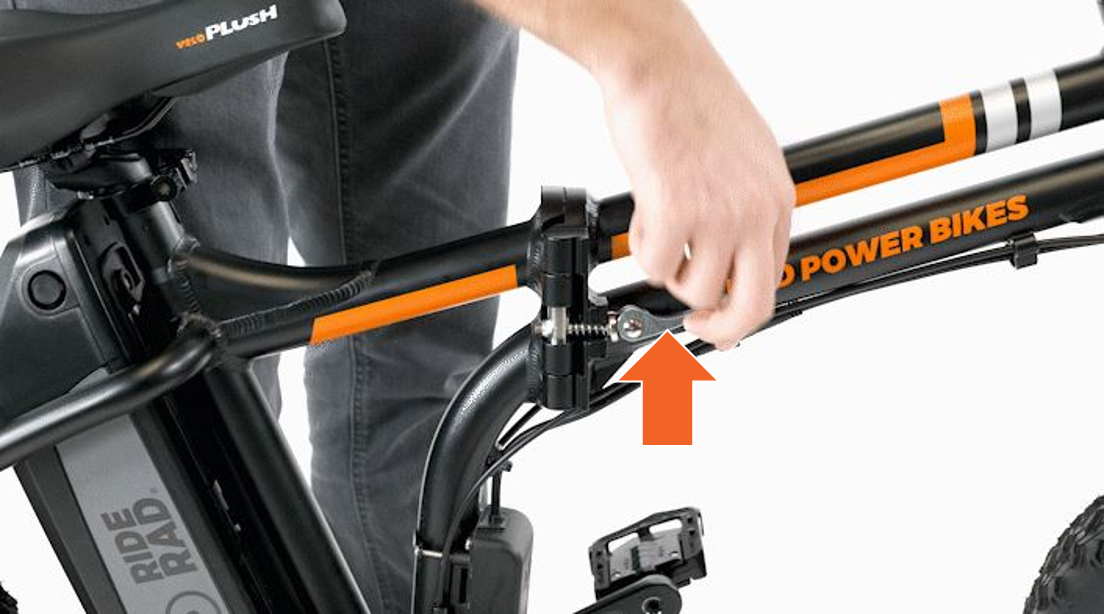
- Close the lever. This will require enough resistance that it leaves an imprint in your hand.
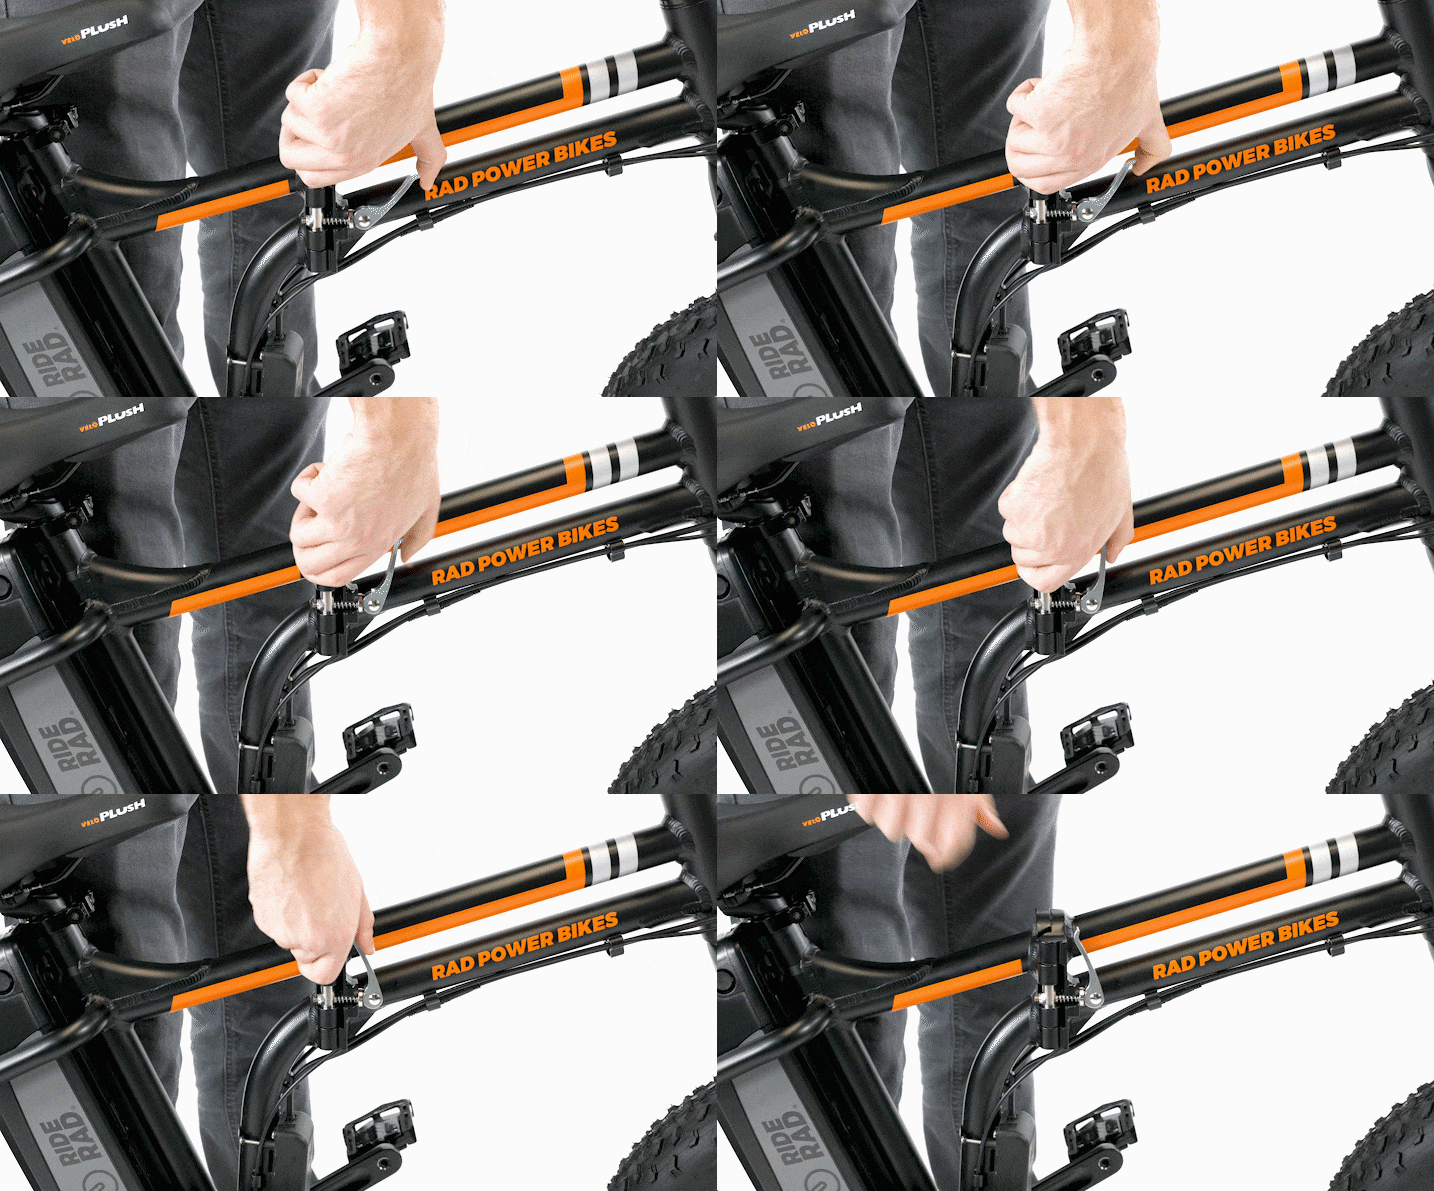
- Repeat the adjustment until the quick release lever nut is tightened, and close the quick release lever securely.
If the quick release lever is hard to close, it is likely too tight. Use the wrench to hold the nut in place, then rotate the quick release lever counterclockwise (away from the bike) one half turn to loosen, and try to close the quick release lever.
- Place a 10 mm wrench over the nut to keep it in place. Rotate the quick release lever clockwise (toward the bike) one full turn to tighten the quick release lever.
- Double-check that the lever is closed securely.
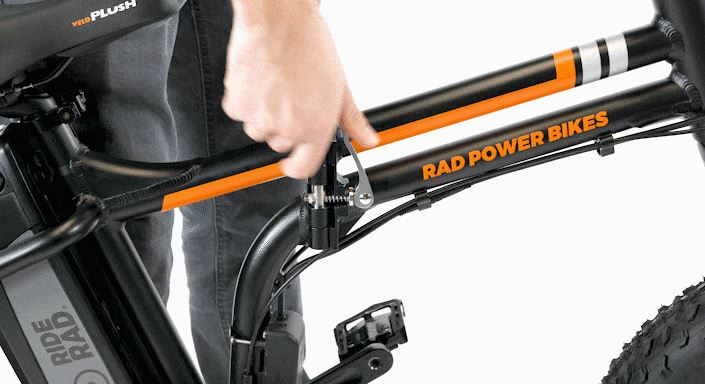
-
