Technical bulletin: RadMini stem riser clamp bolt tightening guide
The video and instructions in this technical bulletin apply only to RadMini 4 and RadMini Step-Thru 2 bicycles delivered between January 1, 2020 and May 30, 2020.
This article will show you (or your bike mechanic) how to test for adequate stem clamp tightness with a handlebar twist test and how to properly torque the lower two stem riser clamp bolts on your RadMini 4 and RadMini Step-Thru 2 delivered between January 1, 2020 and May 30, 2020.
To test and adjust the stem riser clamp bolts and headset tightness on another RadMini, please use the article linked HERE and reference your owner's manual available for download HERE.
First, perform a handlebar twist test to check that the stem riser clamp is securely tightened.
- Get the bike ready for testing (and maintenance). Turn off the bike, remove the battery, and press and hold the MODE button to discharge remaining power.
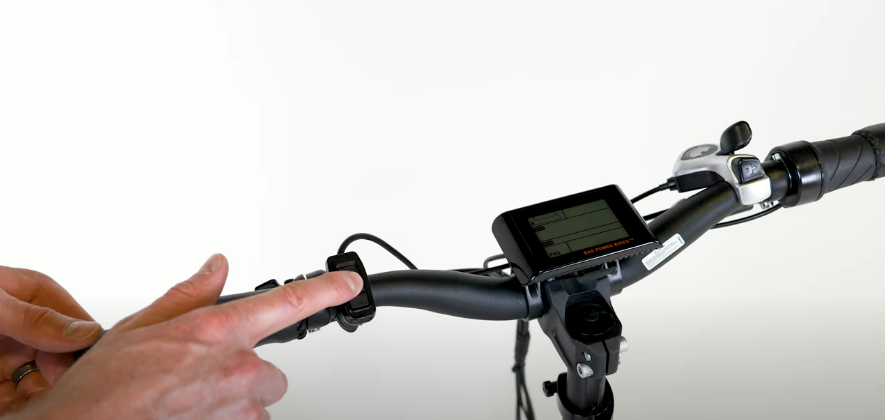
- Check that the handlebar stem quick release lever is closed securely. When the lever is closed, there must be no excess movement between the handlebar stem and the stem riser. If a lever adjustment is needed, open the lever, add resistance by turning the thumbnut clockwise, and close the lever to secure. The lever will require enough force while closing that it leaves an imprint in your palm.
- Perform the twist test.
- Brace the front wheel. Stand at the front of the bike and brace the front wheel between your feet and lower legs.
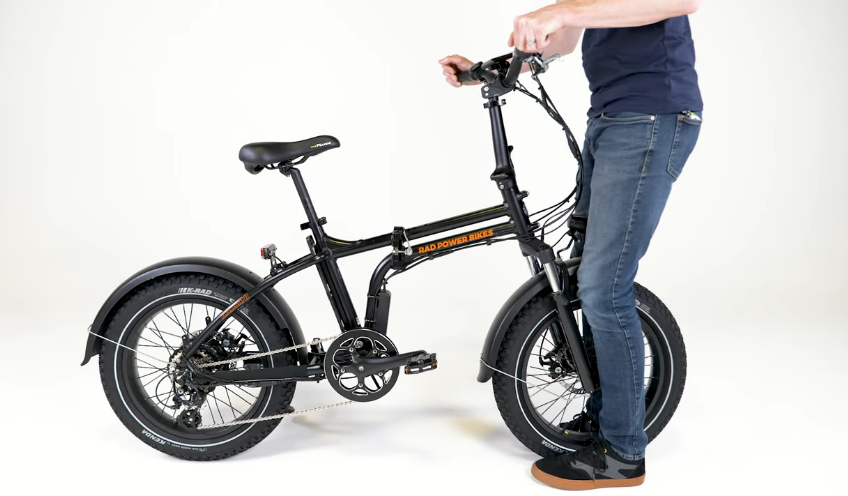
- Try to twist the handlebar. Hold both handlebar grips and push forward with one hand while pulling back with the other hand. Push and pull with about 20 pounds of force with each hand.
.PNG?revision=1)
- Ensure the handlebar and wheel stay properly aligned. While a small amount of movement near the stem quick release lever is expected, the handlebar must remain perpendicular to the front wheel, and they must not twist independently of each other at the stem riser clamp.
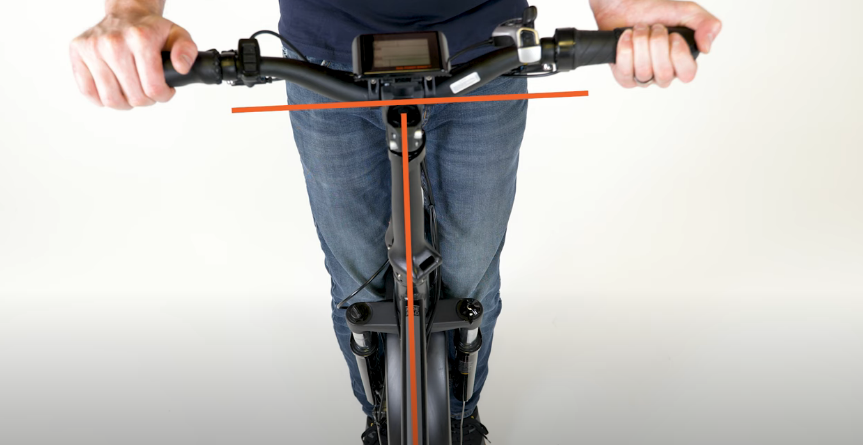
- Repeat the twist test with the opposite hands, pushing and pulling with about 20 pounds of force applied, and verify the handlebar and front wheel are properly aligned.
- If you pass the twist test, reinstall the battery, test the bike fully, and have your work inspected by a certified, reputable bike mechanic.
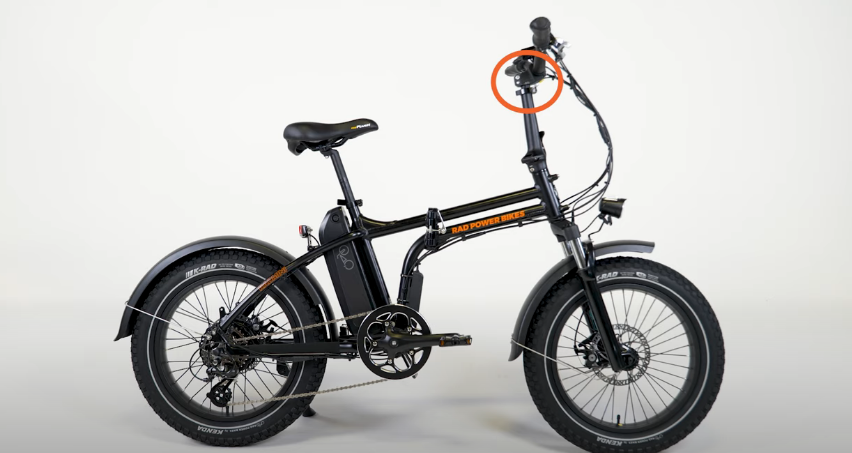
- If needed, properly torque both bolts. If the stem riser twists out of alignment, follow the instructions below, to properly torque both bolts.
On any bike, bolts and other hardware can vibrate loose during shipping and over time with normal use. Check your bike components and hardware are tightened securely and/or to required torque values before each ride and have your bike regularly serviced by a certified, reputable bike mechanic.
- Brace the front wheel. Stand at the front of the bike and brace the front wheel between your feet and lower legs.
If needed, properly torque both bolts following the instructions below.
You will need:
- A 6 mm Allen wrench
- A torque wrench capable of 25 Nm, with a 6 mm Allen bit
- Remove and reinstall both lower stem riser clamp bolts, torquing both evenly to 25 Nm.
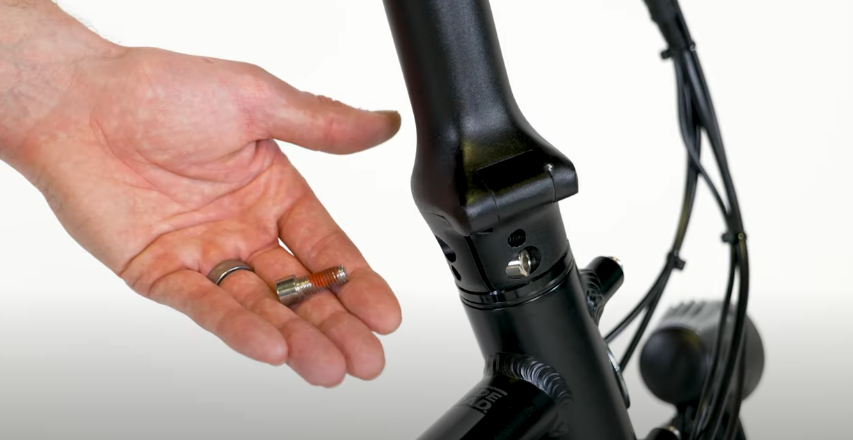
- Use a 6 mm Allen wrench to fully remove both stem riser clamp bolts from the stem riser.
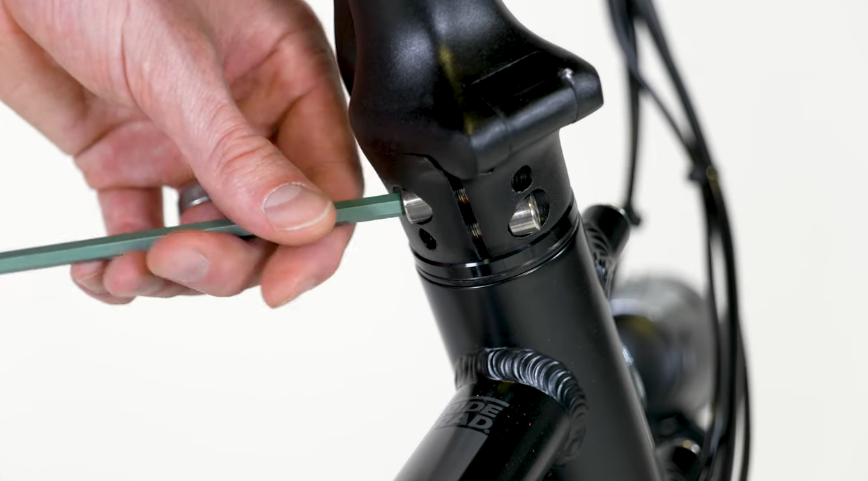
- Reinstall both bolts. Use a 6 mm Allen wrench to tighten each bolt until the base of the bolt head is snug against the stem riser. Once tight, you will feel resistance and no bolt threads will be visible at the bolt head.
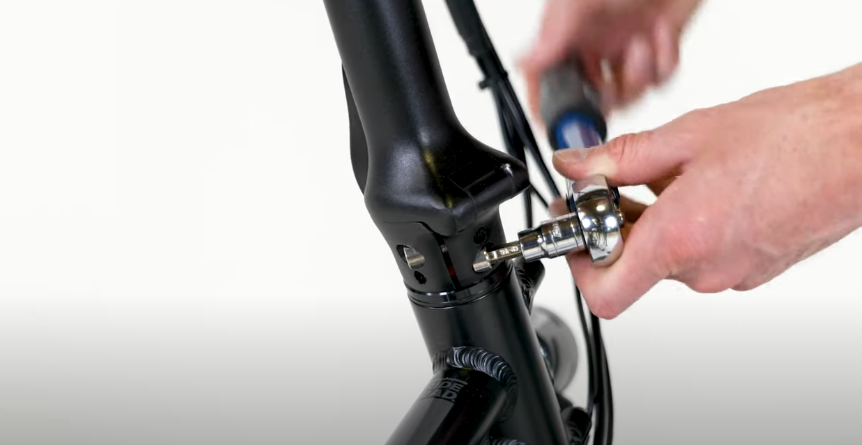
- Torque both bolts evenly to 25 Nm. Use a torque wrench to evenly torque both bolts to 25 Nm. Start with the top bolt and tighten one quarter turn, then switch to the bottom bolt. Repeat tightening each bolt one quarter turn, then alternating to the other bolt, until both bolts are torqued to 25 Nm.
- Use a 6 mm Allen wrench to fully remove both stem riser clamp bolts from the stem riser.
- Recheck TWICE that both bolts are properly torqued. Once the torque wrench indicates that both bolts are torqued to 25 Nm, recheck they are properly secured at least two times.
- Start at the top bolt and tighten until the torque wrench indicates 25 Nm.
.PNG?revision=1)
- Switch to the bottom bolt and tighten until the torque wrench indicates 25 Nm.
- Repeat to check that both the top bolt and bottom bolt are torqued to 25 Nm.
- Start at the top bolt and tighten until the torque wrench indicates 25 Nm.
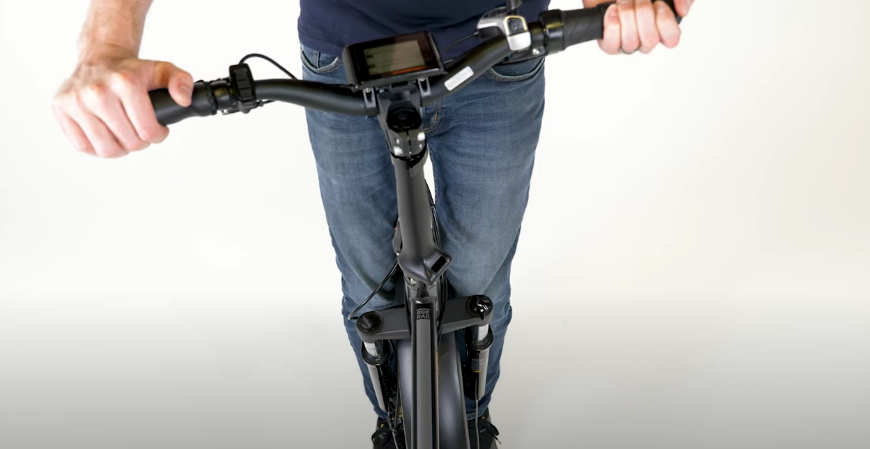
- Perform the handlebar twist test again. Once the torque on both bolts has been verified at least a total of three times, check the security of the stem riser clamp by performing the handlebar twist test above.
- If needed, repeat the process to properly torque both bolts. If the stem riser twists out of alignment, repeat the process again, ensuring that both bolts are secured to 25 Nm.

LOOSE OR IMPROPERLY TORQUED HARDWARE, SUCH AS THE STEM RISER CLAMP BOLTS, CAN CAUSE LOSS OF CONTROL, ACCIDENTS, SERIOUS INJURY, OR DEATH. Check that all hardware is securely tightened to the required torque values before each ride.
- If the bike passes the twist test, reinstall the battery, test the bike fully, and have your work inspected by a certified, reputable bike mechanic.