LED Display replacement guide
The LED display on a RadMission, RadRunner and RadExpand can be replaced in the unlikely event it is damaged or determined to be non-functional by Rad Power Bikes Product Support.
Follow the steps below to replace an LED display. This guide uses a RadRunner, but the steps will be the same for other models using the LED display.
If you want to upgrade the LED display to the LCD display, click HERE to purchase and HERE for installation steps.
Tools Needed:
- 3 mm Allen wrench
- Flat side cutters
- A few zip ties
- The replacement display from Rad Power Bikes
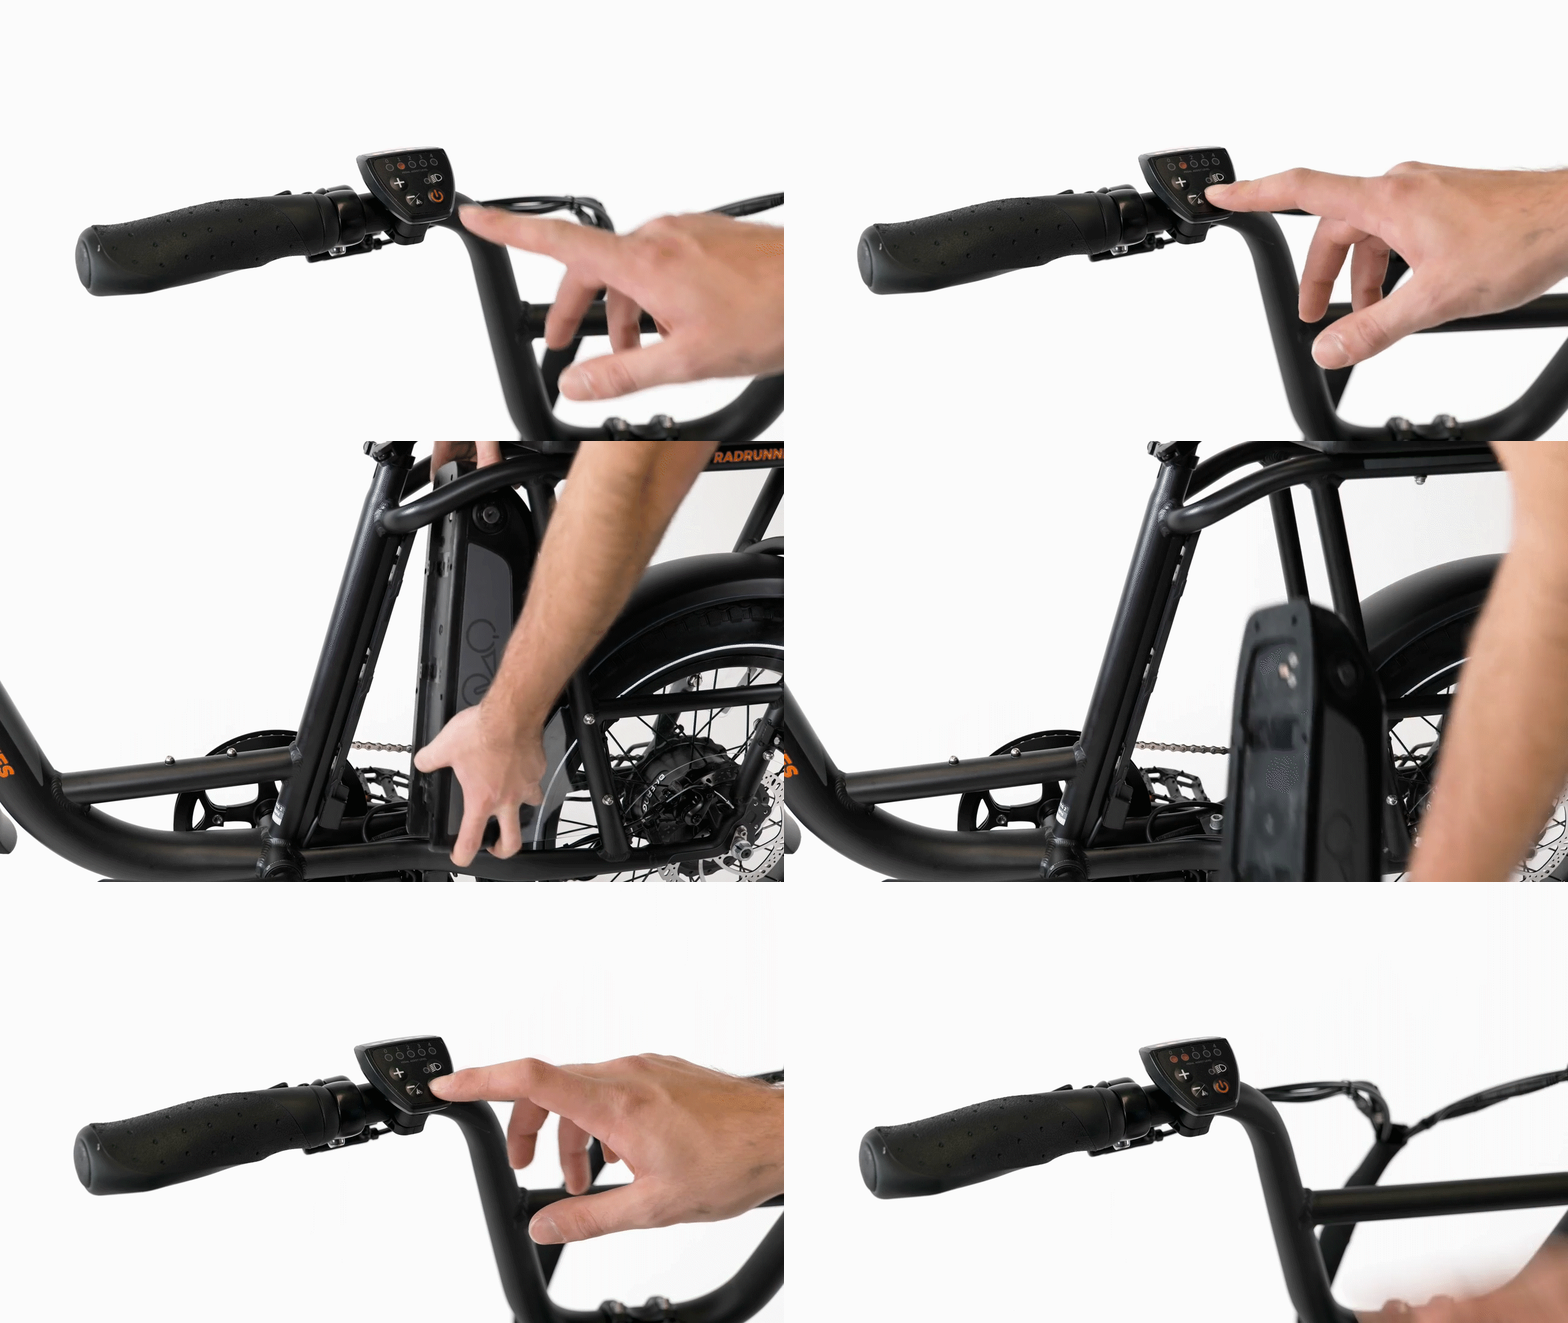
- Get the bike ready for maintenance. Turn off the bike, remove the battery, and press and hold the power button to discharge remaining power.
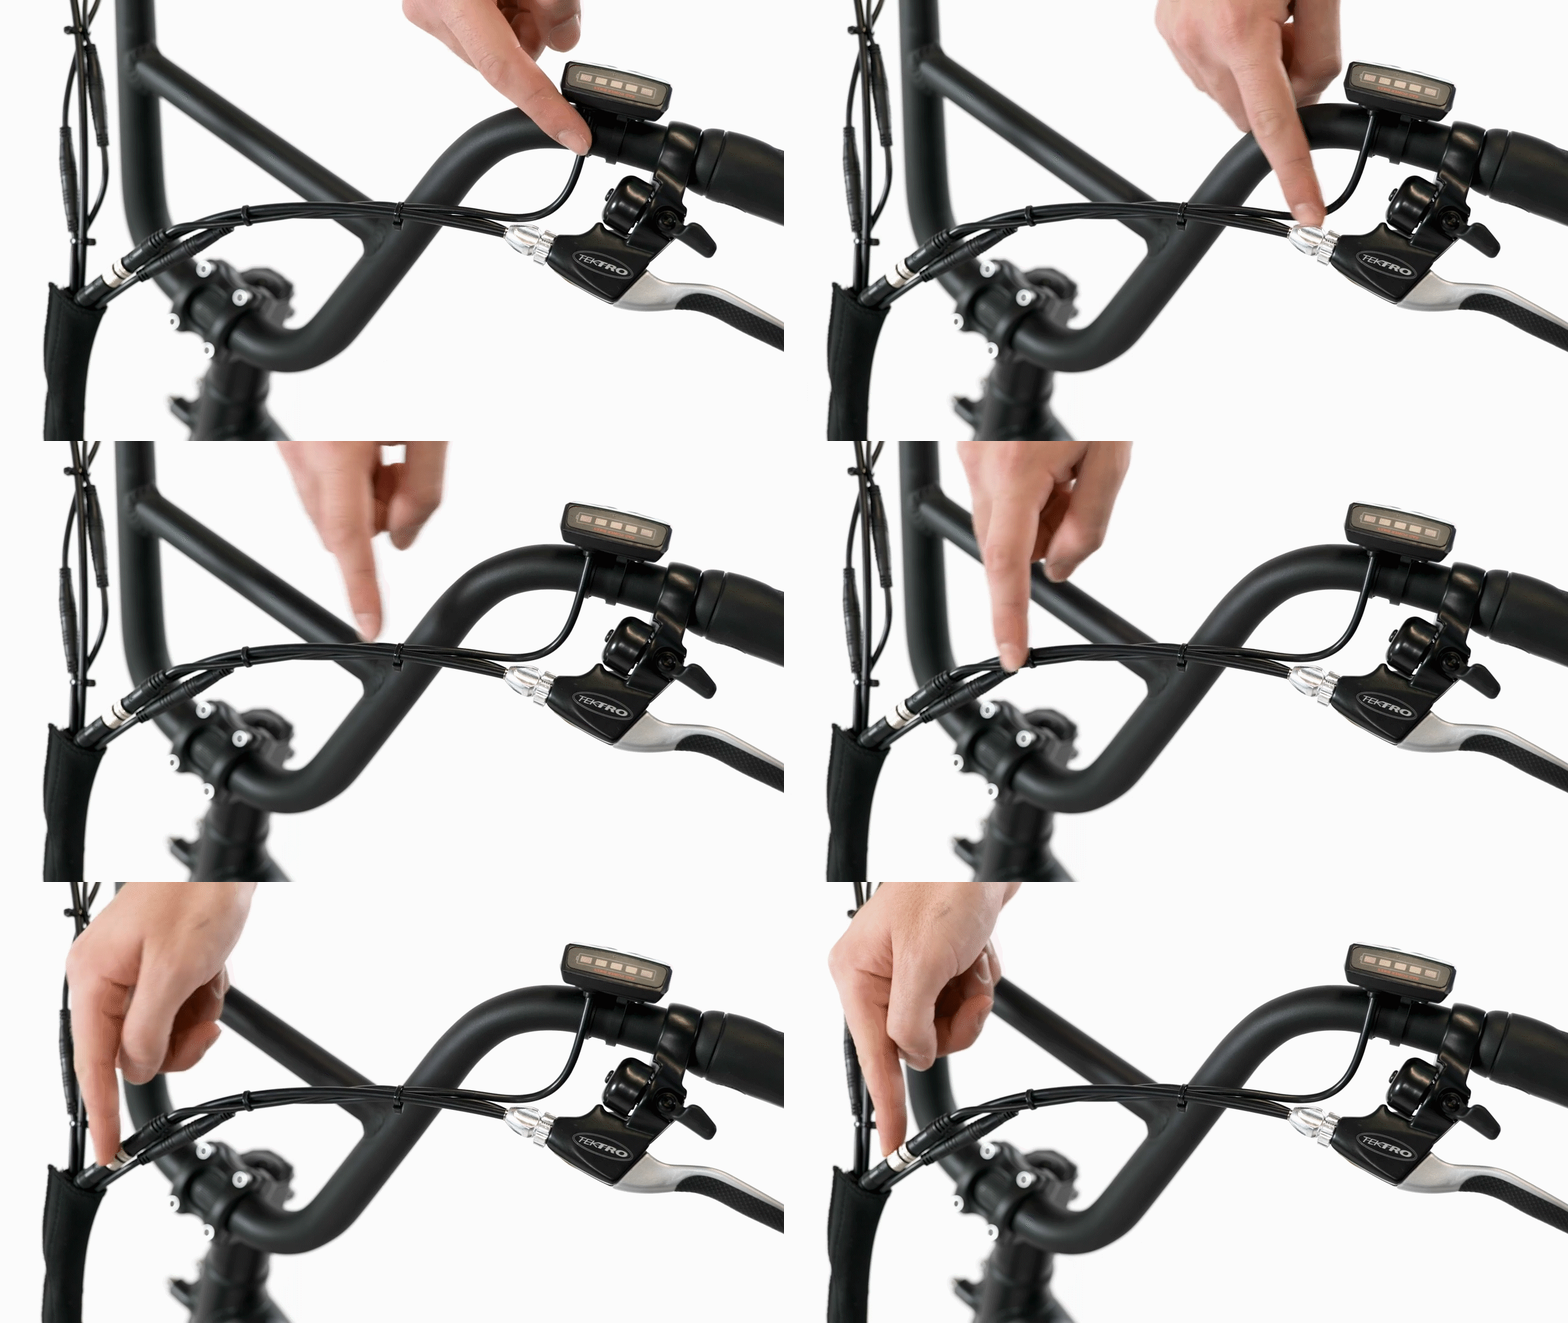
- Locate the display connector. Trace the cable coming out of the display to the silver metal connector.
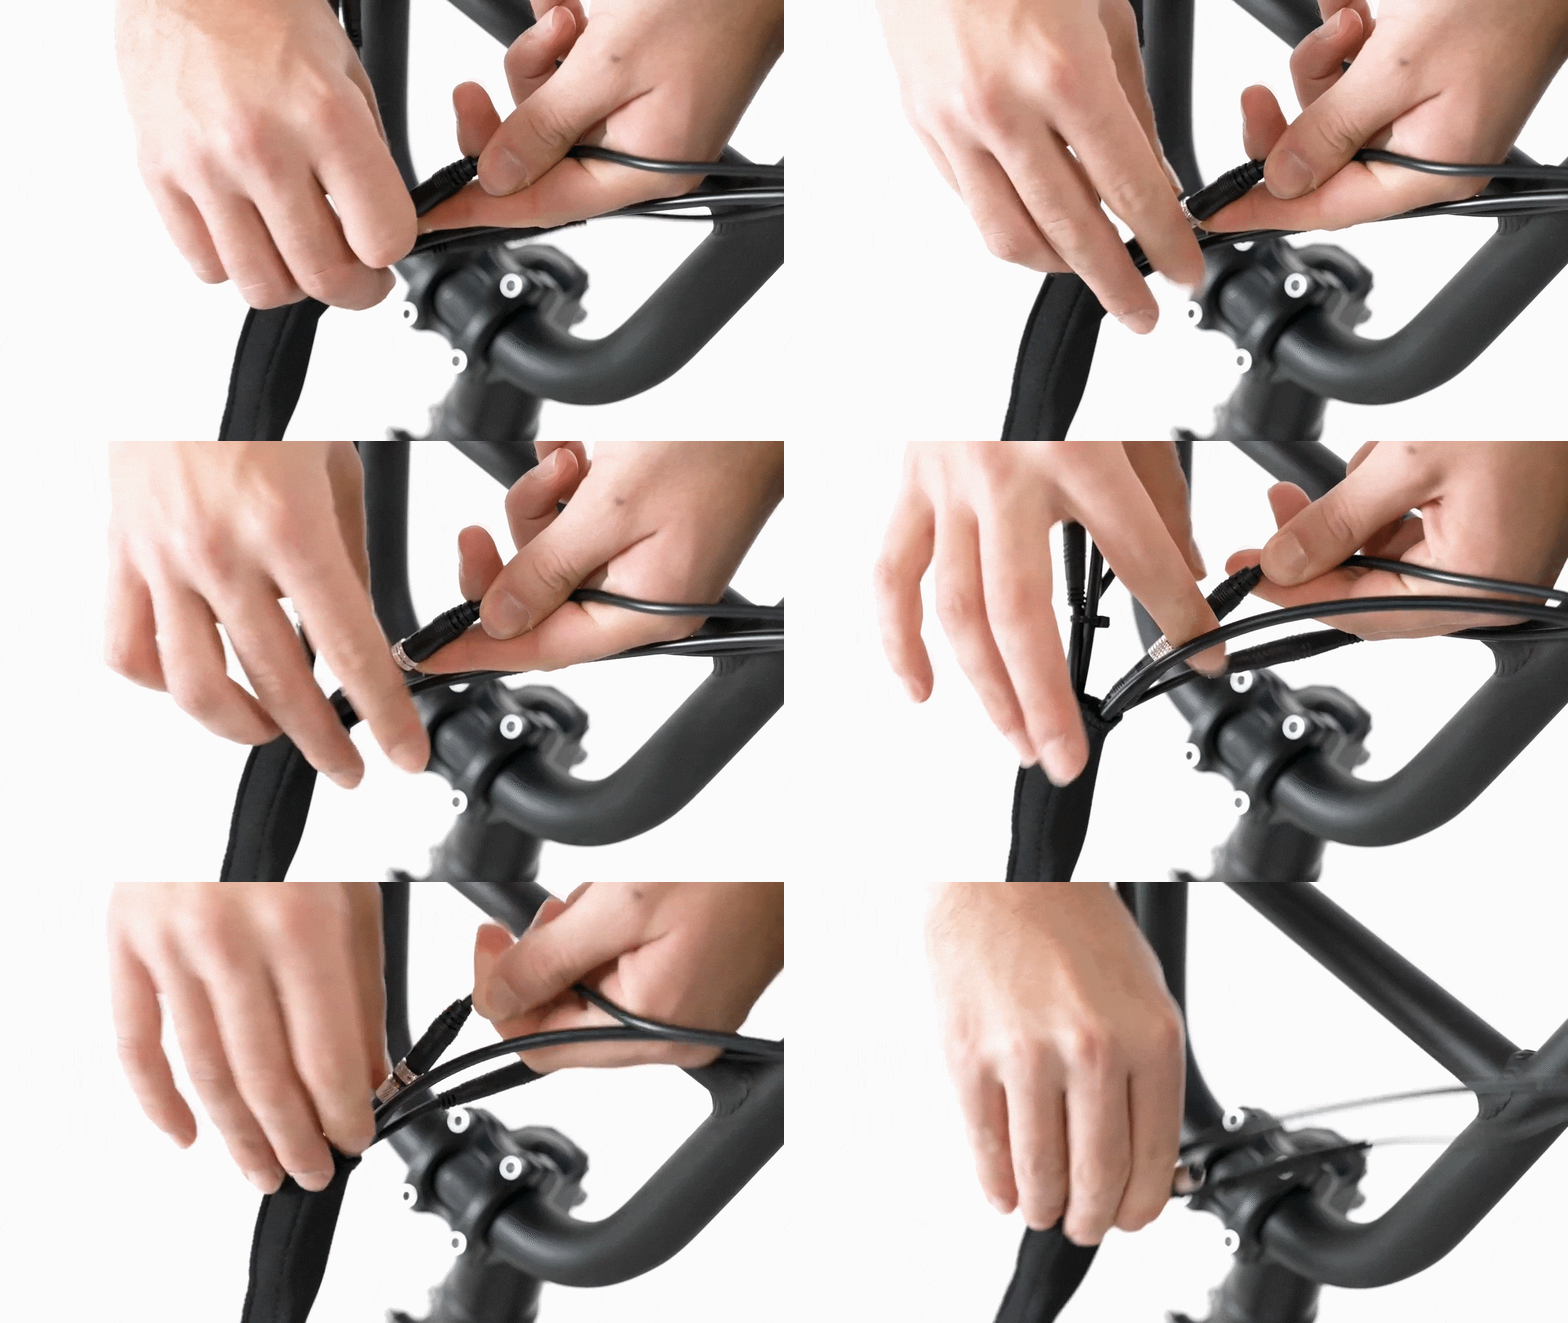
- Unplug the connector. Use flat side cutters to snip the zip tie. Twist each side of the silver metal connector until the threaded portion releases fully and then pull each side of the connector directly apart, without twisting, to unplug.
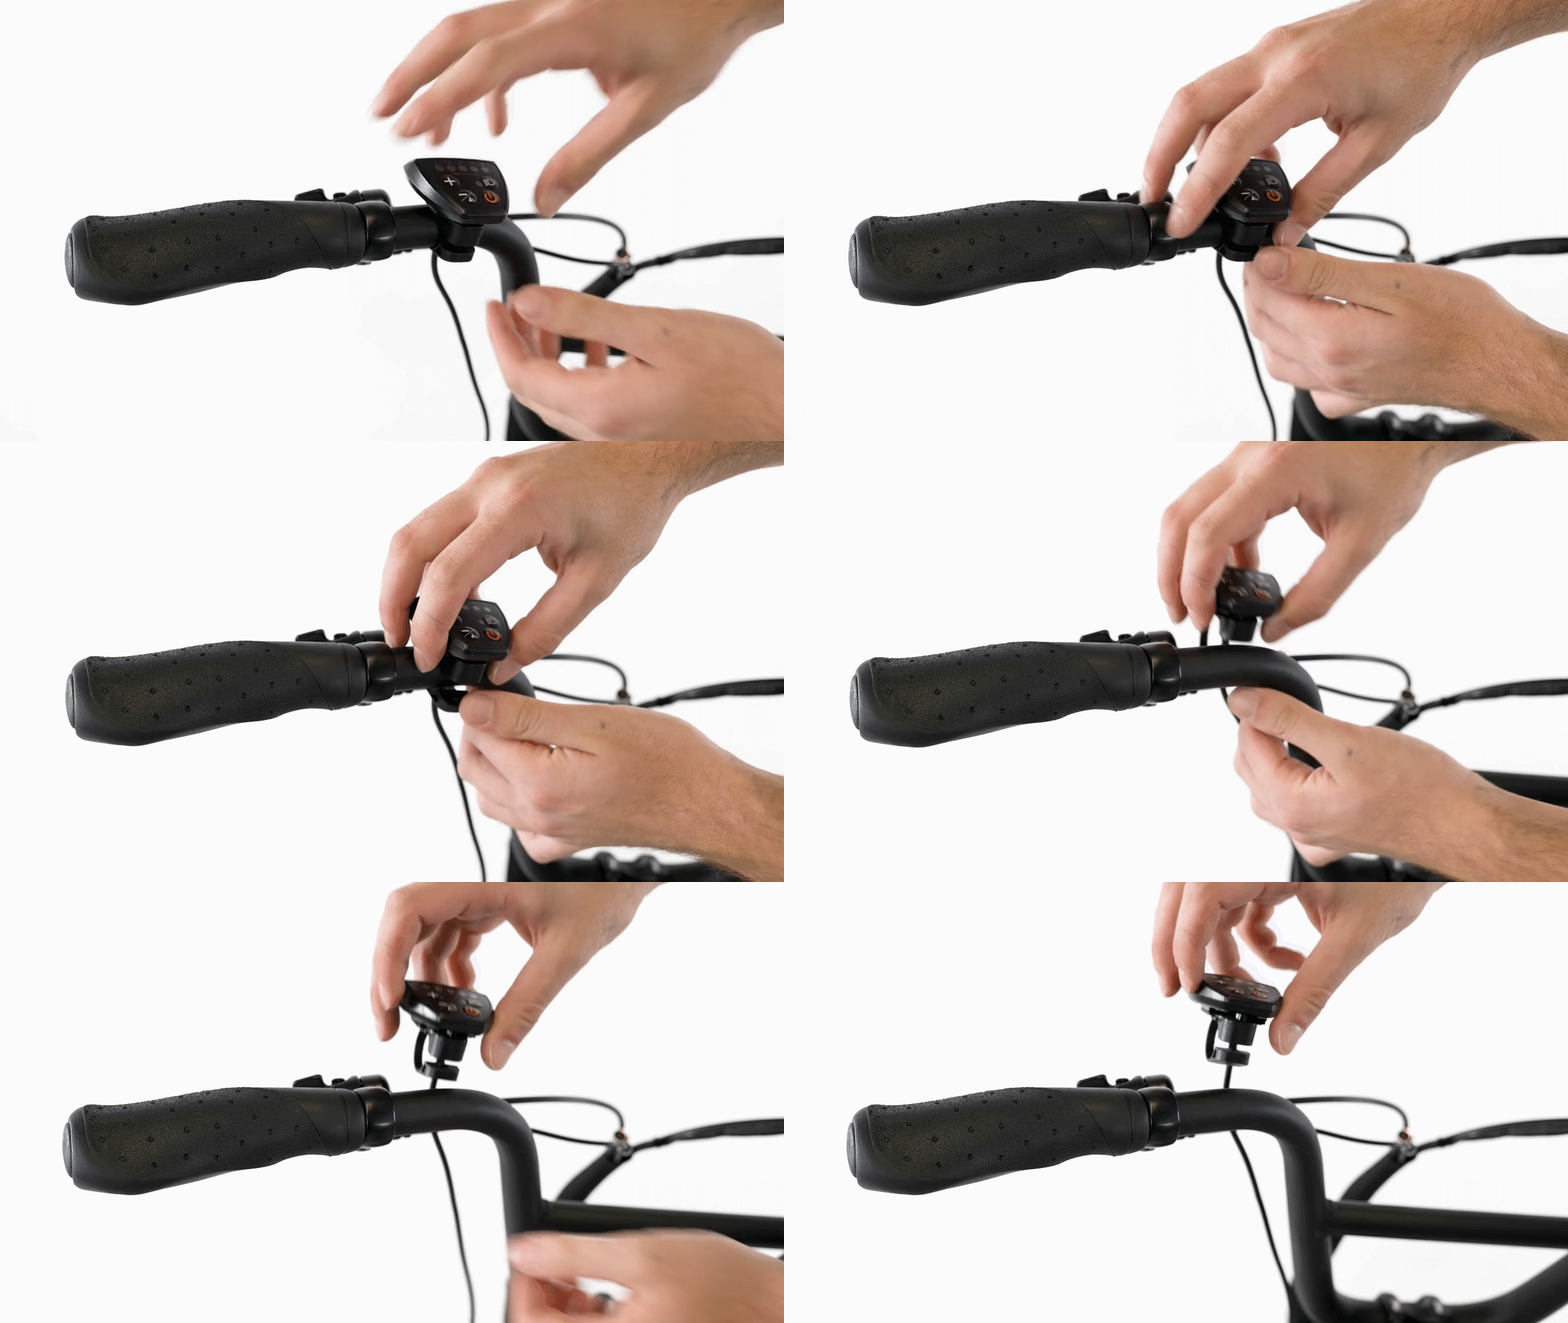
- Remove the display from the handlebar.
- Use a 3 mm Allen wrench to remove the display clamp bolt.
.gif?revision=1)
- Open the display clamp and remove the display from the handlebar. Recycle the display according to local rules.
- Use a 3 mm Allen wrench to remove the display clamp bolt.
- Install the new display.
- Pass the new display clamp over the handlebar.
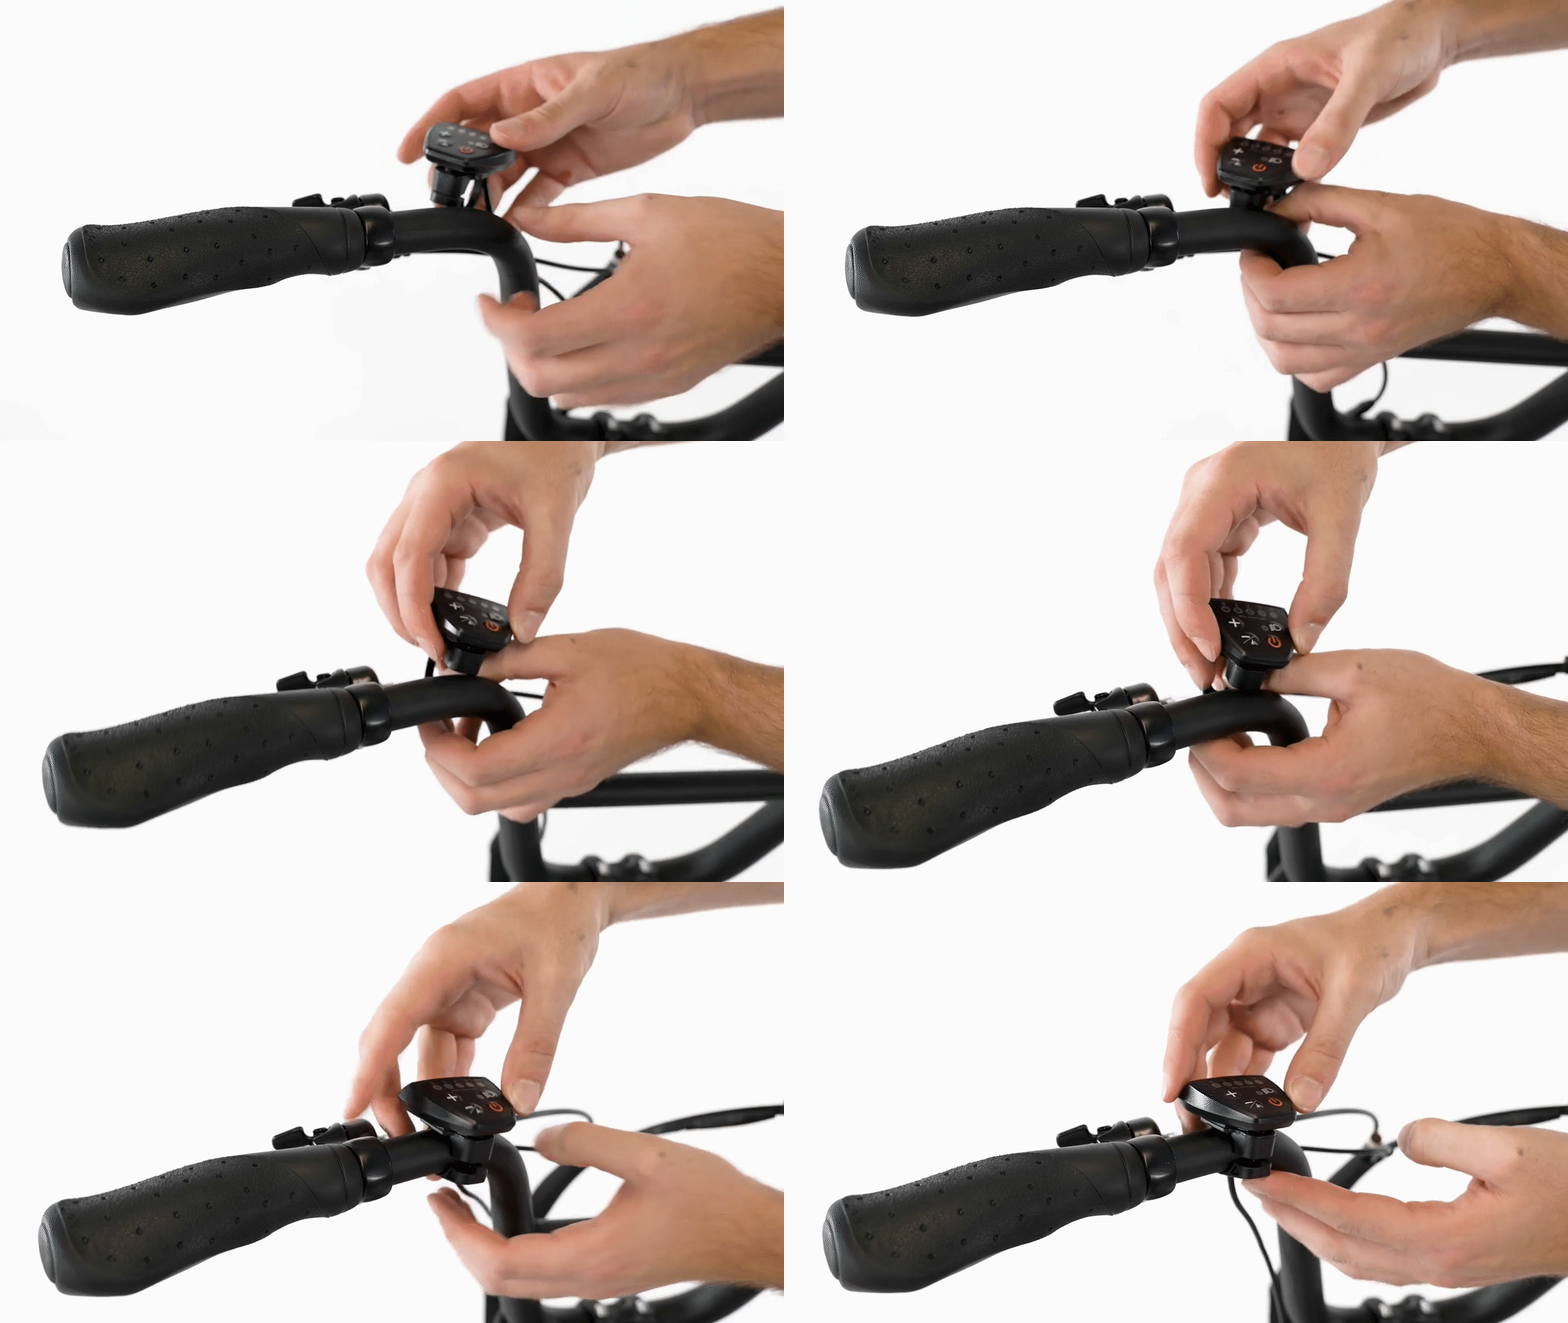
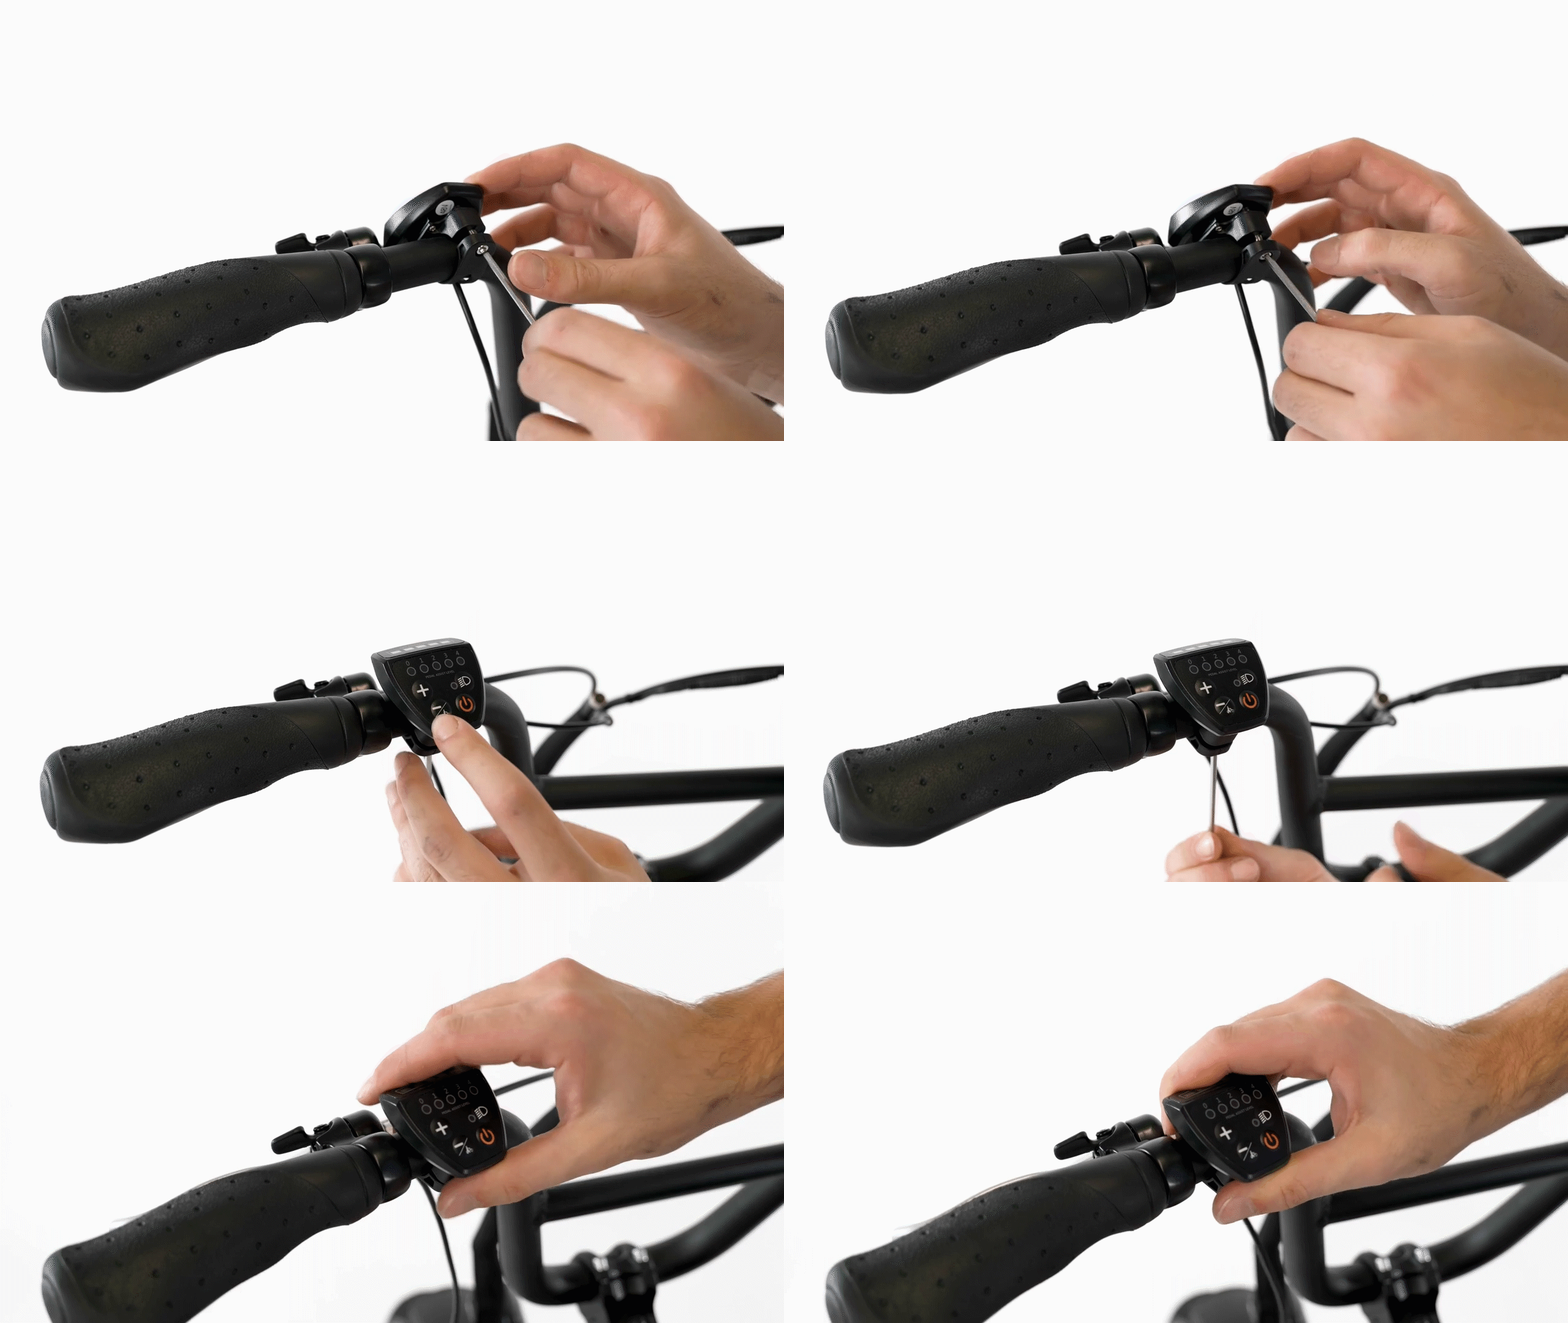
- Thread in the bolt by hand and use a 3 mm Allen wrench to tighten the bolt partway. Adjust the display so it is in the proper position for a rider to use and then tighten the bolt securely. The display must not move once tightened securely.
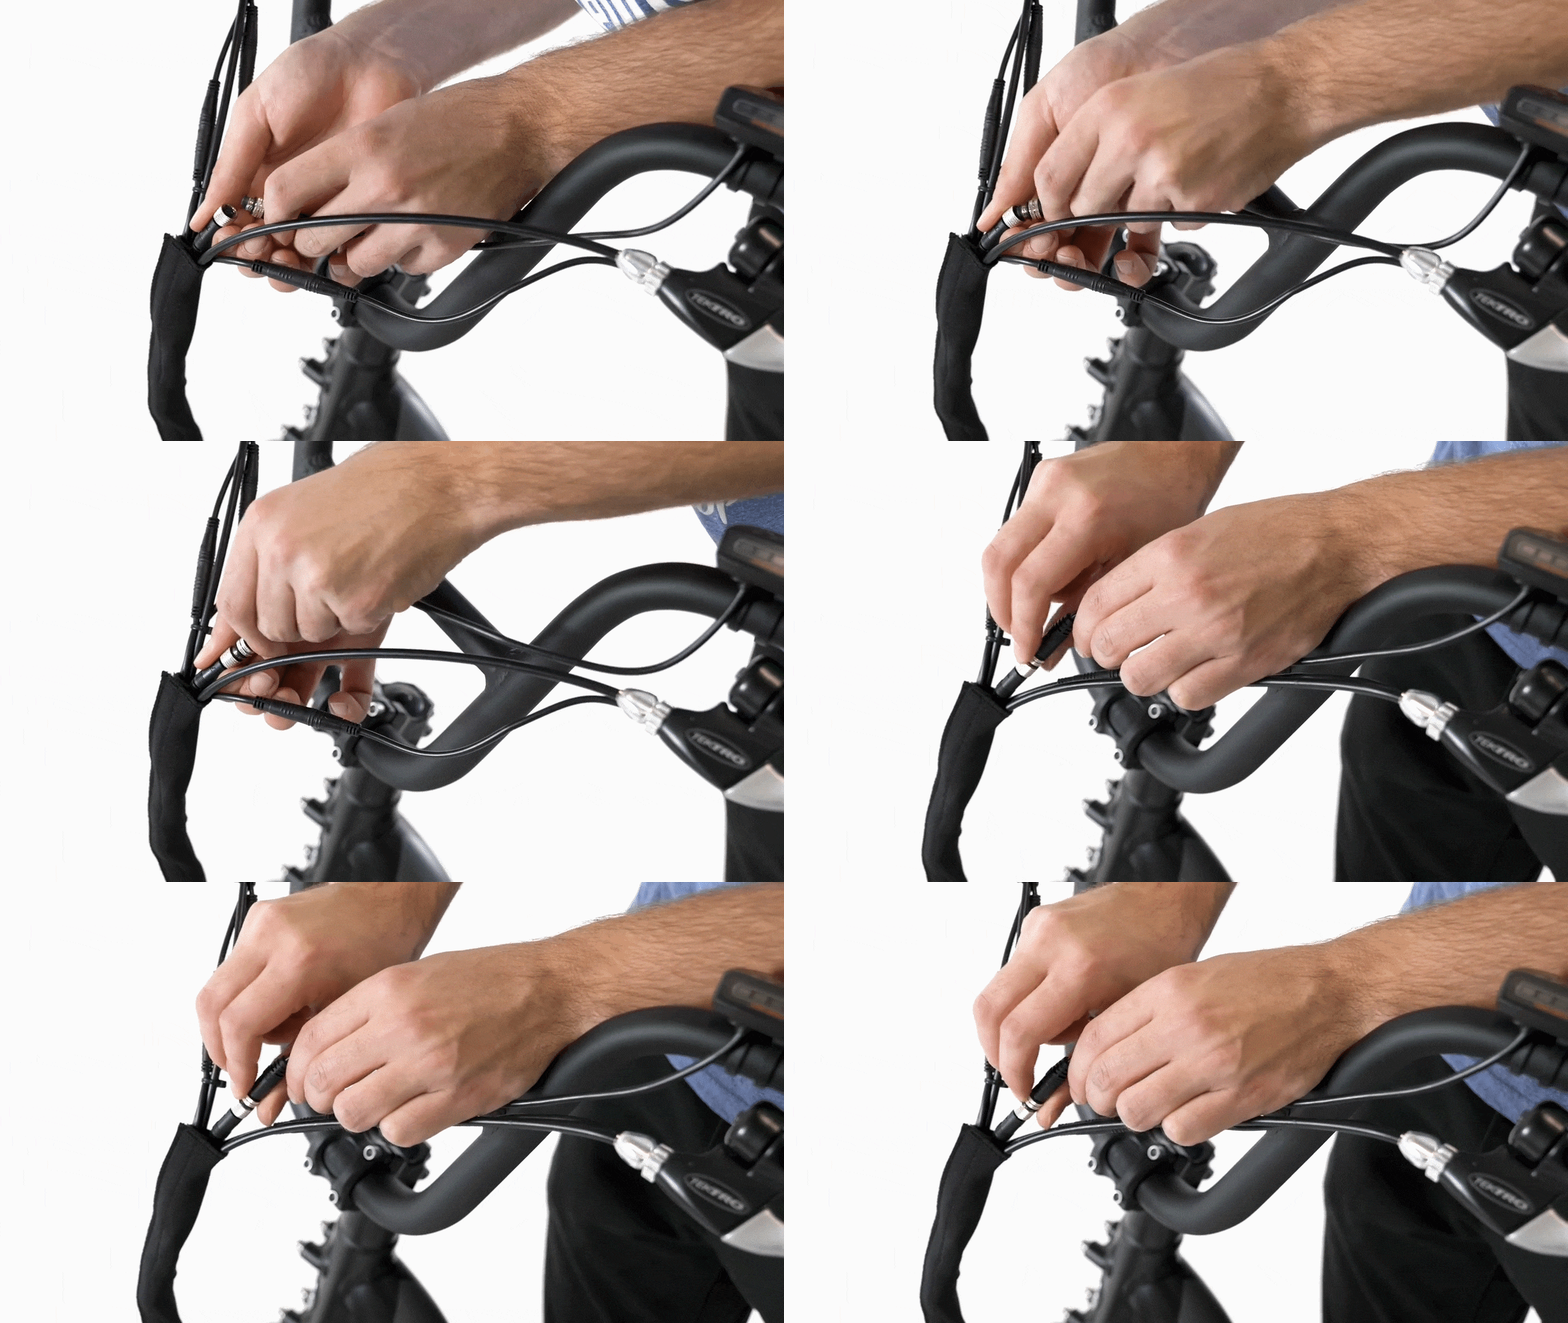
- Plug in the display connector. Line up the internal notch and pins (and external arrows) and press each side of the connector directly together, without twisting, to reconnect. Then twist just the silver metal portion until the connector is fully secure.
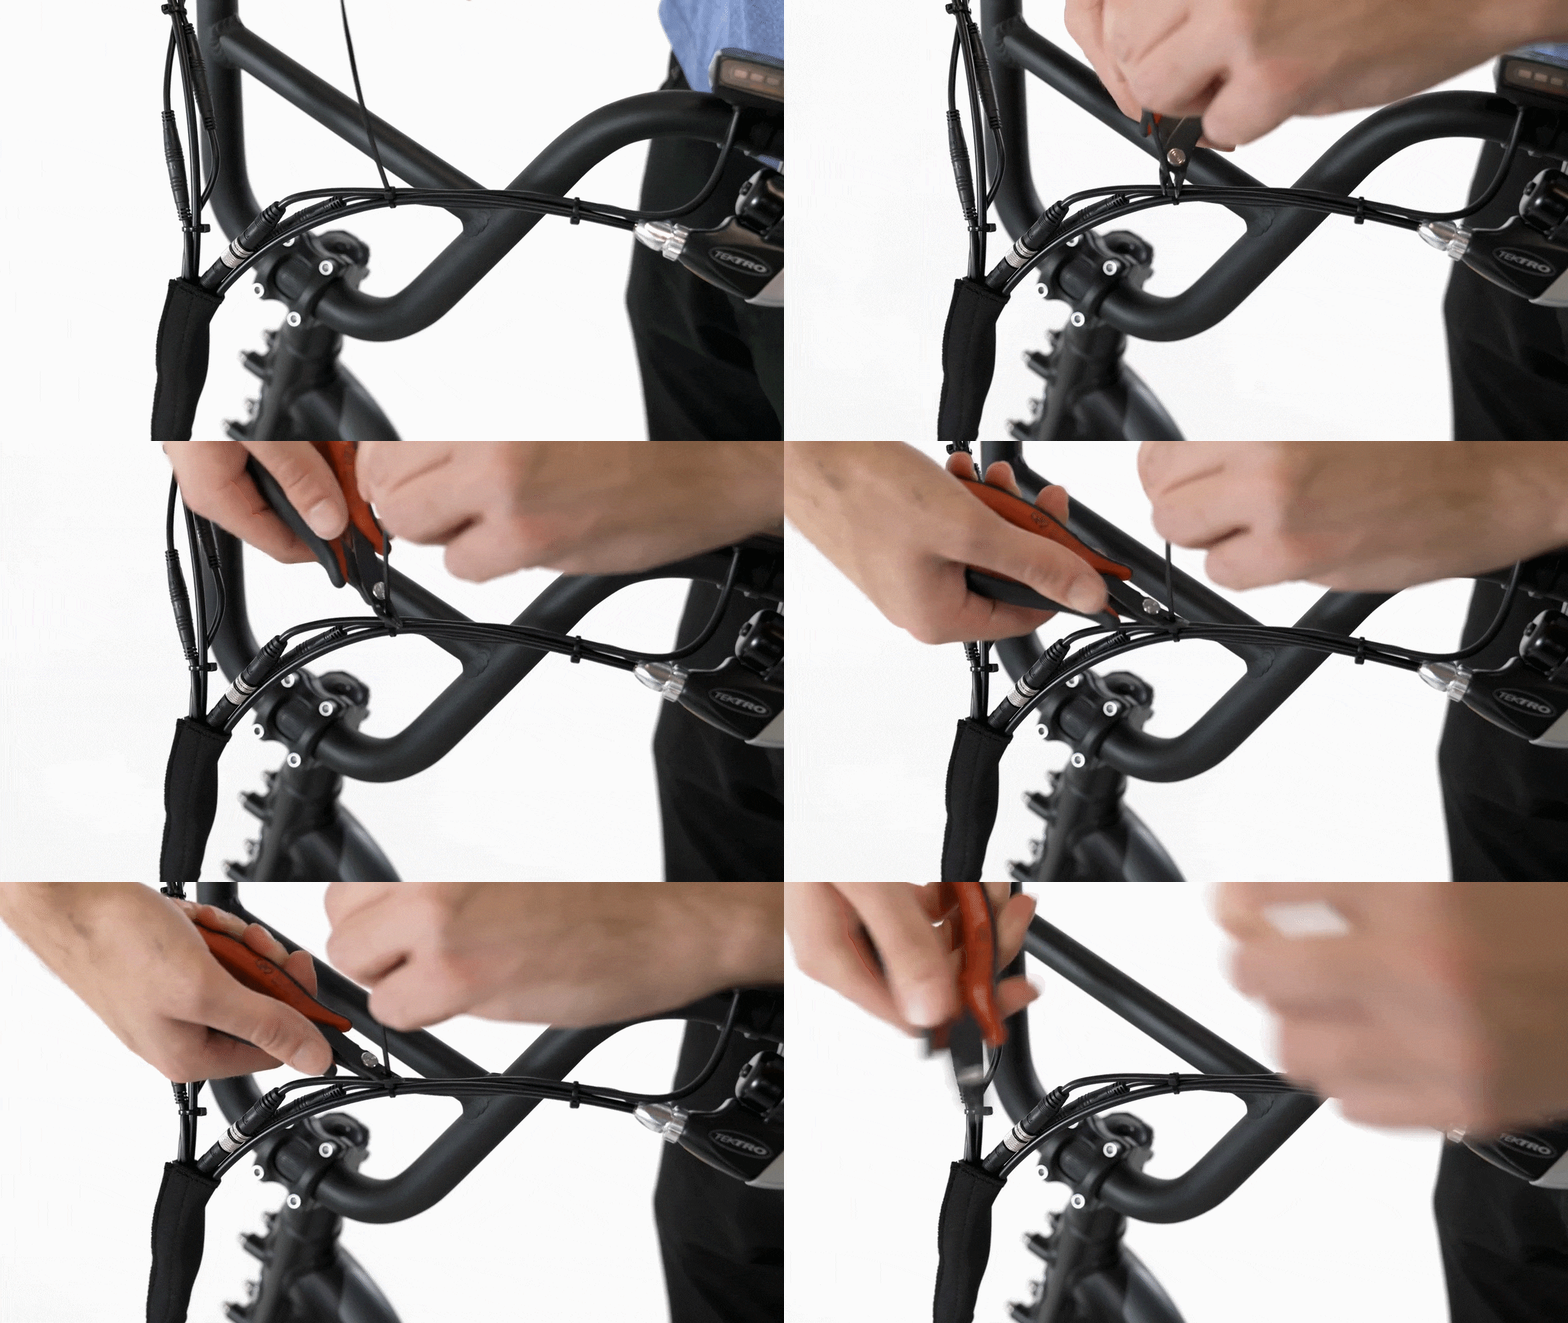
- Replace any snipped zip ties and trim them to be flush and smooth.
- Pass the new display clamp over the handlebar.
- Reinstall the battery and test the bike fully before riding.
