Rad UI Display and Rad UI Remote replacement guide
Follow this guide to replace the Rad UI Display or Rad UI Remote on your ebike in the unlikely event either component becomes damaged or is determined to be non-functional by Rad Power Bikes Product Support. This article is relevant only for ebikes that come with the Rad UI Display and Rad UI Remote (e.g., the RadRover 6 Plus and RadCity 5 Plus).
Tools needed:
- 3 mm Allen wrench
- Flat-side cutters
- A few zip ties
- The replacement Rad UI Display or Rad UI Remote from Rad Power Bikes
Hardware may vary (bolt head style) and/or require different tools. Use the appropriate head size and type of tool for your bolts. Ensure the tool is pressed firmly into the bolt head and turn slowly to prevent stripping.
Replace the Rad UI Display
Remove the Old Rad UI Display
- Start by getting the bike ready for maintenance. Turn off the bike, remove the battery, and press the power button to discharge remaining power.
- Unplug the Rad UI Display connector. Trace the cable from the back of the Rad UI Display to the wiring harness or jumper cable.
- If your bike has a jumper cable, the Rad UI Display will connect to the jumper cable. (B, pictured below):
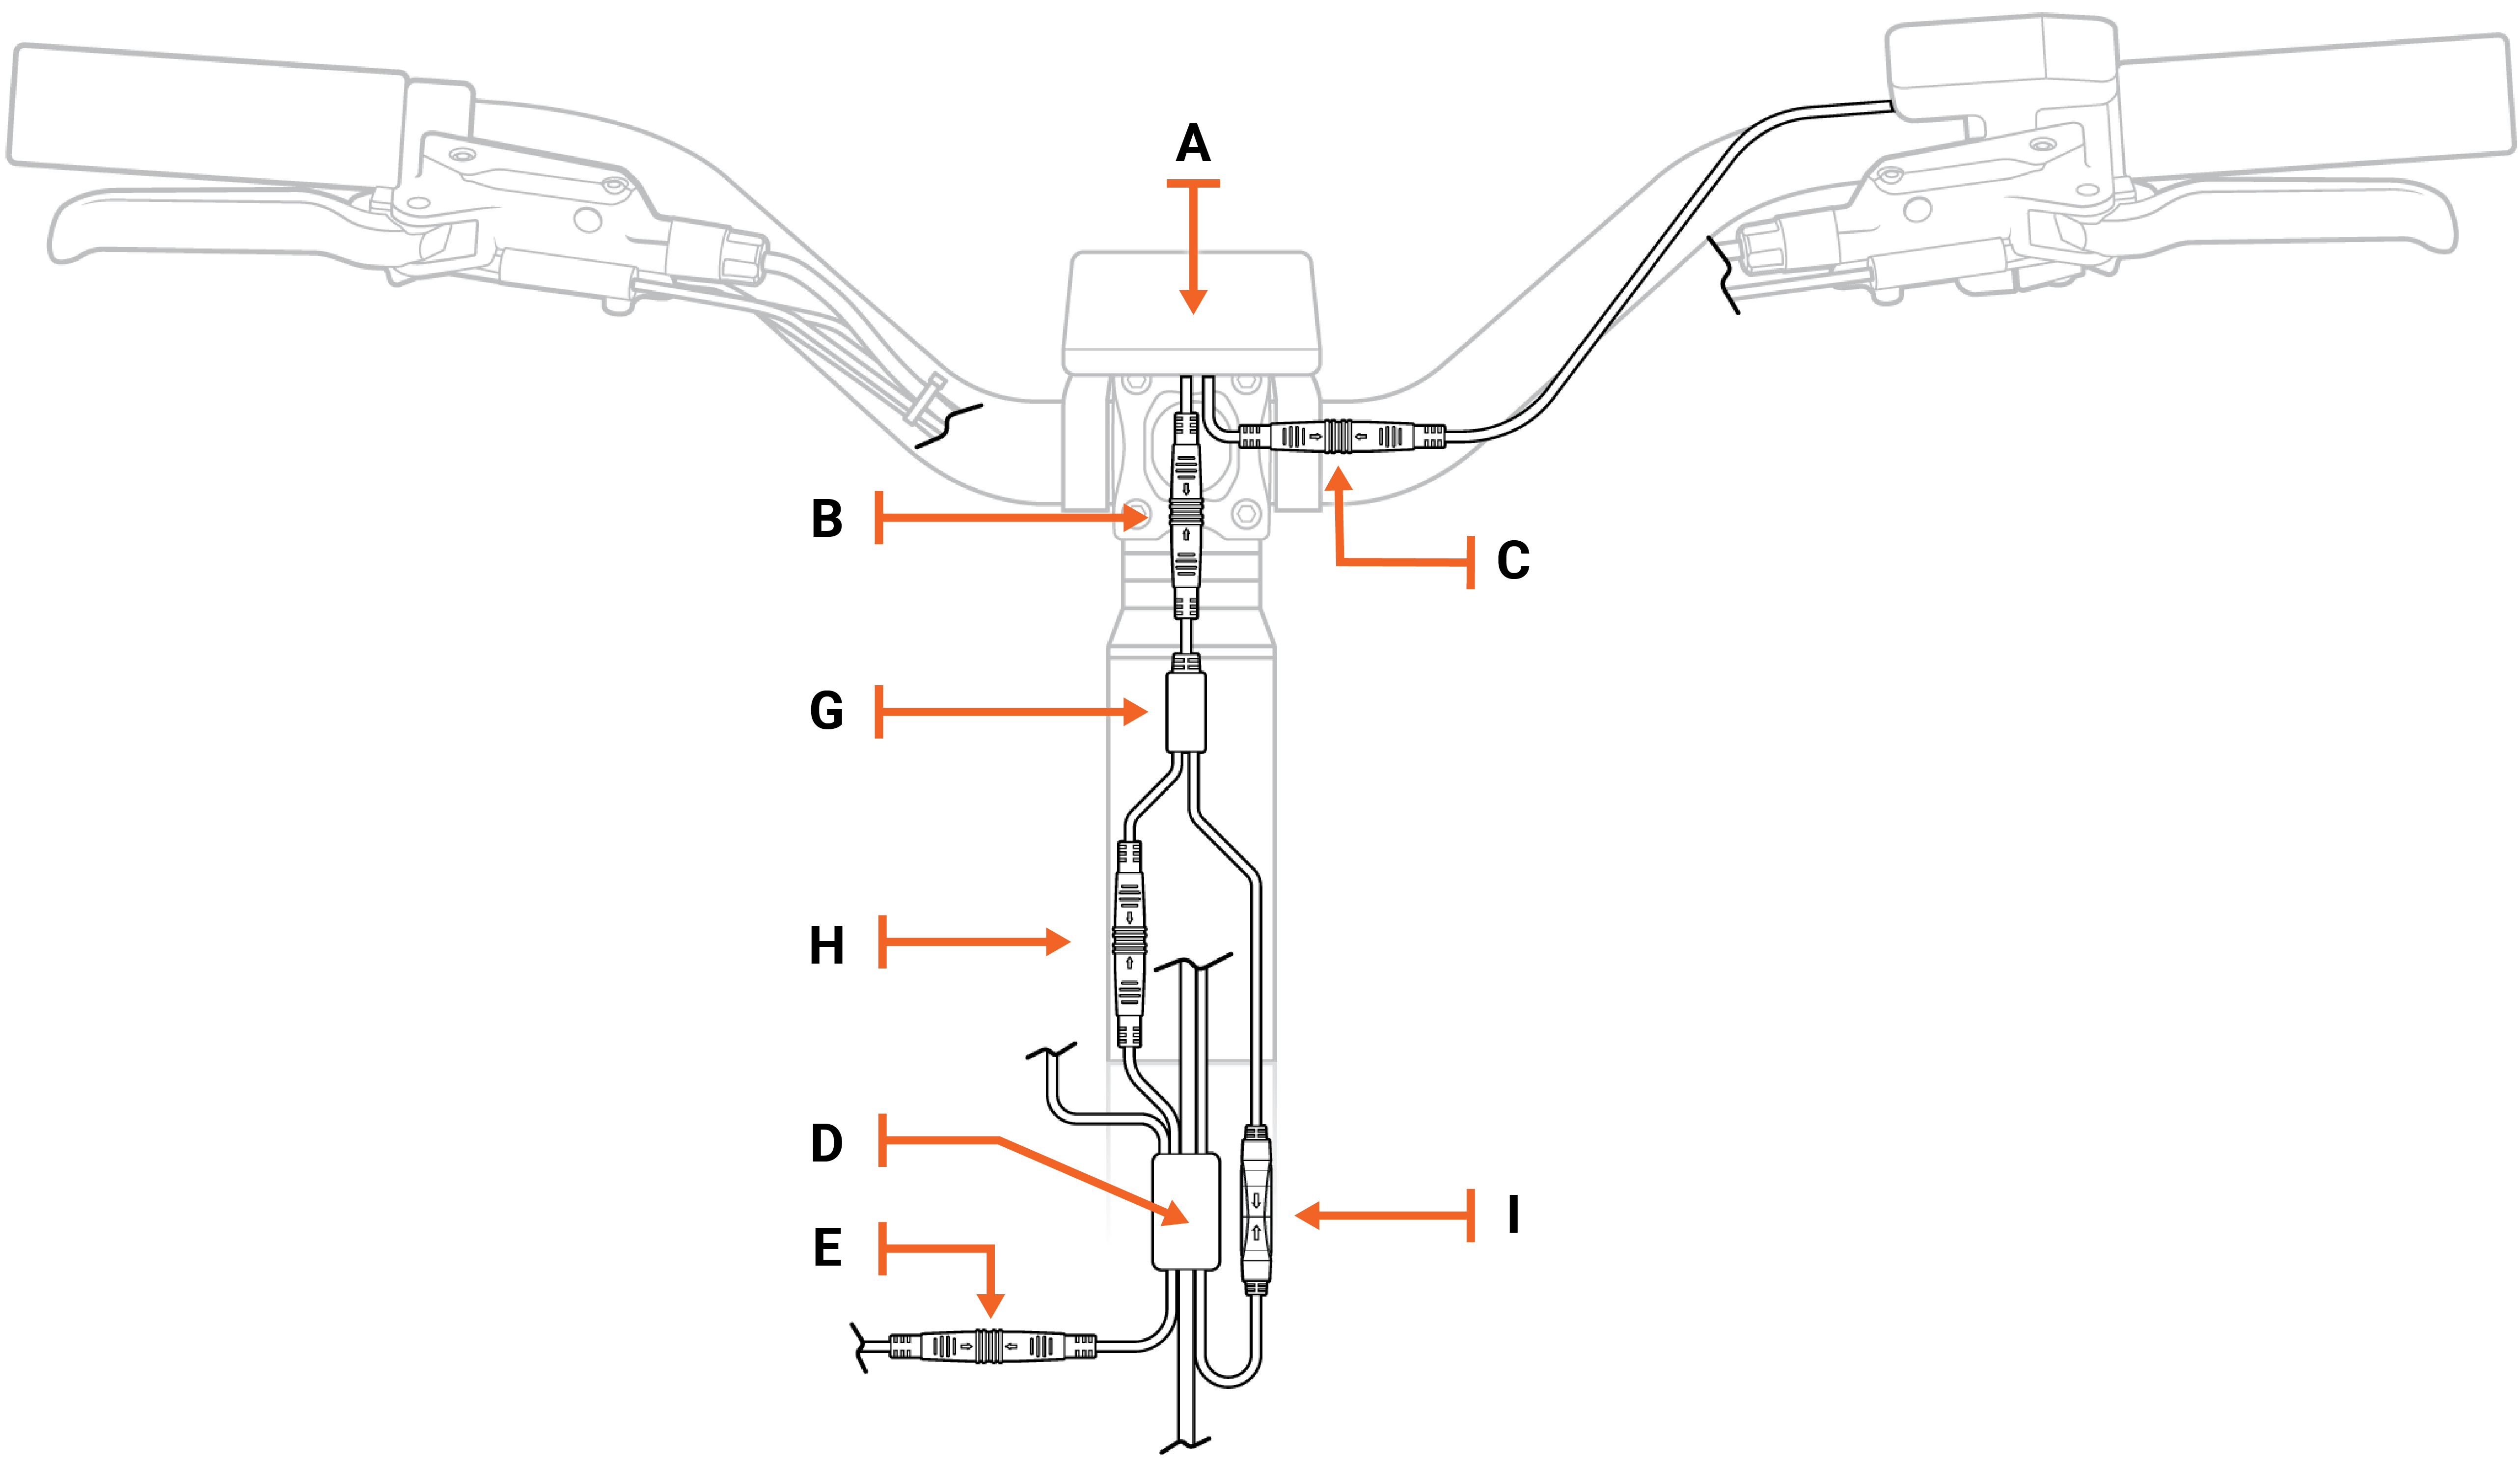
- If your bike does not have a jumper cable, the Rad UI Display will connect to the wiring harness. (B, pictured below):
- If your bike has a jumper cable, the Rad UI Display will connect to the jumper cable. (B, pictured below):
Disconnect the Rad UI Display from the connected cable by pulling both ends apart without twisting.
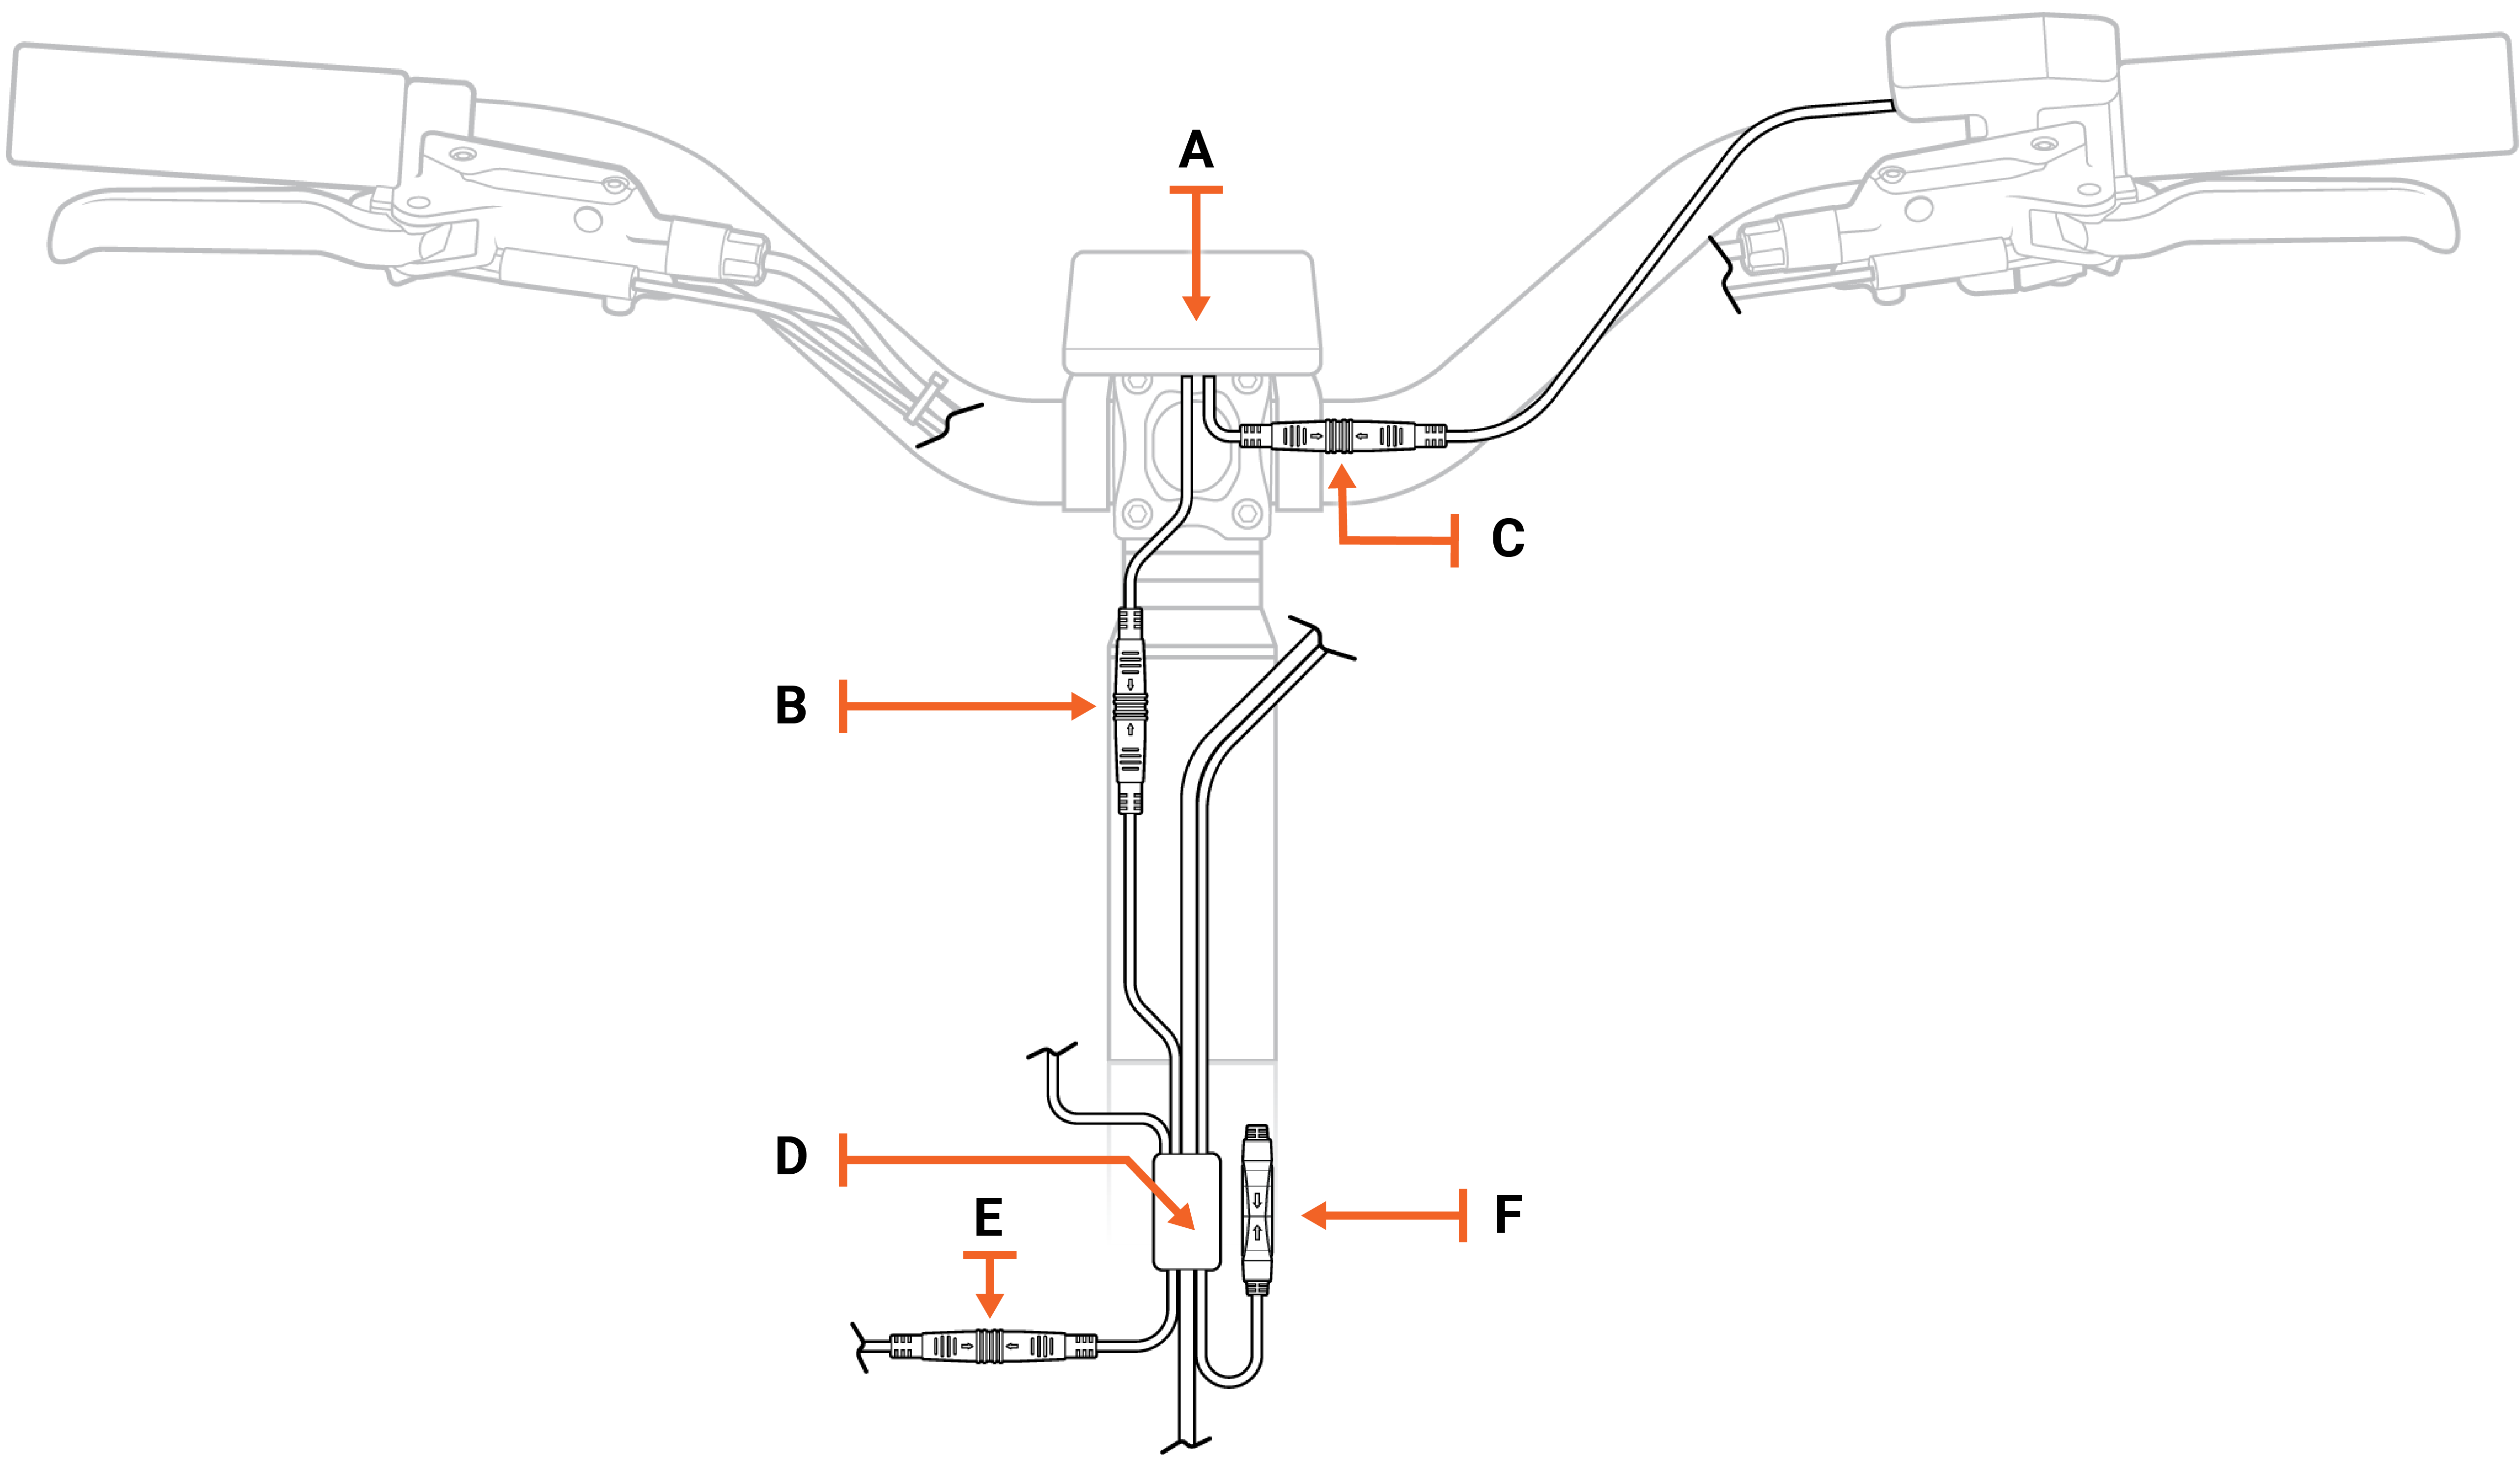
- Unplug the Rad UI Remote. Locate the connector by tracing the cable from the back of the Rad UI Remote to the Rad UI Display. (C, pictured below):

- Pull both ends of the connector apart, without twisting, to disconnect.
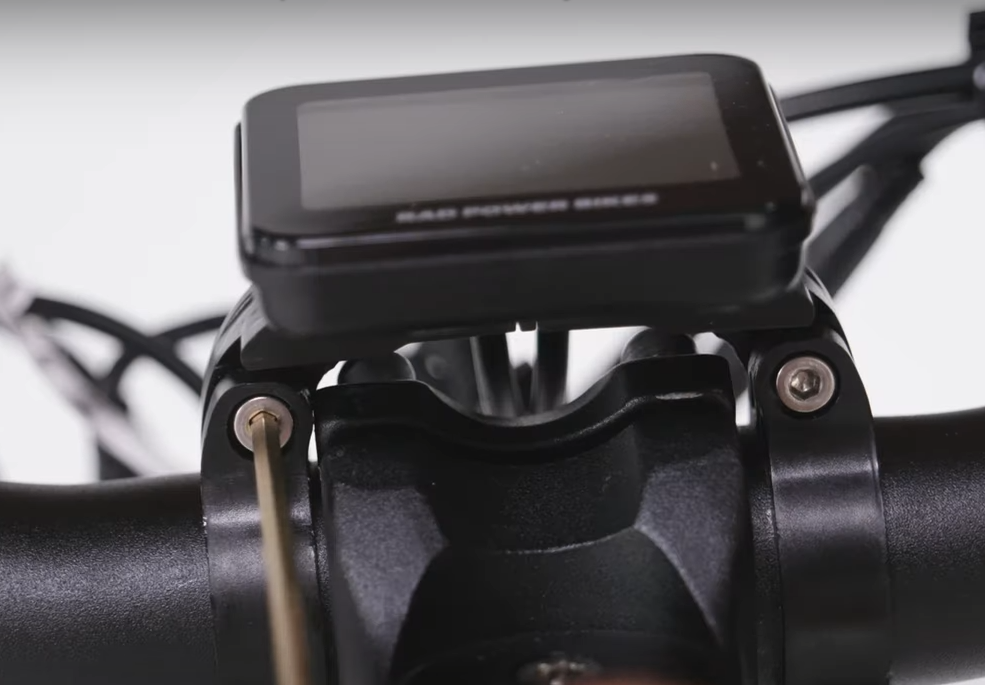
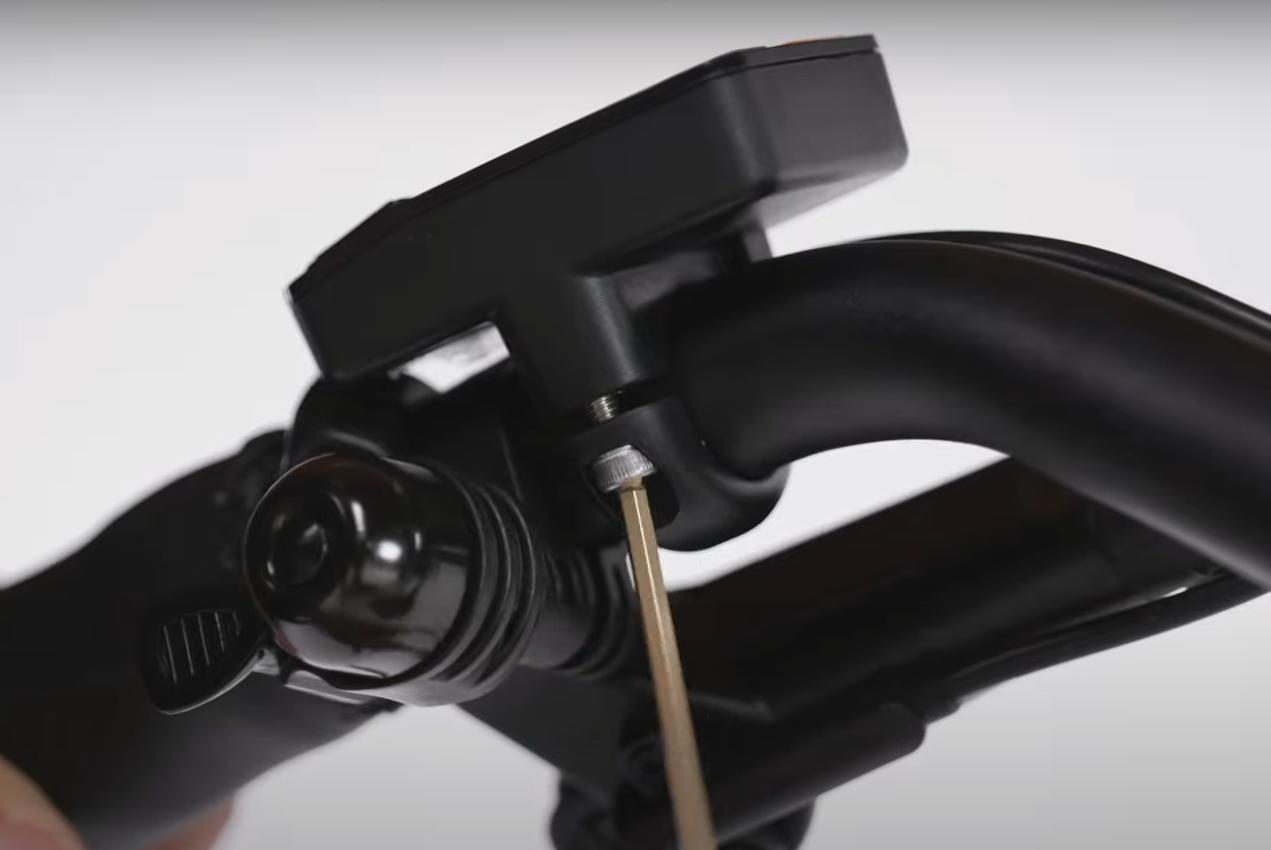
- Remove the Rad UI Display. Use a 3 mm Allen wrench to loosen the Rad UI Display clamp bolts and set the bolts aside. Remove the clamp by passing it over the handlebar, and recycle the part according to local rules.
Install the New Rad UI Display
- Install the Rad UI Display clamp. Pass the clamp onto the handlebar and thread in the bolts by hand. Use a 3 mm Allen wrench to tighten the bolts. Torque to 3 Nm.
- Connect the Rad UI Display. Plug the Rad UI Display connector into the wiring harness (or jumper cable). Line up the internal notches and pins, and external arrows, and press directly together, without twisting.
- Connect the Rad UI Remote. Line up the internal notches and pins, and external arrows, and press directly together, without twisting.
- Replace zip ties. Use flat-side cutters to snip off zip tie excess. Ensure the cut is flush and smooth, with no sharp point.
- Reinstall the battery, test the bike fully, and ride Rad!
Replace the Rad UI Remote
Remove the Old Rad UI Remote
- Start by getting the bike ready for maintenance. Turn off the bike, remove the battery, and press the power button to discharge remaining power.
- Unplug the Rad UI Remote. Trace the cable from the back of the Rad UI Remote (C, pictured below):

- Disconnect the Rad UI Remote from the Rad UI Display by pulling both ends apart without twisting.
- Remove the Rad UI Remote. Use a 3 mm Allen wrench to loosen the Rad UI Remote clamp bolts and set the bolts aside. Remove the clamp by passing it over the handlebar, and recycle the part according to local rules.
Install the New Rad UI Remote
- Install the Rad UI Remote clamp. Pass the clamp onto the handlebar and thread in the bolts by hand. Use a 3 mm Allen wrench to tighten the bolts. Torque to 3 Nm.
- Connect the Rad UI Remote. Plug the Rad UI Remote connector into the Rad UI Display. Line up the internal notches and pins, and external arrows, and press directly together, without twisting.
- Replace zip ties. Use flat-side cutters to snip off zip tie excess. Ensure the cut is flush and smooth, with no sharp point.
- Reinstall the battery, test the bike fully, and ride Rad!