Reinstall the battery, test the bike fully, and have your work inspected by a certified, reputable bike mechanic.
2016-2018 RadMini controller replacement guide
If Rad Power Bikes customer support determined you need a replacement controller, watch the following video or use the steps below to perform this procedure.
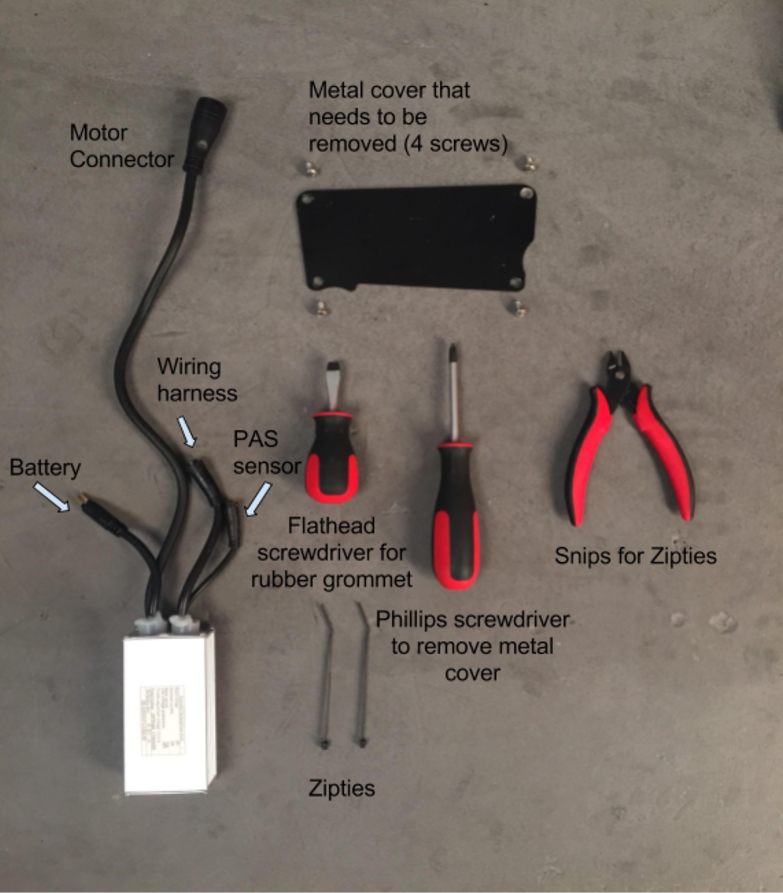
- Gather the tools you will need and familiarize yourself with this controller diagram:
- Power off the bike. Ensure the bike is in the off position and use the key to remove the battery. Once removed, press and hold the “MODE” button on the LCD Display Remote until the display remains off for about two seconds (it may flash on briefly). This ensures the power is fully discharged from the bike and it is safe to work on.
-
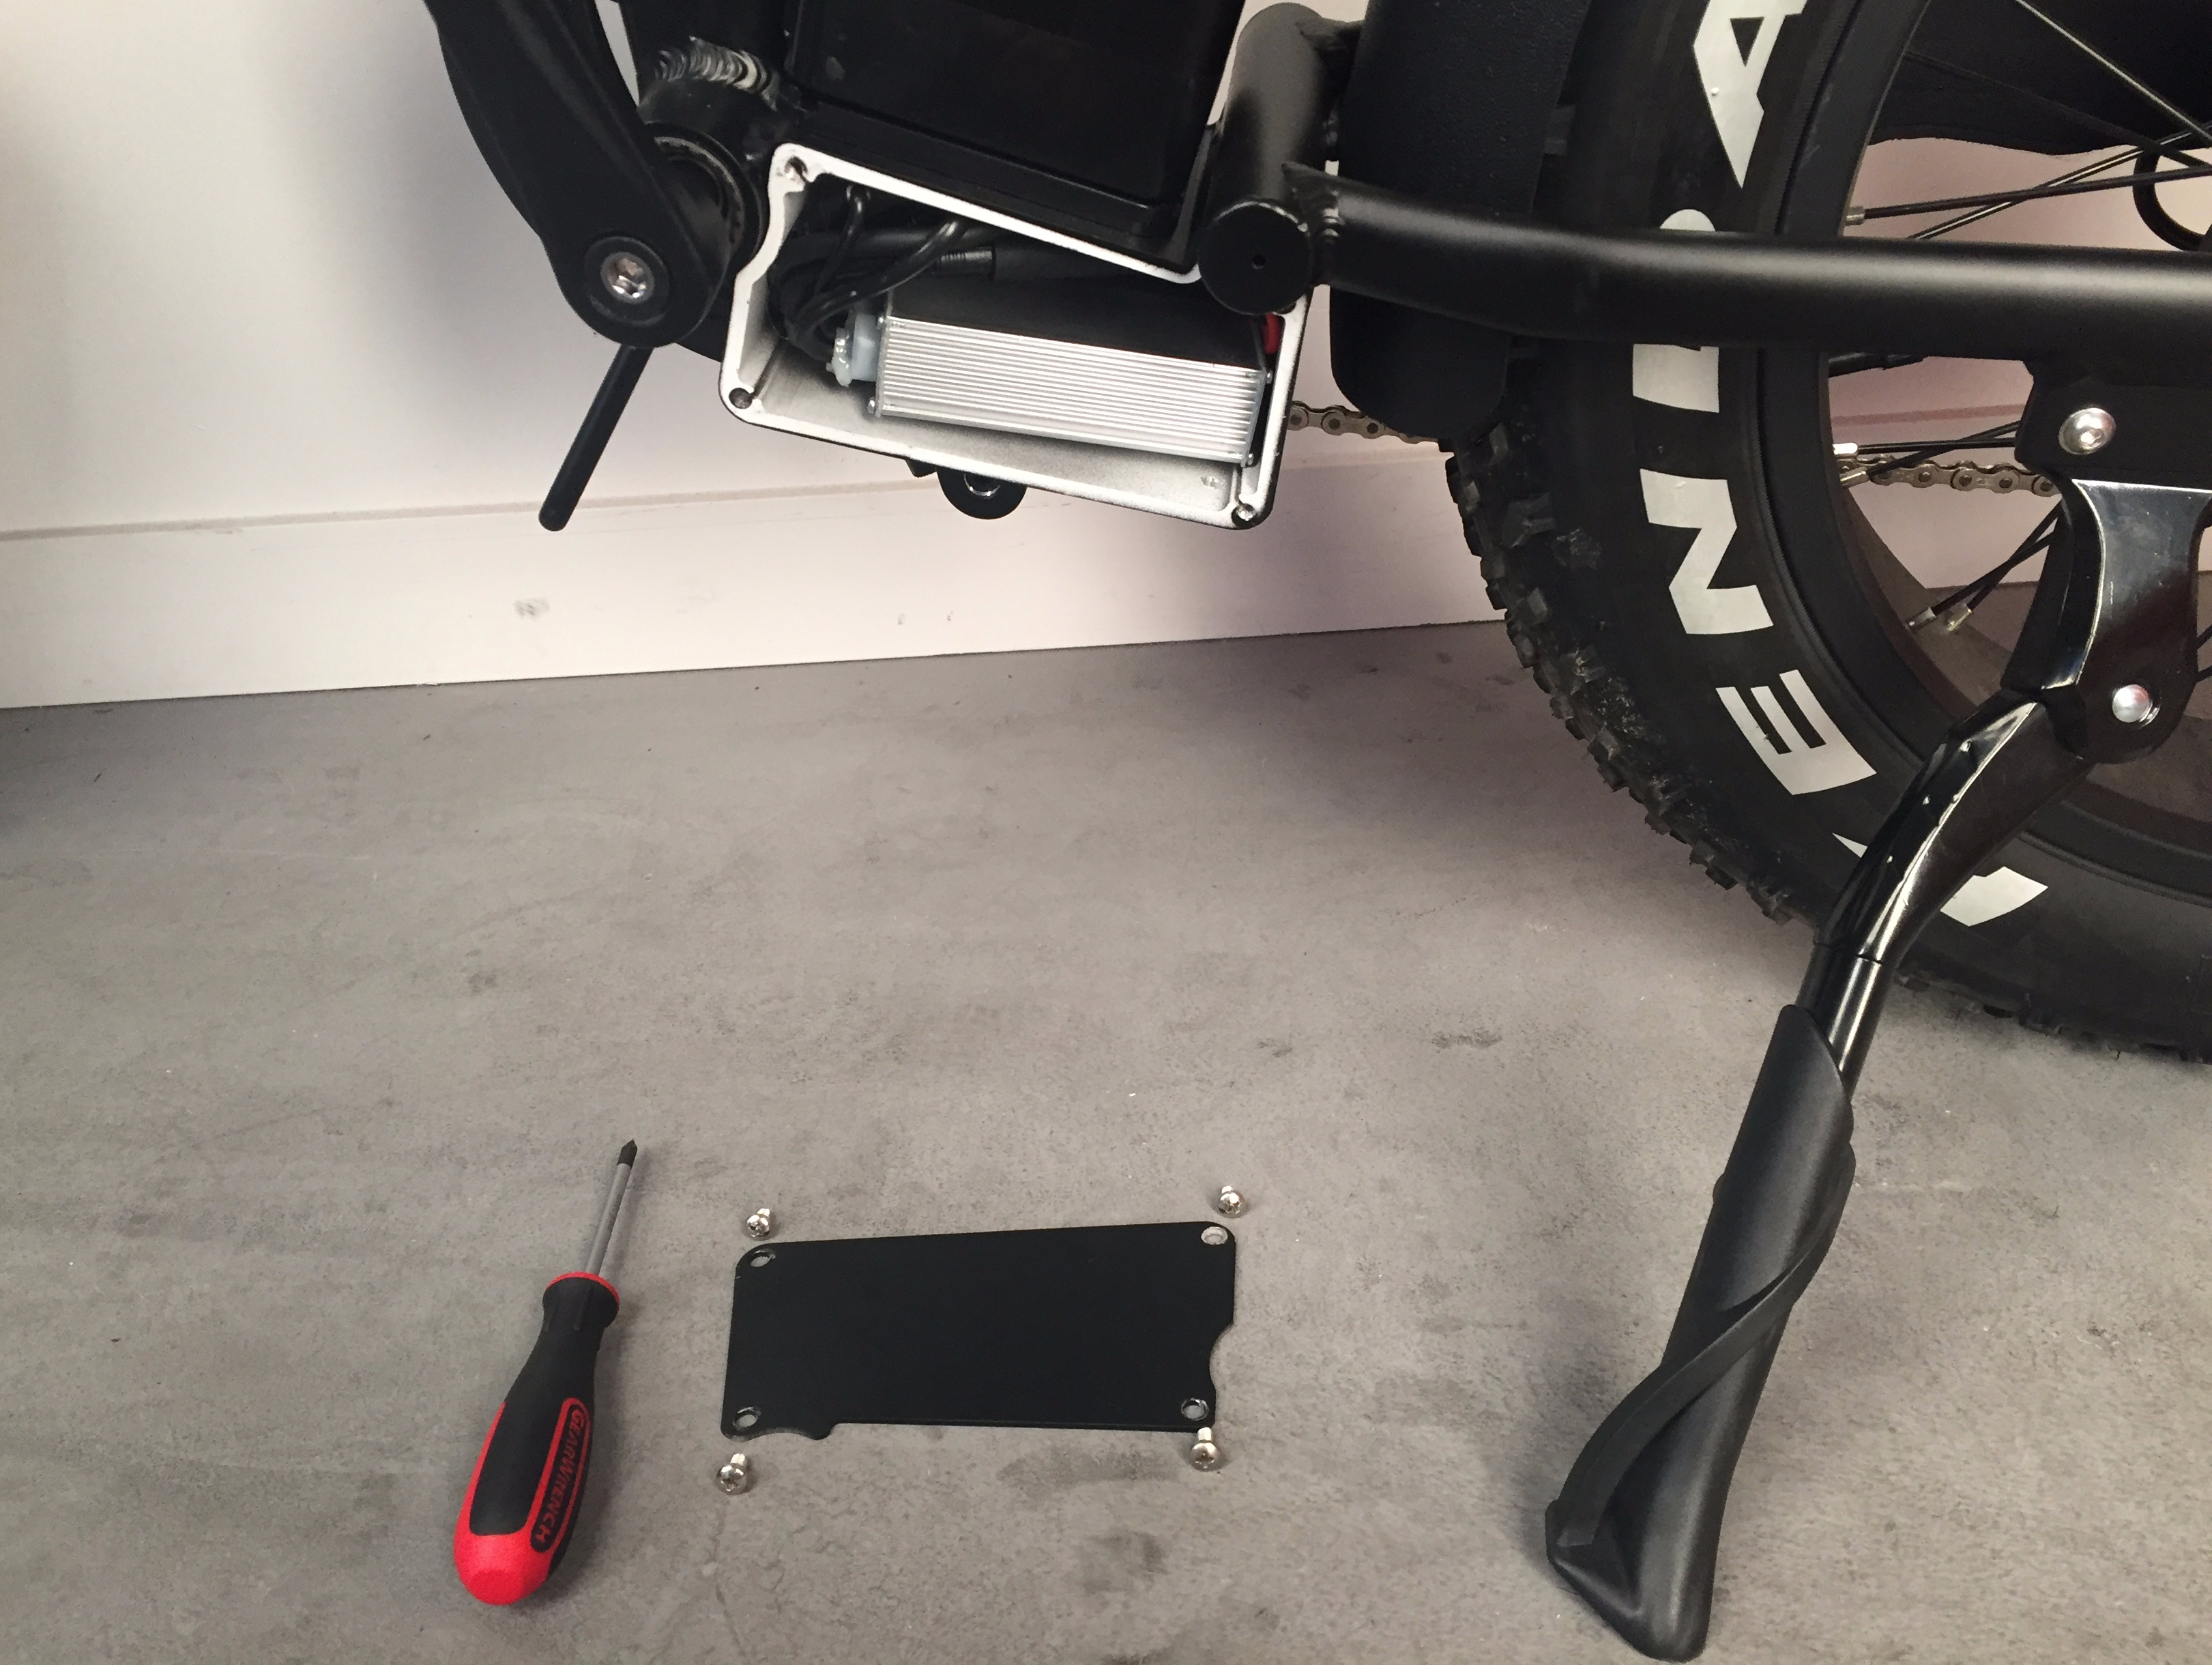
The controller for the 2016-2018 RadMini is located behind a metal plate held by four screws near the bottom of the bike. For model year 2016-2018 RadMinis, use a Phillips head screwdriver to remove the screws and the plate to access the controller.
-
Disconnect the three connectors inside the controller housing. Locate the following connectors:
- Wiring harness
- PAS sensor
- Battery connector
Pull the connectors directly apart without twisting to unseat the connectors.

- Unplug the motor connector. Locate the motor connector on the chainstay, about six inches away from the motor, and carefully snip the zip ties holding the motor cable to the bike frame. Holding the connector housing, pull directly apart without twisting to disconnect.

- Move the motor connector into the controller housing. Use a flathead screwdriver to carefully unseat the rubber grommet on the side of the connector housing facing the rear wheel. Use caution to avoid damaging the paint, frame, or cables.
Pull the rubber grommet over the motor connector, and pull the motor connector through the cable opening in the controller housing box to remove the old controller. You may also need to loosen the derailleur housing from the cable guide and push it through the opening to provide more clearance for the motor connector to fit through.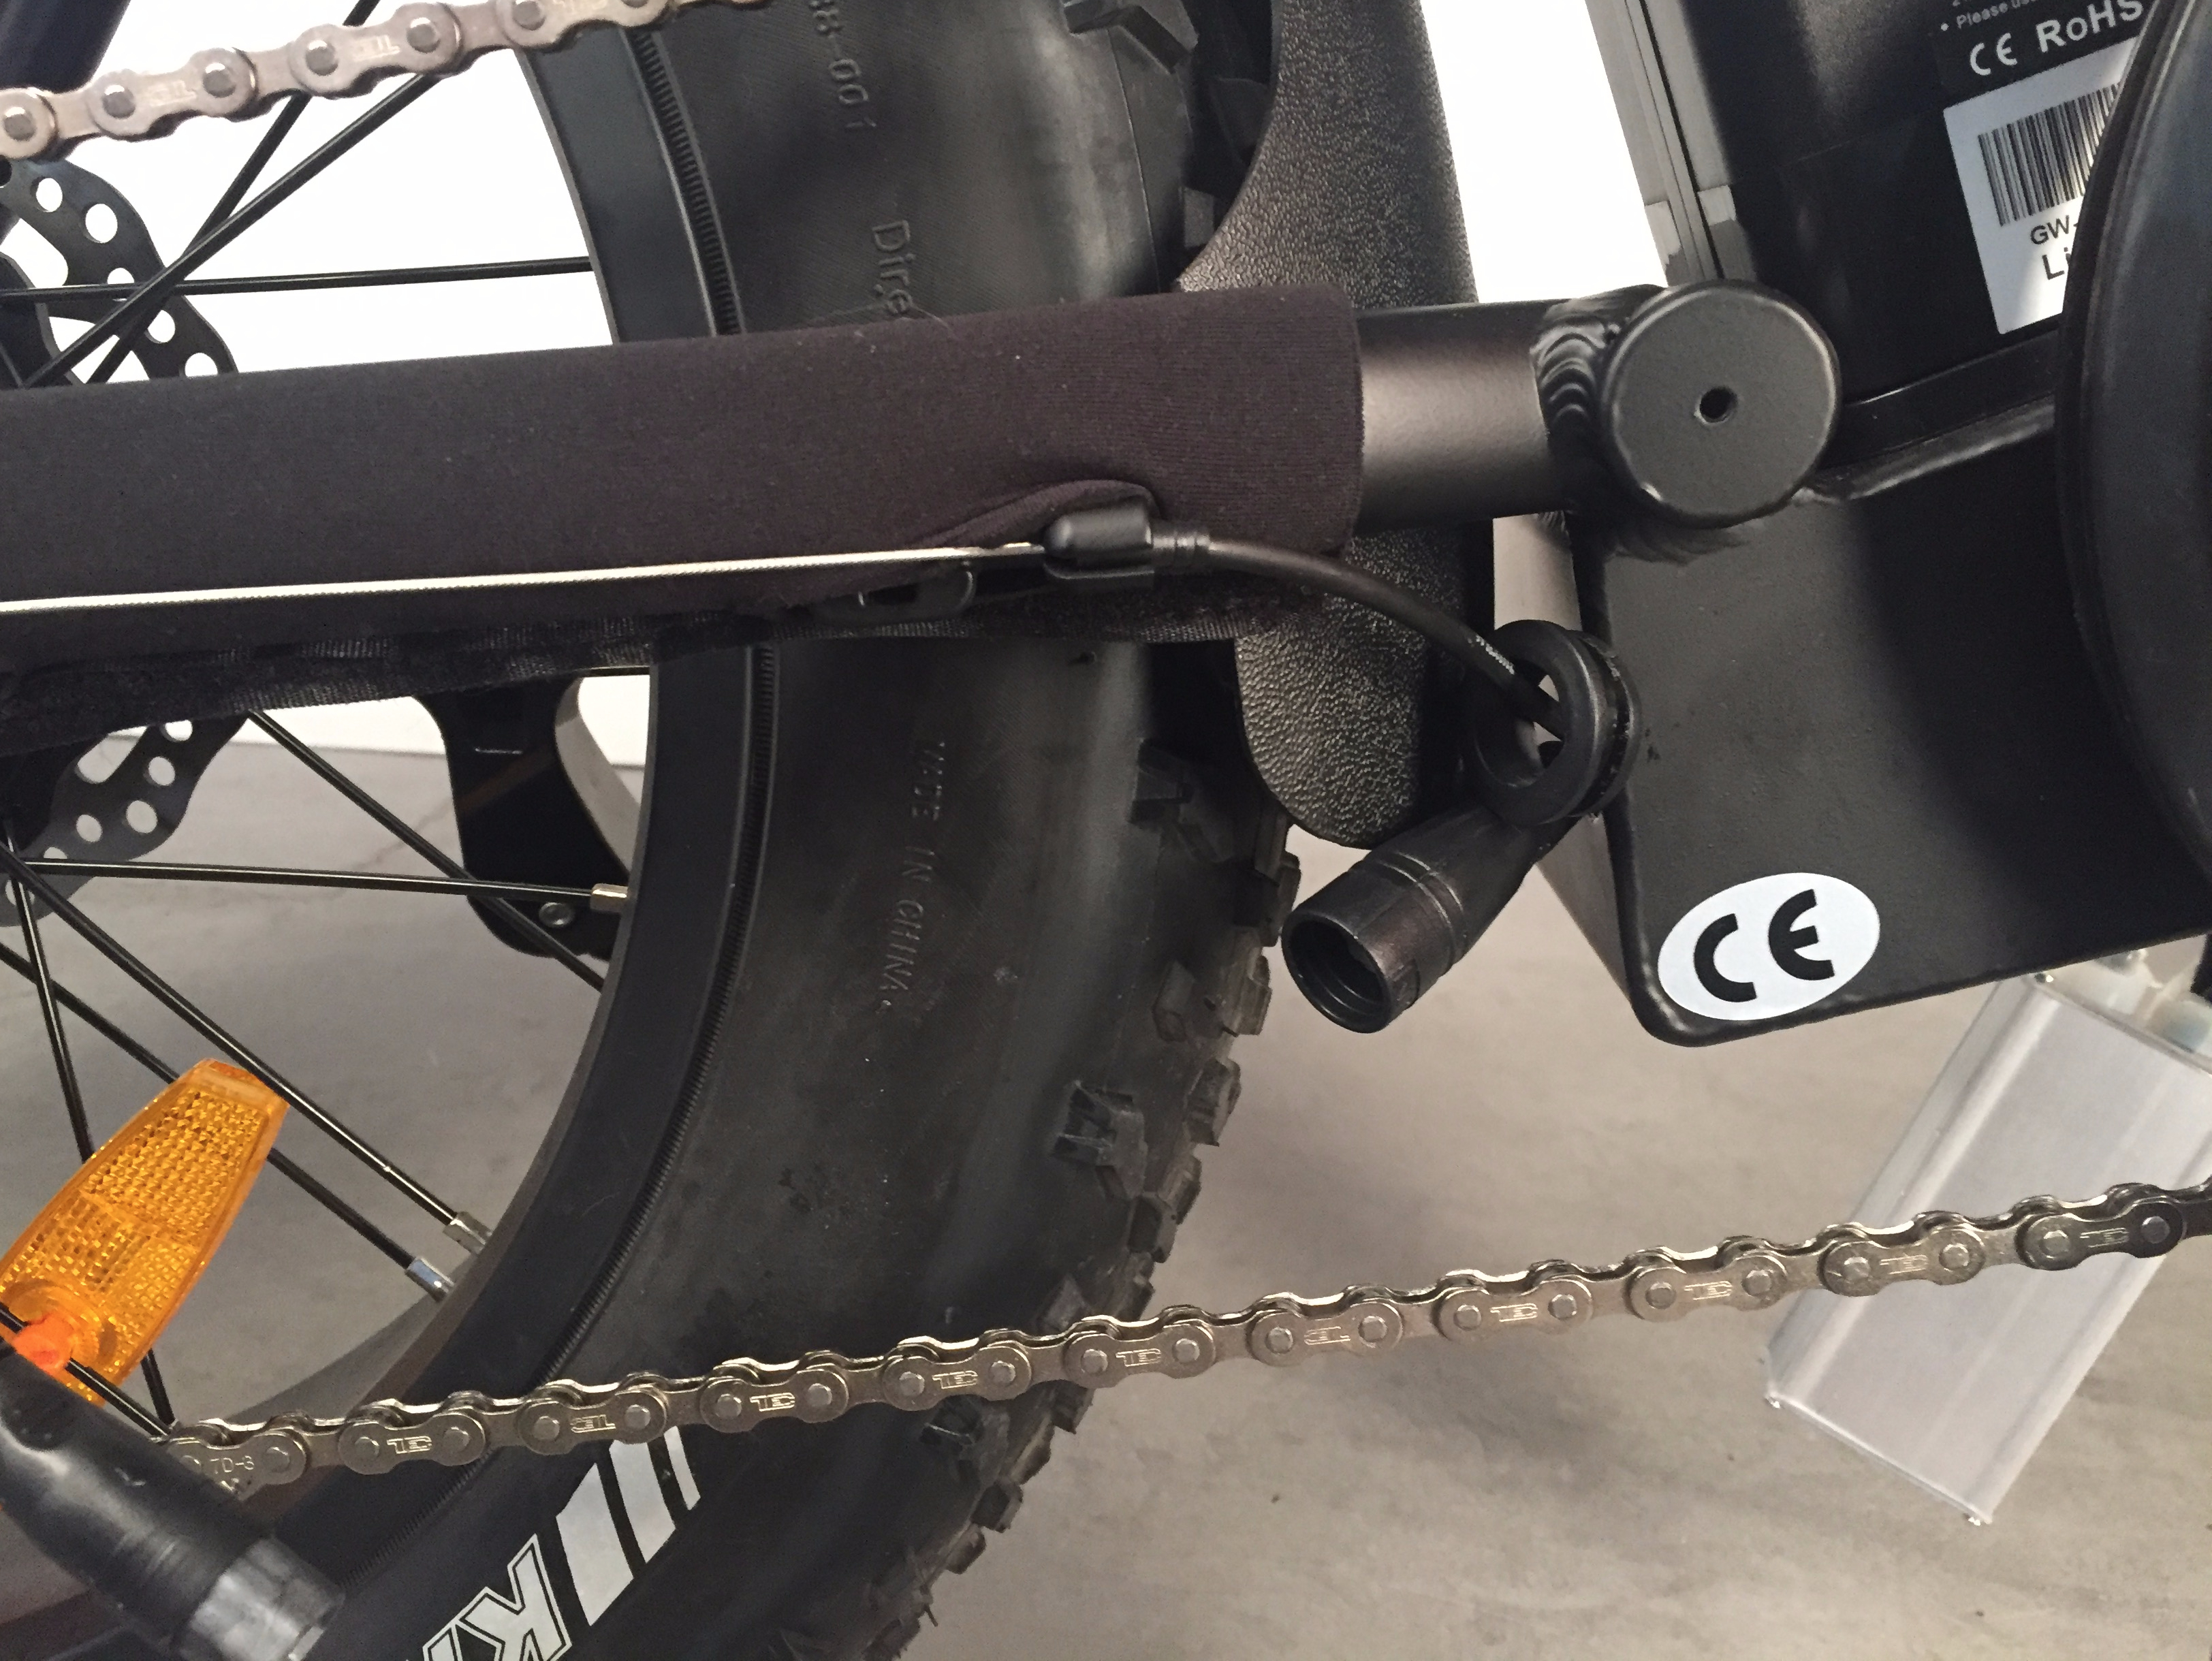
- Connect the new controller's motor connector by passing the motor connector through the cable opening in the controller housing, thread the connector through the grommet and re-mount the derailleur housing on the cable guide. Re-seat the grommet by squeezing it onto one side of the cable opening and then using a flat head screwdriver to carefully press the grommet into place. Align the internal pins and external arrows on the motor connectors and press directly together without twisting to fully seat the connection. Use zip ties to attach the motor cable to the chainstay and then use flat side cutters to snip the zip tie excess.
- Connect the three connectors inside the controller housing. Match each of the wiring harness, PAS sensor, and battery connectors to the corresponding connector end. Align the internal pins and external arrows on the connector housing and press directly together without twisting to fully seat each connection.
-
Reattach the controller housing face plate. On model years 2016-2018 RadMinis, use a Phillips head screwdriver to secure the face plate onto the controller housing box.
-