Remove and reinstall wheels on RadTrike
If you need to fix a flat tire or perform any other service on the trike wheels, use the following procedures to remove and reinstall the front and rear wheels.
Tools needed:
- Socket wrench with 14 mm, 19 mm and 21 mm deep well sockets
- 4 mm Allen wrench
- 5 mm Allen wrench
- Torque wrench with Allen bits and deep well sockets
- Flat-side cutters
- Box to prop the rear of the trike on
- Nitrile gloves (optional)
Remove the front wheel
| Do not touch the brake rotor, which has sharp edges and can cause serious injury. Touching the brake rotor or brake pads with bare skin can also transfer natural oils. Oils or other lubricants can decrease braking performance. We recommend wearing protective gloves when working near the braking system. | 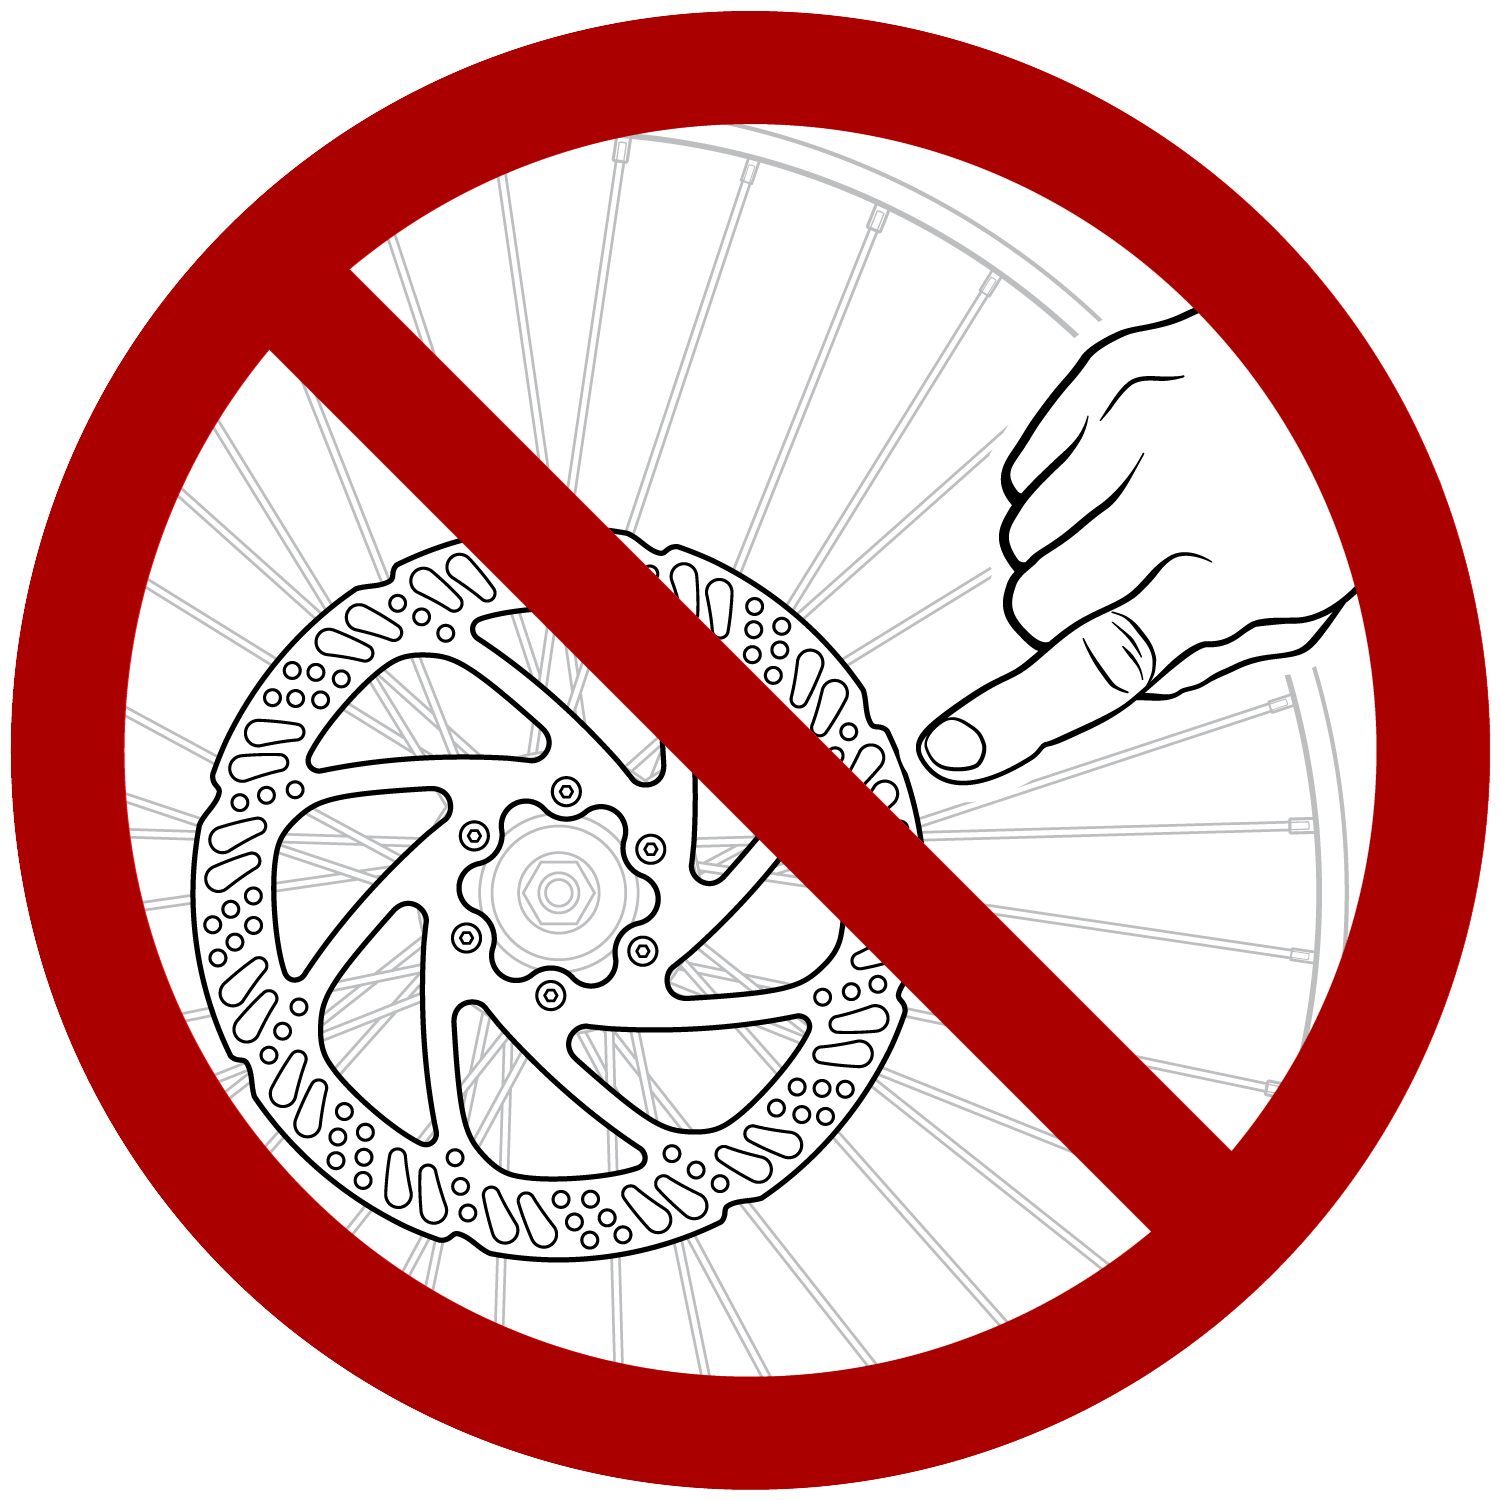 |
- Get the trike ready for maintenance. Press and hold the Power button on the remote to turn off the trike, remove the battery, and then press and hold the Power button again to discharge any remaining power.
- Disconnect the motor cable. Use a pair of flat-side cutters to snip the bottom zip tie on the fork that holds the motor cable in place. Disconnect the motor cable by pulling the connectors apart without twisting.
- Remove the torque plates. Use a 4 mm Allen wrench to remove the two torque plate bolts on both sides of the fork.
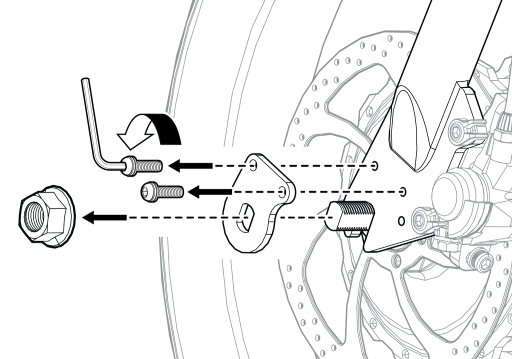
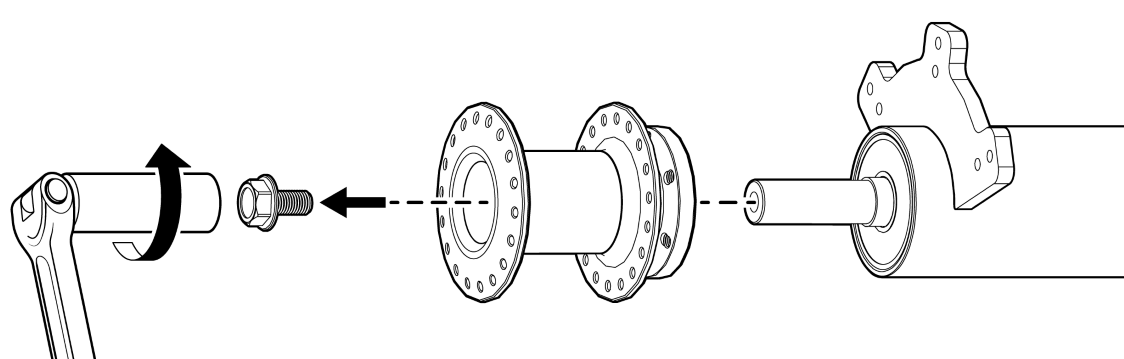
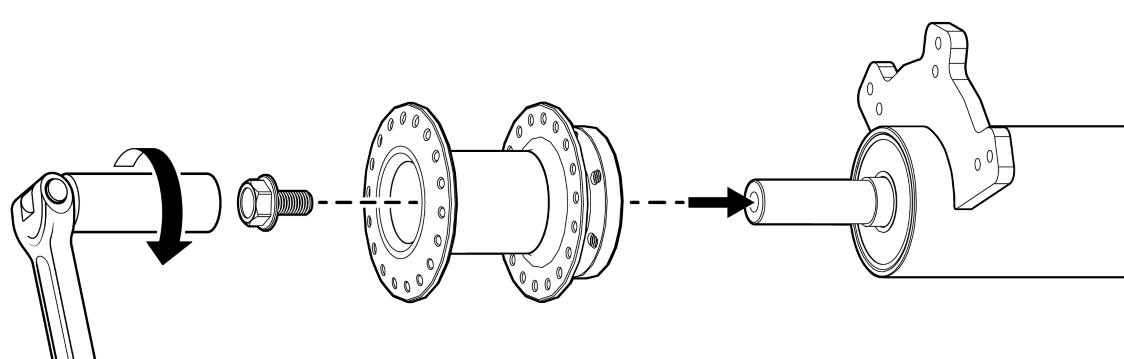
- Loosen the axle nuts. Use a 21 mm socket wrench to loosen the axle nuts on both sides of the fork. You do not need to remove the axle nuts and torque plates from the wheel axle, but make sure you have enough clearance on both sides so that the wheel can be removed.
- Remove the front wheel from the fork dropouts and set the fork down carefully.
- Perform any service on the front wheel.
Reinstall the front wheel
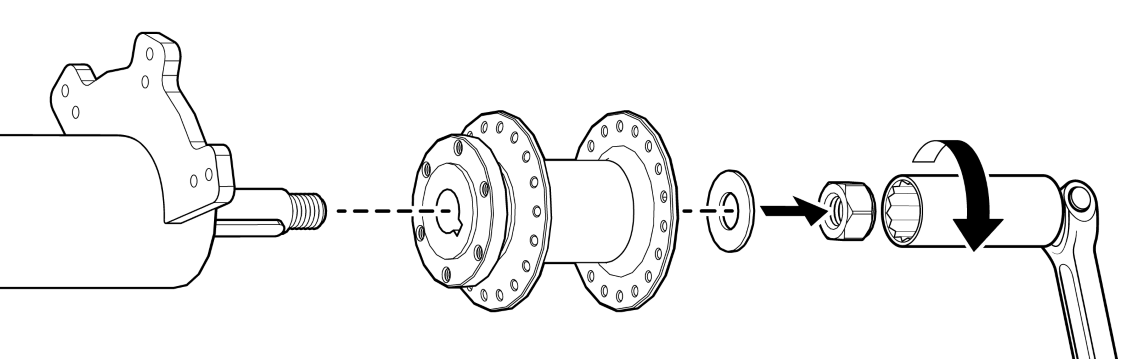
- Reinstall the front wheel in the fork dropouts, and make sure the brake rotor goes in between the brake pads in the caliper evenly.
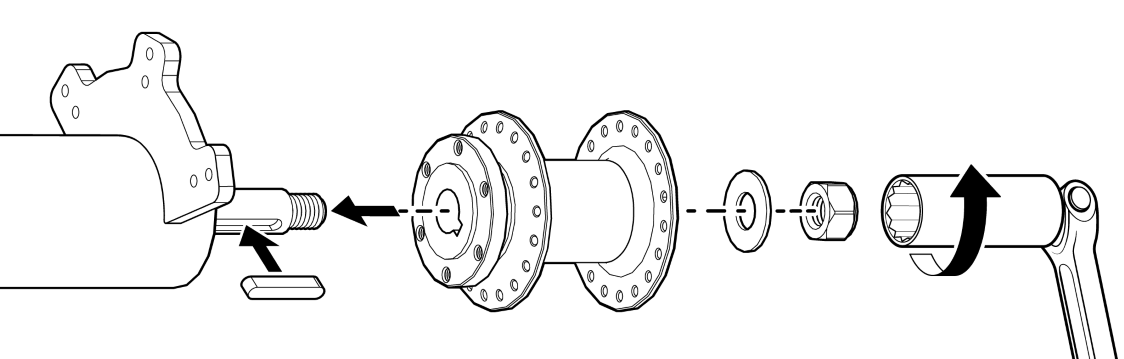
- Reinstall the torque plate bolts. Move the torque plates back against the fork dropouts, and use a 4 mm Allen wrench to reinstall the two bolts. Use a torque wrench to tighten to 4 Nm.
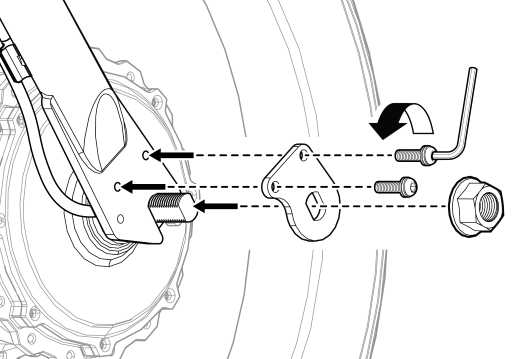
- Reinstall the axle nuts. Use a 21 mm socket wrench to tighten the axle nuts until secure on both sides. Use a torque wrench to tighten to 45-50 Nm.
- Reconnect the motor cable. Line up the internal notch and pins and the external arrows of the motor cable, and press together without twisting.

- Secure the motor cable. Take up any slack from the cable and replace the zip tie to secure the motor cable in place. Snip off the excess without leaving any sharp points.
- Reinstall the battery, press and hold the Power button on the remote, and Ride RAD!
Remove the rear wheels
If you are fixing a flat tire you do not need to remove the rear wheels to remove the tire and tube. However, you may want to remove the rear wheel fenders to provide more clearance for removing the tires.
If you are removing both wheels, start with the non-drive side wheel first.
- Get the trike ready for maintenance. Press and hold the Power button on the remote to turn off the trike, remove the battery, and then press and hold the Power button again to discharge any remaining power.
- Set the parking brake to prevent the front wheel from moving.
- Prop the rear of the Trike up on a box.
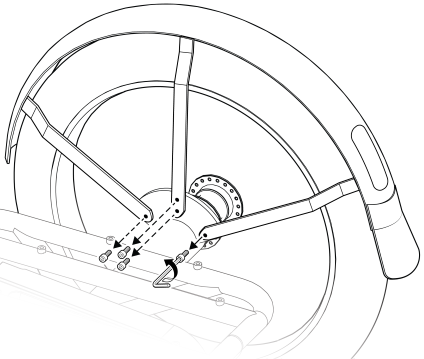
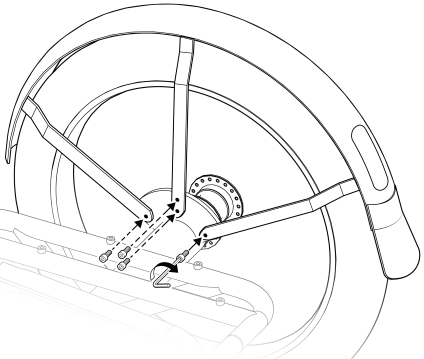
- Remove the rear wheel fenders. Use a 5 mm Allen wrench to remove the four bolts securing the rear fenders to the frame.
- Remove the non-drive side wheel. Hold the drive side wheel in place with one hand and use a 14 mm socket wrench with a deep well socket to loosen the non-drive side wheel in a counter-clockwise motion. Once the axle nut is off, pull the wheel off the axle. If the wheel is difficult to remove, use a large flat head screwdriver or similar tool between the axle and the hub to carefully pry the wheel off the axle.
- Remove the drive side wheel. Use a 19 mm socket wrench with a deep well socket to loosen the drive side wheel in a counter-clockwise motion. Once the axle nut is off, pull the wheel off the axle. If the wheel is difficult to remove, use a large flat head screwdriver or similar tool between the axle and the hub to carefully pry the wheel off the axle.
- Perform any service on the rear wheels.
Reinstall the rear wheels
- Reinstall the drive side wheel. Mount the drive side wheel on the axle and use a 19 mm socket wrench with a deep well socket to tighten the axle nut in a clockwise motion until secure. Use a torque wrench to tighten to 30-35 Nm.
- Reinstall the non-drive side wheel. Mount non-drive drive side wheel on the axle and use a 14 mm socket wrench with a deep well socket to tighten the axle nut in a clockwise motion until secure. Use a torque wrench to tighten to 30-35 Nm.
- Reinstall the rear wheel fenders. Use a 5 mm Allen wrench to reinstall the four bolts that hold the rear fenders to the frame. Use a torque wrench to tighten the fender mounting arm bolts to 4-5 Nm.
- Release the parking brake.
- Reinstall the battery, press and hold the Power button on the remote, and Ride RAD!