RadMission headlight replacement guide
The RadMission headlight can be replaced if instructed to do so by Rad Power Bikes Product Support. The headlight can be replaced without replacing the bracket. If needed, the headlight and the bracket can also be replaced.
Follow the steps below to replace the headlight on a RadMission.
Tools needed:
- A 4 mm Allen wrench
- An 8 mm wrench
- Flat side cutters
- A few zip ties
- A table, wall, or friend to help stabilize the bike, or wood blocks (to protect the display when the bike is upside down)
- A replacement headlight from Rad Power Bikes
Click a heading below and follow the steps to replace the headlight only, or to replace the headlight and the bracket.
Replace the Headlight Only (Leaving the Bracket Installed)
- Get the bike ready for maintenance. Turn off the bike, remove the battery, and press and hold the power button to discharge remaining power.
- Stabilize the bike. Have a table, wall, or friend ready to help keep the bike in place, or put the kickstand down (if installed).
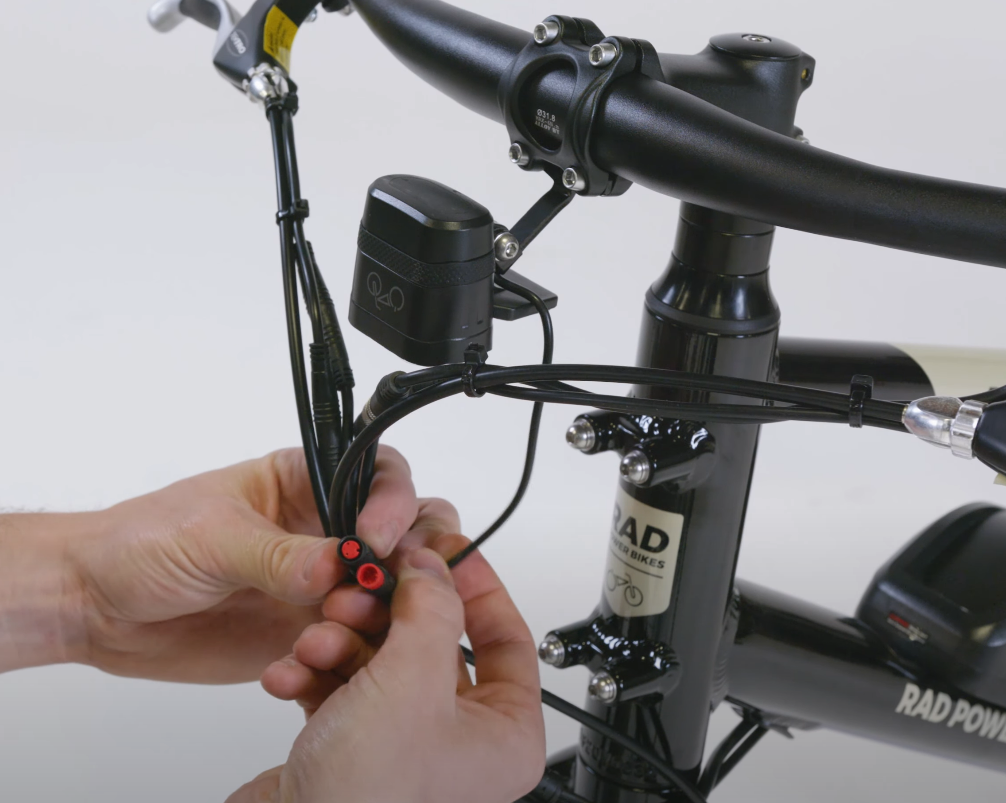
- Unplug the headlight. Trace the cable from the headlight to the connector. Pull each side of the connector directly apart, without twisting, to unplug.
.png?revision=1)
- Remove the old headlight.
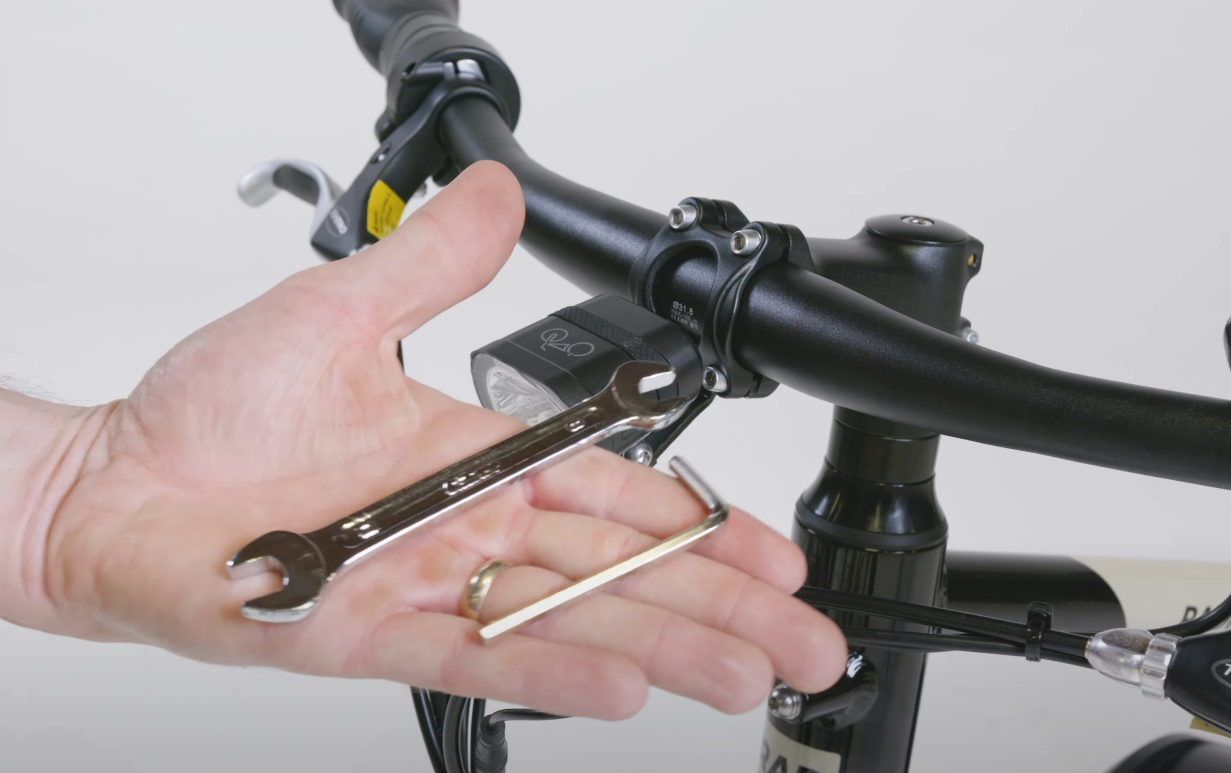
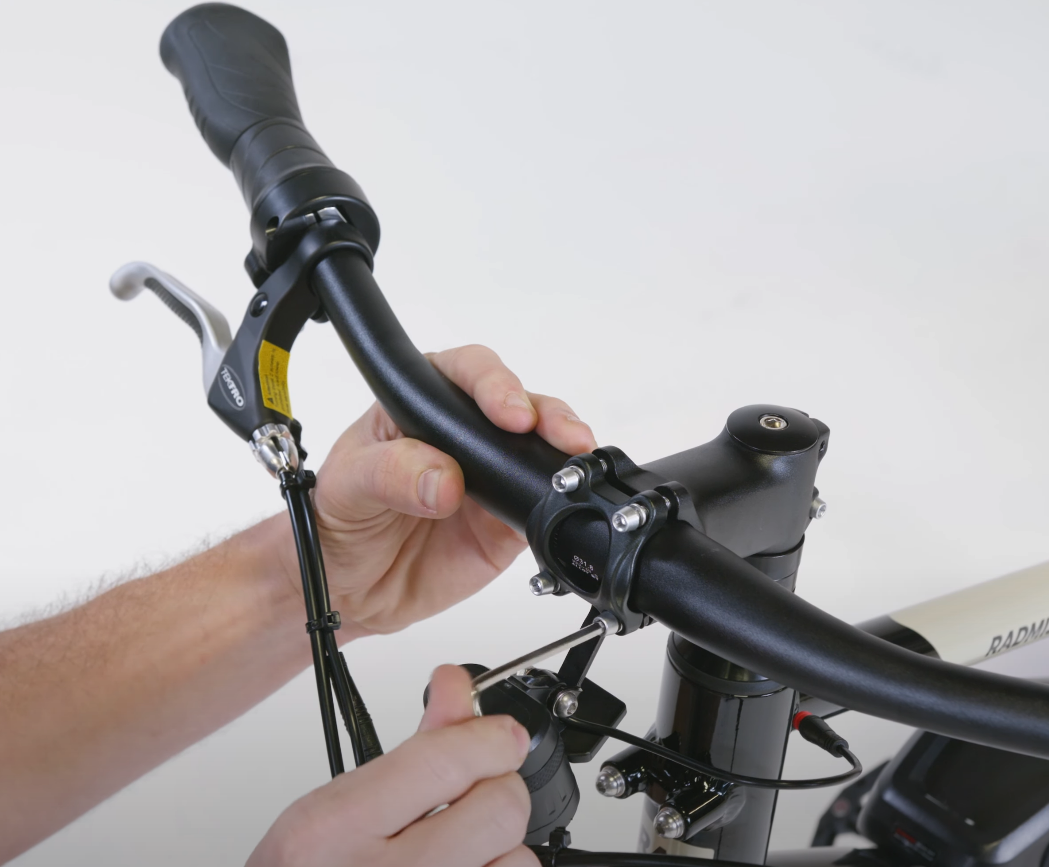
- Use a 4 mm Allen wrench and an 8 mm wrench to remove the headlight adjustment bolt.
- Remove the old headlight and recycle it according to local rules.
- Use a 4 mm Allen wrench and an 8 mm wrench to remove the headlight adjustment bolt.
- Install the new headlight.
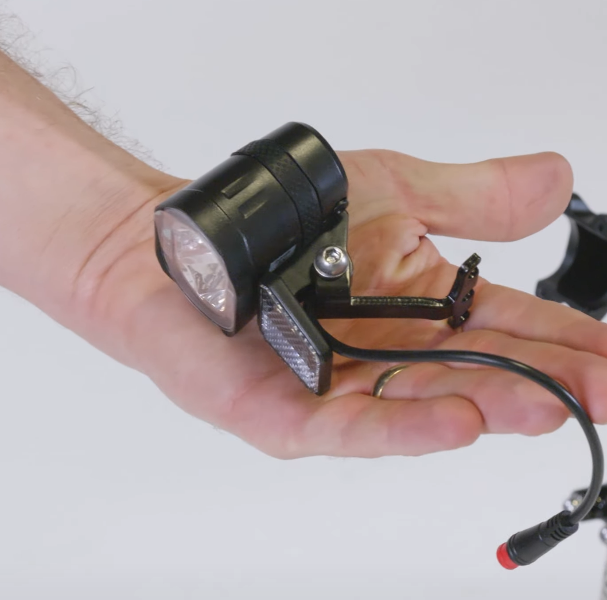
- Locate the new headlight.
- Use a 4 mm Allen wrench and an 8 mm wrench to remove the headlight adjustment bolt.
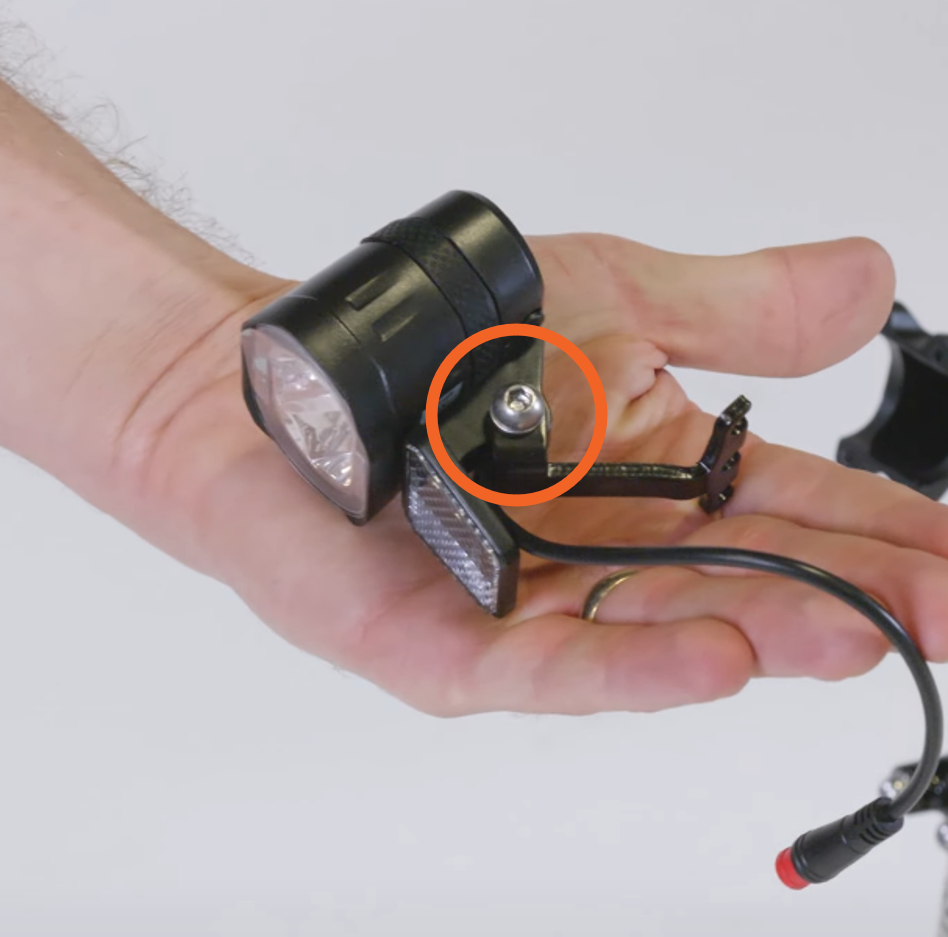
- Remove the headlight from the bracket. Recycle the bracket according to local rules, or store it for future use.
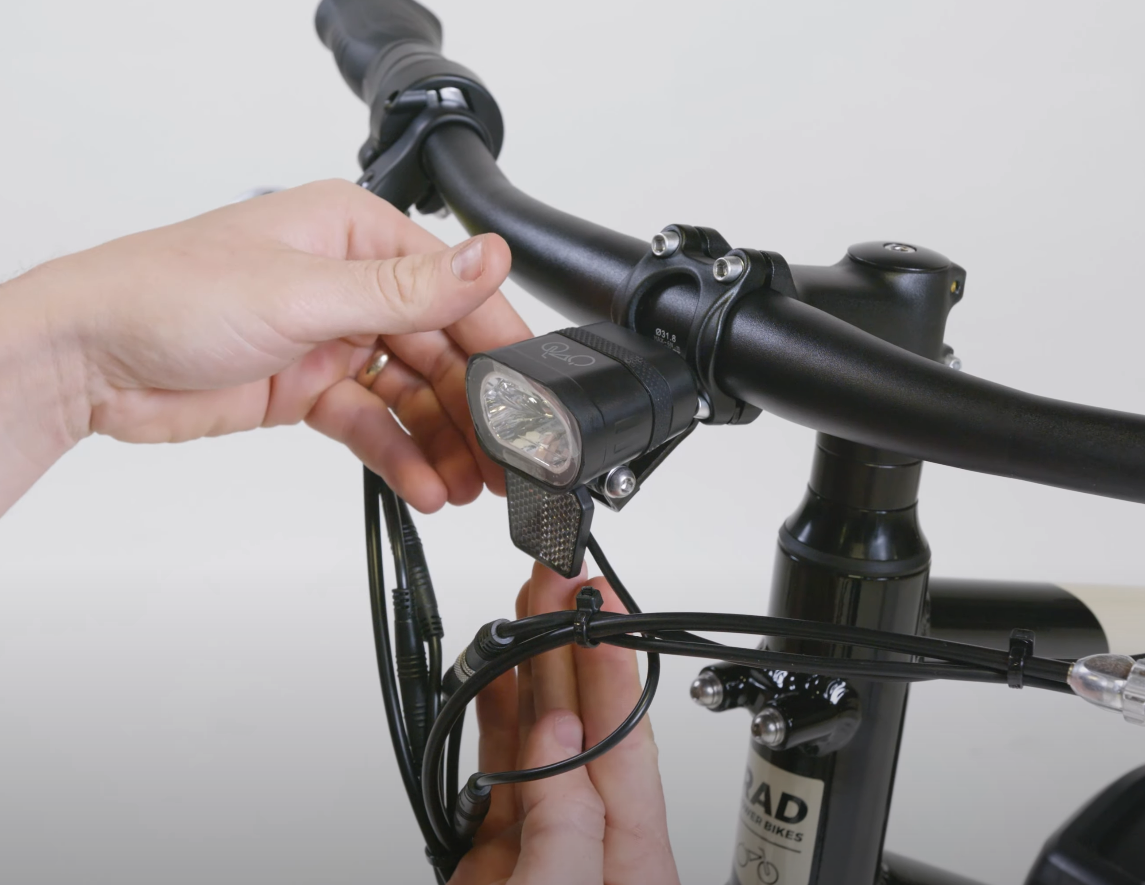
- Place the headlight into position on the bracket secured to the handlebar. Install the headlight adjustment bolt and locknut. Tighten the bolt securely. Do not overtighten.
- Plug in the headlight. Locate the matching connector ends. Carefully align the internal notch and pins (and external arrows) and press directly together, without twisting, to connect.
.PNG?revision=1)
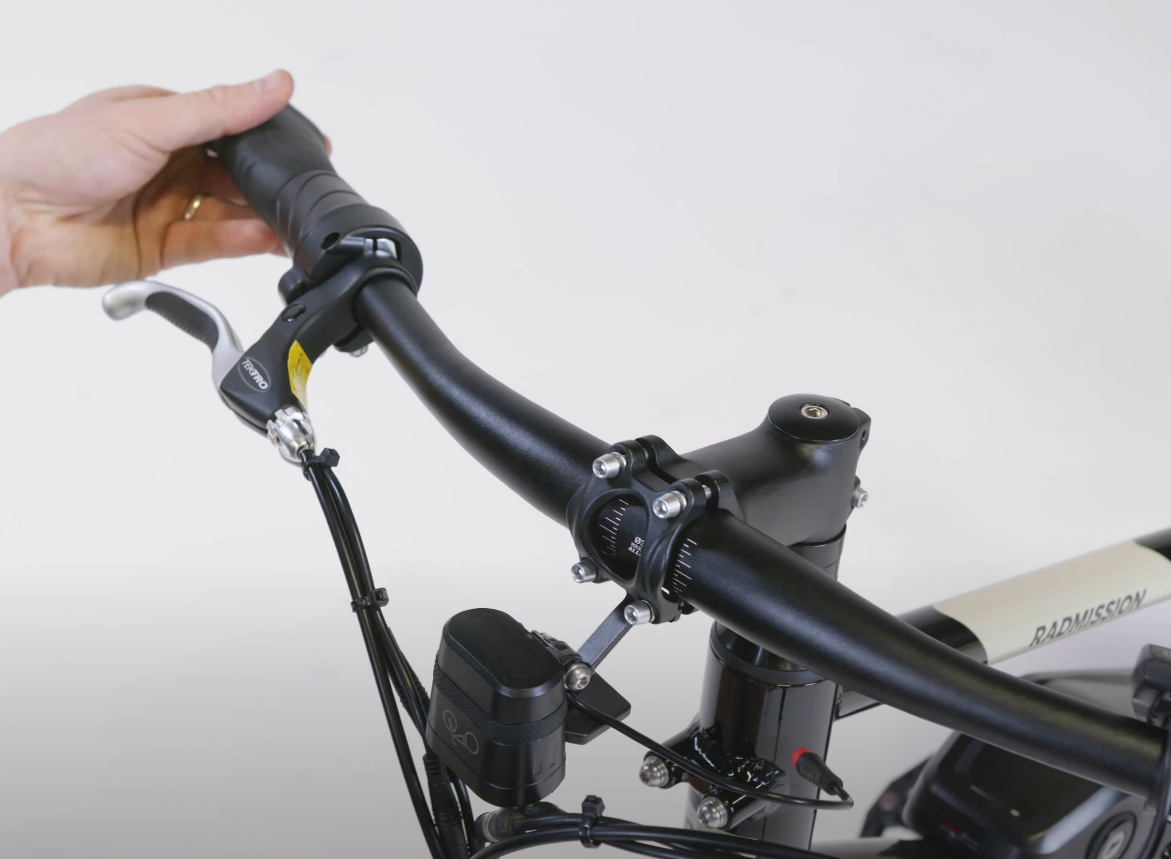
- Adjust the angle of the headlight slightly downward so it will illuminate the road ahead and not blind oncoming traffic. If needed, use a 4 mm Allen wrench and an 8 mm wrench to loosen the headlight adjustment bolt located just below the headlight. Adjust the headlight, then tighten the bolt. Do not overtighten.
.PNG?revision=1)
- Replace any snipped zip ties and trim them to be flush and smooth. Check that all cables are free from any moving parts.
- Reinstall the battery, test the bike fully before riding, and ride Rad!
Replace the Headlight and Bracket
- Get the bike ready for maintenance. Turn off the bike, remove the battery, and press and hold the power button to discharge remaining power.
- Stabilize the bike. Have a table, wall, or friend ready to help keep the bike in place, or put the kickstand down (if installed).
- Unplug the headlight. Trace the cable from the headlight to the connector. Pull each side of the connector directly apart, without twisting, to unplug.
.png?revision=1)
- Remove the old headlight and bracket.
- Remove the two bottom faceplate mounting bolts. Tilt the headlight downward to allow for bolt access, and use a 4 mm Allen wrench to loosen all four bolts evenly, about two full turns each. Leave the top two bolts installed loosely and remove the two bottom bolts fully.
Note: Ensure the tool is inserted fully, press firmly, and turn slowly to avoid damaging the bolt heads.
.PNG?revision=1)
- Remove the headlight and bracket. Slide the headlight bracket out from under the faceplate. Set the faceplate hardware nearby for reinstallation, and recycle the headlight and bracket according to local rules.
- Remove the two bottom faceplate mounting bolts. Tilt the headlight downward to allow for bolt access, and use a 4 mm Allen wrench to loosen all four bolts evenly, about two full turns each. Leave the top two bolts installed loosely and remove the two bottom bolts fully.
- Install the new headlight and bracket.
- Locate the new headlight. Unfold the bracket to allow access to the faceplate mounting bolts during installation.
- Install the headlight and center the handlebar. If needed, center the handlebar and ensure the brake levers are easily accessible to the rider. Slide the headlight bracket under the faceplate mount and loosely install the two faceplate mounting bolts by hand to keep the headlight bracket in position.
- Locate the new headlight. Unfold the bracket to allow access to the faceplate mounting bolts during installation.
- Tighten the faceplate mounting bolts evenly. Use a 4 mm Allen wrench to tighten the two bottom bolts one-quarter turn at a time, and alternating between bolts until they are approximately as tight as the top two bolts. Then tighten all four bolts evenly, alternating between bolts each quarter-turn and moving in an X pattern until they are tightened securely. Ensure the tool is inserted fully, press firmly, and turn slowly to avoid damaging the bolt heads.
- Evenly torque all four faceplate bolts to 6 Nm. Check that the headlight bracket does not move once the faceplate bolts are tightened.

- Plug in the headlight. Locate the matching connector ends. Carefully align the internal notch and pins (and external arrows) and press directly together, without twisting, to connect.
- Adjust the angle of the headlight slightly downward so it will illuminate the road ahead and not blind oncoming traffic. If needed, use a 4 mm Allen wrench and an 8 mm wrench to loosen the headlight adjustment bolt located just below the headlight. Adjust the headlight, then tighten the bolt. Do not overtighten.
- Replace any snipped zip ties and trim them to be flush and smooth. Check that all cables are free from any moving parts.
- Reinstall the battery, test the bike fully before riding, and ride Rad!