Replacement grips and pedals installation guide
Rad Power Bikes offers a variety of replacement grips (colored grips, "Comfort Grips," etc.) and pedals to make your ride even more Rad!
Click a heading below to find the tool list and installation instructions for each accessory.
Grips
Tools Needed:
- Flat head screwdriver
- Isopropyl alcohol
- Paper towel
- Get the bike ready for maintenance. Turn off the bike, remove the battery, and press and hold MODE (or the power button) to discharge remaining power.
- Remove the handlebar grips. Store the grips for later use or recycle according to local rules.
- Remove the grip end cap. Use a flat head screwdriver to carefully pry off the grip end cap.
- Remove the grip. (Most of the handlebar grips on ebikes from Rad Power Bikes use a friction system to stay on, and the directions below assume that's what you have on your bike. If you have a different kind of grip, remove it according to its manufacturer's instructions.) Twist and pull the grip off the handlebar end. If needed, apply a small amount of rubbing alcohol in between the grip and the handlebar as temporary lubrication: carefully insert the screwdriver between the handlebar tubing and the grip, pry the grip away from the handlebar slightly, then use a paper towel or squeeze bottle to apply the alcohol into the gap.
- Repeat with the other handlebar grip.
- Remove the grip end cap. Use a flat head screwdriver to carefully pry off the grip end cap.
- Install the new handlebar grips.
- Identify the shorter grip. This grip will be installed on the side with the throttle.
- Orient the grip so the narrower end points toward the center of the bike. Remove the grip end cap.
- Apply a small amount of isopropyl alcohol to the top of the handlebar. Twist the grip into place. The grip should not move easily once the alcohol dries.
- Reinstall the grip end cap.
- Repeat with the other handlebar grip.
- Identify the shorter grip. This grip will be installed on the side with the throttle.
- Reinstall the battery and test the bike fully before riding.
Pedals
Tools Needed:
- A 15 mm Pedal wrench (or a torque wrench with a crowfoot)
- Clean paper towels or shop towels
- Bicycle grease
- Get the bike ready for maintenance. Turn off the bike, remove the battery, and press and hold MODE (or the power button) to discharge remaining power.
- Locate and remove the pedals. Store the pedals for later use or recycle according to local rules.
- Start with the left pedal, which is reverse threaded and will loosen by turning to the right. Use a pedal wrench, turning clockwise (toward the back of the bike) until the pedal loosens. Then, unthread the pedal by hand until fully released.
- Clean the threads of the left crank using a dry and clean paper or shop towel. Remove any dirt, grime, or grit. Debris, moisture, or dirt can lead to damage during installation or use.
- Use a pedal wrench to remove the right pedal, turning counterclockwise (toward the back of the bike) until the pedal loosens. Then, unthread the pedal by hand until fully released.
- Clean the threads of the right crank using a dry and clean paper or shop towel. Remove any dirt, grime, or grit.
- Start with the left pedal, which is reverse threaded and will loosen by turning to the right. Use a pedal wrench, turning clockwise (toward the back of the bike) until the pedal loosens. Then, unthread the pedal by hand until fully released.
- Locate and install the left pedal.
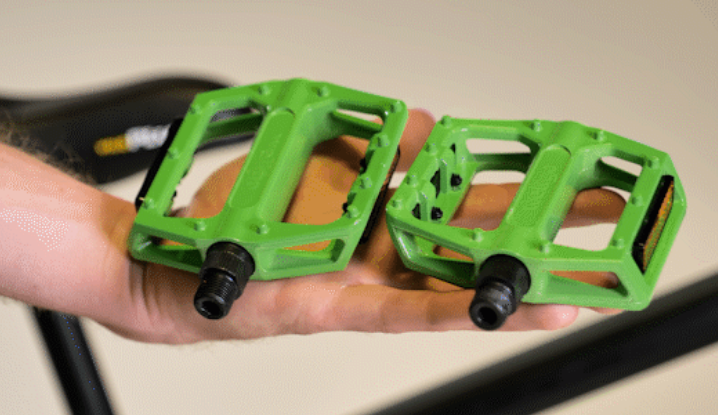
- Identify each pedal by the sticker, and by the markings on the pedal axle. The left pedal has grooves on the axle. Set aside the right pedal until a later step.
- Check that the left crank threads are clean and dry. If needed, use a clean and dry paper towel to clean the threaded portion of the crank arm. Dirt and grit can lead to damage during installation or use.
- Apply grease to the threaded portion of the left pedal axle.
- On the left side of the bike, carefully thread in the left pedal by hand, turning counterclockwise (toward the front of the bike). Use caution to not cross thread or damage the threads.
- Identify each pedal by the sticker, and by the markings on the pedal axle. The left pedal has grooves on the axle. Set aside the right pedal until a later step.
- Locate and install the right pedal. The right pedal has a smooth axle.
- Check that the right crank threads are clean and dry. If needed, use a clean and dry paper towel to clean the threaded portion of the crank arm. Dirt and grit can lead to damage during installation or use.
- Apply grease to the threaded portion of the right pedal axle.
- On the right side of the bike, carefully thread in the right pedal by hand, turning clockwise (toward the front of the bike). Use caution to not cross thread or damage the threads.
- Tighten the pedals securely. Once each pedal is fully threaded into the proper crank, use a pedal wrench to torque each pedal to 35 Nm.
- Reinstall the battery and test the bike fully before riding.