RadRunner Passenger Package installation guide
The RadRunner Passenger Package comes with two custom folding foot pegs, two protective wheel skirts, the elevated rear seat, and a hardware kit. Use the installation video and the instructions below to install these accessories. Please note that some passenger packages purchased in late 2021 or after may have slight visual differences from the package shown in the video and instructions below, but the installation steps are the same.
Tools needed:
- 13 mm wrench
- 10 mm wrench
- 4 mm Allen wrench
- Torque wrench with a 4 mm Allen bit
- Nitrile gloves (optional)
- The Passenger Package
Install the Foot Pegs
- Locate the foot pegs and mounting hardware. Pass a split washer and then a flat washer onto one of the foot peg bolts. Ensure the foot pegs are oriented so that they fold upward.
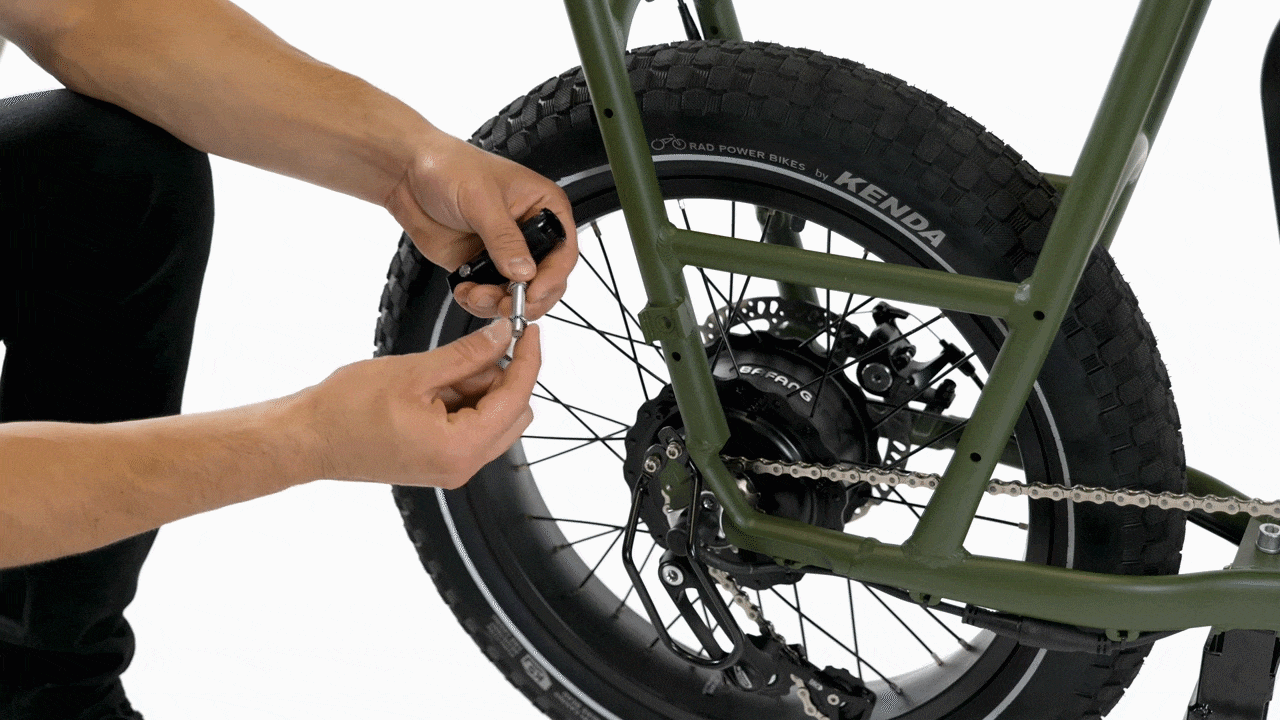
- Install the foot pegs. Place one foot peg over the mounting point and insert the bolt on the other side of the frame. Use a 13 mm wrench to tighten the bolt, and torque to 20 Nm. Repeat on the other side with the second foot peg.

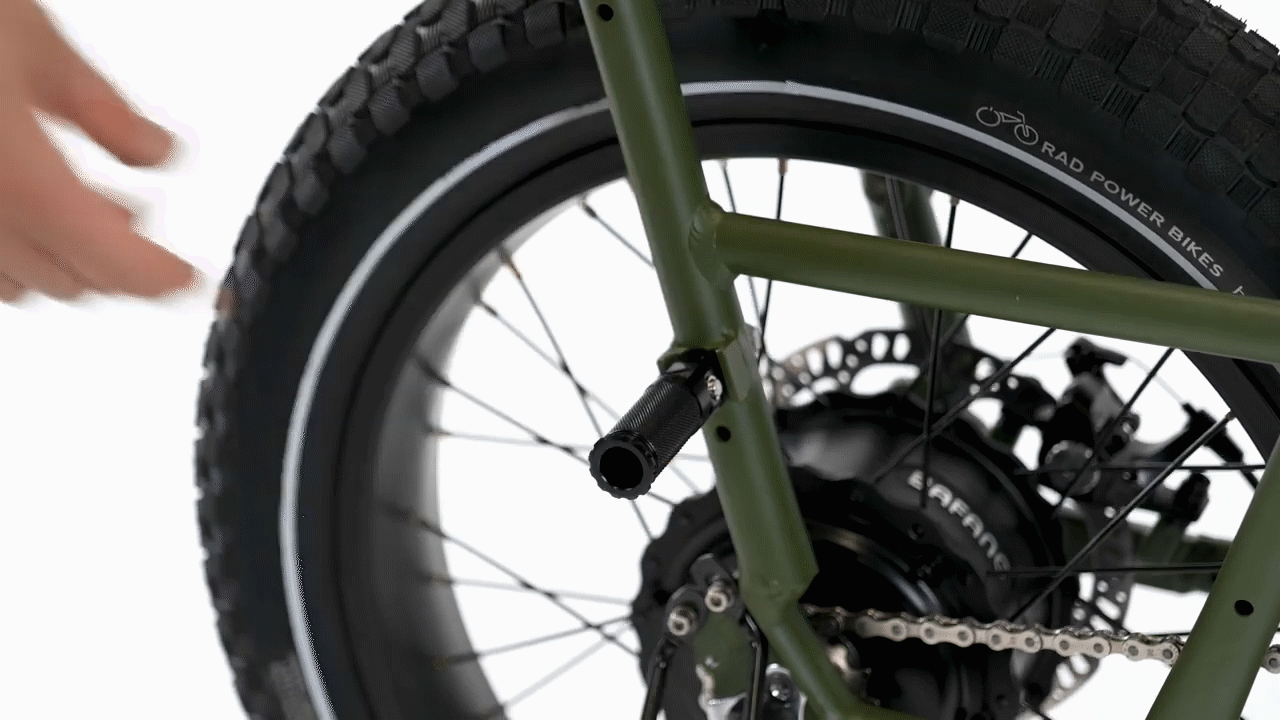
- Fold up the foot pegs. Ensure the foot pegs are folded up and out of the way.
Install the Wheel Skirts
- Remove the protective film from each side of both wheel skirts. On one side, the film is opaque; on the other side, the film is clear.
- Identify the right side wheel skirt. It is shorter and will be installed on the side of the bike with the chain.
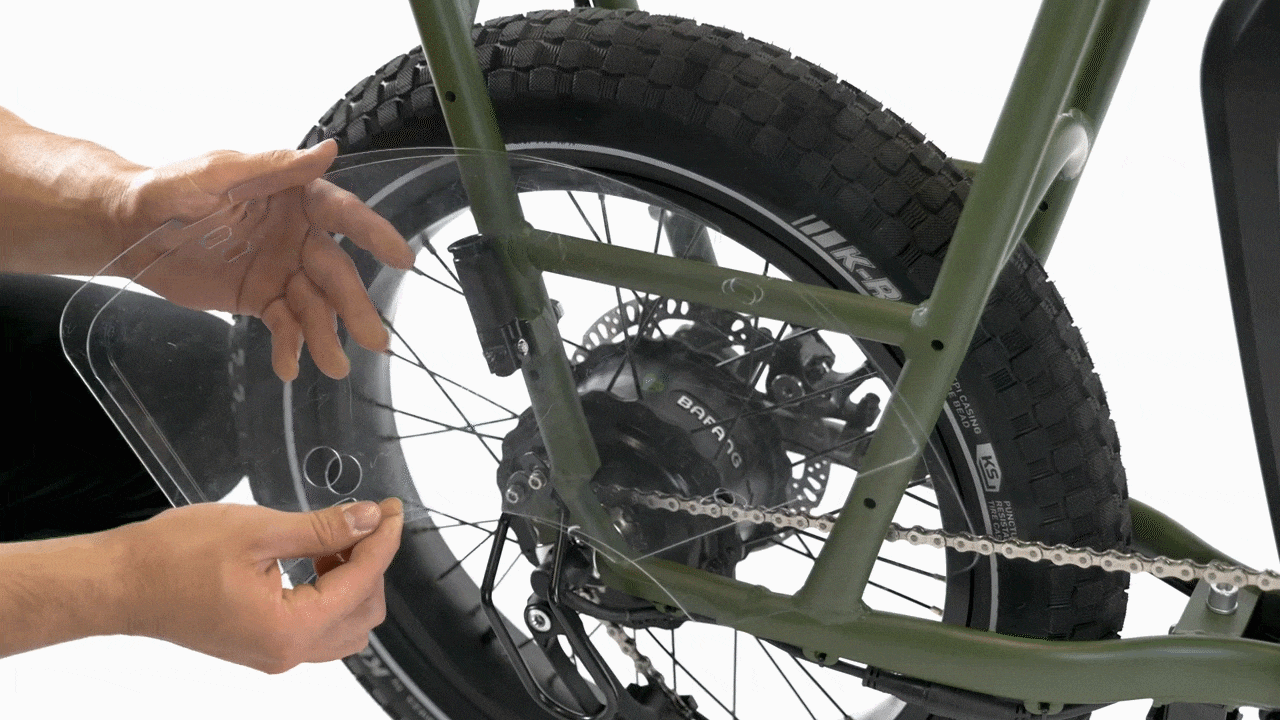
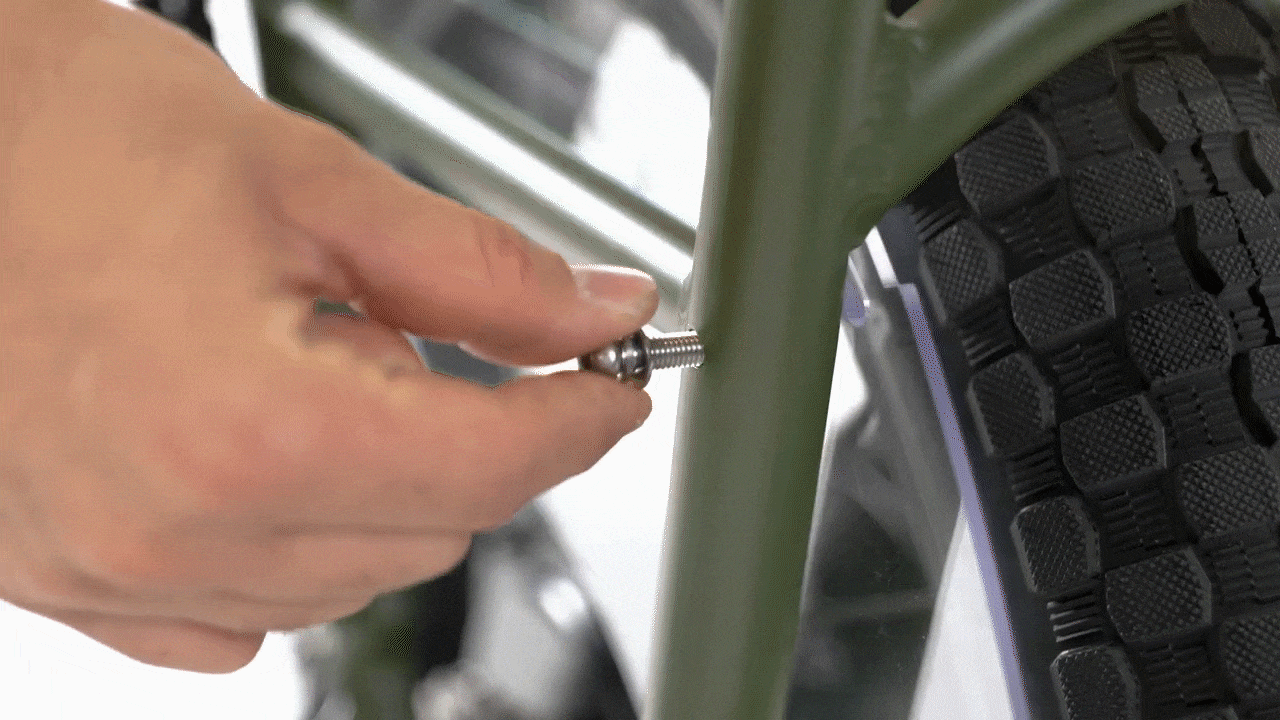
- Pass the wheel skirt between the rear wheel and the bike frame. The largest hole on the skirt should fit over the foot peg bolt, with the remaining three holes aligning with the mounting points on the frame.
- Note: Use caution to avoid touching the chain, as the oils in your skin can damage it. You can wear Nitrile gloves to keep your hands and the chain clean when working on your bike.
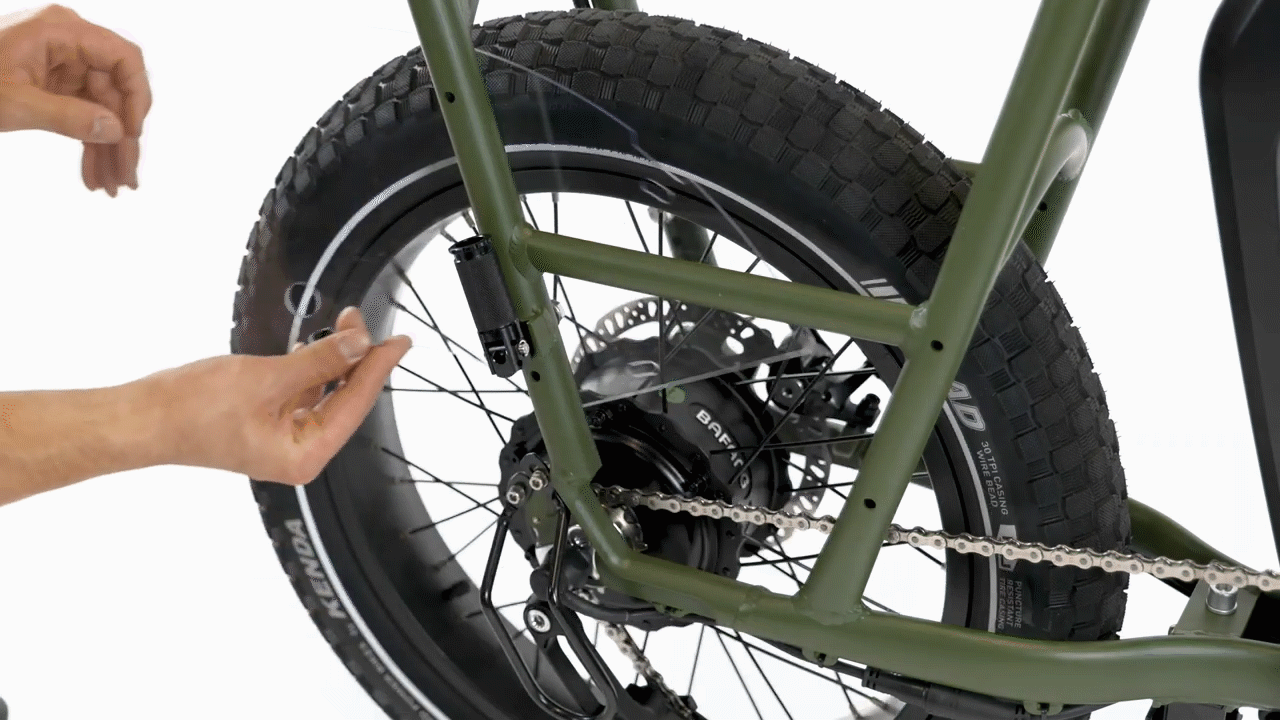
- Secure the wheel skirt. Pass a split washer and then a flat washer over the bolt end. Pass the bolt through a mounting point and the wheel skirt, and then install a washer onto the bolt end. Thread a lock nut onto the bolt end by hand and tighten partway. Repeat with the other three mounting bolts.
- Install the left side wheel skirt. Repeat step 4 to install the second, longer skirt on the left side of the bike. Use a 10 mm wrench and a 4 mm Allen wrench to tighten all of the mounting point bolts for the wheel skirts. Torque to 4 Nm.

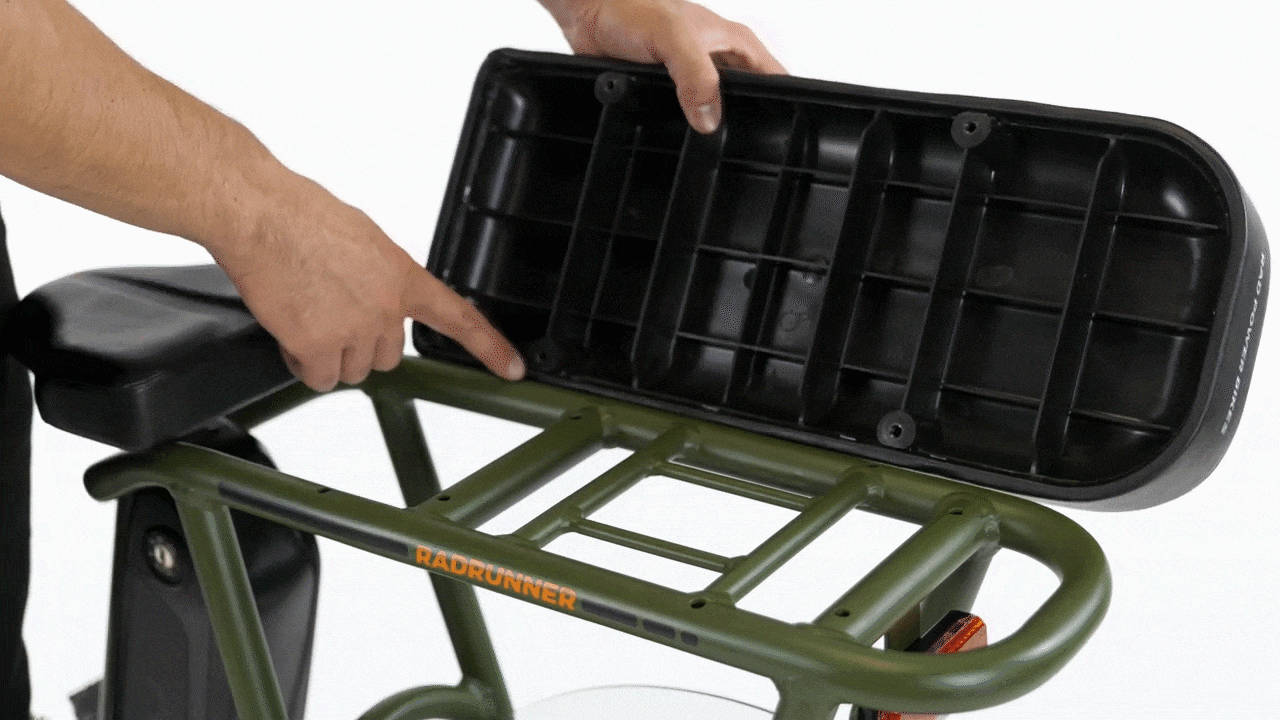
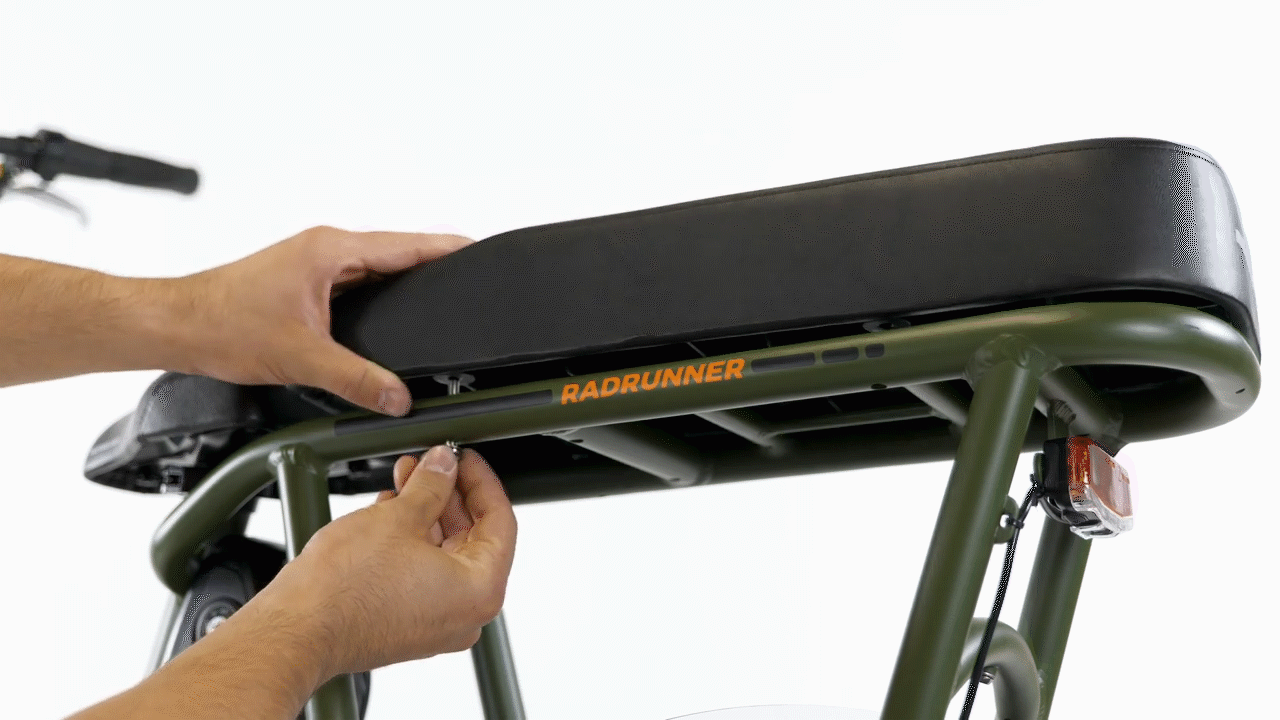
Install the Elevated Rear Seat
- Place the seat on the rack. Line up the four mounting points on the bottom of the seat with the four mounting points on the rear rack.
- Secure the seat to the rack. Pass a washer over the bolt end and pass the bolt through the rack. Carefully thread the bolt into the mounting point on the seat and loosely tighten by hand. Repeat with the other three bolts. Use a 4 mm Allen wrench to tighten each bolt. Torque to 4 Nm. Do not overtighten.
- Test the bike fully, and ride Rad!