Front wheel with bolt-on axle installation instructions
Most current ebike models are now coming with a bolt-on axle mechanism for the front wheel. If you received an ebike with the bolt-on axle and that differs from the assembly instructions in your Owner's Manual, use the installation steps contained in this article and video.
Depending on when your bike was manufactured, it is possible that you may receive a bike with either type of front wheel axle. Remove the front wheel from the box, remove the protective plates and inspect the axle:
|
Front wheel with bolt-on axle |
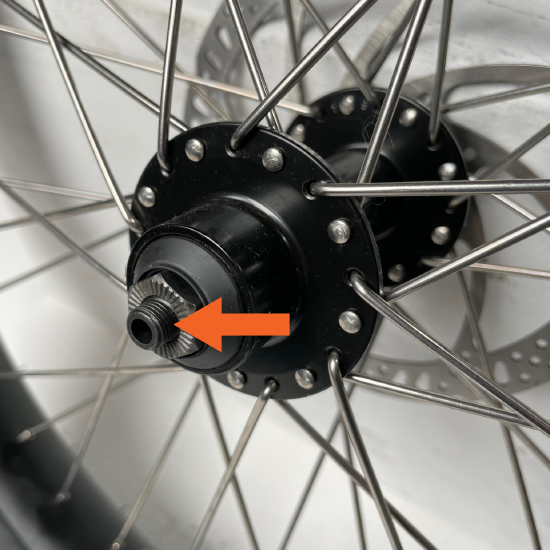
Front wheel with thru axle |
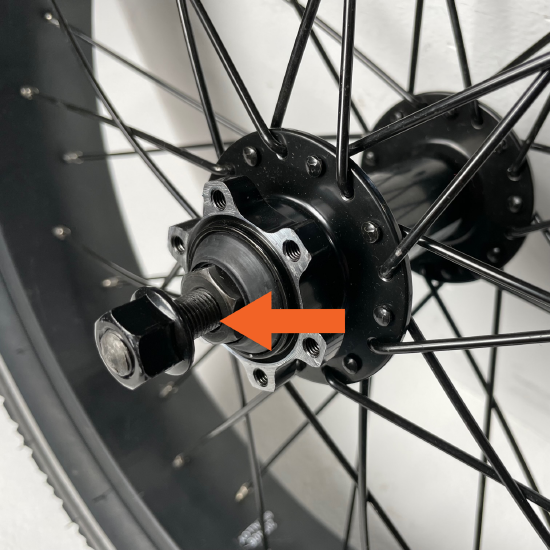
- Ebikes with the bolt-on axle mechanism (left) will come with pre-installed nuts on the axle. Proceed with the installation steps below.
- Ebikes with the quick-release mechanism (right) will have a shorter thru-axle where the quick-release skewer is inserted. Disregard the installation steps below and follow the front wheel installation instructions in the assembly video or your Owner's Manual.
| Do not touch the brake rotor, which has sharp edges and can cause serious injury. Touching the brake rotor or brake pads with bare skin can also transfer natural oils. Oils or other lubricants can decrease braking performance. We recommend wearing protective gloves when working near the braking system. | 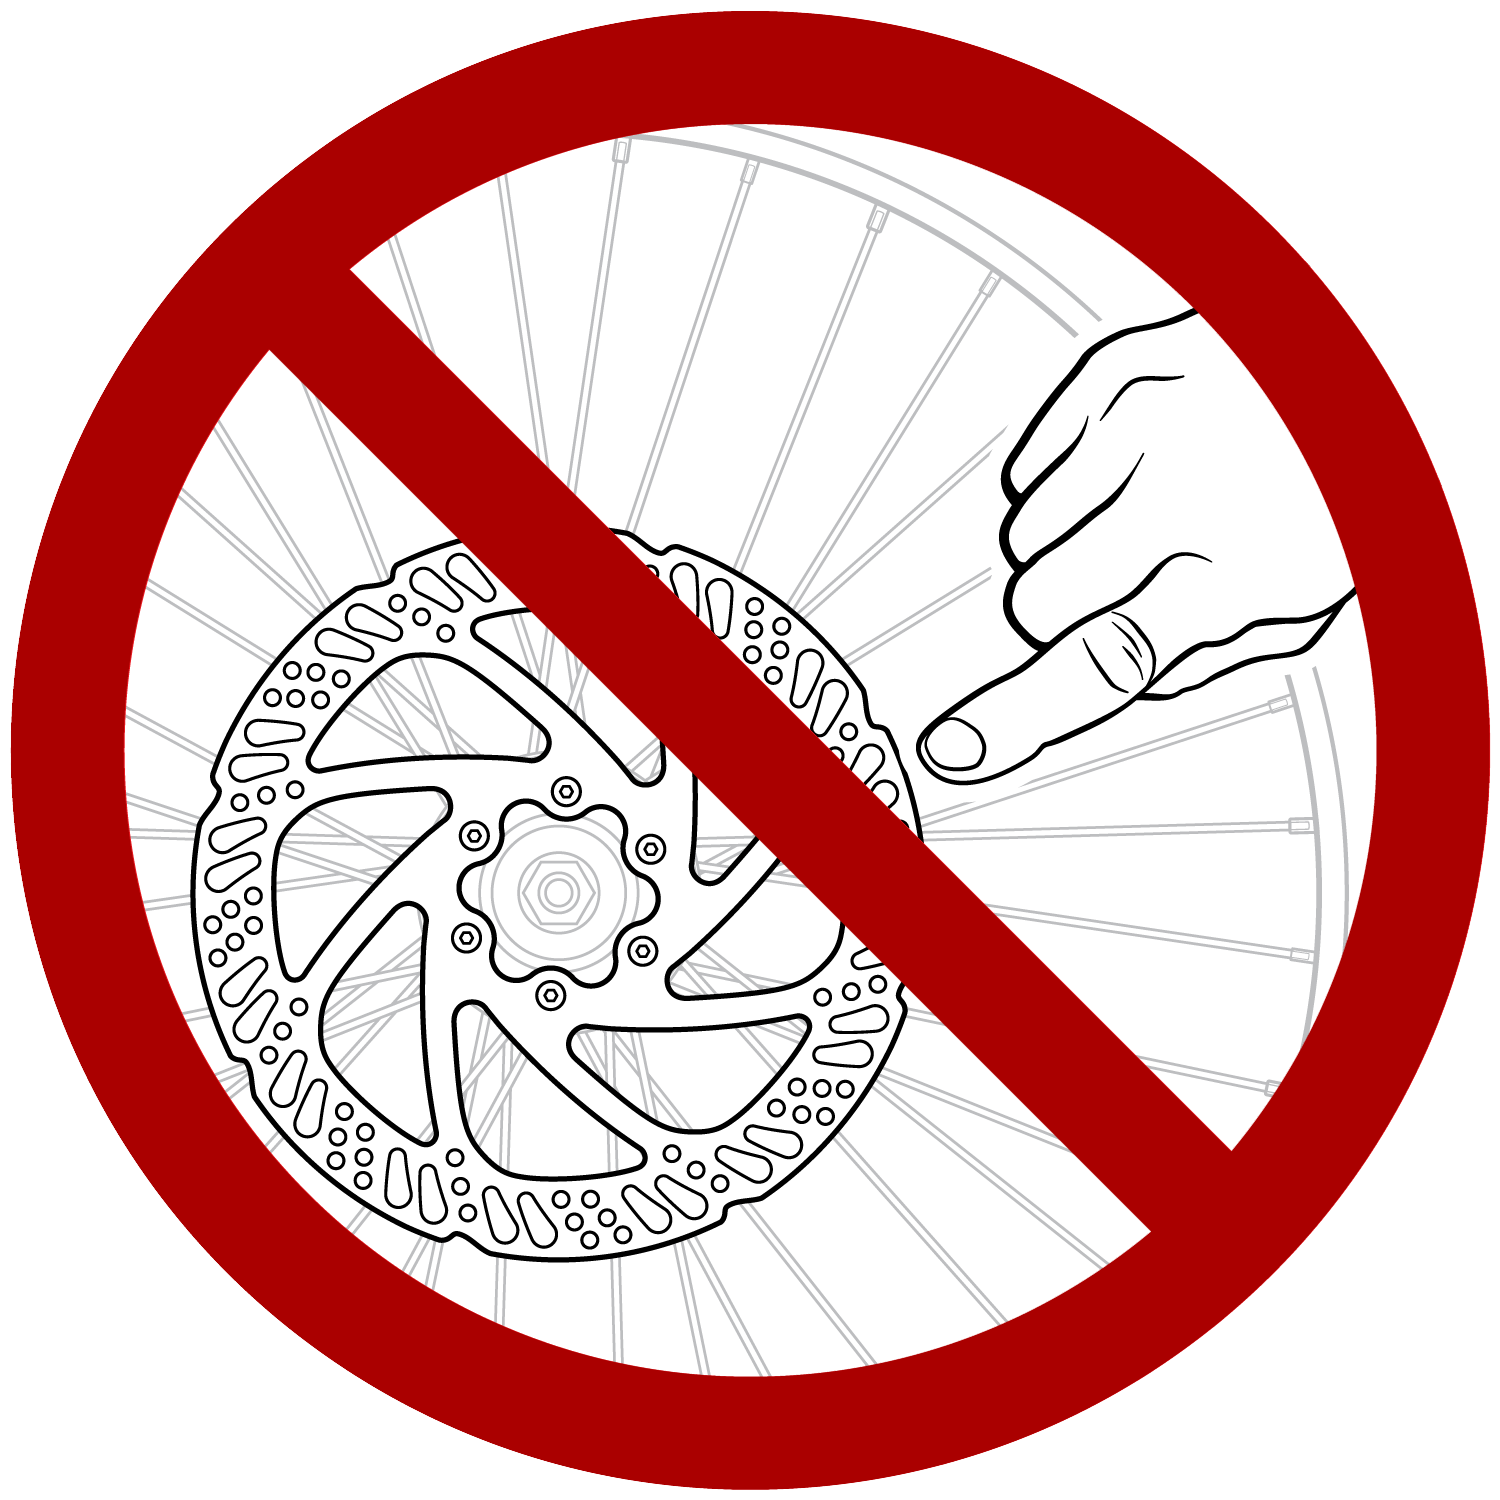 |
- Orient the front fork properly. Make sure the fork is oriented so that the brake pads are on the non-drive side, and the brake cable runs straight down and is not twisted around the head tube.
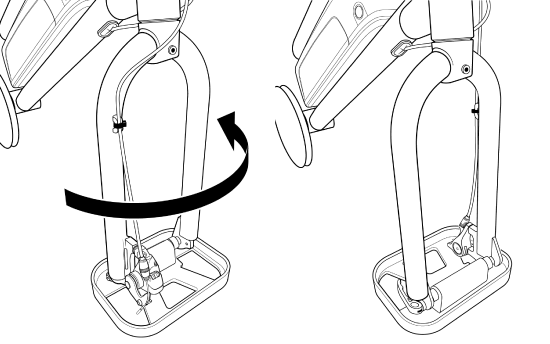
- Locate and remove the quick-release skewer that holds the fork on the fork protector plate. Open the lever, remove the thumbnut and cone spring on the opposite side, and remove the skewer. Lift the fork off the protector plate and carefully set it on the ground.
- Prepare the front wheel. Remove the protective plates from both sides of the front wheel.
The fork protector plate packaging includes a quick release lever and skewer to secure the fork during shipping. If your front wheel has a bolt-on axle, these parts will not be used for the front wheel installation, and can be recycled according to local rules.
- Loosen the pre-installed axle nuts on the front wheel enough to fit in the fork dropouts, but do not remove them. If the front wheel comes with additional washers, position these against the axle nuts for installation.
- Carefully lower the front fork onto the wheel. With the help of a friend, carefully lift the front of the bike and lower the fork onto the wheel so that the brake rotor enters the caliper between the brake pads, and the axle enters the fork dropouts fully. Pay attention to the brake rotor: It needs to slide between the brake pads. Once the rotor is between the brake pads, guide the fork onto the wheel so that the wheel axle enters the fork dropouts.
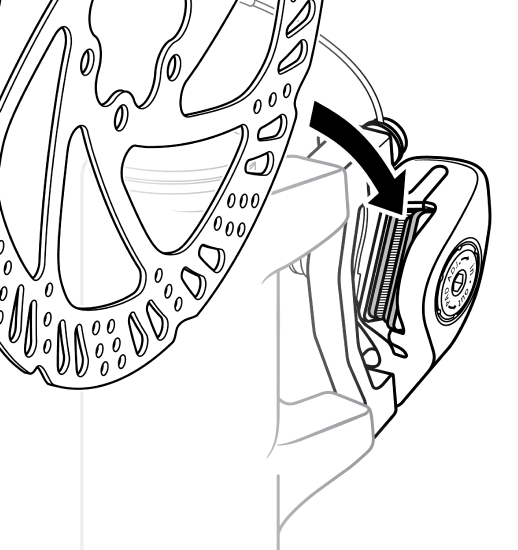
If it’s difficult to get the brake rotor between the brake pads, you may need to loosen the brake calipers slightly. Use an Allen wrench to widen the gap between the brake pads by turning the inner pad adjuster “out” (counterclockwise) two clicks. Stop after you feel two clicks or have turned the adjustment bolt one quarter to one half of a full rotation. When wheel installation is complete, you can turn the pad adjuster back “in” (clockwise) if necessary to ensure the brakes engage properly.Loosening the calipers too much (more than two clicks or more than half a full rotation) can cause very small brake components, including a tiny spring and ball bearing, to fall out of the brake assembly, and those will need to be reinstalled by a professional mechanic. Failure to have them reinstalled properly may compromise brake function, potentially leading to serious injury or death.
- Verify the wheel is seated in the fork dropouts. Check that the wheel is fully seated in the fork dropouts on both sides, the wheel axle is level and parallel to the ground, and that the wheel is centered.
- Tighten the axle nuts. Use the 15 mm wrench from the toolkit to tighten the axle nuts on both sides of the fork until secure. If the front wheel comes with additional washers, make sure they are positioned against the axle nuts before tightening.
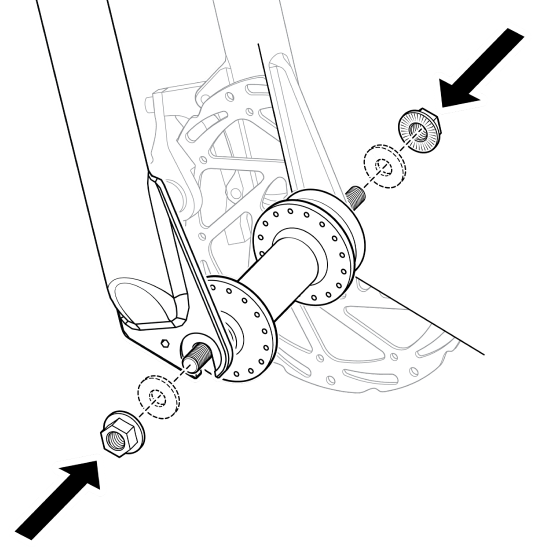
- Torque the axle nuts to 35 Nm. Use a torque wrench with a 15 mm socket head or crowfoot bit to torque the axle nuts to 35 Nm.
-
Test your front wheel installation. Check that the same amount of dropout is visible under the axle on both sides of the fork. If there's a difference, your axle is not fully inserted into both dropouts, and you'll need to repeat the previous steps. If the axle is fully seated, perform the following tests:
-
First, have a friend lift the front of the bike off the ground, and spin the front wheel to ensure it has no wobble or looseness.
-
Second, while straddling the bike with your hands on the handlebars, squeeze the front brake lever with your left hand. Rock the bike forward and backward and ensure the front brake is securely keeping the front wheel from turning and that there’s no play or wiggle in the wheel, handlebars, or front fork. Any sign of play or wiggle is a sign that you may not have properly secured the front wheel, and you must repeat the installation process.
-
- Continue with the rest of the ebike assembly as described in the assembly video or your Owner's Manual.
Ensure the front wheel axle is fully inserted in the fork dropouts on both sides, and both of the axle nuts have been torqued to 35 Nm. An improperly secured front or rear wheel can cause loss of control, accidents, serious injury, or death. Inspect and test both wheels before each ride.