RadRunner chain tensioner replacement guide
The RadRunner chain tensioner can be replaced if you are instructed to do so by Rad Power Bikes Product Support.
Follow the steps below to replace the chain tensioner.
Tools Needed:
- Phillips head screwdriver
- 5 mm Allen wrench
- Camera
- Paper towel or shop towel
- Nitrile gloves (optional)
- The replacement chain tensioner from Rad Power Bikes
Hardware bolt head, style, and size may vary between models. Use the appropriate head size and type of tool for your bolts. Ensure the tool is pressed firmly into the bolt head and turn slowly to prevent stripping.
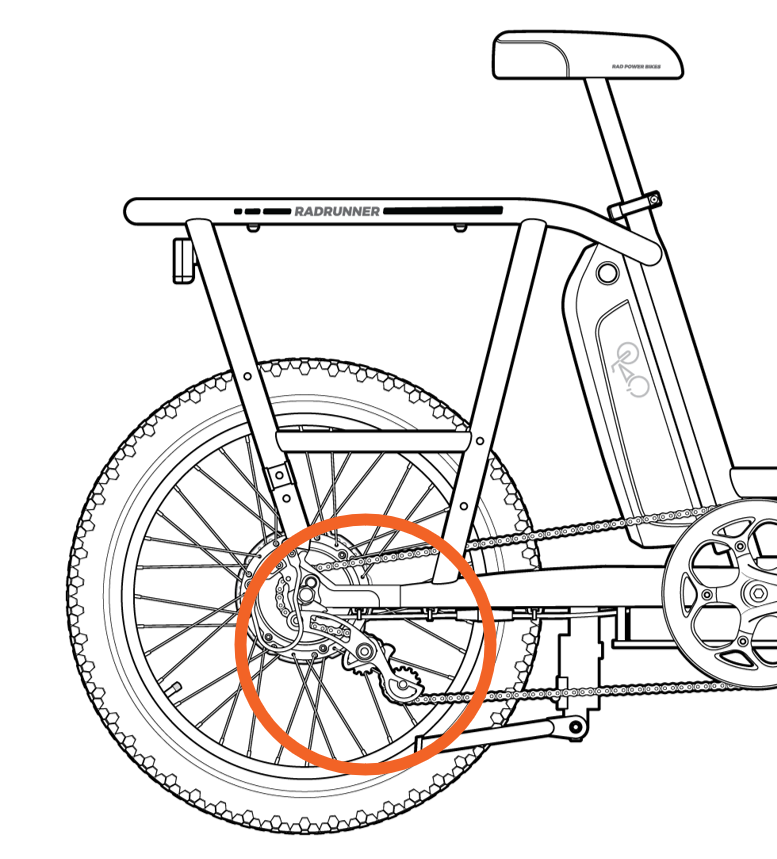
Remove the Old Chain Tensioner
- Get the bike ready for maintenance. Turn off the bike, remove the battery, and press and hold MODE or the power button to discharge remaining power.
- Take a photo of the chain tensioner and chain routing to help with installation of the new chain tensioner at a later step.
- Roll the chain off the chainring. Push the chain tensioner toward the front of the bike to provide slack. Use a paper towel or shop towel to grab the chain, then lift and hold the chain toward the inside while turning the pedals toward the back of the bike to carefully roll the chain off the chainring.
.gif?revision=1)
- Remove the lower pulley wheel. Use a Phillips head screwdriver to remove the lower pulley wheel bolt. Recycle the bolt and pulley wheel according to local rules.
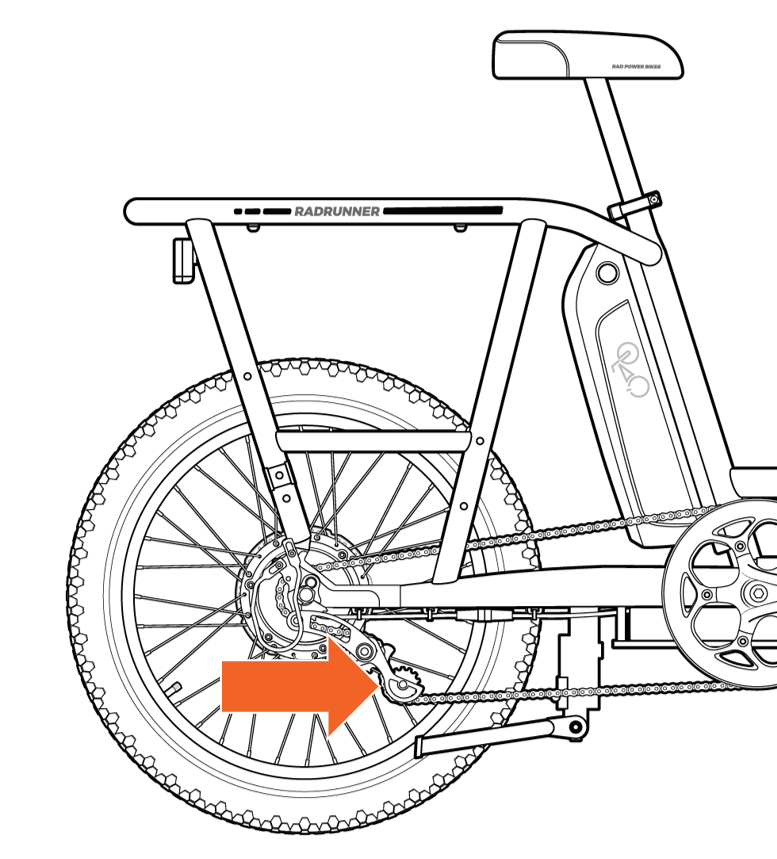
- Remove the chain tensioner mounting bolt and remove the chain tensioner. Use a 5 mm Allen wrench to remove the chain tensioner mounting bolt. Remove the chain tensioner from the derailleur hanger. Set the hardware aside; it will be used to install the new chain tensioner. Recycle the old chain tensioner according to local rules.

Continue to the next section to install the new chain tensioner.
Install the New Chain Tensioner
- Locate the new chain tensioner and hardware set aside earlier.
- Remove the lower pulley wheel on the new chain tensioner. Use a Phillips head screwdriver to unscrew the bolt. Set the bolt and pulley wheel aside for a later step.
- Place the chain tensioner in position on the derailleur hanger so the chain runs across the right side of the upper pulley wheel. Carefully thread the bolt through the chain tensioner mounting point and into the axle without cross-threading the bolt. Use a 5 mm Allen wrench to tighten the bolt. Torque to 6 Nm.
An improperly secured chain tensioner, or chain tensioner components that are not installed in the correct order, can lead to premature wear on components, or can cause loss of control, accidents, serious injury, or death.
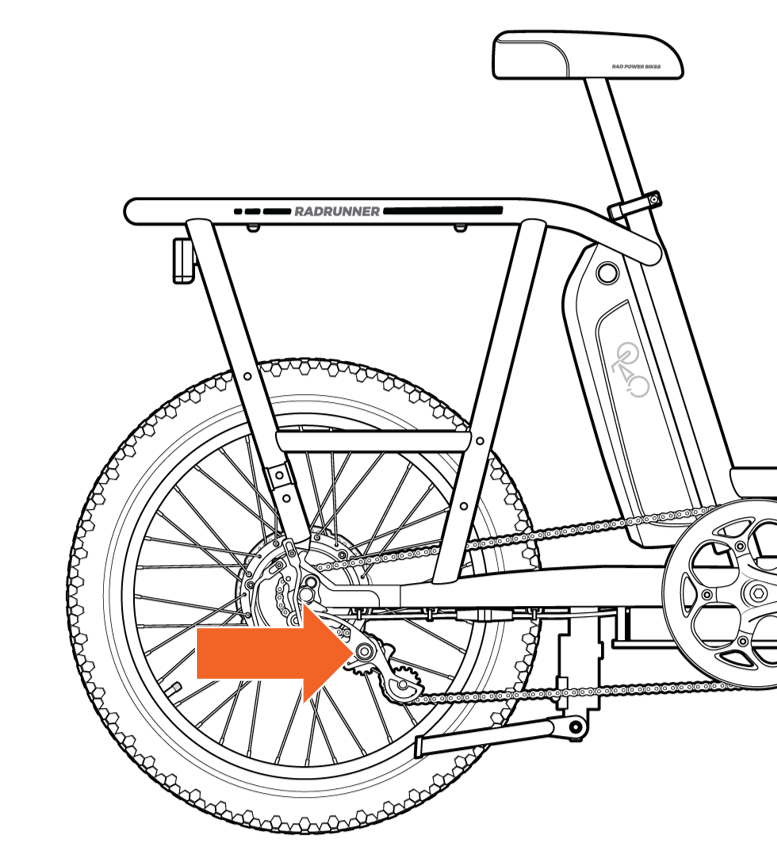
- Reinstall the lower pulley wheel. Place the pulley wheel in position so the chain runs across the left side of the lower pulley wheel, and thread in the bolt by hand. Use a Phillips head screwdriver to tighten the bolt. Torque to 5 Nm.
- Reinstall the chain on the front chainring and ensure there is adequate chain tension. Press the chain tensioner toward the front of the bike with your left hand. Use a paper towel in your right hand to grab the chain and carefully set it fully onto the teeth of the chainring. Rotate the crank toward the front of the bike to install the chain.
.gif?revision=1)
- Rotate the pedals toward the back of the bike to ensure the chain is properly routed on the front chainring and chain tensioner.
.gif?revision=1)
- Reinstall the battery, test the bike fully before riding, and ride Rad!