Battery tray replacement guide
The battery tray is where the battery locks onto the frame and is replaceable if needed. If instructed by Product Support to replace the battery tray, follow the steps below. This article applies to the battery trays for external batteries.
If you're looking for similar information for a semi-integrated battery, click HERE.
This guide uses a RadMini Step-Thru, but the steps will be the same for most models.
Tools needed:
- A 4 mm Allen wrench
- A camera
- Zip ties
- The replacement battery tray from Rad Power Bikes
Remove the Old Battery Tray
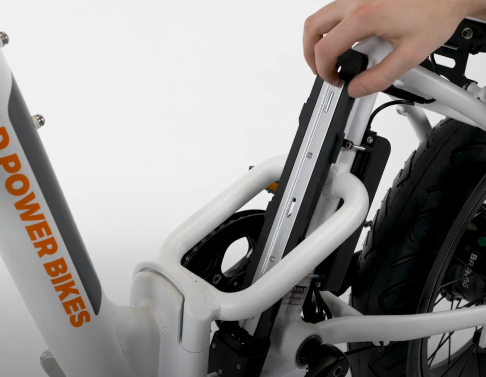
- Get the bike ready for maintenance. Turn off the bike, remove the battery, and press and hold MODE (or the power button) to discharge remaining power.
- Take a photo of the battery tray and the battery connector location. The battery connector may pass through or into the frame tubing on some models. Take clear photos or make note of how the cable is routed to help with reinstallation later.
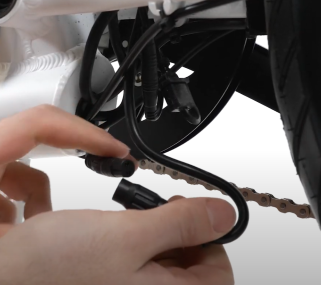
- Locate and unplug the battery connector. Trace the cable from the battery to the large connector near the bottom bracket. Pull each side of the connector directly apart, without twisting, to unplug. Snip zip ties to increase cable slack, if needed.
Note: The battery connector has 2 pins inside.
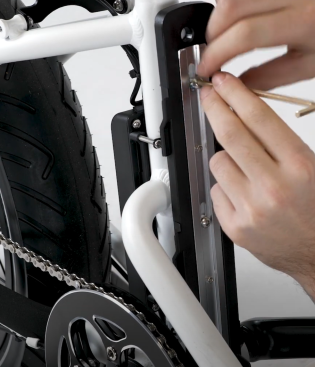
- Remove the battery tray. Use a 4 mm Allen wrench to remove the three battery tray mounting bolts. Ensure the tool is inserted fully, press firmly, and turn slowly to avoid damaging the bolt heads. Remove the battery tray and recycle it according to local rules.
Continue to the next section to install the new battery tray.
Install the New Battery Tray
- Locate the new battery tray and place it in position.
- Orient the battery tray so the mounting holes match the mounting points on the bike frame.
- Route the cable in the same way the old battery tray cable was routed. Refer to the photo taken earlier, if needed.
- Orient the battery tray so the mounting holes match the mounting points on the bike frame.
- Secure the battery tray to the bike. Thread in the three battery tray mounting bolts by hand. Use a 4 mm Allen wrench to tighten each bolt evenly, about one turn at a time, alternating between the three bolts until they are all securely tightened. Ensure the tool is inserted fully, press firmly, and turn slowly to avoid damaging the bolt heads. Do not overtighten.
- Plug in the battery tray connector. Locate the matching connector ends. Align the internal notch and external markings, and press directly together, without twisting, to connect.
- Secure the cable away from moving parts. Replace any snipped zip ties and trim them to be flush and smooth. Make sure the cable is out of the way of any moving parts.
- Reinstall the battery, test the bike fully, and ride Rad!