Small Basket, Large Basket, and Platform installation guide
A basket or platform can be installed on the front rack or rear rack of any ebike by Rad Power Bikes.
If you do not have an integrated rear rack, or you want to mount a basket or platform on the front of your ebike, check out our Accessories page to find racks compatible with your ebike.
Note: On the rear rack of most models, the hardware will thread directly into the rear rack mounting points. On the rear rack of the RadMission or RadRunner 1, 2 or RadRunner Plus models, the bolt will pass directly through the mounting points and be secured on the underside using a locknut over the bolt end. The RadRunner 3 Plus model has threaded mounting points and will not require locknuts.
Watch the video and follow the steps below to install these accessories on your bike.
Tools needed:
- 4 mm Allen wrench
- 5 mm Allen wrench (for installation on a RadMission or selected Radrunner models rear rack)
- 10 mm wrench (for installation on a RadMission or selected Radrunner models rear rack)
- The accessory kit from Rad Power Bikes
Hardware may vary (bolt head style) and/or require different tools. Use the appropriate head size and type of tool for your bolts. Ensure the tool is pressed firmly into the bolt head and turn slowly to prevent stripping.
- Get the bike ready for installation. Press and hold MODE or the power button to turn off the bike. Prop the bike on the kickstand.
- Choose where you want to install the basket or platform. Ensure you have a front or rear rack installed before attempting to install the accessory. If installing on the RadWagon rear rack, remove the wooden deck hardware and set the mounting hardware and deck aside.
- Locate and prepare the mounting hardware.
- To install an accessory on the rear rack of the RadMission or selected RadRunner models: Locate the 4 longer bolts. Pass a small washer over each of the 4 longer bolts and set them aside with the remaining 4 small washers and the 4 locknuts.
- To install an accessory on the rear rack of all other models, and the front rack of all models: Locate the 4 shorter bolts. Pass a split washer, a small flat washer, and then a large flat washer over each of the 4 shorter bolts and set them aside.
- Orient the accessory and place it in position. Make sure the accessory is not pinching any cables.
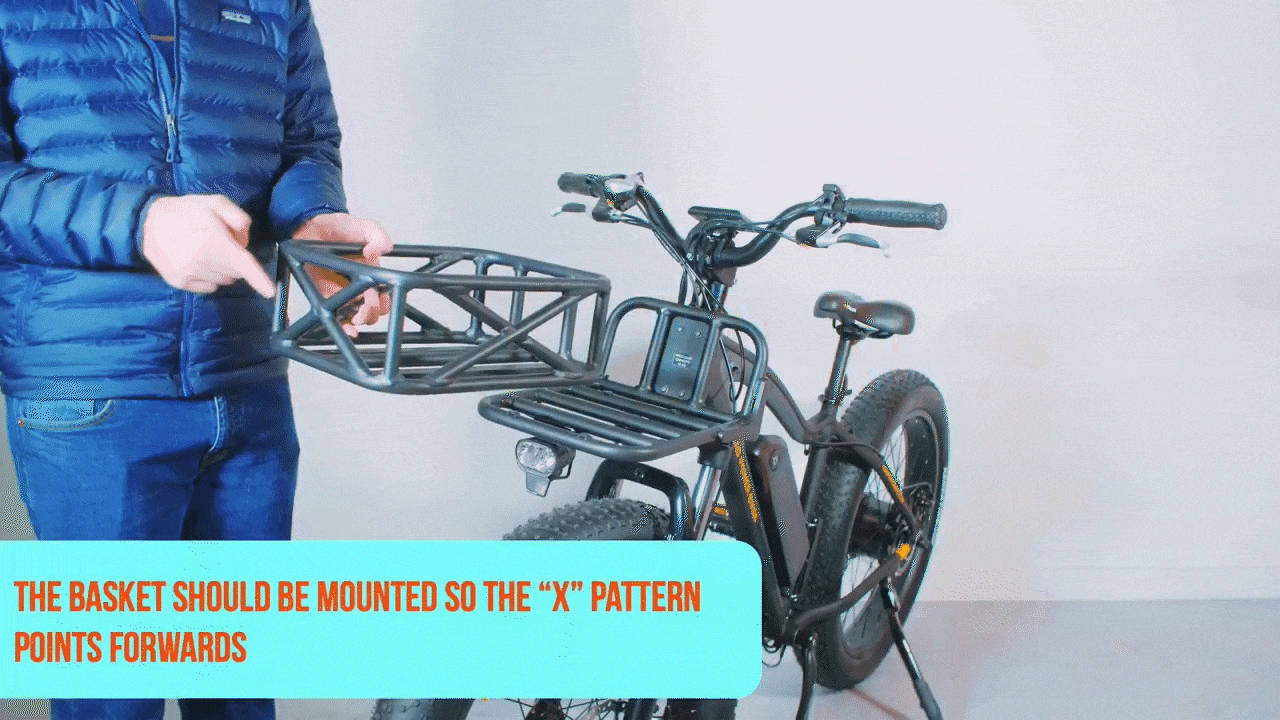
- Small or large basket: Orient the basket so the X is facing away from the rider (forward if installed on the front rack and backward if installed on the rear rack).
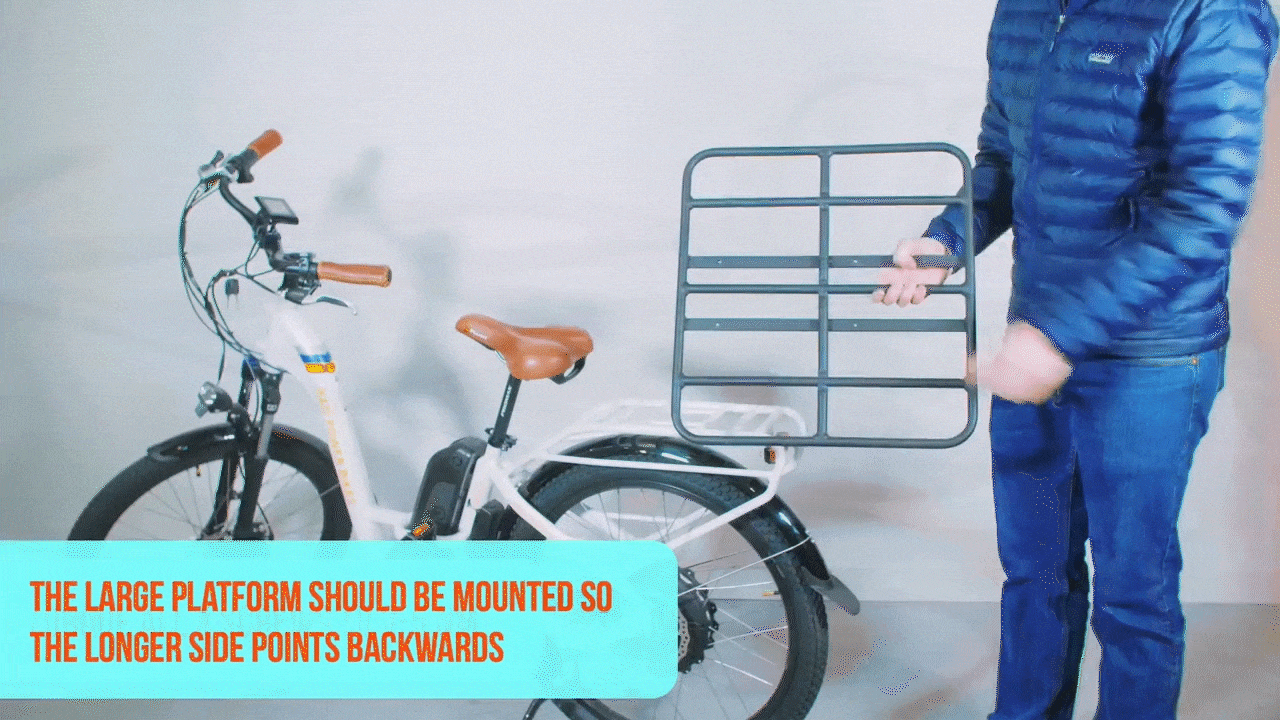
- Large platform: Orient the platform so the larger side is facing away from the rider and the flat side of the platform will sit flush against the rack.
- Small or large basket: Orient the basket so the X is facing away from the rider (forward if installed on the front rack and backward if installed on the rear rack).
- Secure the accessory.
- To install an accessory on the rear rack of the RadMission or selected RadRunner models:
- Pass the longer bolt through the mounting hole on the accessory and through the mounting hole on the rack.
- On the underside of the rear rack, pass another washer over the bolt end, then thread on a locknut.
- Repeat with the remaining bolts.
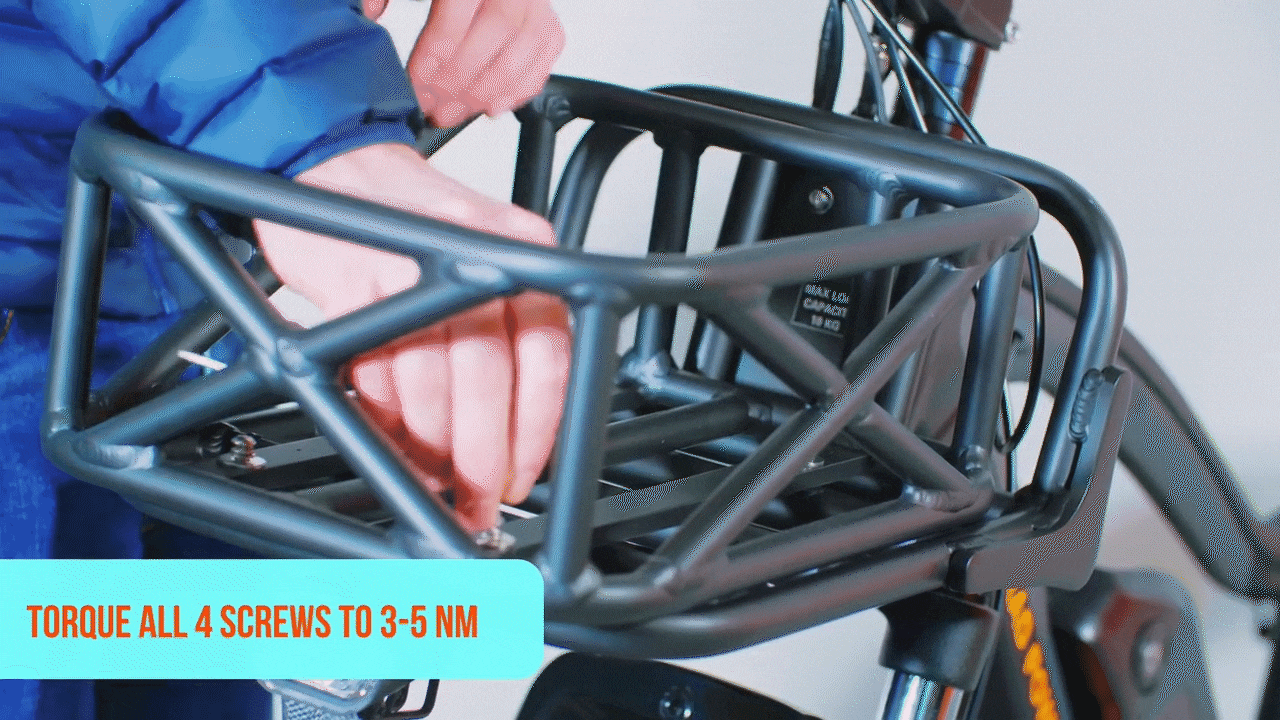
- Use a 5 mm Allen wrench and a 10 mm wrench to tighten all bolts evenly, by tightening partway then switching to another bolt until they are all securely tightened. Torque each bolt to 3-5 Nm.
- To install an accessory on the rear rack of all other models, and the front rack of all models:
- Pass the shorter bolt through the mounting hole on the accessory, and through the mounting point on the rack. Thread into the mounting point on the rack by hand.
- Repeat with the remaining bolts.
- Use a 4 mm Allen wrench to tighten all bolts evenly, by tightening partway then switching to another bolt until they are all securely tightened. Torque each bolt to 3-5 Nm.
- To install an accessory on the rear rack of the RadMission or selected RadRunner models:
- Check that all cables are free of moving parts and that the front wheel can turn freely. Rotate the handlebar fully to check that the accessory does not block the wheel and does not pinch any cables. Do not exceed the recommended payload capacity for your model. Click HERE to learn about payload capacity for your bike.
- Test the bike fully and ride Rad!