RadWagon Running Boards installation guide
Use this procedure to mount the RadWagon Running Boards on a RadWagon 4 or RadWagon 5.
Tools needed:
- 6 mm Allen wrench
- Torque wrench with 6 mm socket head
|
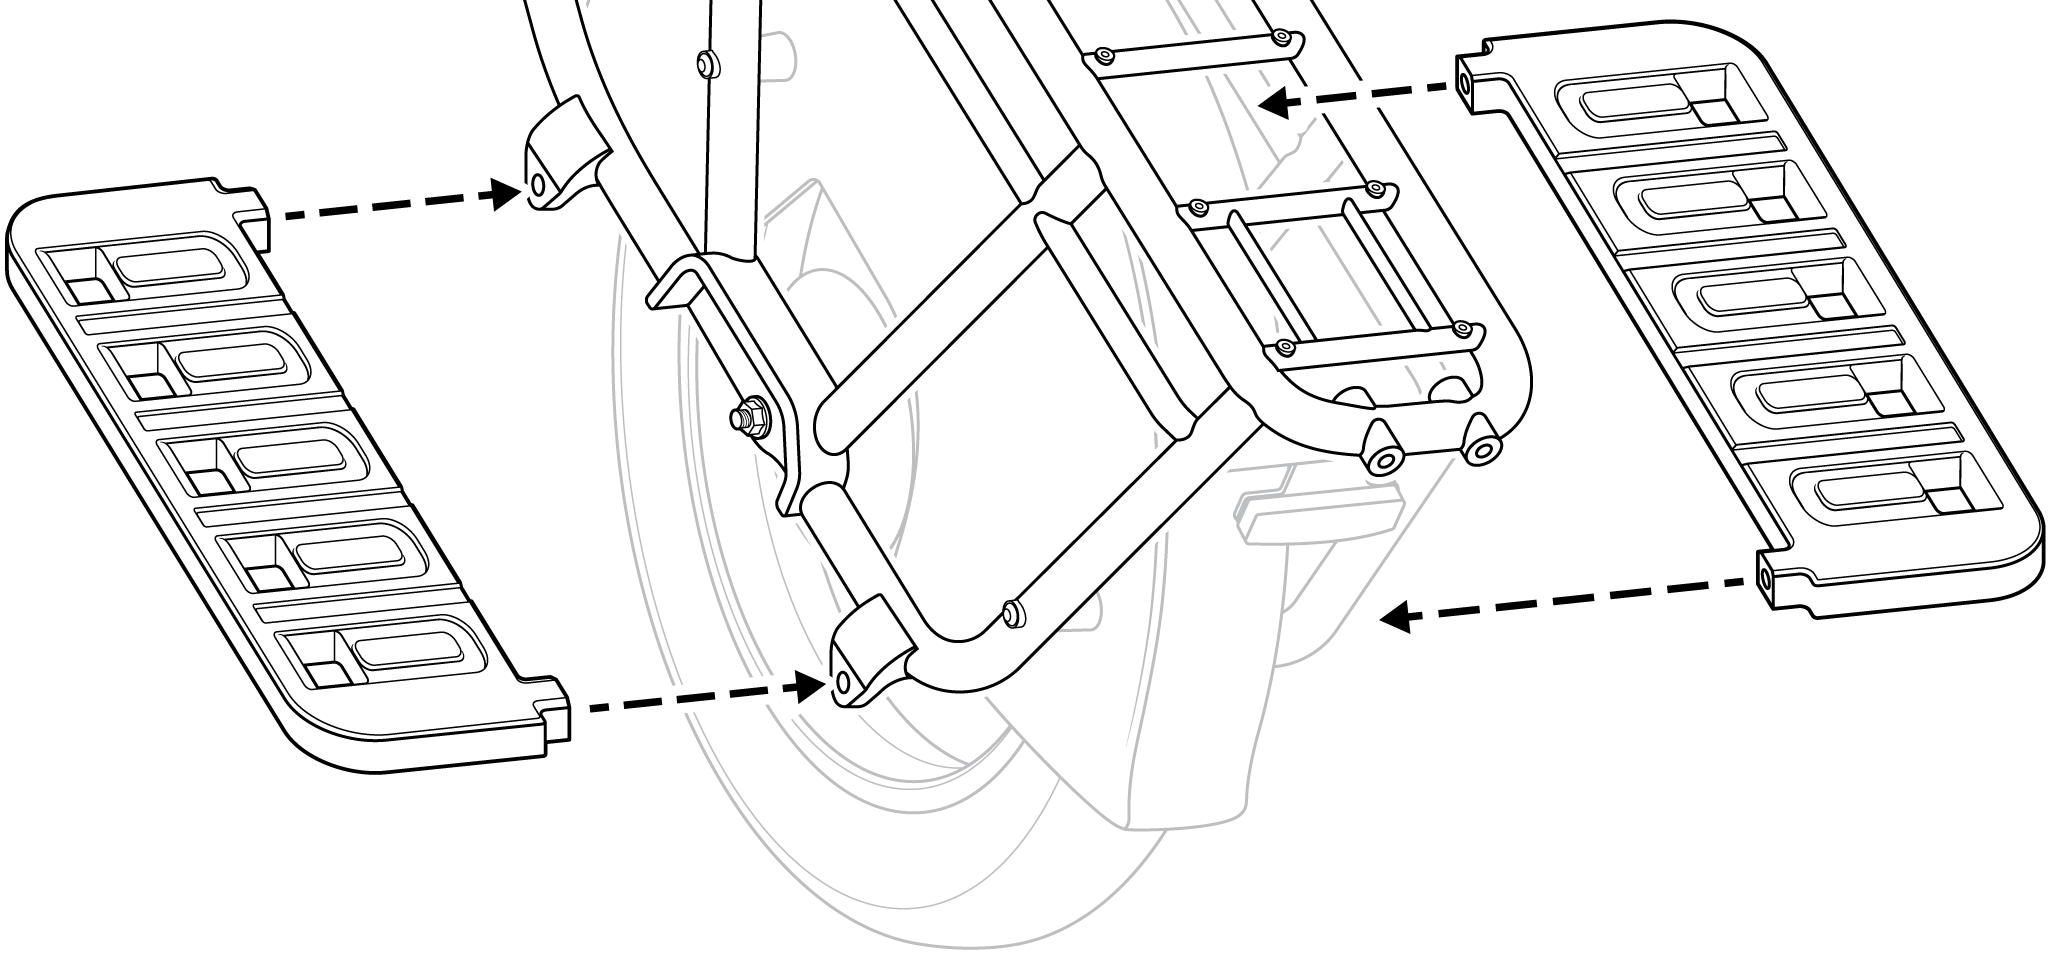
Figure 1: Position the running boards. |
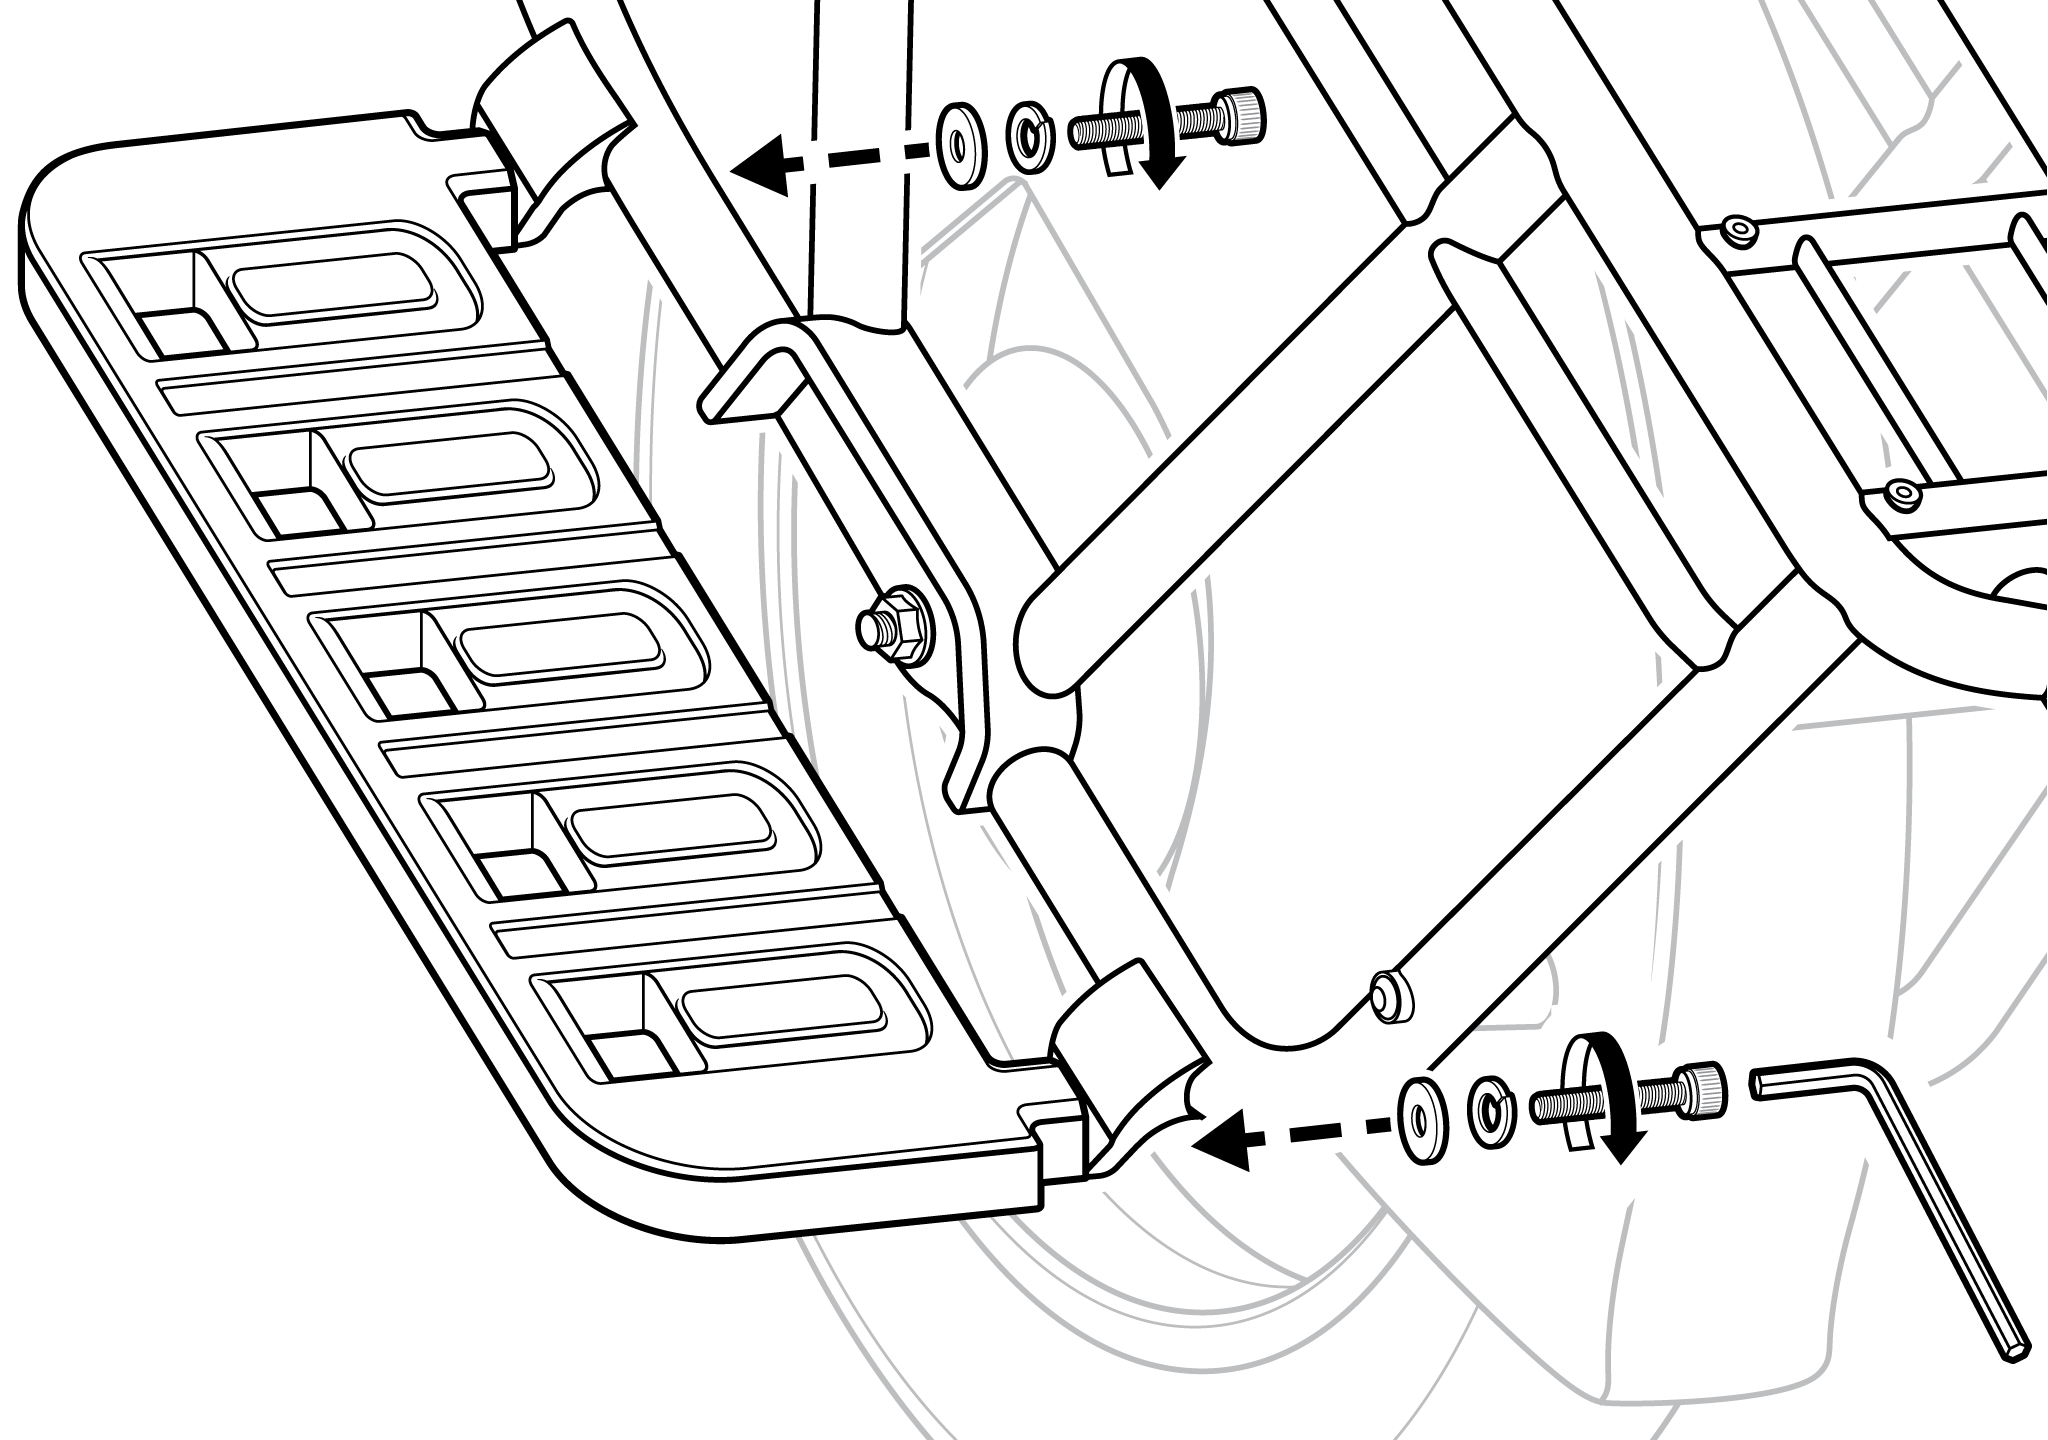
Figure 2: Secure the mounting bolts |
- Get the ebike ready for maintenance. Turn off the ebike, remove the battery, and press the on/off button on the remote to discharge remaining power.
- Remove the bash guard. Loosen the rear wheel axle nut on the drive side and remove the bash guard (if necessary) to make room for the running board installation. Once removed, re-tighten the axle nut to the torque value listed in your RadWagon Owner’s Manual.
- Position the running boards. Start at the mounting point that is the farthest back on the ebike. Place a lock washer and flat washer against the bolt head, pass the bolt from the tire side through the mounting point on the frame, and tighten partway by hand. Repeat on the front mounting point. Refer to Figure 1.
- Use the 70 mm bolts for the RadWagon 4 model ebike.
- Use the 35 mm bolts for the RadWagon 5 model ebike.
- Secure the mounting bolts. Press the running board against the mounting point and use a 6 mm Allen wrench to tighten each bolt evenly, alternating between bolts until secure. Refer to Figure 2.
- Torque the bolts. Use a torque wrench with a 6 mm socket head to torque both bolts to 25 Nm.
- Repeat on the other side. Mount and install the running board on the other side of the ebike using the same steps.
- Reinstall the battery, test the ebike fully, and have your work inspected by a local, professional, reputable bike mechanic.