Reflector installation
Some ebikes from Rad Power Bikes ship with extra reflectors that can be installed to improve the visibility of your bike to other vehicles. These reflectors are required in some jurisdictions, and not others. It is your responsibility to know and follow relevant laws where you ride your bike.
Even if these reflectors are not required where you ride, we recommend installing them and taking all possible steps to increase your visibility, including the following:
- Use your headlight at all times, angling it slightly downward so that it does not blind oncoming traffic.
- Never obstruct the visibility of your headlight, taillight/brake light, or reflectors with other components, accessories, or gear.
- Ensure all lights and reflectors are secure.
- Wear bright colors and/or reflective clothing, especially when riding in low-visibility conditions.
Reflectors that may ship with your ebike
- Two spoke reflectors. Depending on your bike model, they may be labeled “F” for front and “R” for rear. If not pre-installed, these will come with clips or similar mounting components.
- Handlebar reflector (generally white). Mounting hardware typically consists of a clamp that wraps around the handlebar.
- Rear reflector (generally red). Mounting hardware differs depending on whether the reflector is designed to be installed on the seatpost or fender. Most bikes come with a seatpost-style reflector that mounts with a clamp. Some bikes, including the RadCity 5 Plus, come with a reflector designed to attach to the back of the rear fender.
Tools you may need
Depending on your bike model and the reflectors you received, installation may require a flat-head screwdriver, Phillips-head screwdriver, an Allen wrench, or other tools.
Hardware may vary (bolt head style) and/or require different tools. Use the appropriate head size and type of tool for your bolts. Ensure the tool is pressed firmly into the bolt head and turn slowly to prevent stripping.
The reflector’s color or required installation may vary. Your bike may come with some reflectors pre-installed, or might require different installation steps.
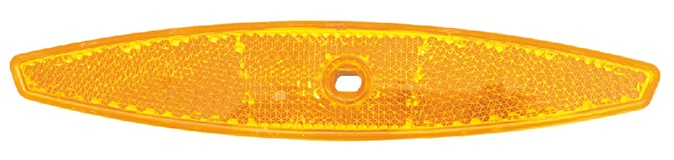
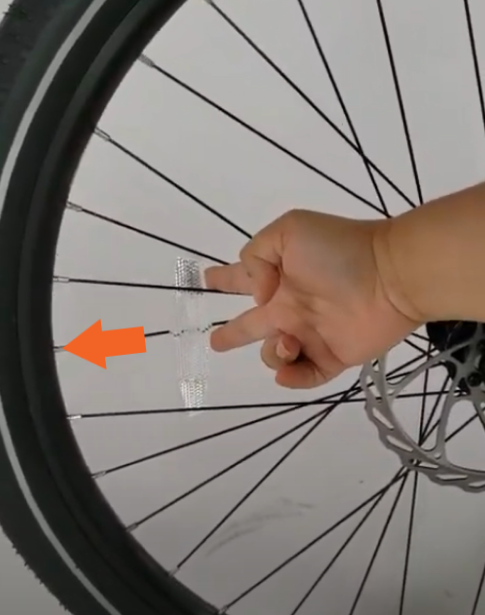
- Locate the spoke reflectors. These are long, narrow reflectors designed for installation on the spokes. They may be white or yellow. Here are some examples of what they may look like:
The reflectors may be marked with a sticker: “F” for front, and “R” for rear. Any necessary hardware or clips will come with the reflectors. - Position the reflector on the spoke. There is a spoke guide in the center of the reflector.
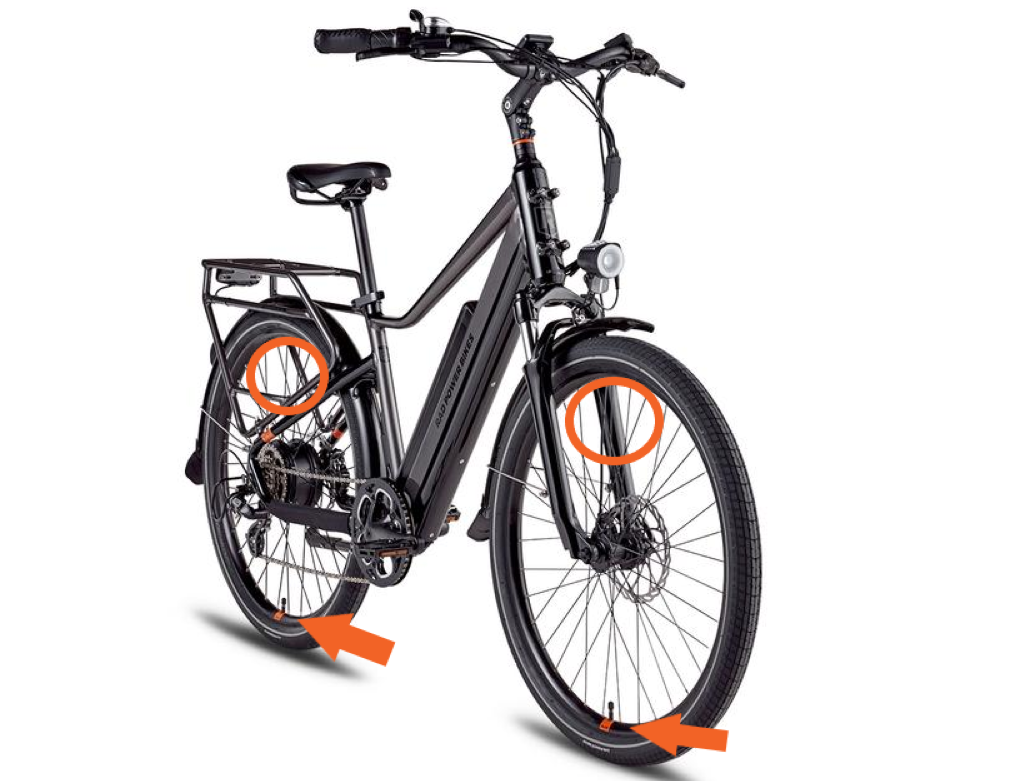
- Choose a position that's on the opposite side of the wheel from the tire valve. (It does not have to be exact.)
- Position the reflector on the spoke(s). The reflector should run between the two rows of spokes and parallel to the bike rim.
- If the reflector is not parallel, try the next spoke until the positioning looks right. (The angle of the spokes alternate.)
- Use the provided clips or other hardware to secure the reflector to the spoke. Here's an example of a spoke reflector that uses a center clip.

And here is an example of how to position a reflector that uses side mounts:

- If you have a reflector that uses a center clip, push the reflector toward the wheel, so that it is held firmly by the spokes on either side. This will help keep the reflector secure.
- Repeat this process with the other spoke reflector.
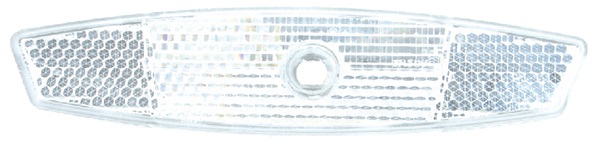
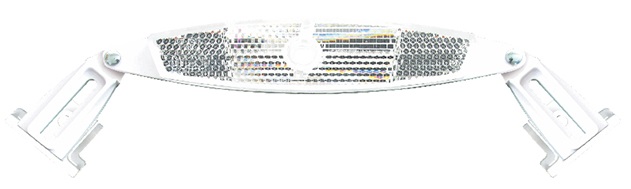
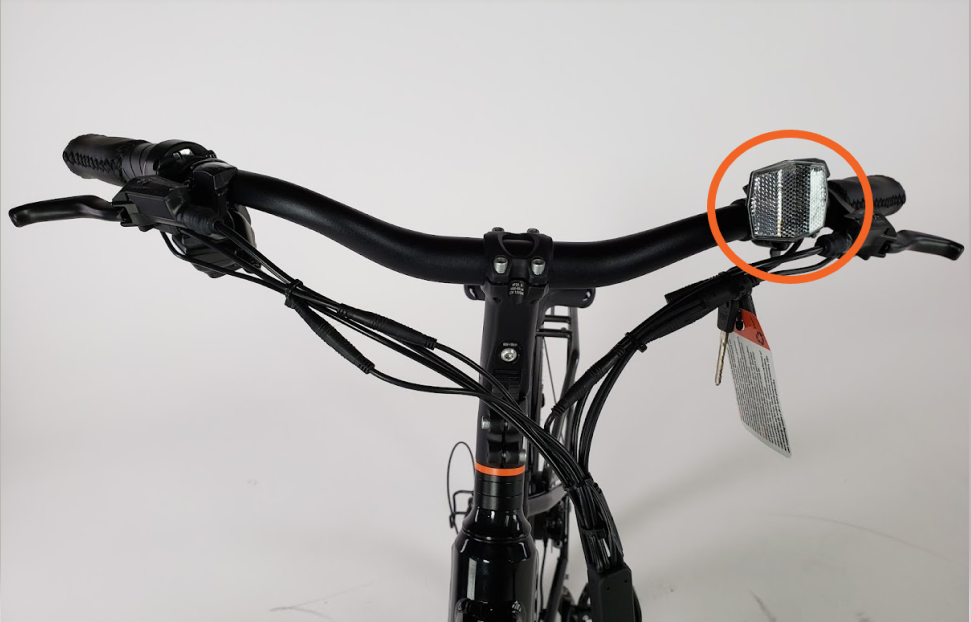
- Locate the front reflector. Here is an examples of what it may look like:

- Remove the mounting bolt using a Phillips head screwdriver. Set the bolt aside.
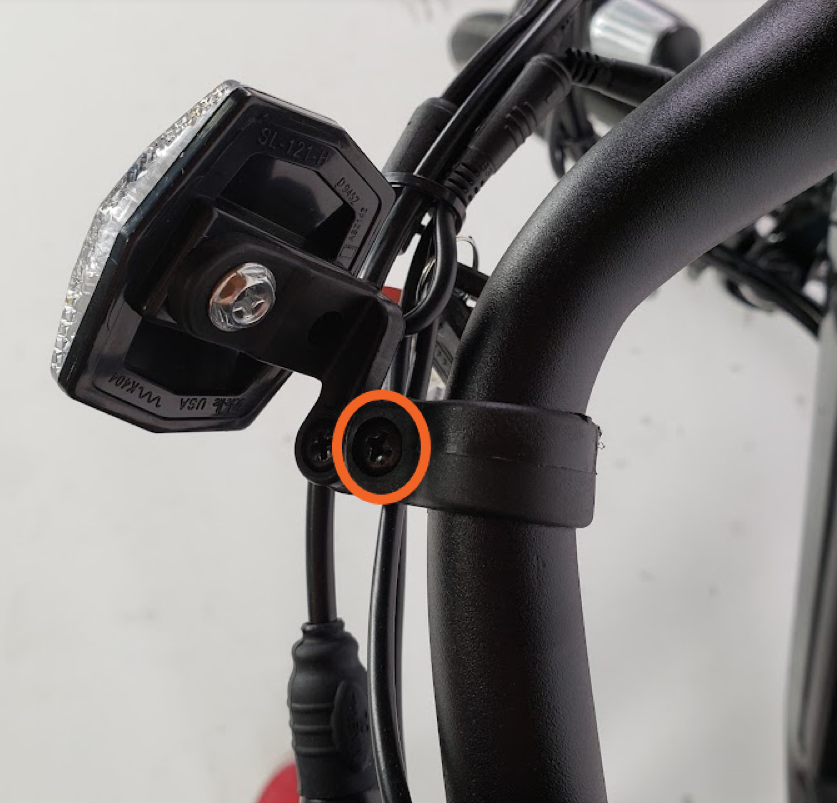
- Loop the reflector’s bracket around the handlebar near the remote. Make sure the cables are out of the way.
- Position the reflector. Tilt the reflector downwards, and tighten the adjustment bolt, using a Phillips head screwdriver.
- Tighten the mounting bolt using the Phillips head screwdriver.
.PNG?revision=1)
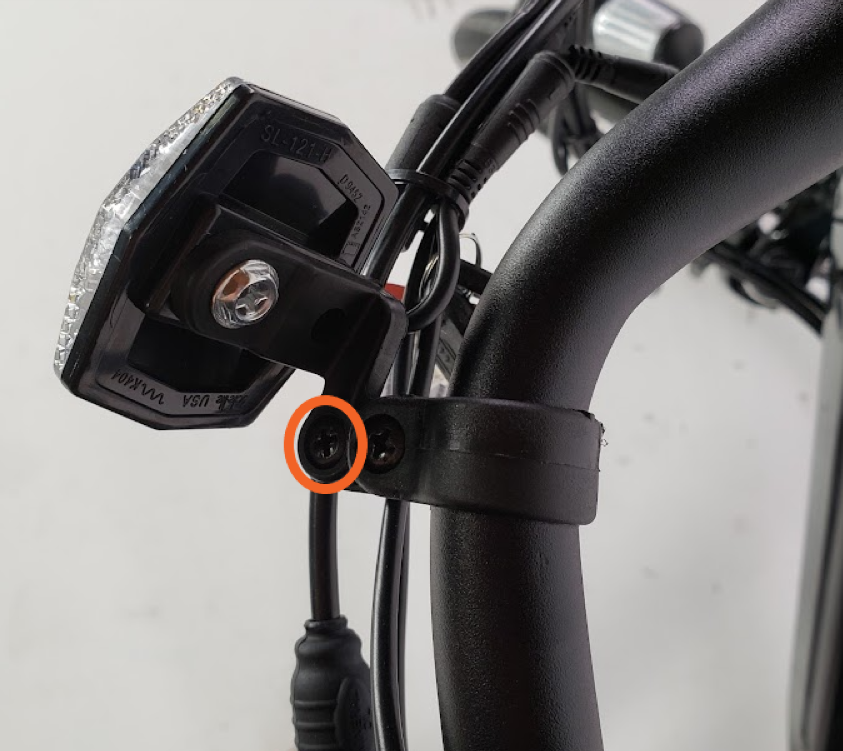
- Make sure it is secure, by firmly pushing and pulling the reflector.
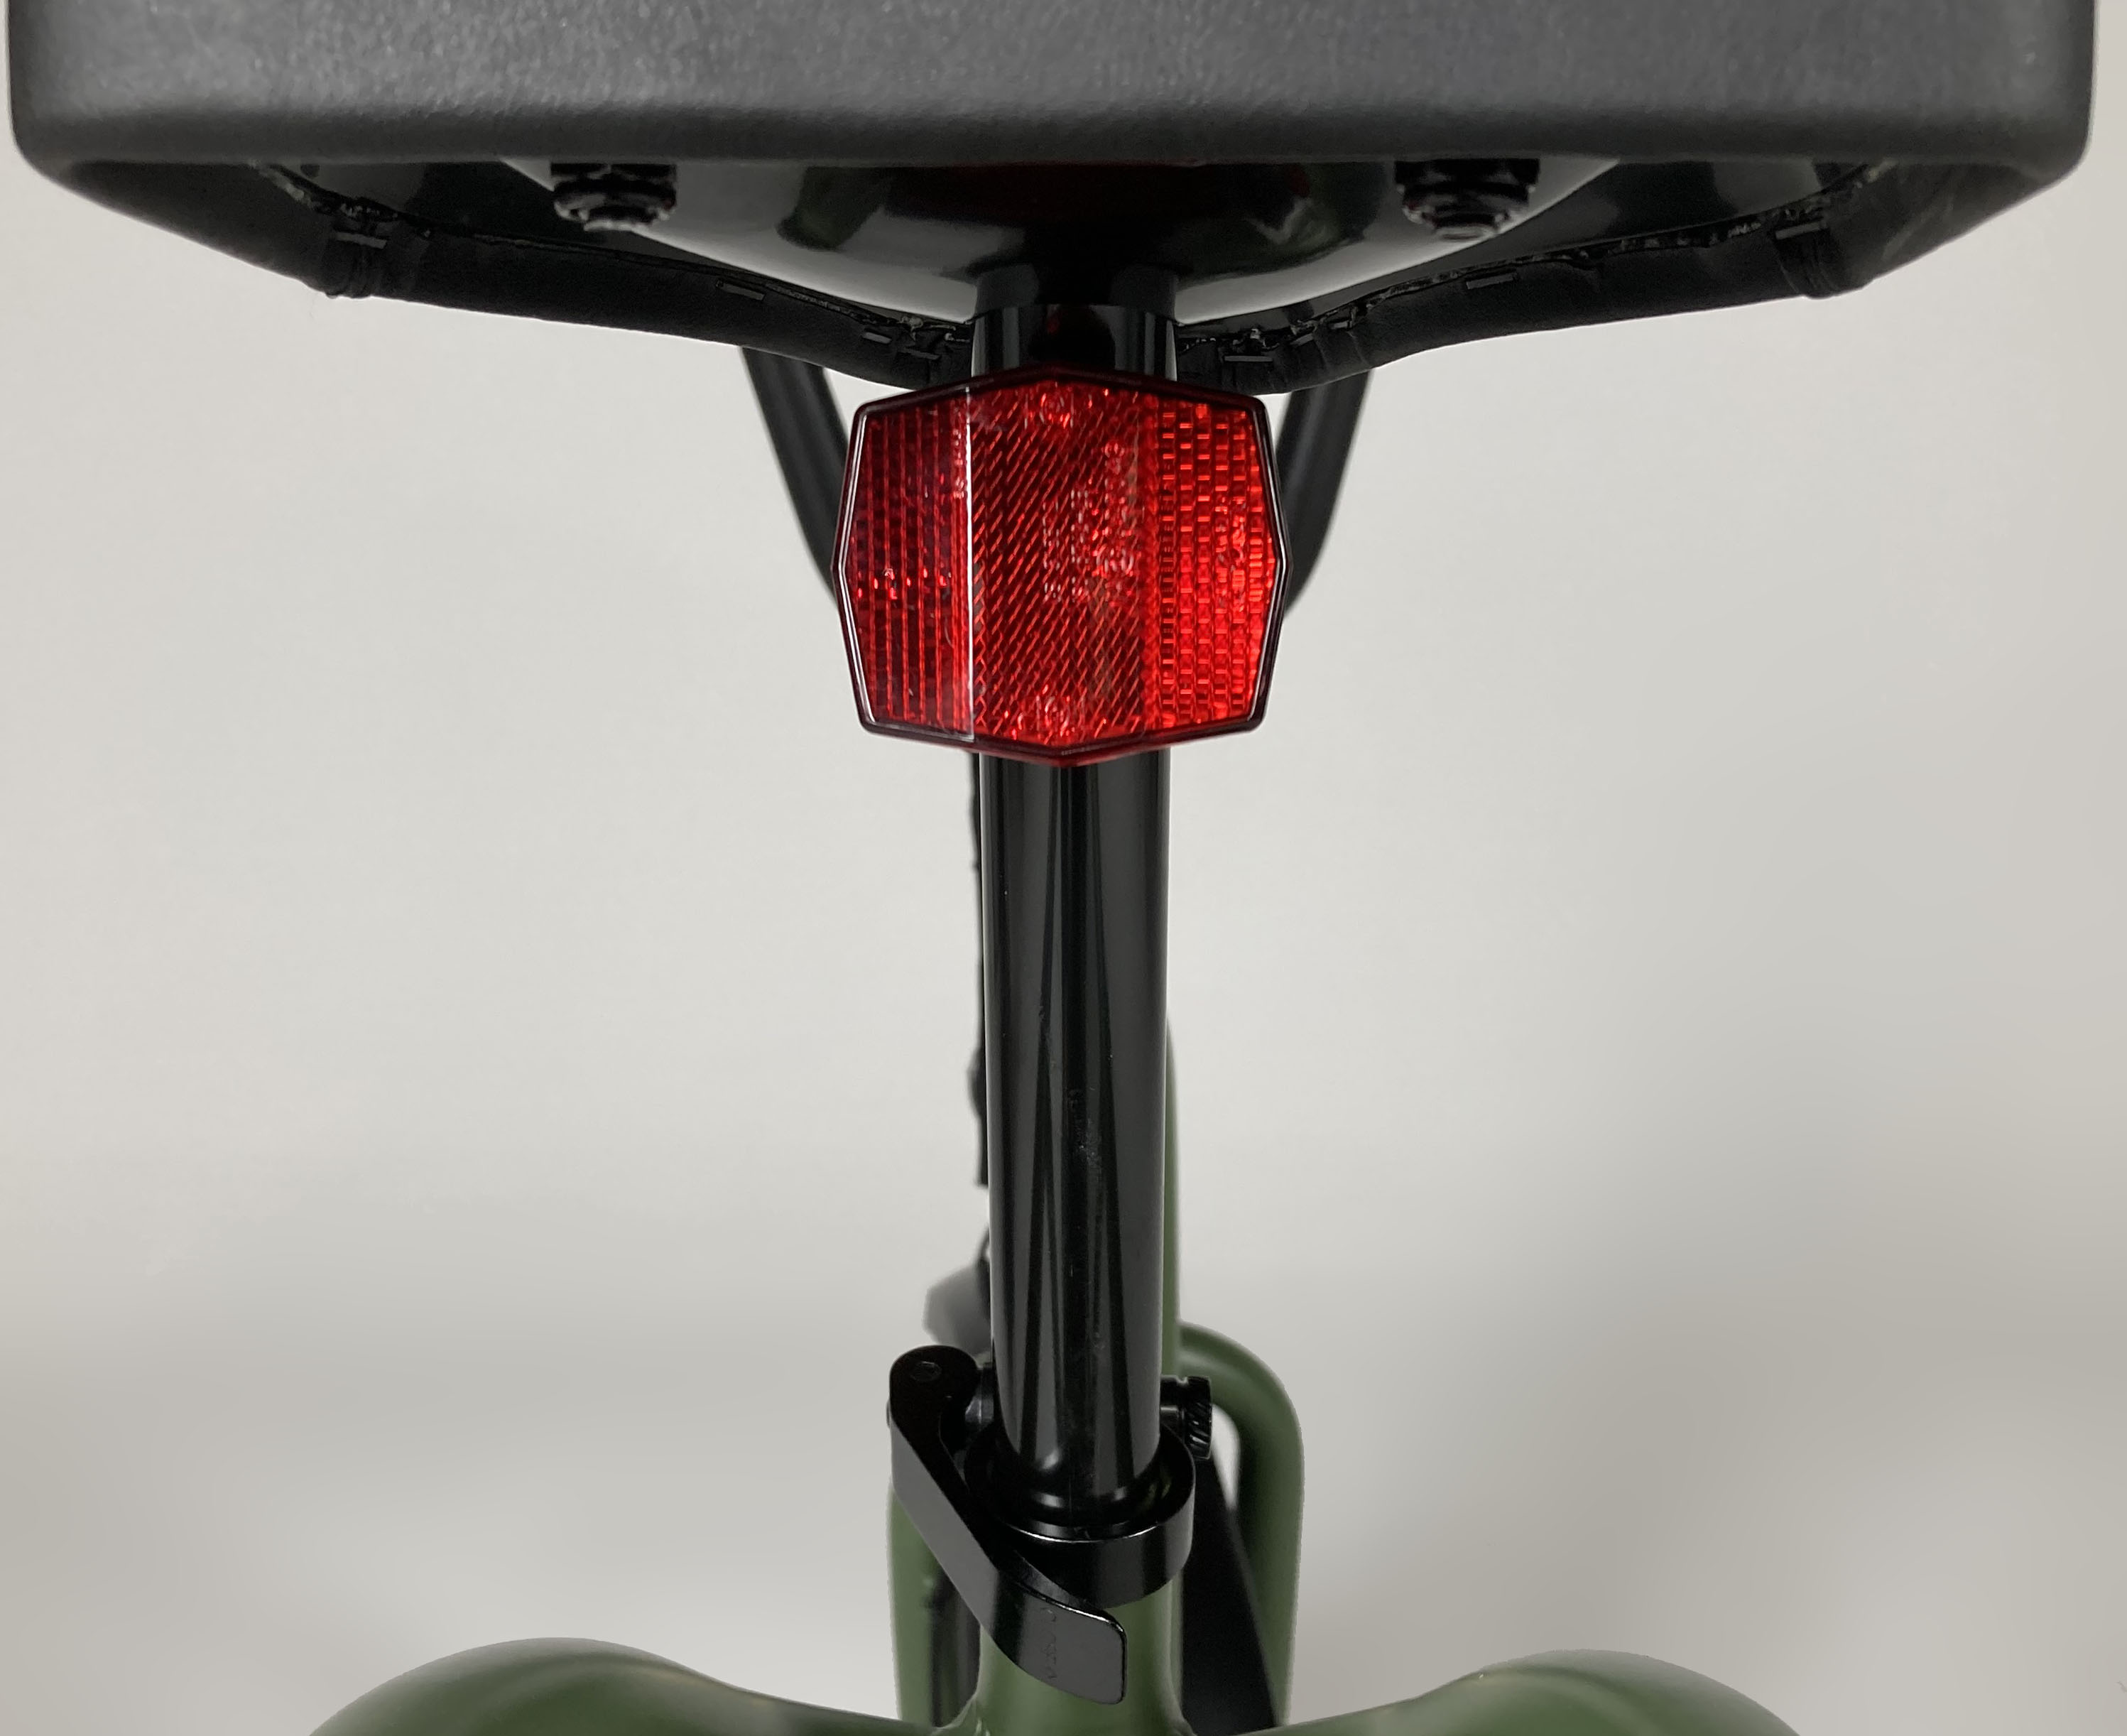
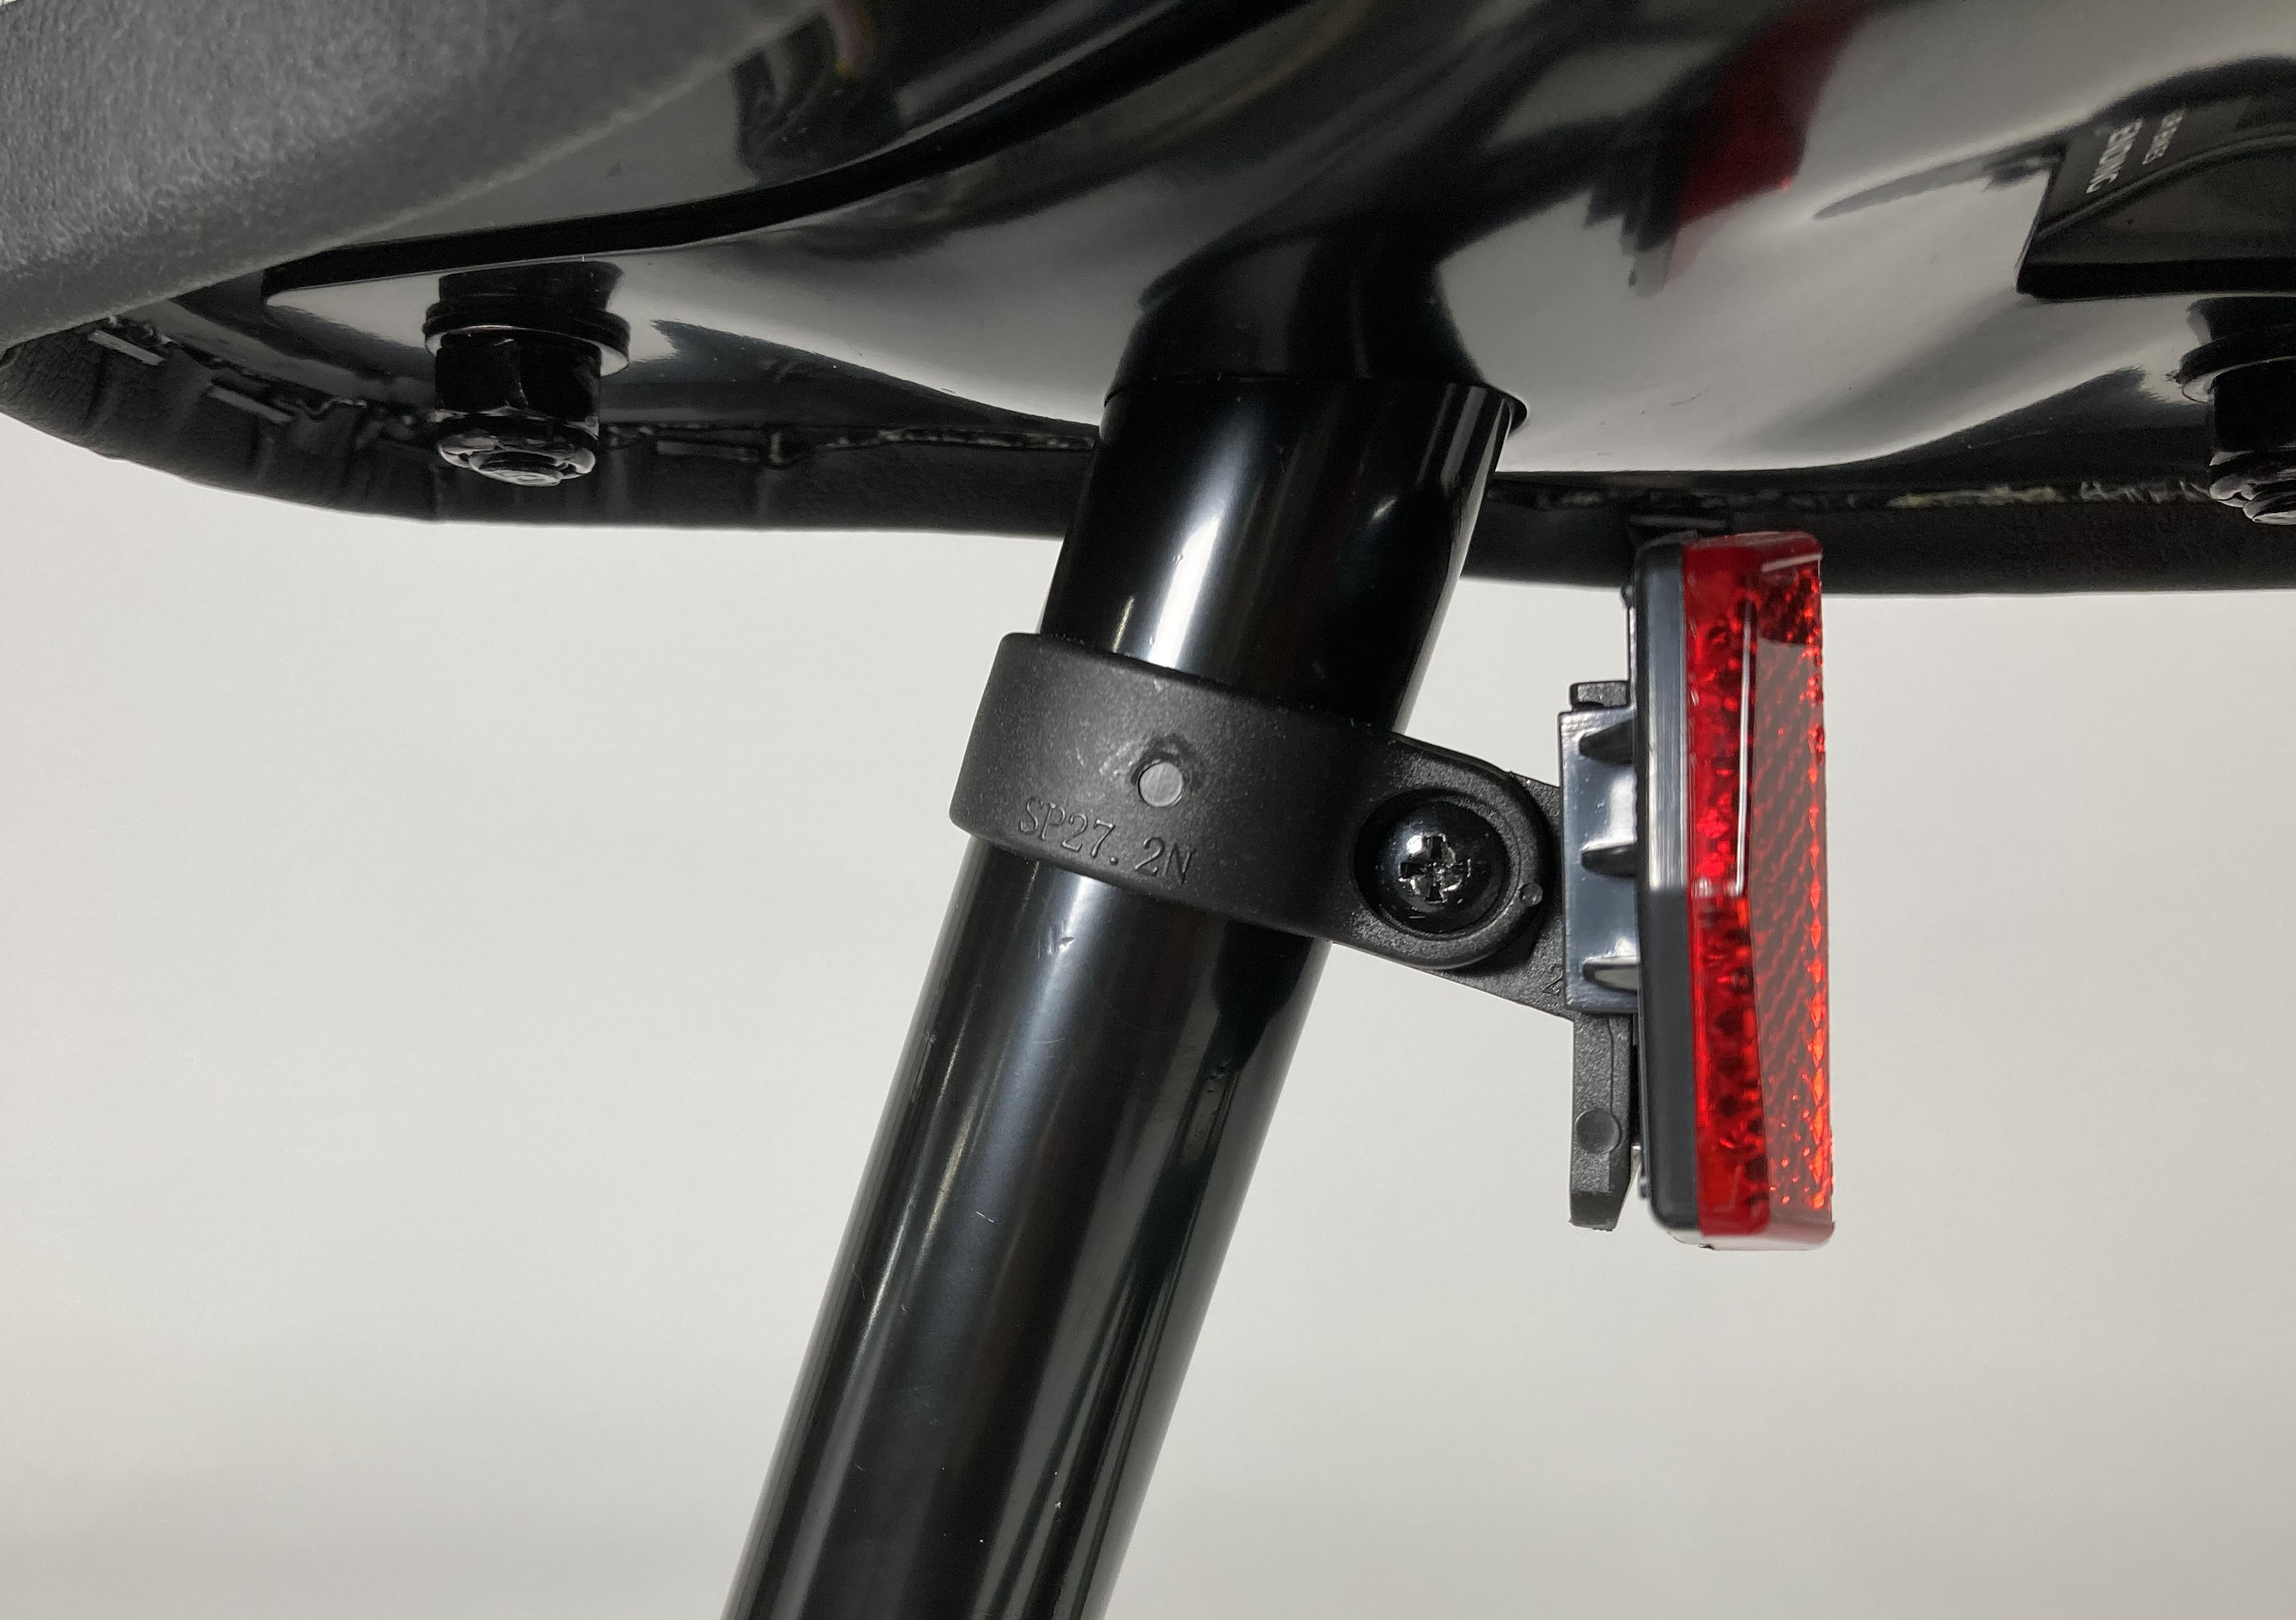
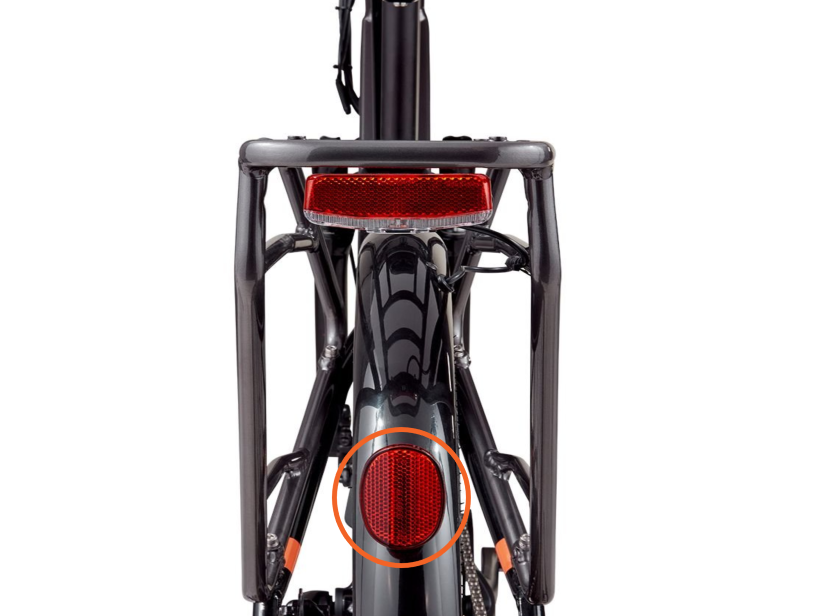
Rear reflectors are generally red and provide extra visibility on the rear of the bike in addition to the taillight/brake light, which is also red. Most bikes that come with a rear reflector that is not pre-installed will have a reflector that mounts to the seatpost using a clip very similar to the one used to install the front reflector onto the handlebar.
Installing the rear reflector onto the seatpost (most ebike models)
Install the rear reflector onto the seatpost using the clamp that it came with. The procedure will be the same as the procedure for the front reflector. Be sure to position the reflector to maximize its visibility to other vehicles. Here's an example of how the reflector should look once mounted.
Installing the rear reflector on the RadCity 5 Plus:
- Remove the pegs from the rear fender. There are two pegs on the rear of the fender. Pull them out using a slotted screwdriver.
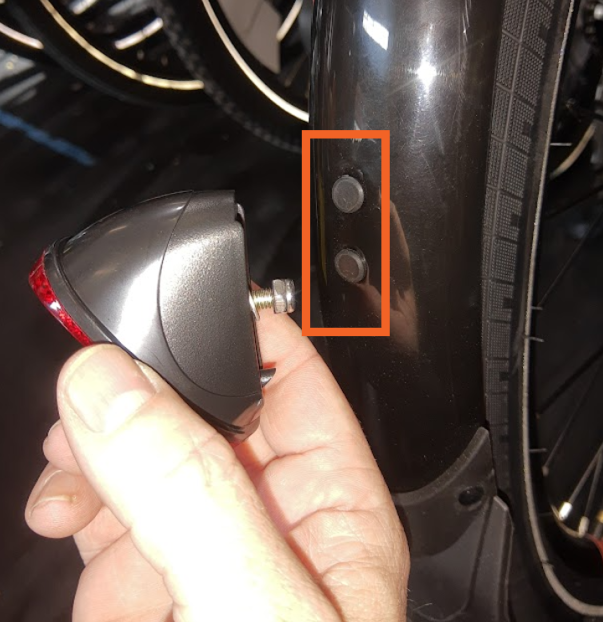
- Locate the rear reflector and hardware.
- Position the reflector on the rear fender.
- Position the fender and insert the mounting bolt. Insert the bolt through the washer, the top mounting point, and into the reflector.
- Tighten securely (do not overtighten) with an 8 mm Allen wrench.
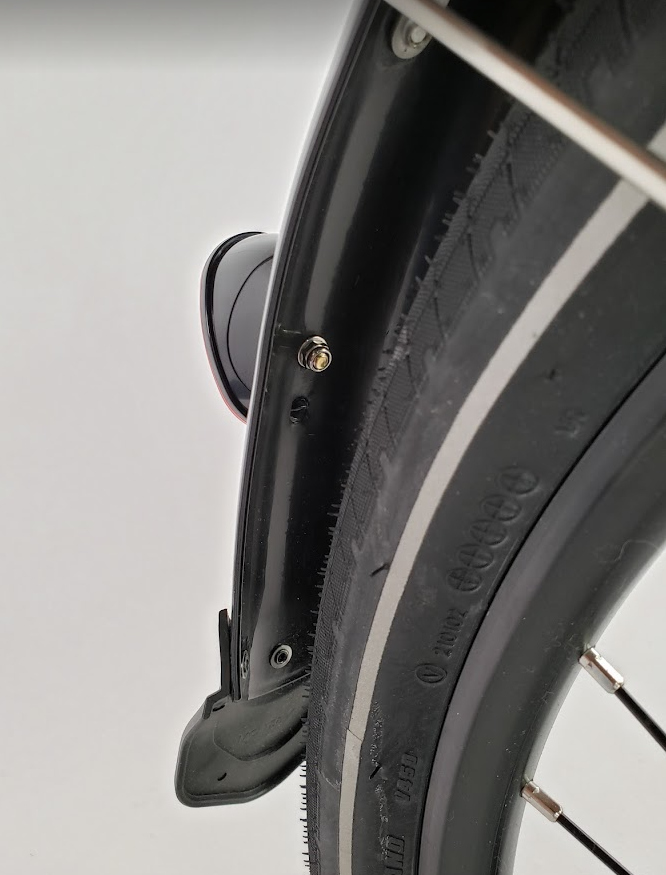
- Ensure the rear reflector is secure.