RadExpand controller replacement guide
If Rad Power Bikes Product Support determines your RadExpand has a defective controller, use the following procedure to remove and replace the controller.
The process for replacing the controller will be identical on both the RadExpand 5 and RadExpand 5 Plus models, though the controllers on these models will look slightly different.
Incorrect assembly, maintenance, or use of your ebike can cause component or performance failure, loss of control, serious injury, or death. Ebikes have parts that non-motorized bikes do not have, and neither the assembly steps and/or assembly videos cover all potential aspects of ebike configuration, maintenance, and repair, which can require specialized tools and skills. We strongly recommend you consult a professional, reputable bike mechanic to assist in the assembly, repair, and maintenance of your ebike, or inspect your work if you choose to do it yourself.
Tools needed:
- 4 mm Allen wrench
- Torque wrench with Allen bits
- Phillips head/flathead screwdriver
- Flat side cutters
- Extra zip ties
- Bike stand (optional)
- Nitrile gloves (optional)
Take pictures of cable connections, cable routing and controller placement before you start removing these items, as once you replace the controller you will reinstall everything in its original position.
- Get the ebike ready for maintenance. Turn off the ebike, remove the battery, and press and hold the power button to discharge remaining power.
- Use a 4 mm Allen wrench to remove the three bolts securing the battery mount on the front of the seat tube. Move the battery tray out of the way so you can access the controller mounting bolts on the seat tube.
- Use a Phillips head screwdriver to remove the four bolts that secure the controller to the seat tube.
- Unplug the taillight cable at the top of the controller by pulling the connectors apart, without twisting, to unplug.
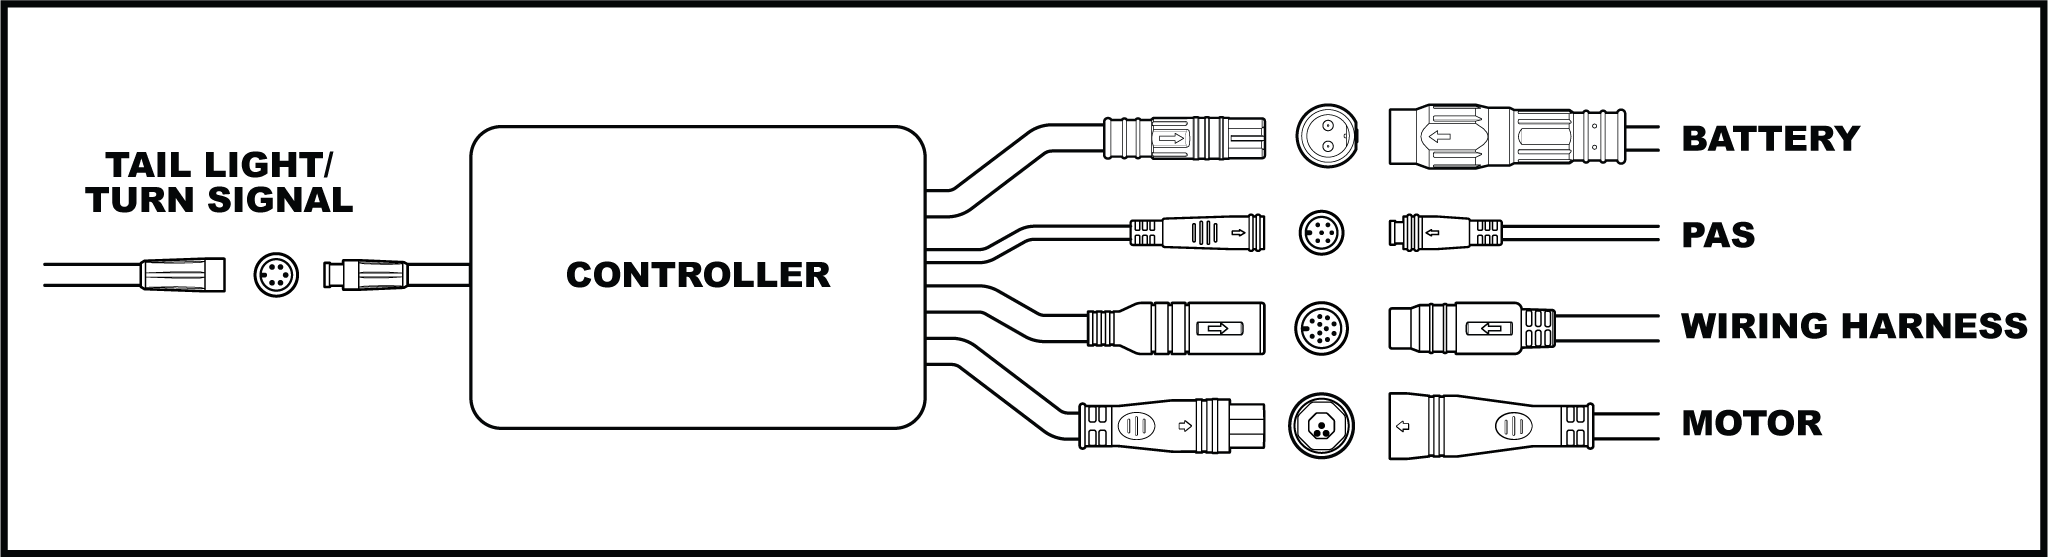
- Use a flathead screwdriver to pry off the rubber grommet securing the cables inside the down tube, and carefully pull the following cables out to disconnect from the bottom of the controller. Use flat side cutters to remove any zip ties, and pull each side of the connectors apart, without twisting, to unplug.
- Battery
- PAS
- Wiring harness
- Motor (mounted on chain stay)
- Remove the controller and recycle according to local rules (if possible). Save the rubber grommet for reuse with the new controller.
- Use a Phillips head screwdriver to mount the new controller in the original location on the seat tube, and tighten the four mounting bolts until secure.
- Replace the rubber grommet on the new controller and reconnect the controller cables by lining up the internal notch and pins and the external arrows of each cable, and press together without twisting.
- Use new zip ties to secure the motor cable to the mounting bosses on the chain stays, and use flat side cutters to snip off any excess from the zip ties to ensure the ends are flush and smooth with no sharp points.
- Carefully feed the extra cable lengths from the bottom of the controller into the down tube and secure with the rubber grommet.
- Use the Allen wrench to re-install the battery tray mounting bolts. Use a torque wrench to tighten the mounting bolts to 5 Nm.
- Reinstall the battery, test the bike fully, and ride Rad!