Remove, inspect, and replace tire components
This article will tell you how to remove a tire from a wheel, inspect the rim strip, tube, and tire, and how to replace these components.
This article assumes you have already removed a wheel from your bike. For instructions on wheel removal, please consult the relevant article(s):
- Remove and Reinstall a Front Wheel with a Quick-Release Lever
- Remove and Reinstall a Rear Wheel from a Multi-Speed Ebike
- Remove and Reinstall a Rear Wheel on a RadRunner
- Remove and Reinstall a Rear Wheel on a RadMission
Gather what you'll need:
- A pump with Schrader valve and pressure gauge,
- At least two tire levers (we recommend sturdy plastic levers with an end that can hook onto a spoke),
- Any replacement parts you know you will need, which may include a replacement tube, tire, and/or a rim strip,
- A small Allen wrench or similar object to release air pressure from the tire, and
- Nitrile gloves (optional)
Nitrile gloves or similar protective gloves can keep your hands clean and provide a barrier between your hands and the brake rotor.
| Do not touch the brake rotor, which has sharp edges and can cause serious injury. Touching the brake rotor or brake pads with bare skin can also transfer natural oils. Oils or other lubricants can decrease braking performance. We recommend wearing protective gloves when working near the braking system. | 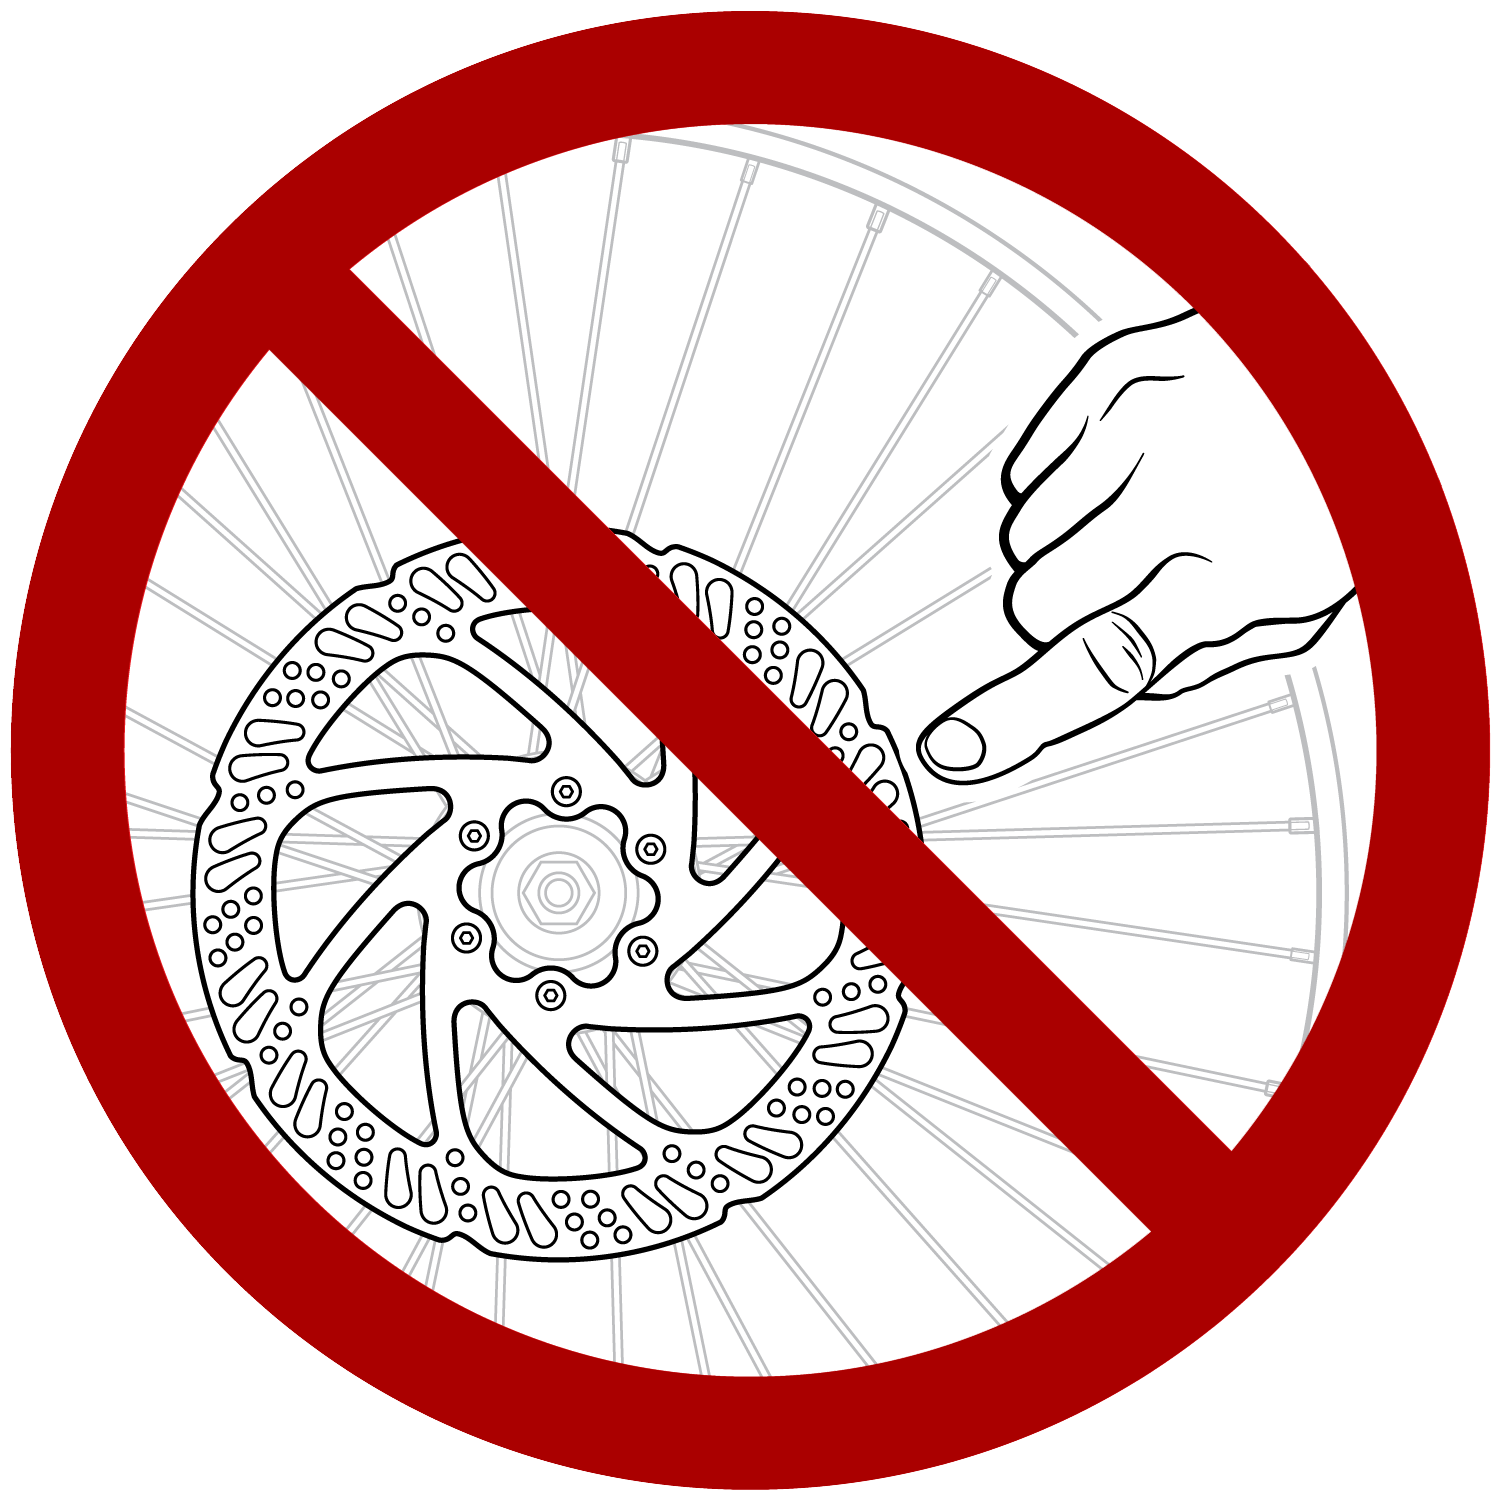 |
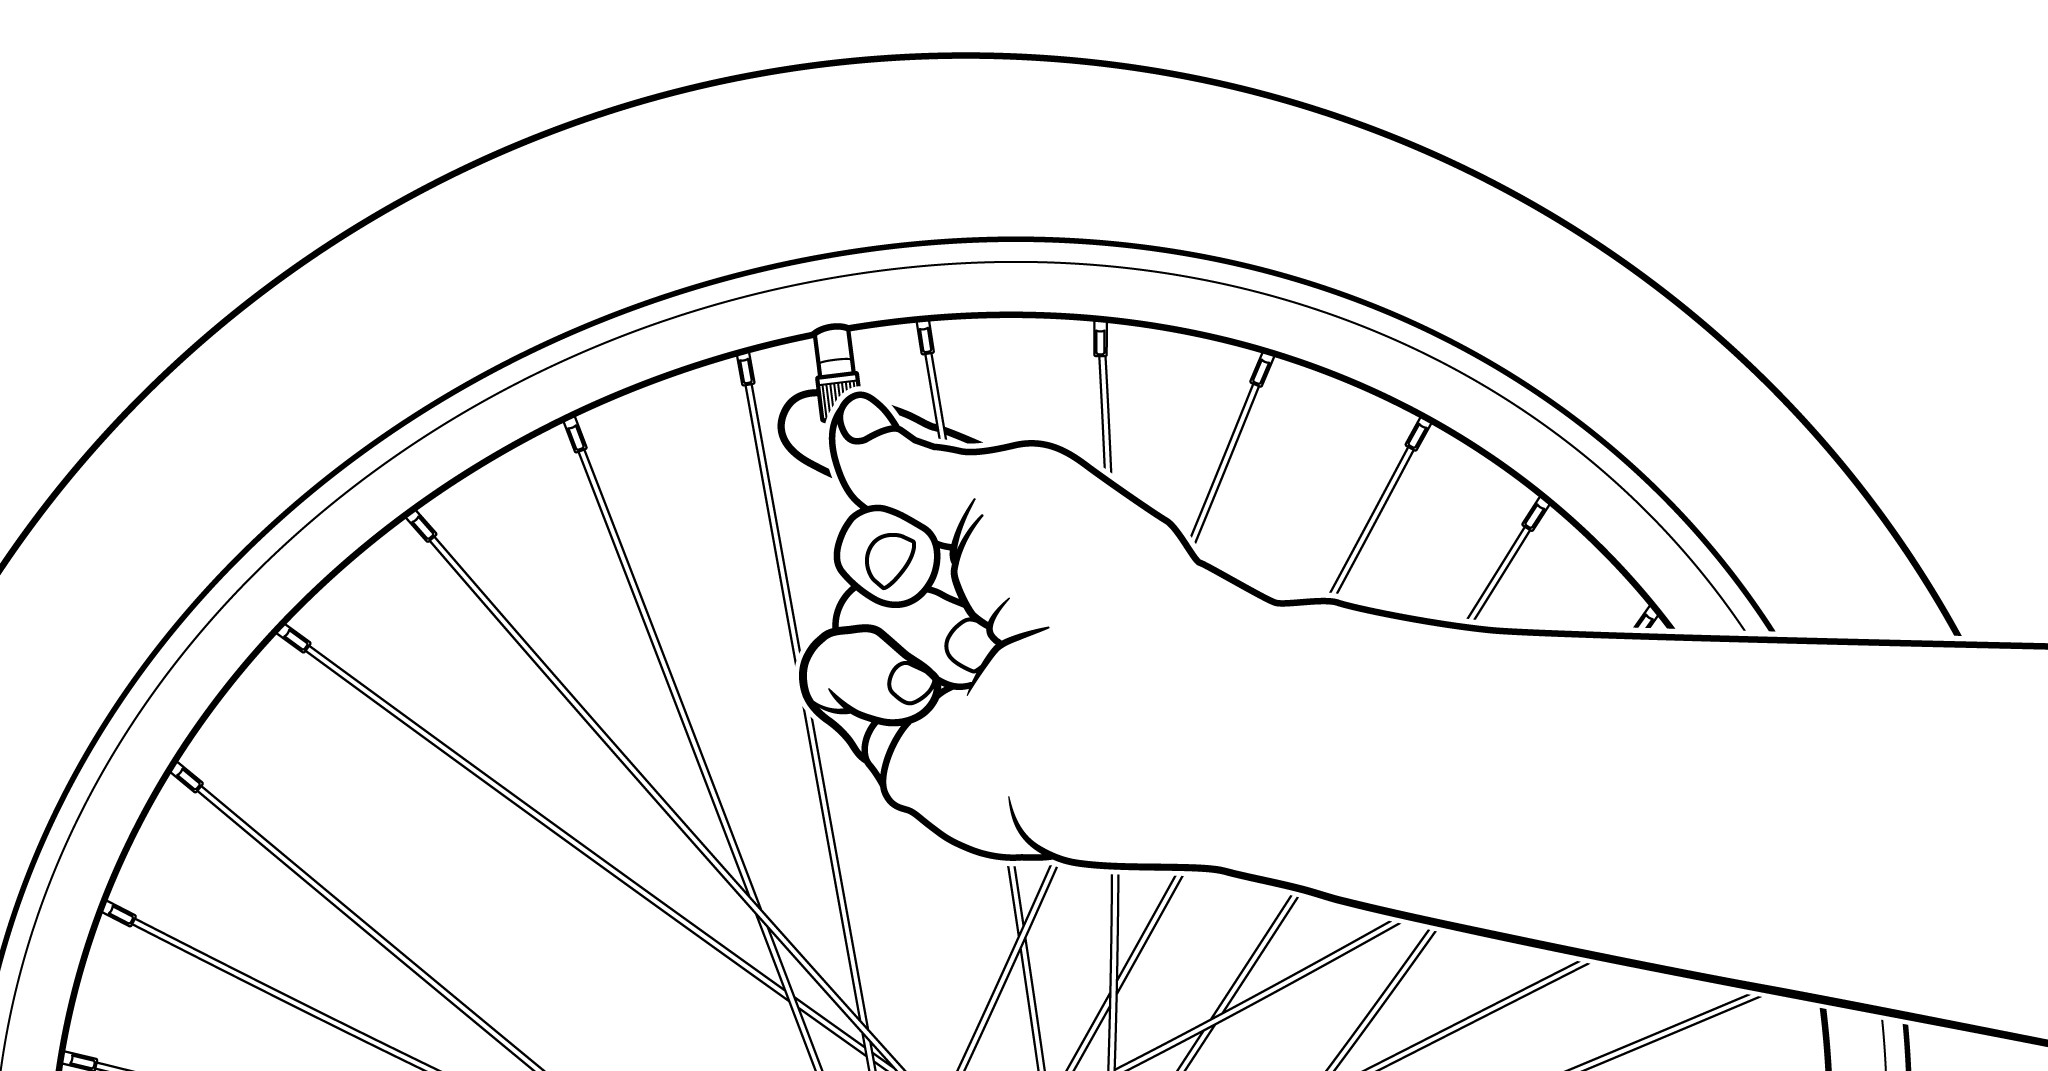
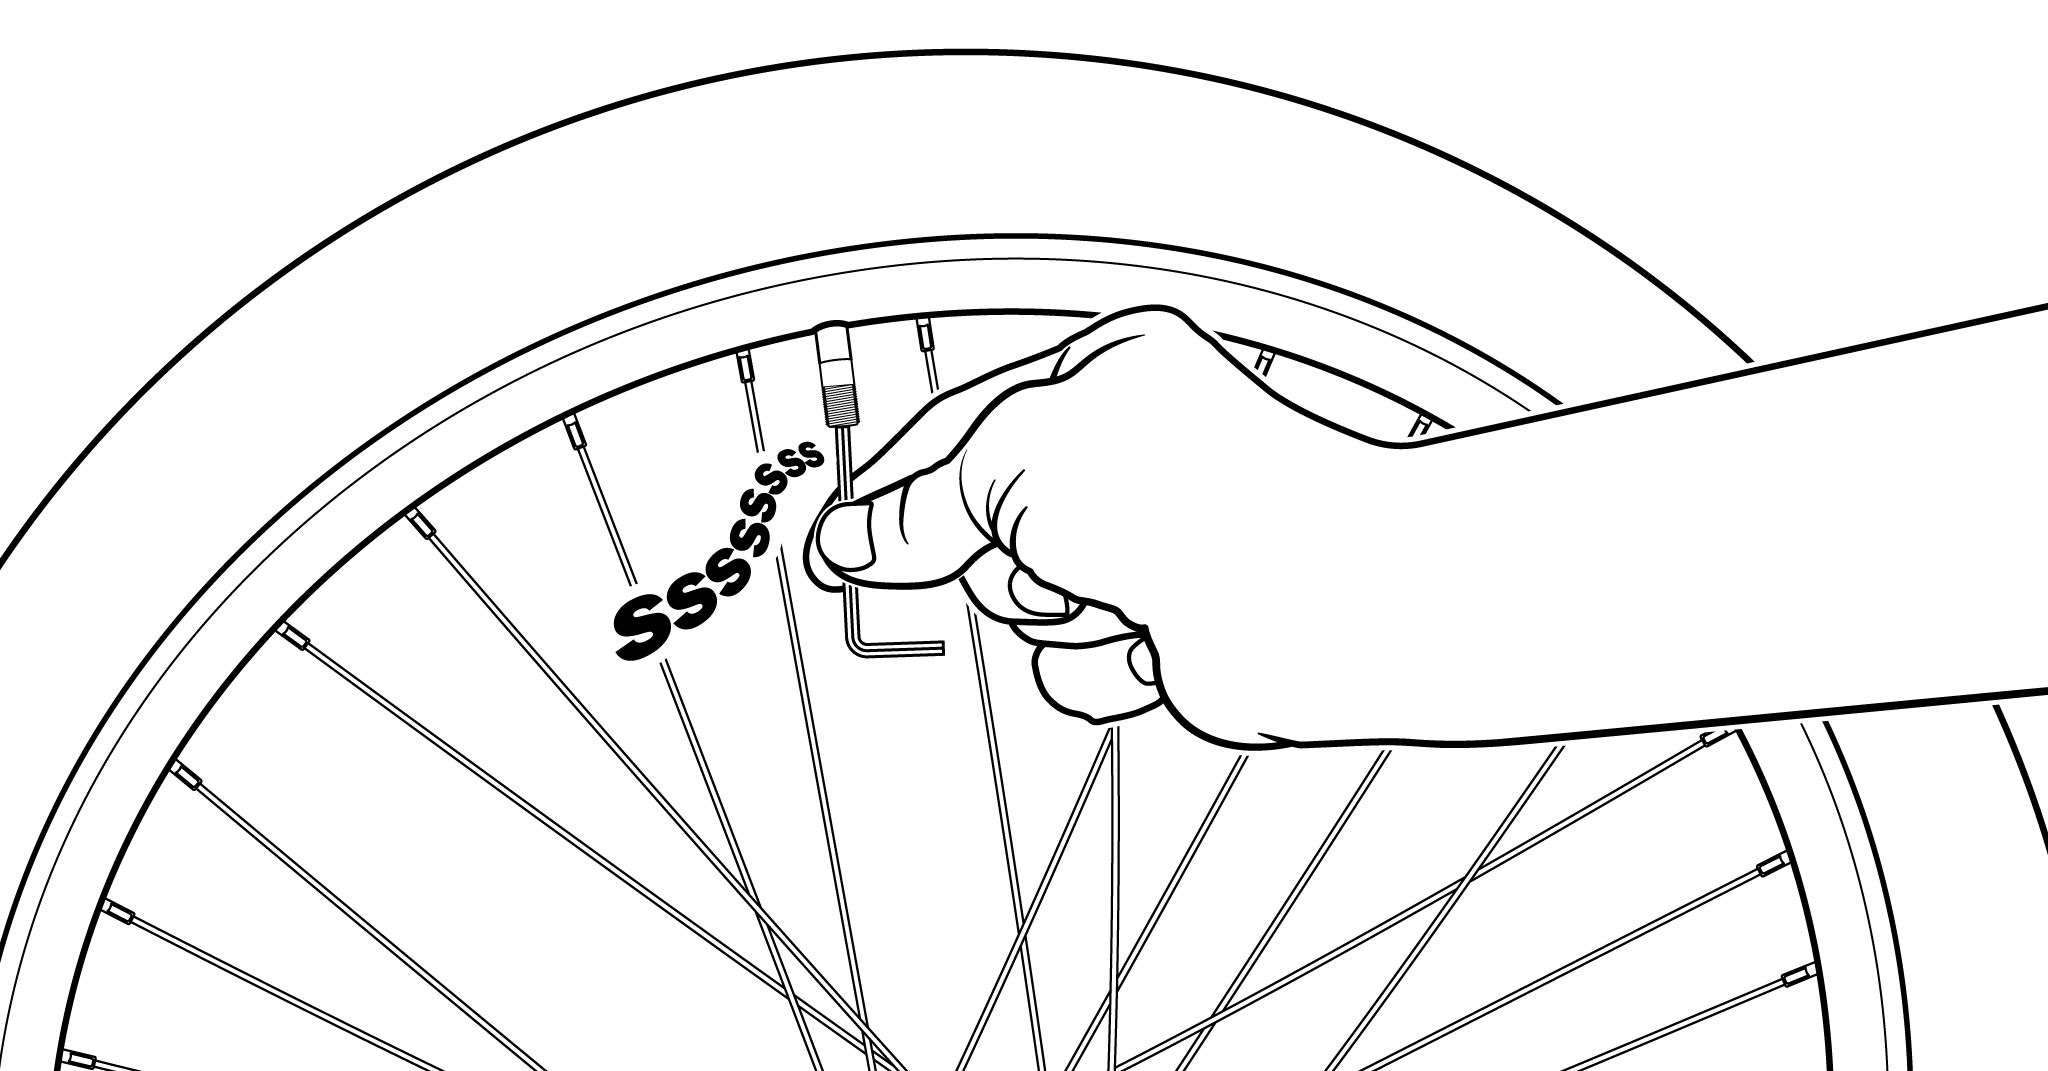
- Unscrew the valve cap on the Schrader valve.
- Release air from the tire. Push the valve core in to release air from the tire (you can use a very small Allen wrench or something similar). Squeeze your tire to get out as much air as you can.
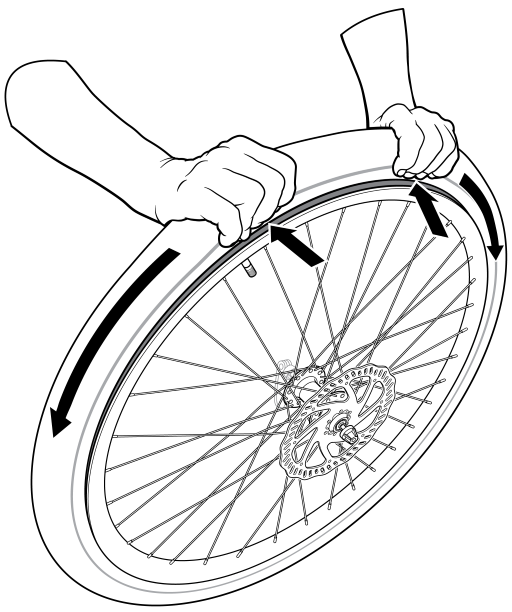
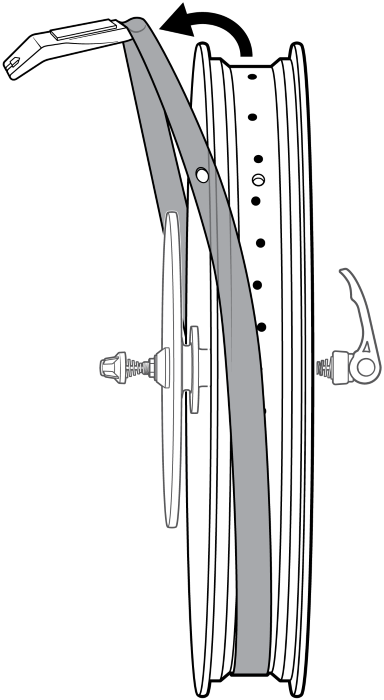
- Loosen the tire from the rim. Go around the tire, squeezing it along the base near the rim and pulling it away from the rim to loosen it. You want to see the bead pulling away from the rim.
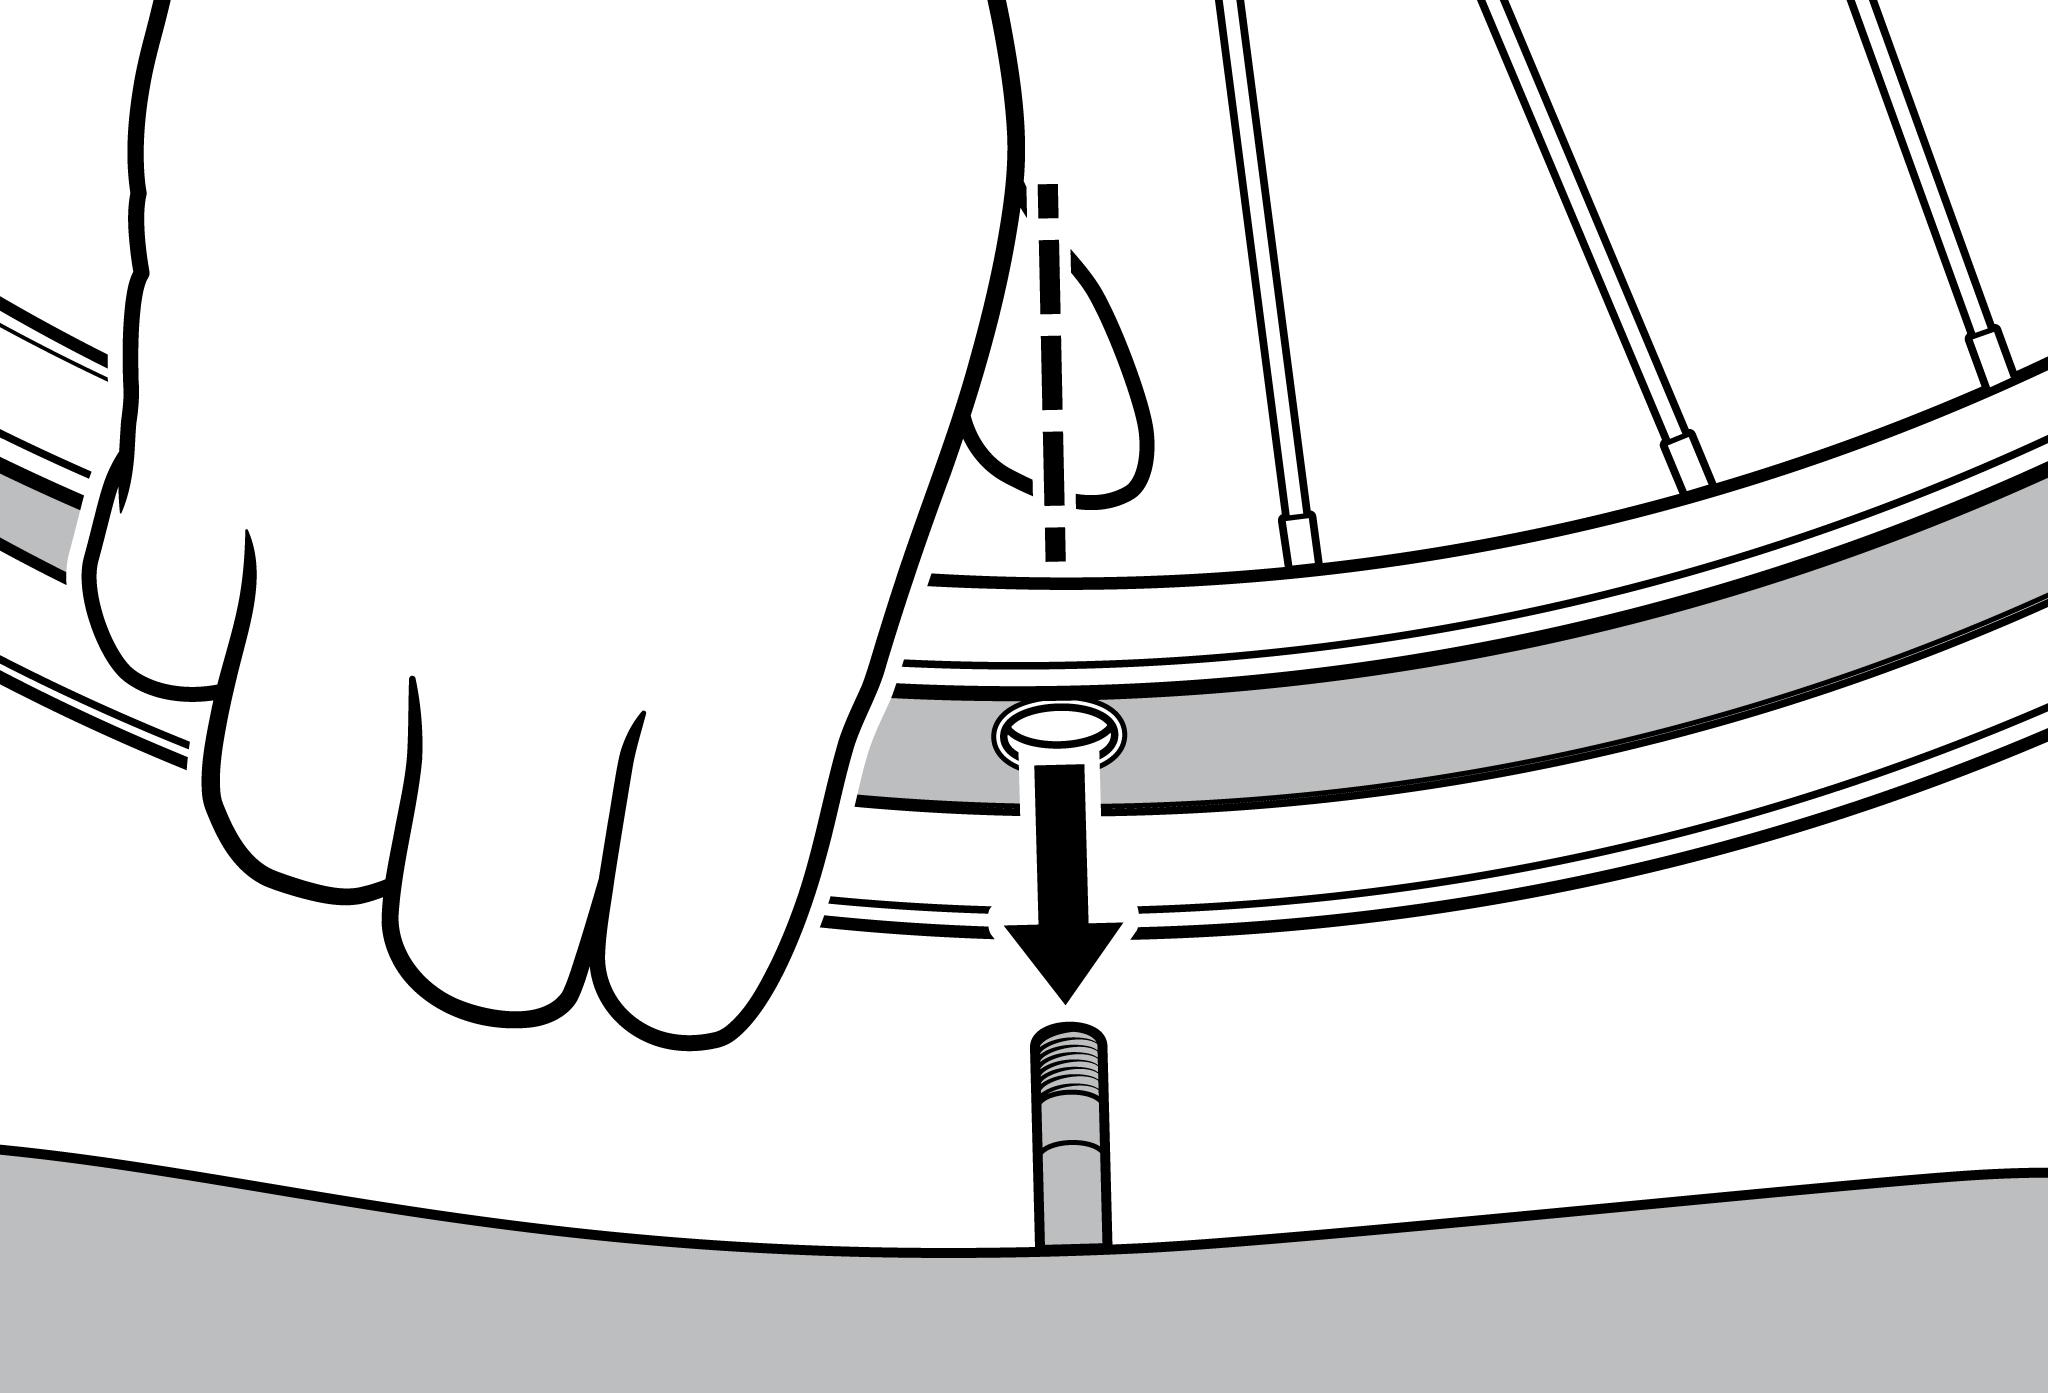
- Position the wheel so the valve is at the bottom.
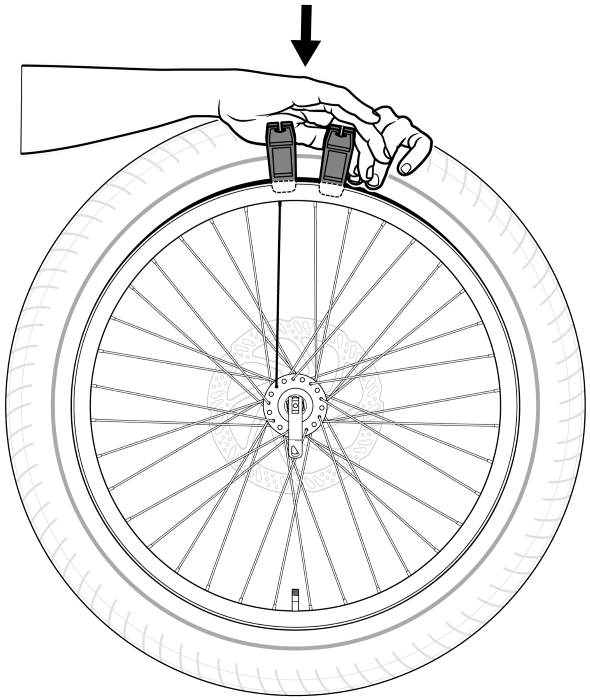
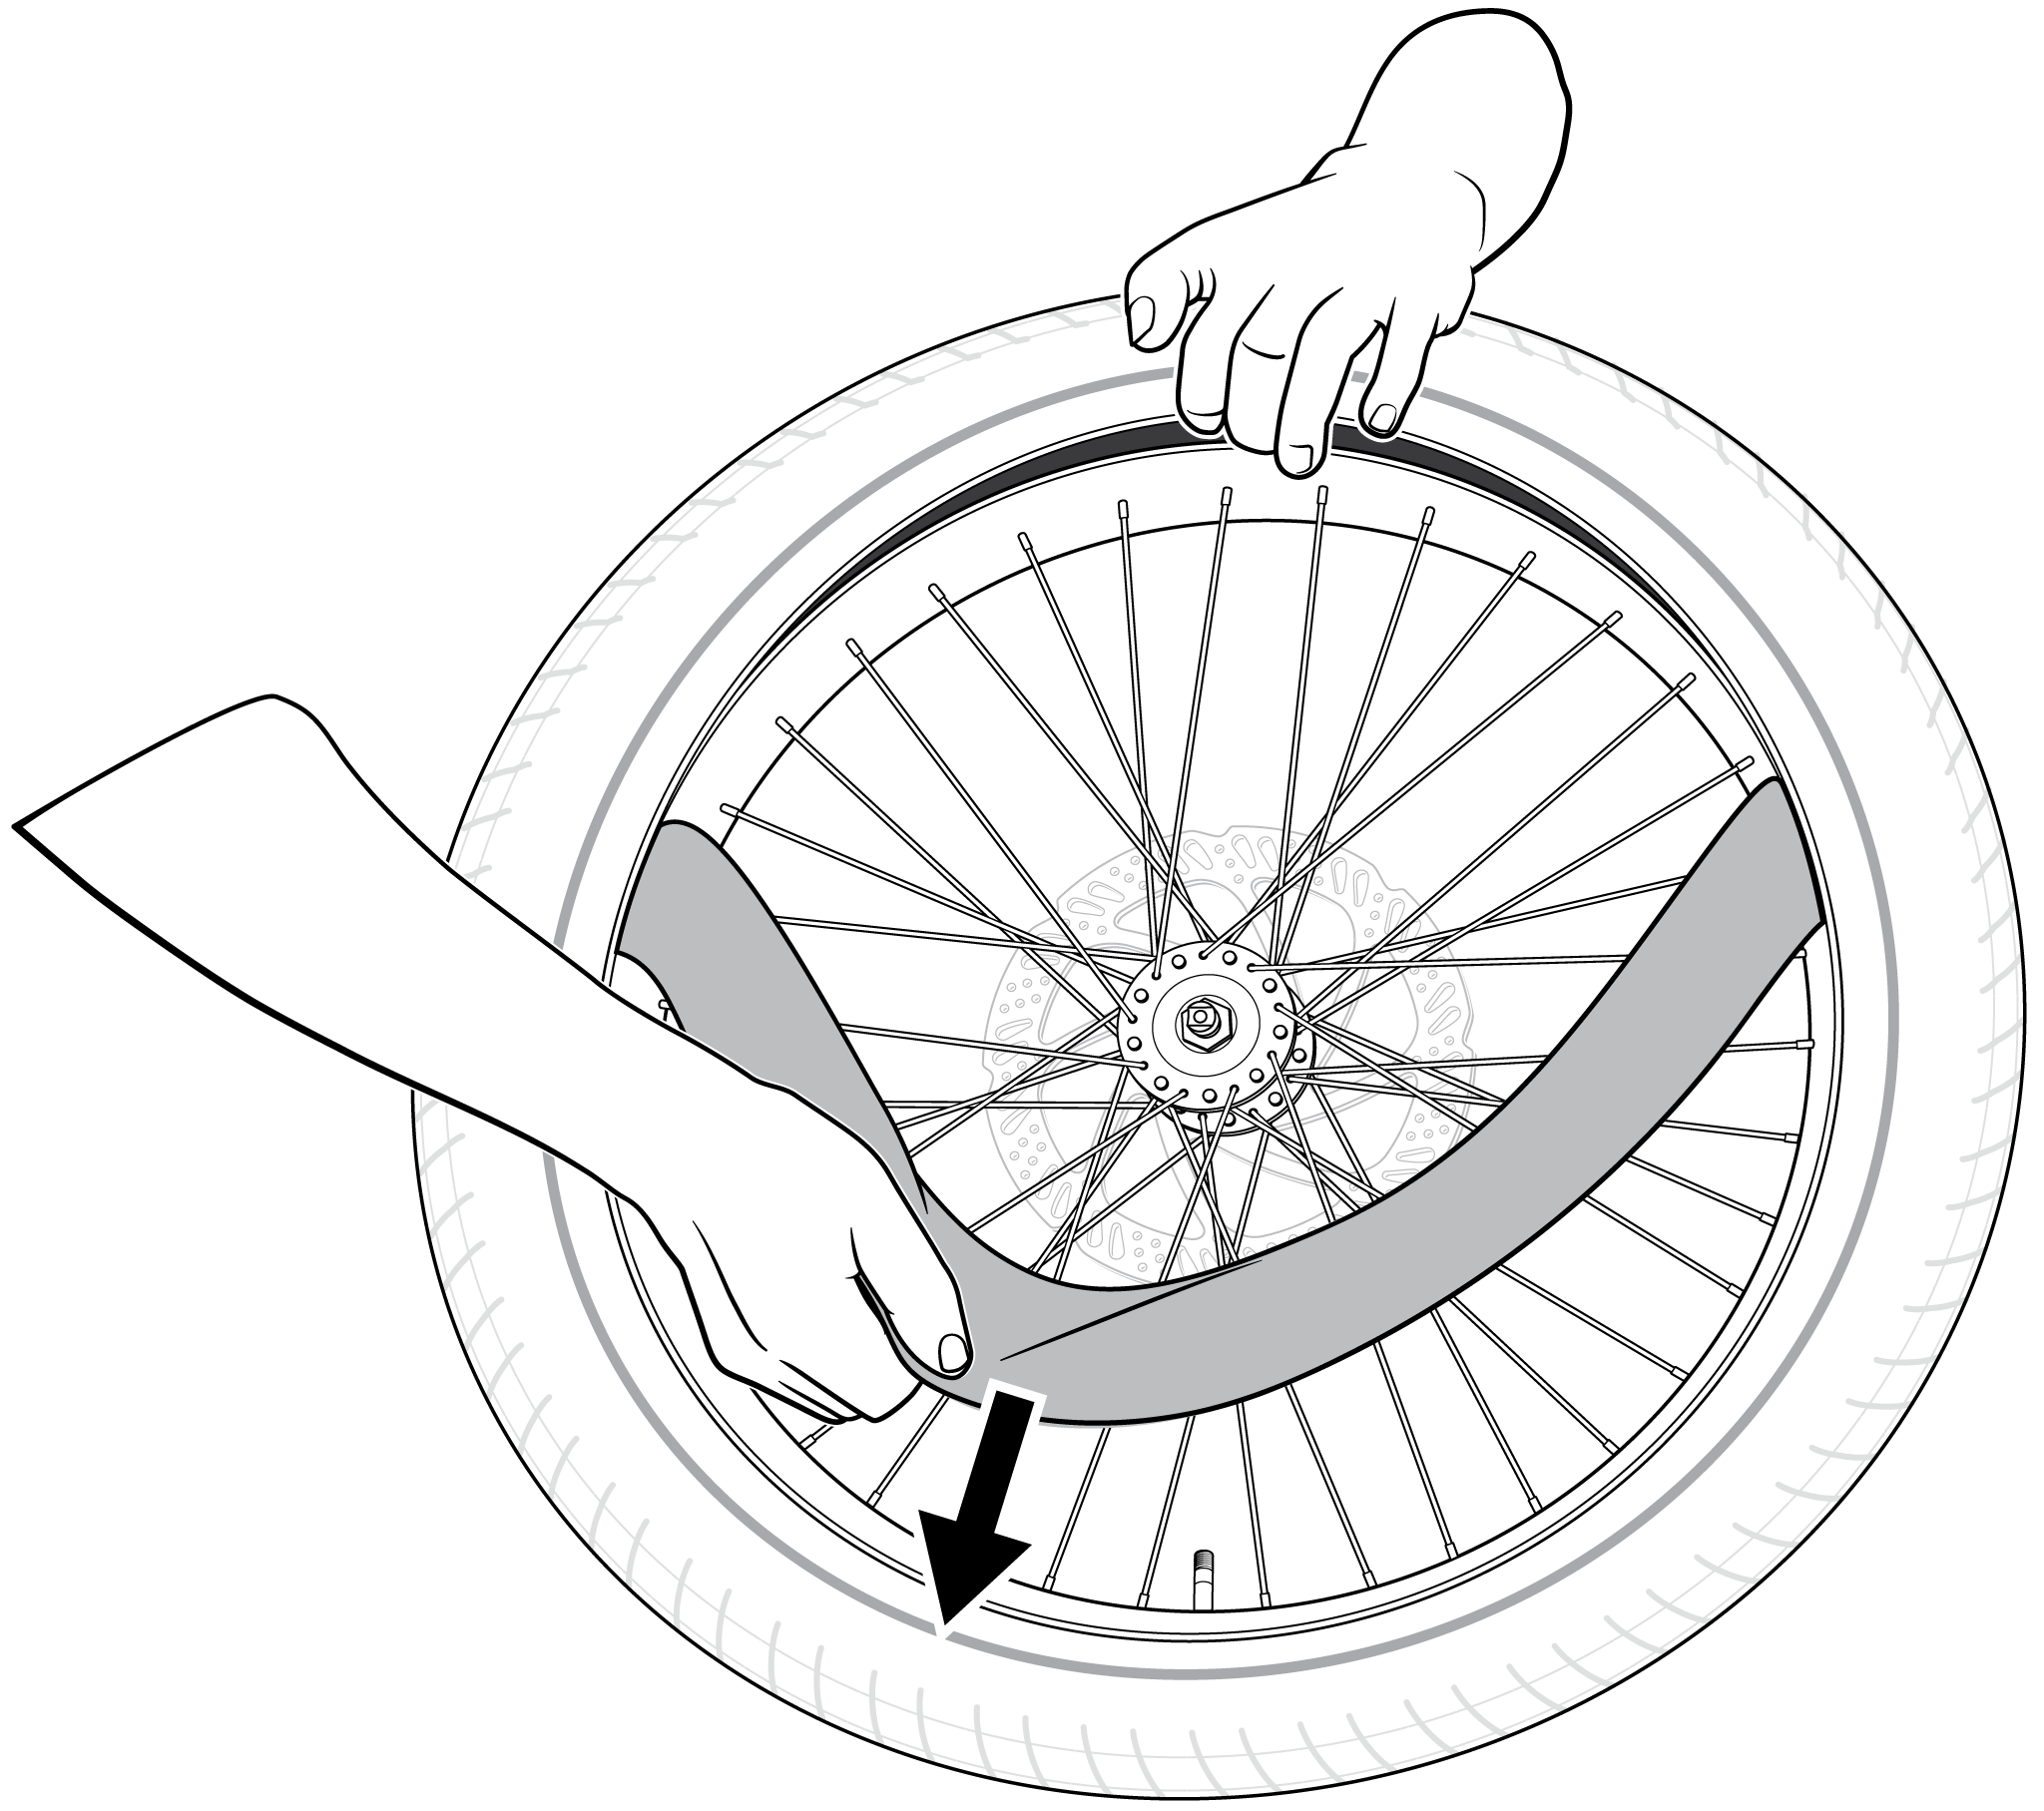
- Insert the tire levers. At the top of the wheel, at a spot that lines up with one of the spokes on the side facing you, insert the tire lever into the rim so that its scoop side faces up, and can wrap around the tire bead. Insert another tire lever near the first one.
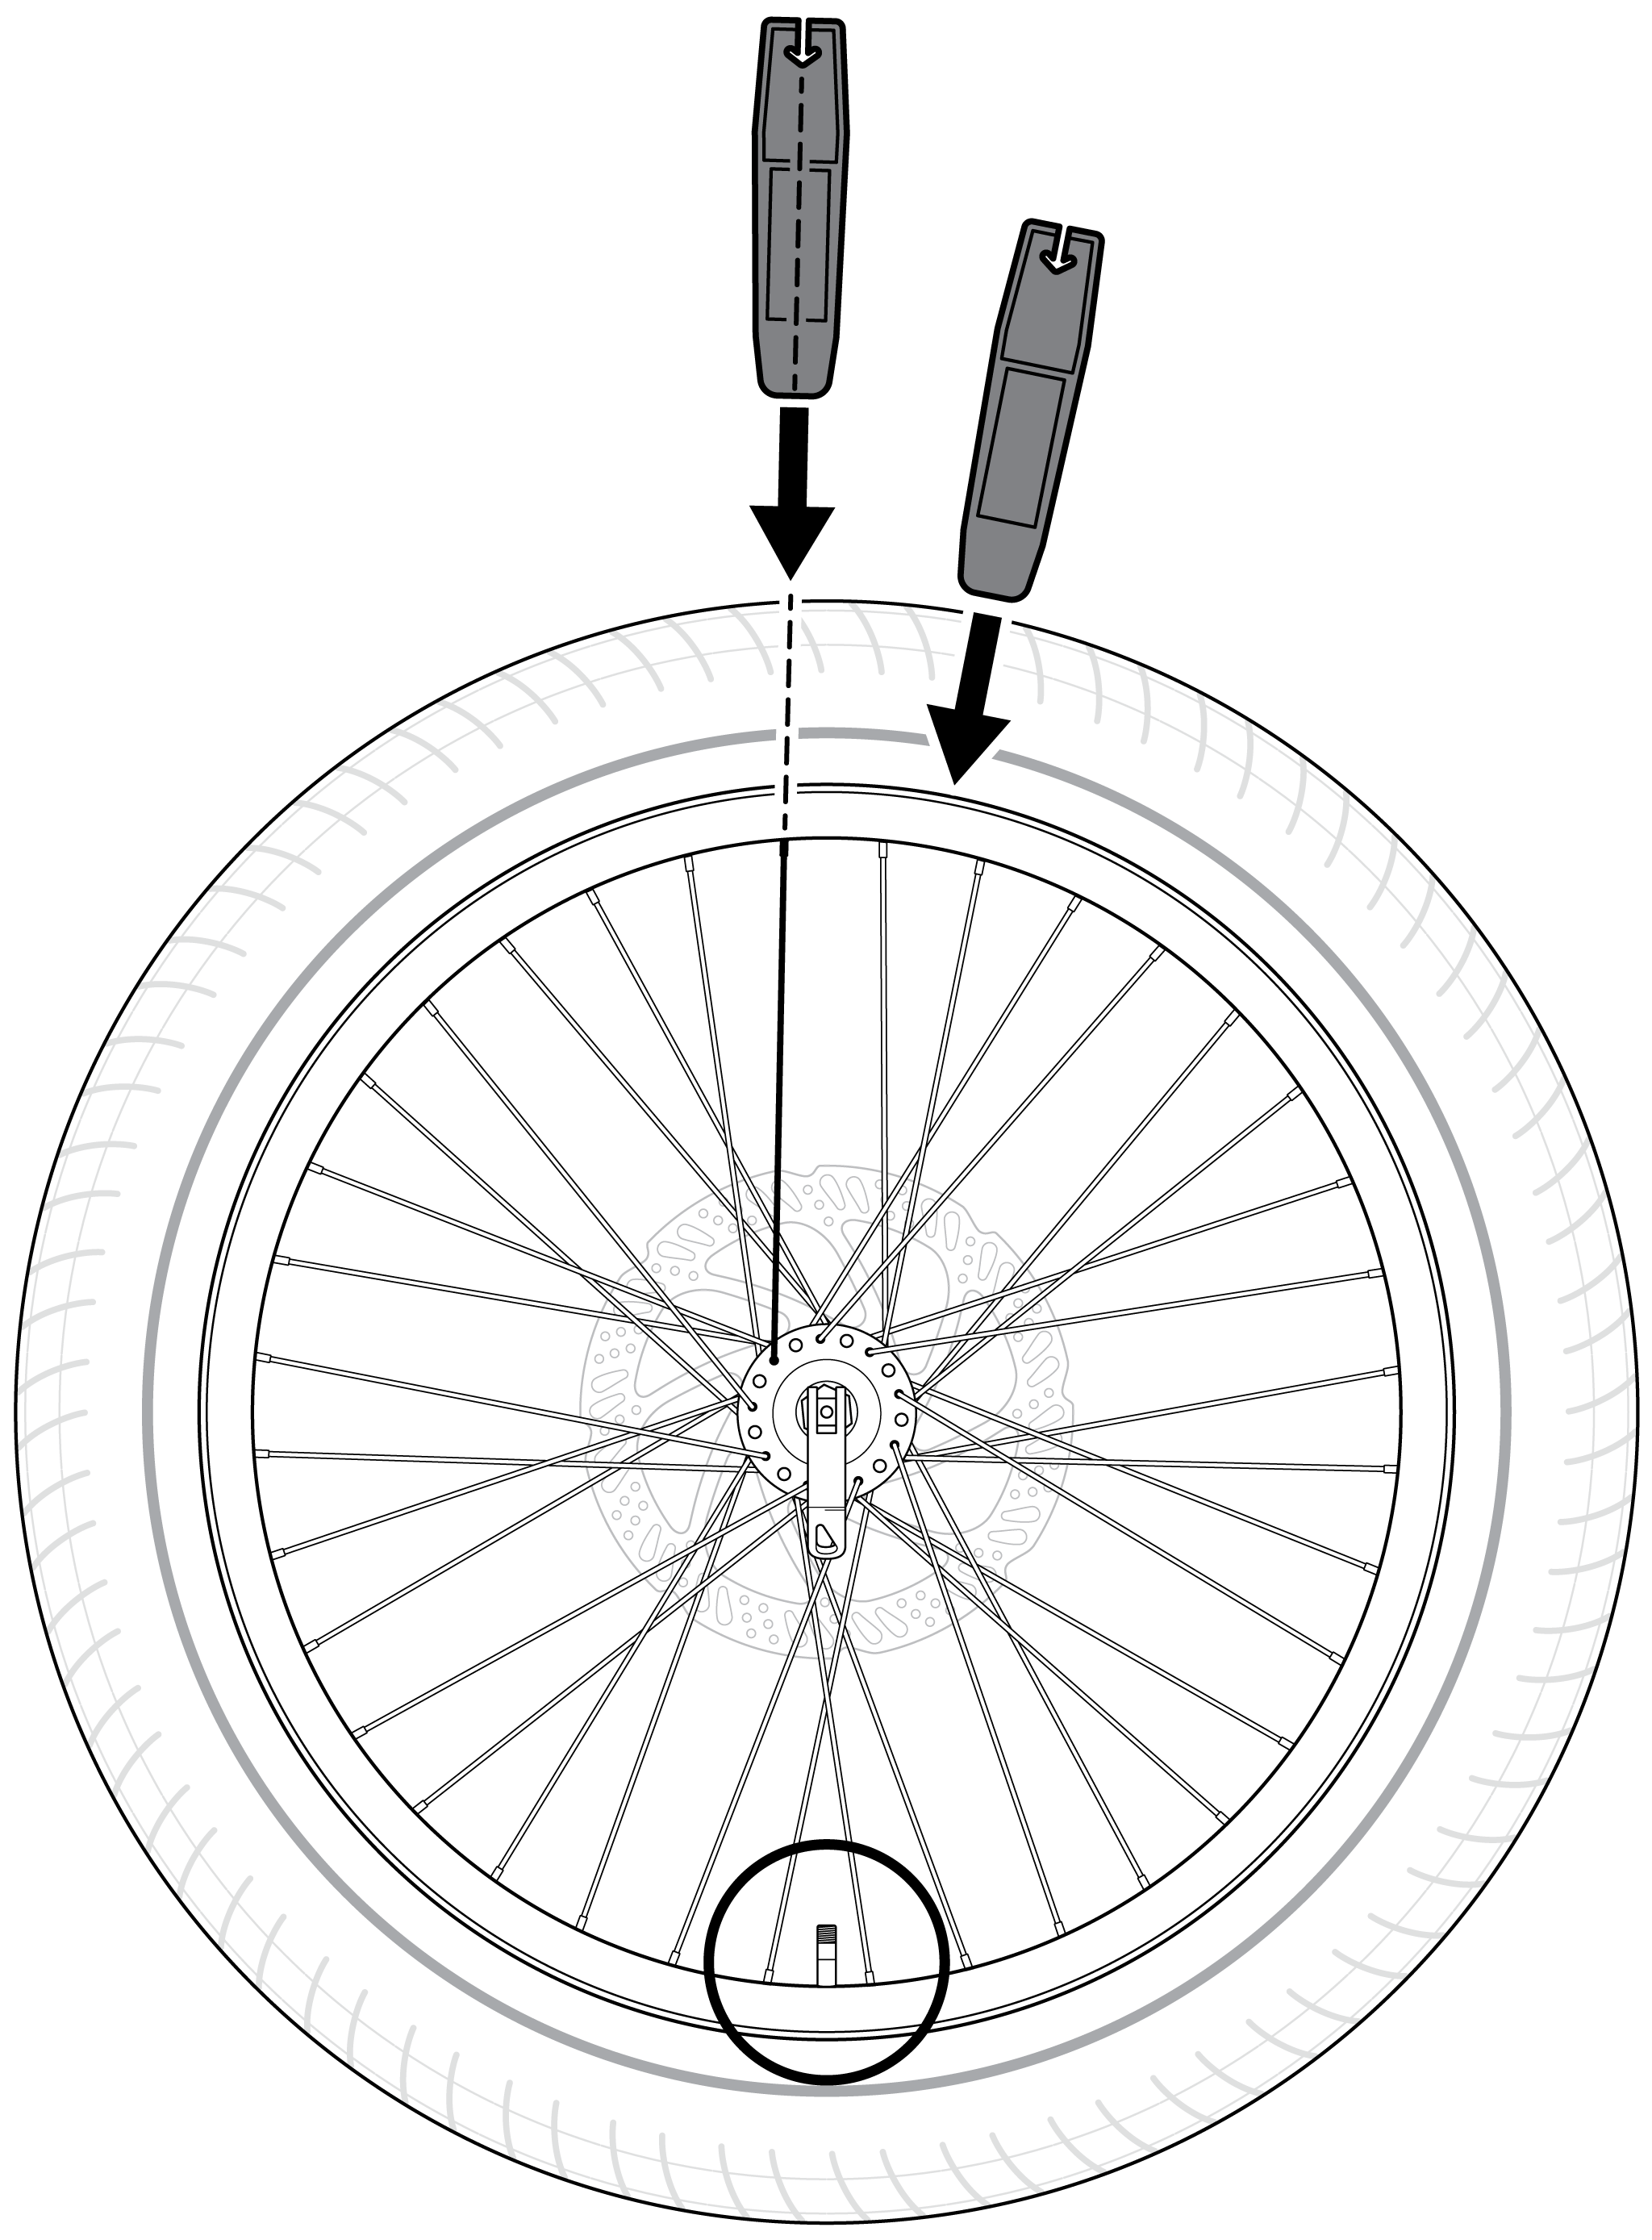
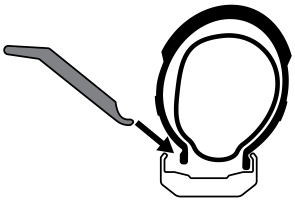
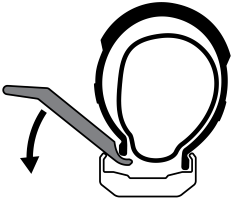
- Push both levers toward the center of the wheel to begin lifting the tire bead up over the rim.
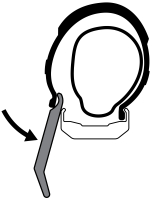
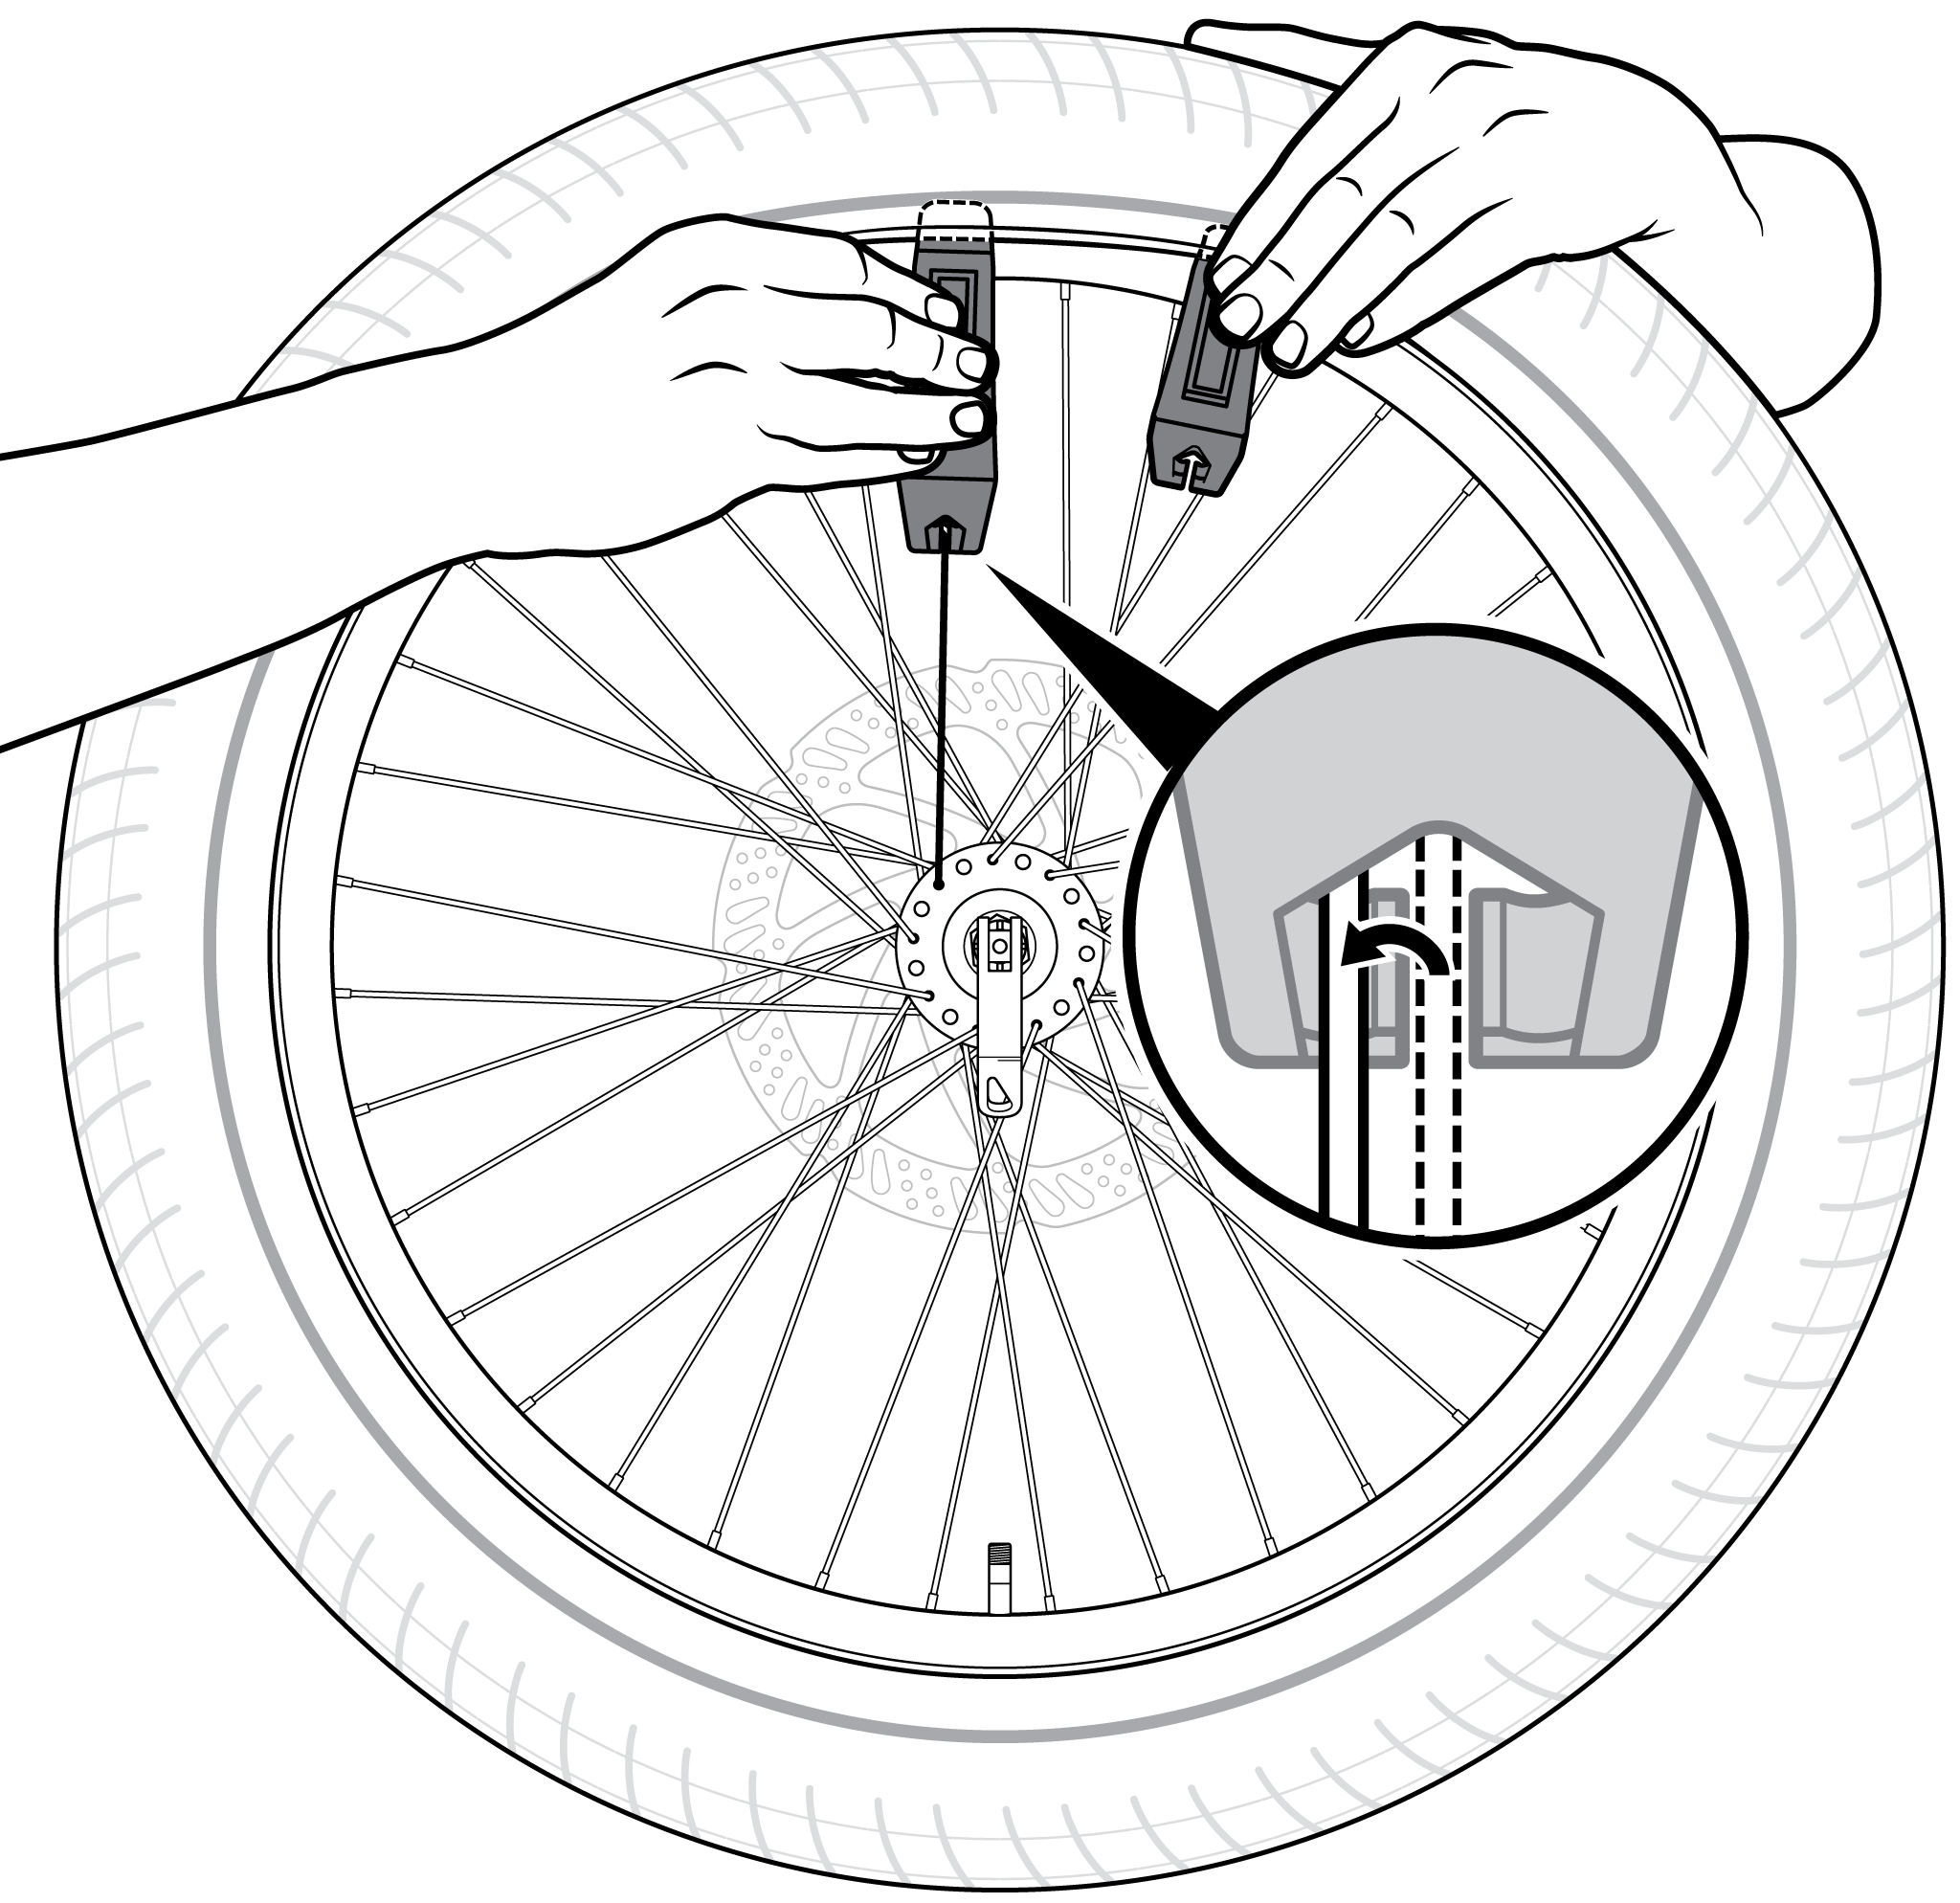
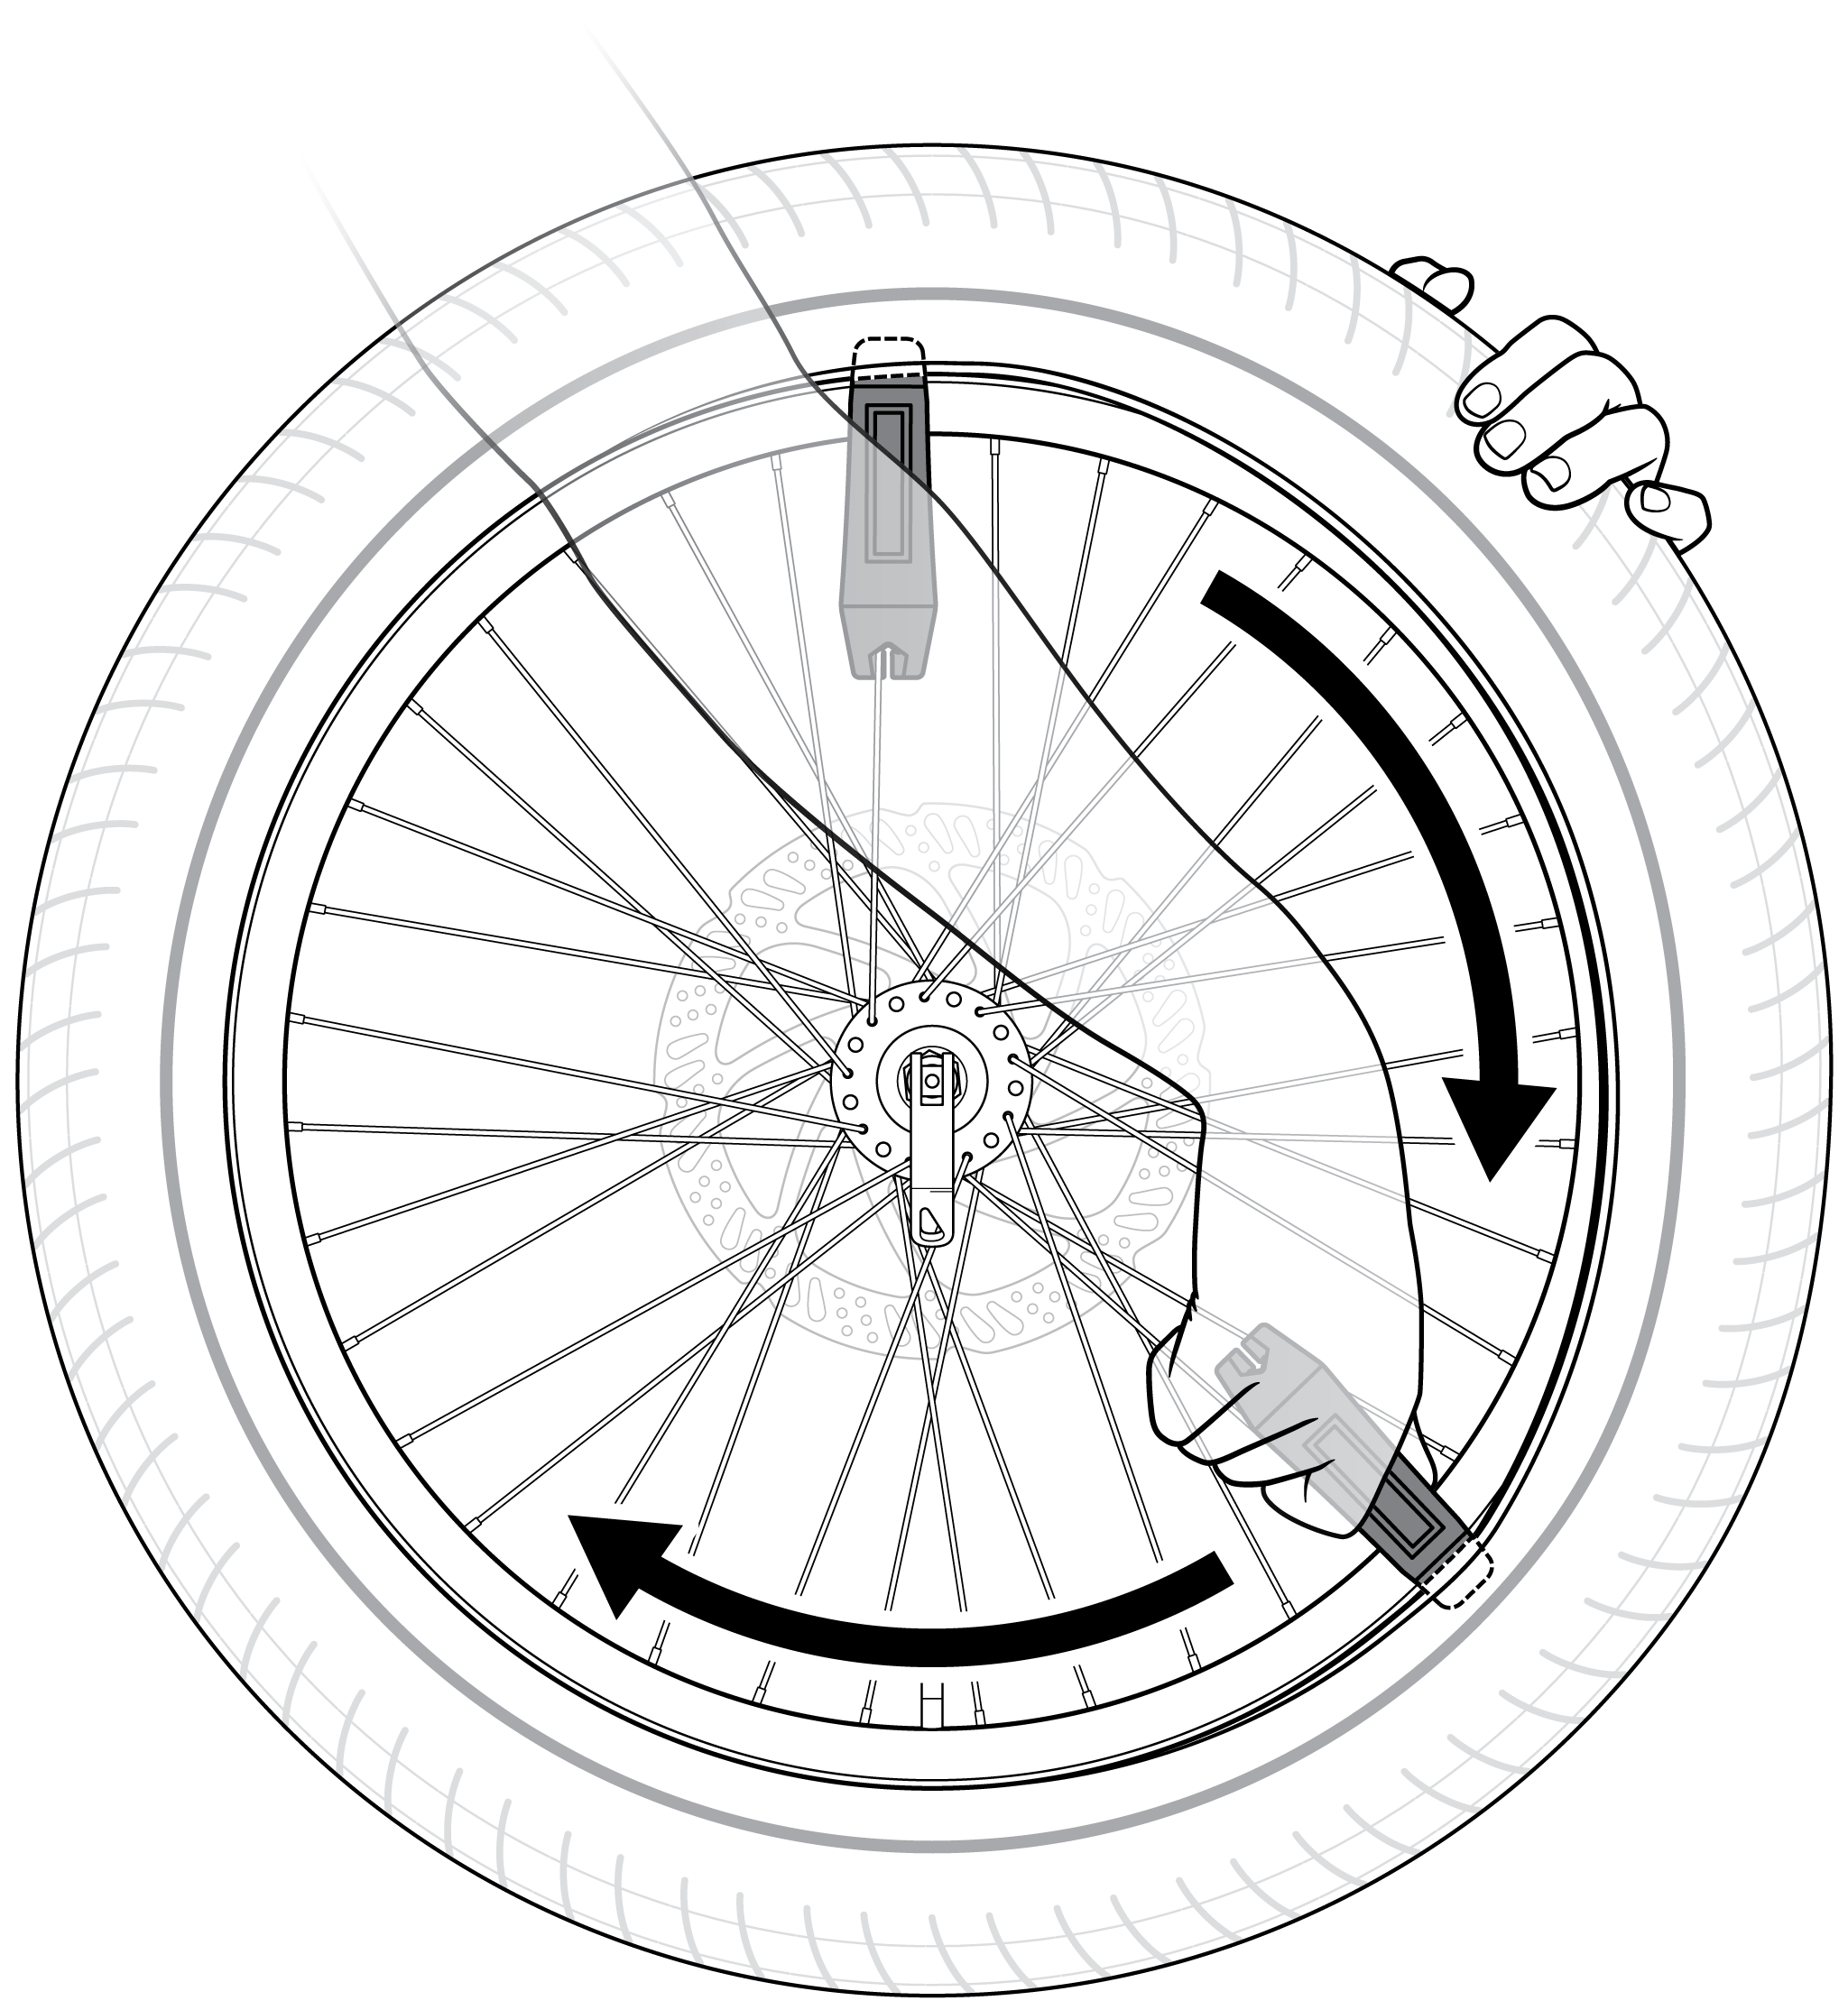
- Anchor one of the levers to a spoke. Begin pulling the other lever away from the first, along the rim, to release that side of the tire.
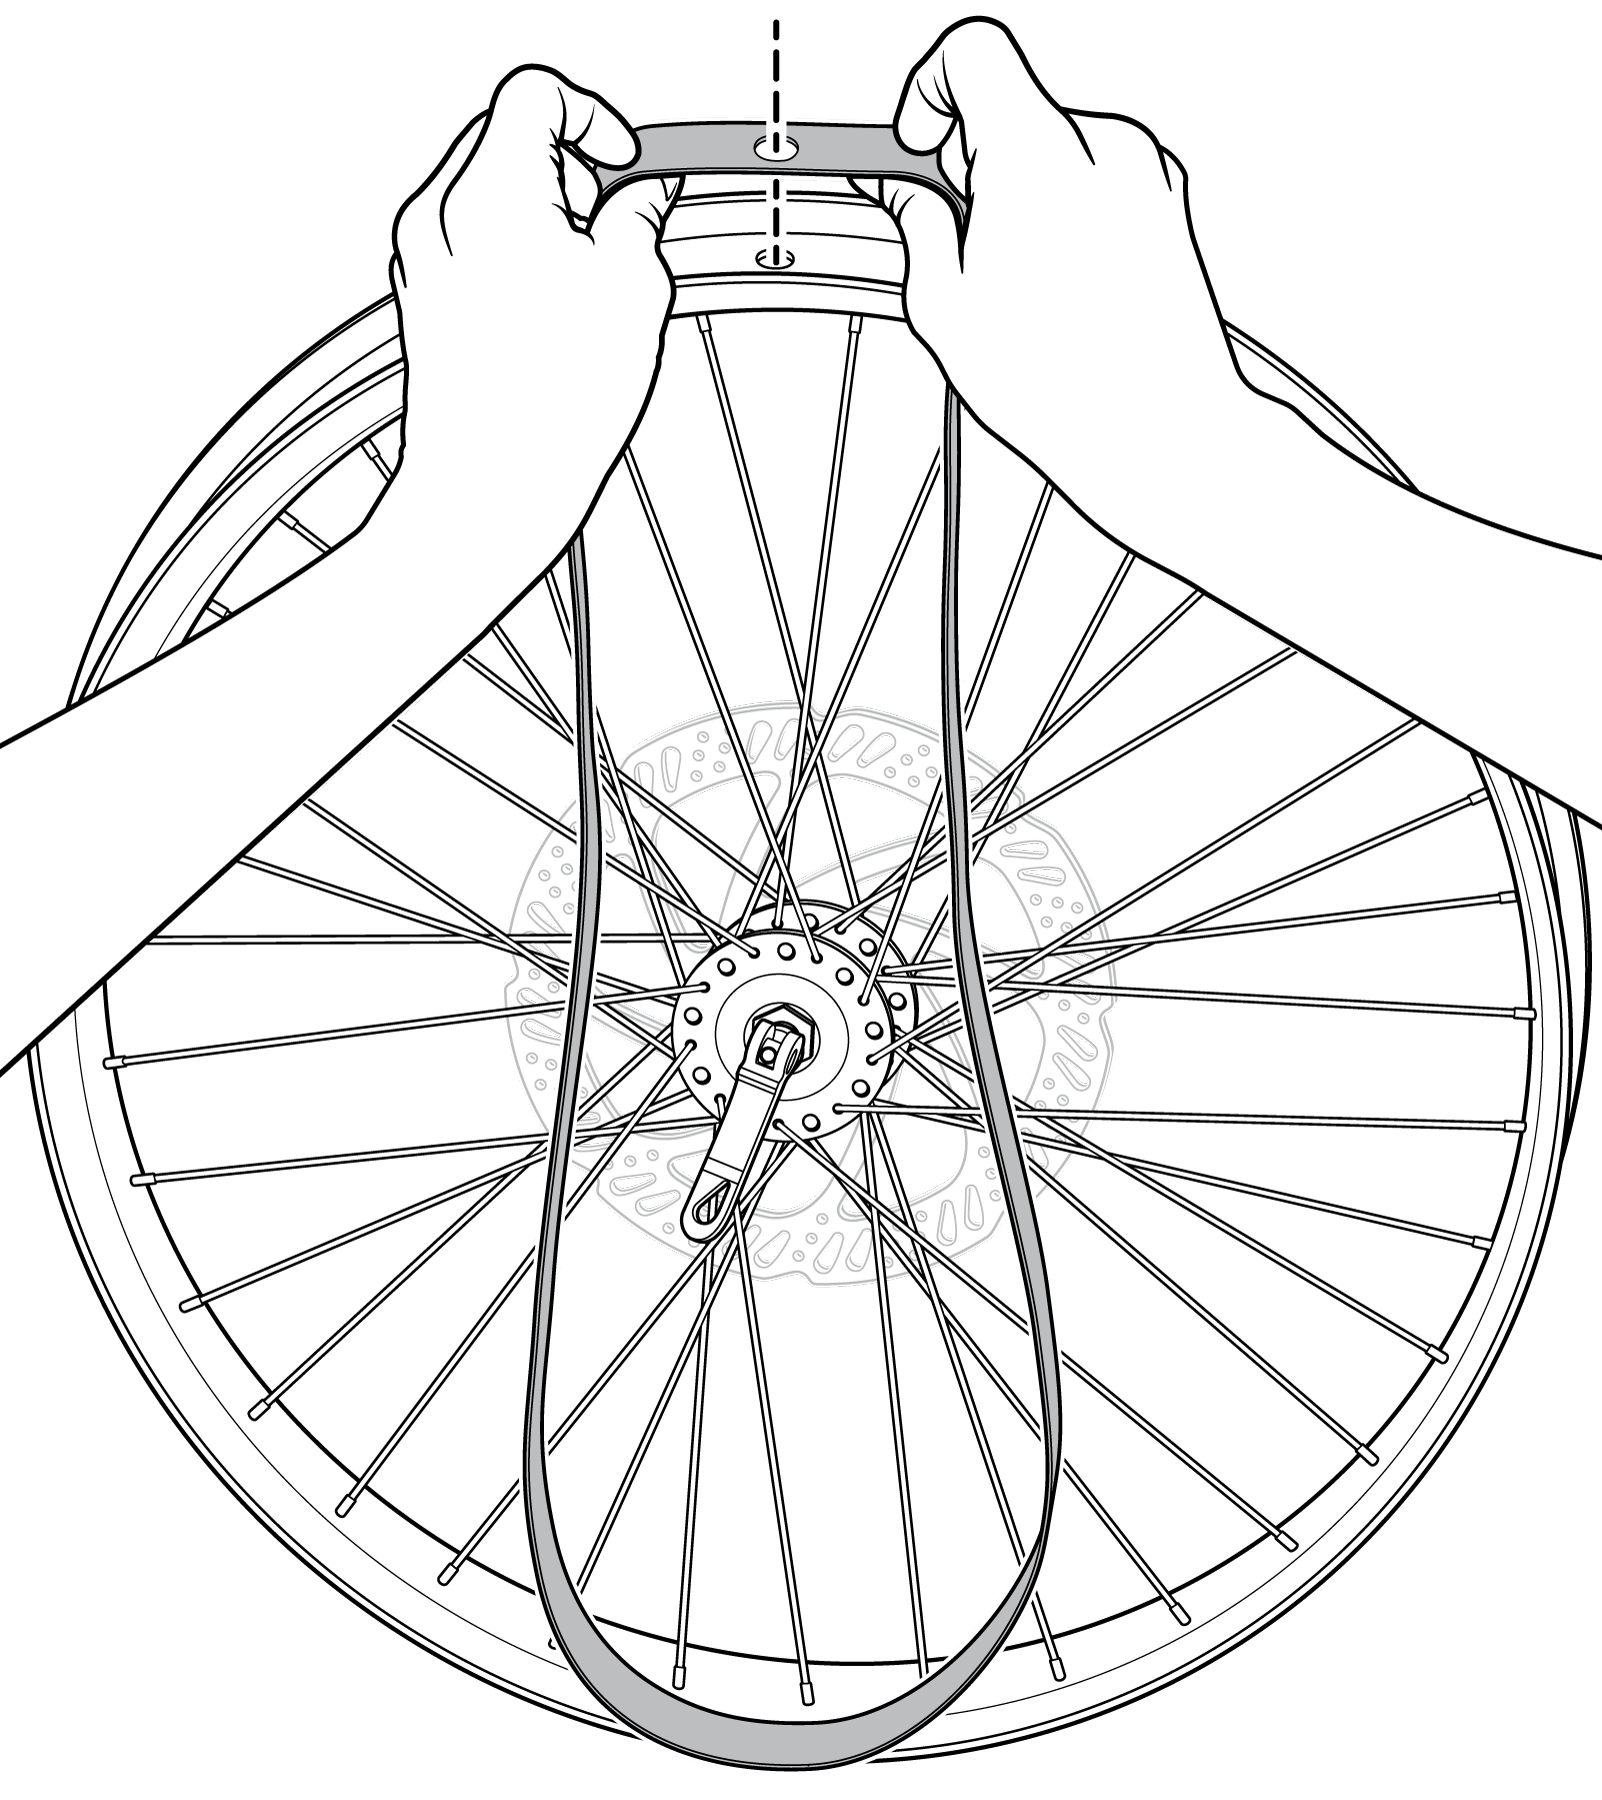
- Opposite the Schrader valve, grasp the tube and begin pulling it out of the tire. If that's too difficult, you might need to release more air from the tube.
- Push the valve through the wheel and then pull out the rest of the tube.
- Pull the tire off of the wheel.
|
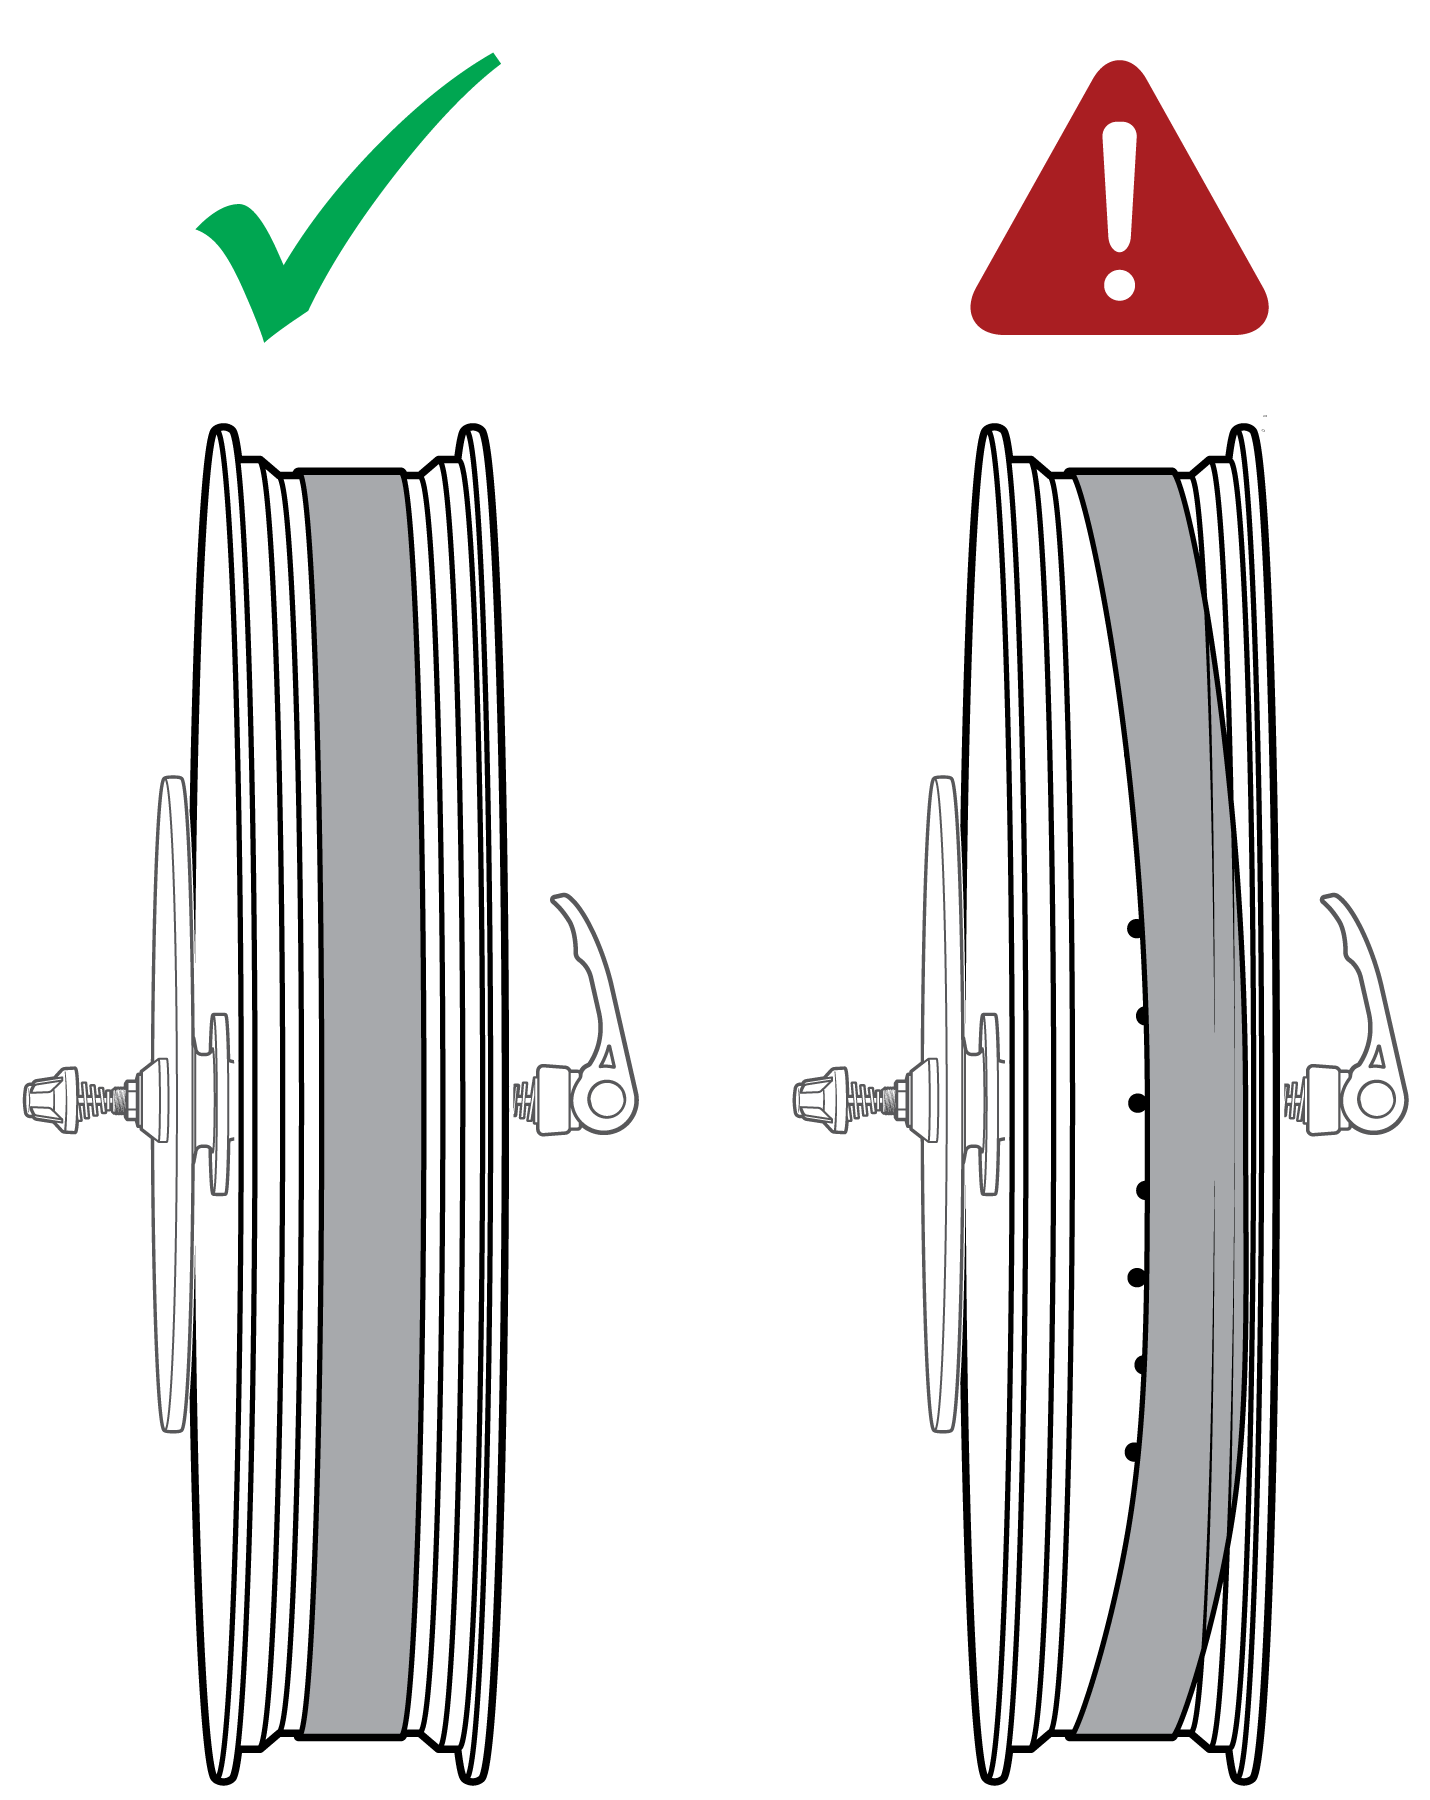
The rim strip is a piece of material that wraps around the inside of your wheel and covers the spoke holes to protect your tube from their potentially sharp edges.
If the rim strip is loose or doesn't cover all of the spoke holes, it needs to be replaced. Remove the faulty rim strip with one of your tire levers. |
 |
 |
 |
Riding on wheels with a loose or improperly positioned rim strip that does not cover all of the spoke holes can increase your risk of a tube puncture, which can cause serious injury or death. Replace loose or otherwise faulty rim strips.
If you have a faulty rim strip, you'll need to get a replacement. If you're a RadWagon 4 owner, be sure to read this article A Note to RadWagon 4 Owners. If you have another ebike from Rad Power Bikes and think your rim strip has a manufacturing defect, please contact us. You can also obtain a rim strip replacement by taking your wheel to a local bike shop for advice on options, which may include rim-strip tape. Your local bike shop can also help you install a replacement correctly.
If you have a replacement rim strip, install it as follows:
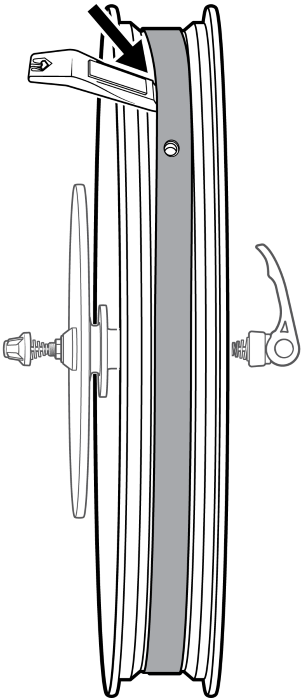
- Position the valve hole in the strip over the valve hole on the wheel.
- Hold the rim strip's valve hole firmly in place as you pull the rest of the rim strip onto the wheel.
|
 |
If your inspection of the rim strip reveal that it was faulty and not covering the spoke holes, assume that your tube may have been damaged by rubbing against the spoke holes and that your tube needs to be replaced. If your rim strip was fine, check the tube and tire anyway.
- Carefully inspect the tube for damage, especially if you suspect a flat tire. If you find any holes, you'll need a patch kit or a replacement inner tube. If you are patching your tube, follow the directions that came with your patch kit.
- Carefully inspect the tire. If you notice excessive wear on your tire, bulges, bald spots, or cracks, you must replace it. If you've had a flat, check the tire for any embedded objects and remove them.
You can order replacement tubes and tires from us as needed.
- Inflate your tube slightly until it's just stiff enough to begin holding a round-ish shape. Set it aside.
- Align your tire with the wheel. Make sure the rotation direction marked on the tire matches the rotation direction marked on the brake rotor.
- Put one side of the tire onto the wheel rim. Starting on the side of your wheel without the brake rotor, push one side of your tire onto the wheel rim. The other side of the tire will still be off the wheel.
|
 |
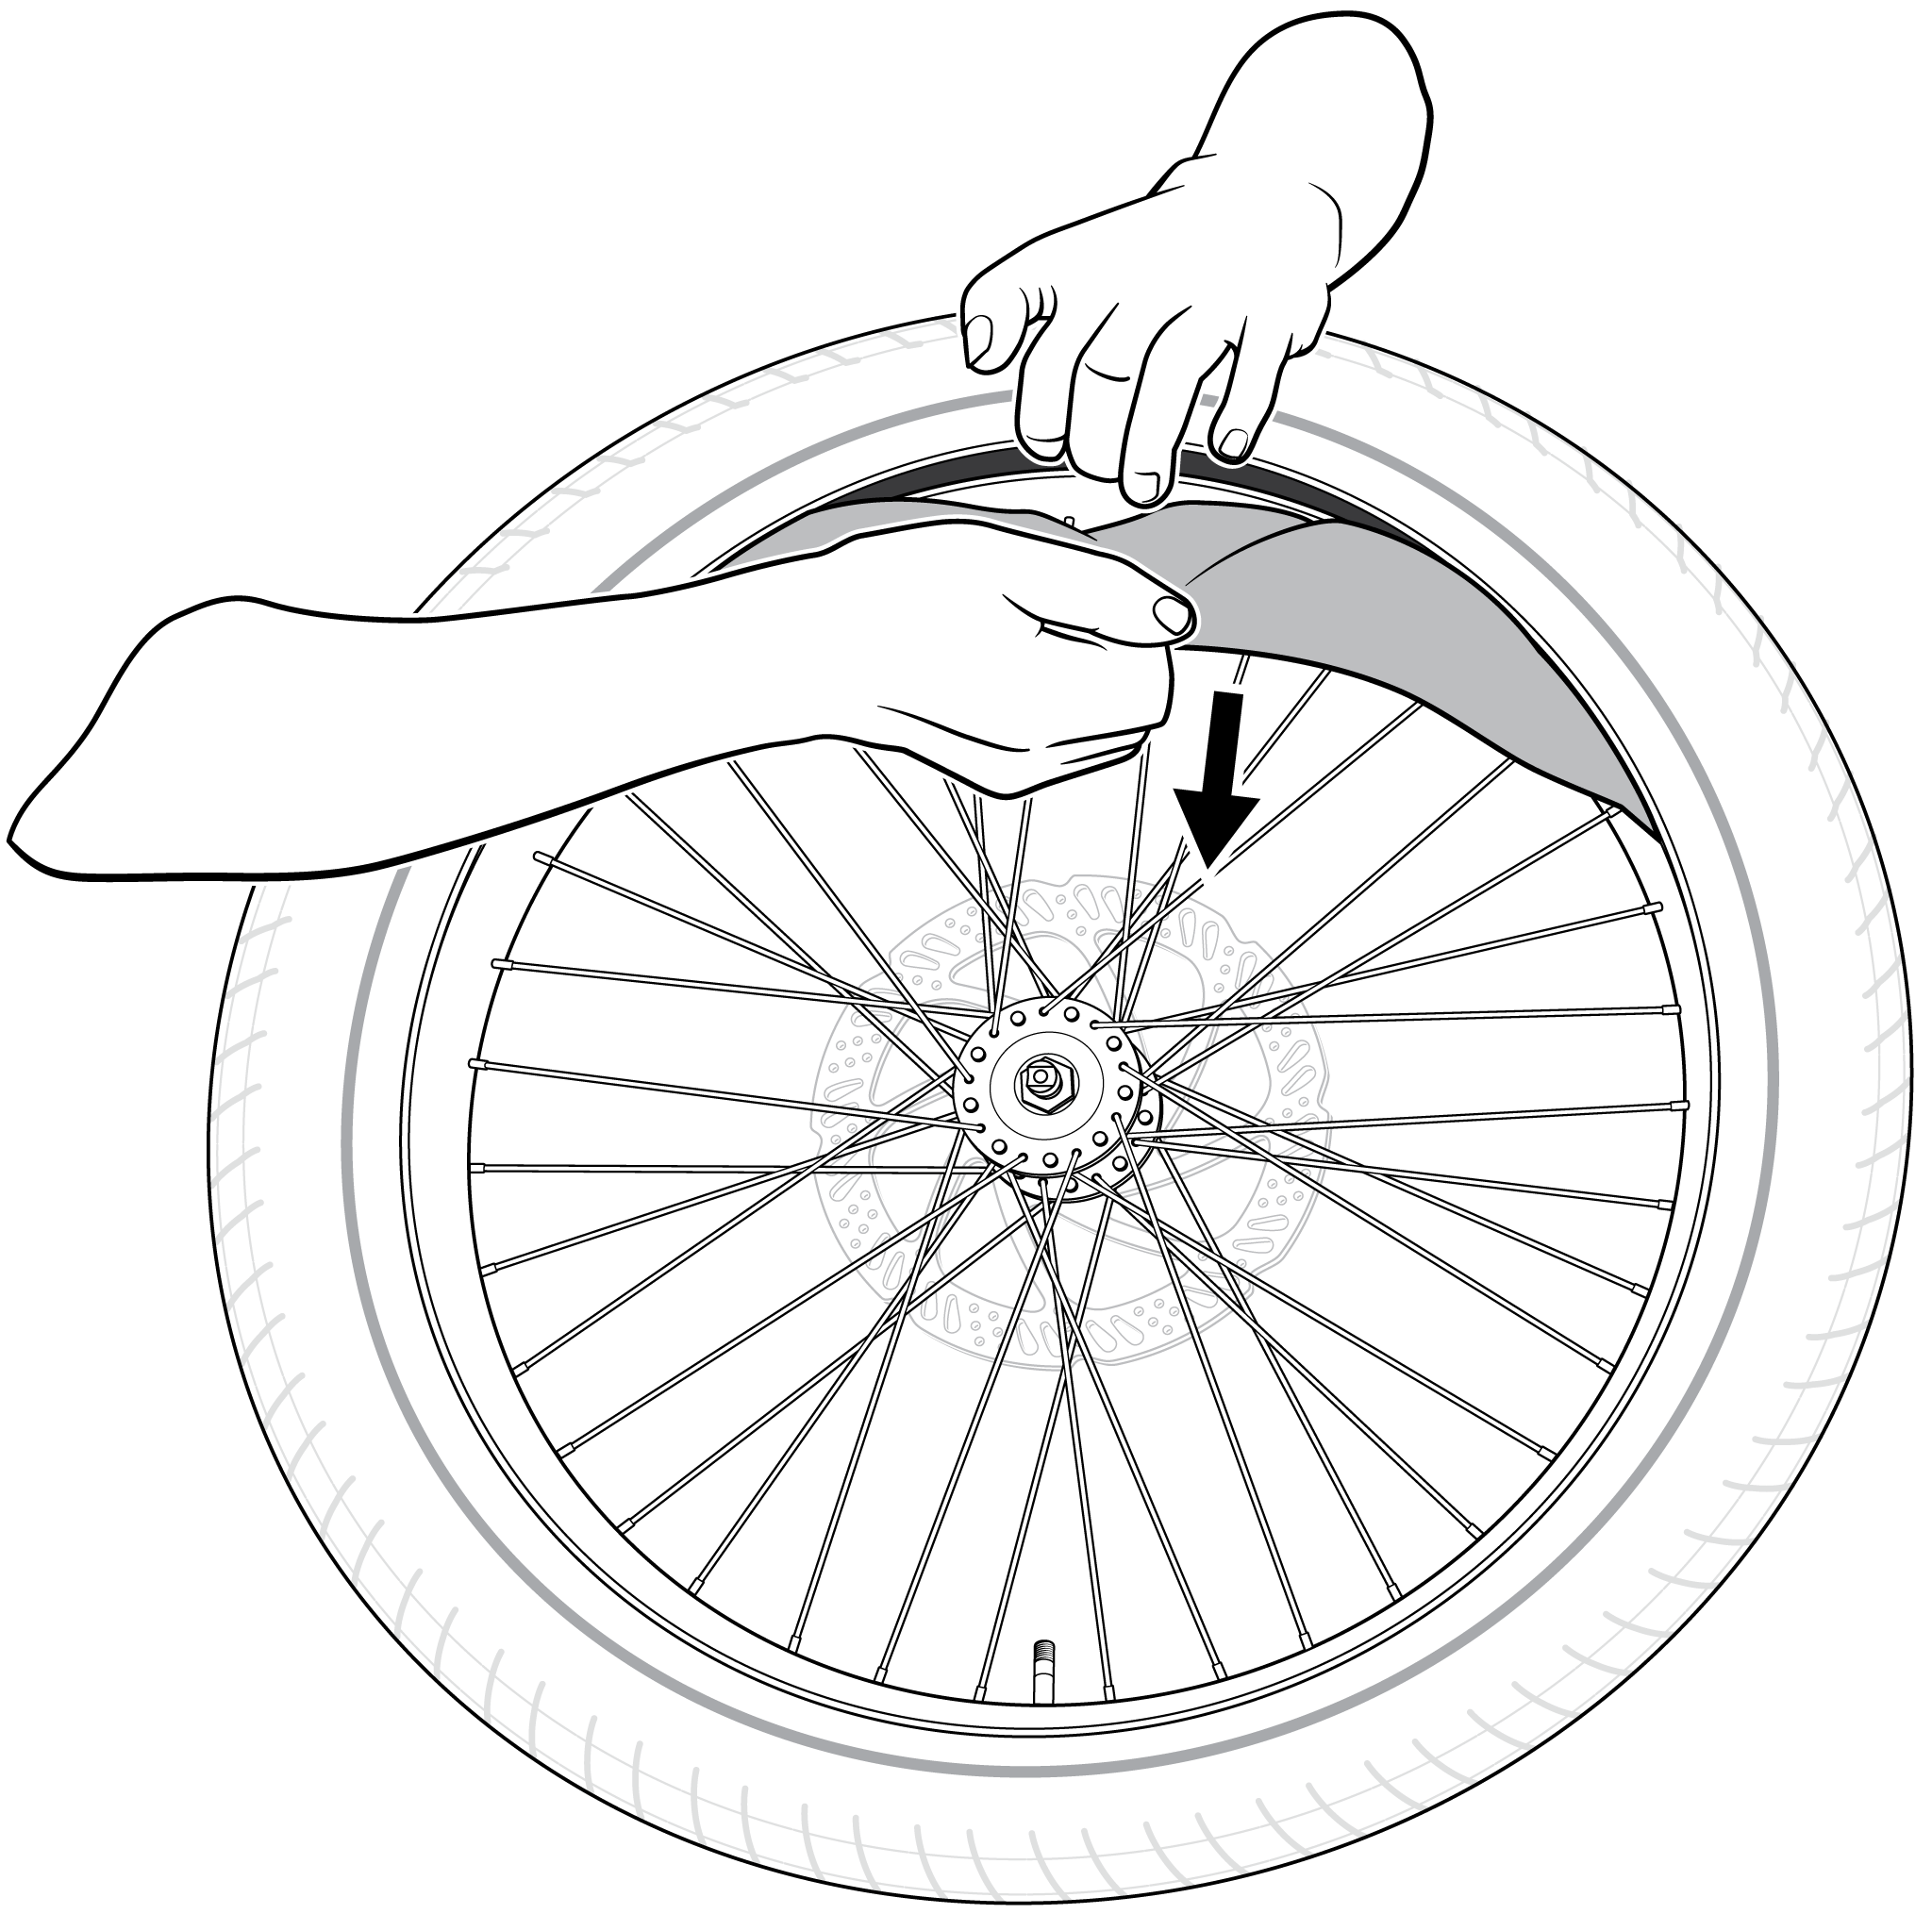
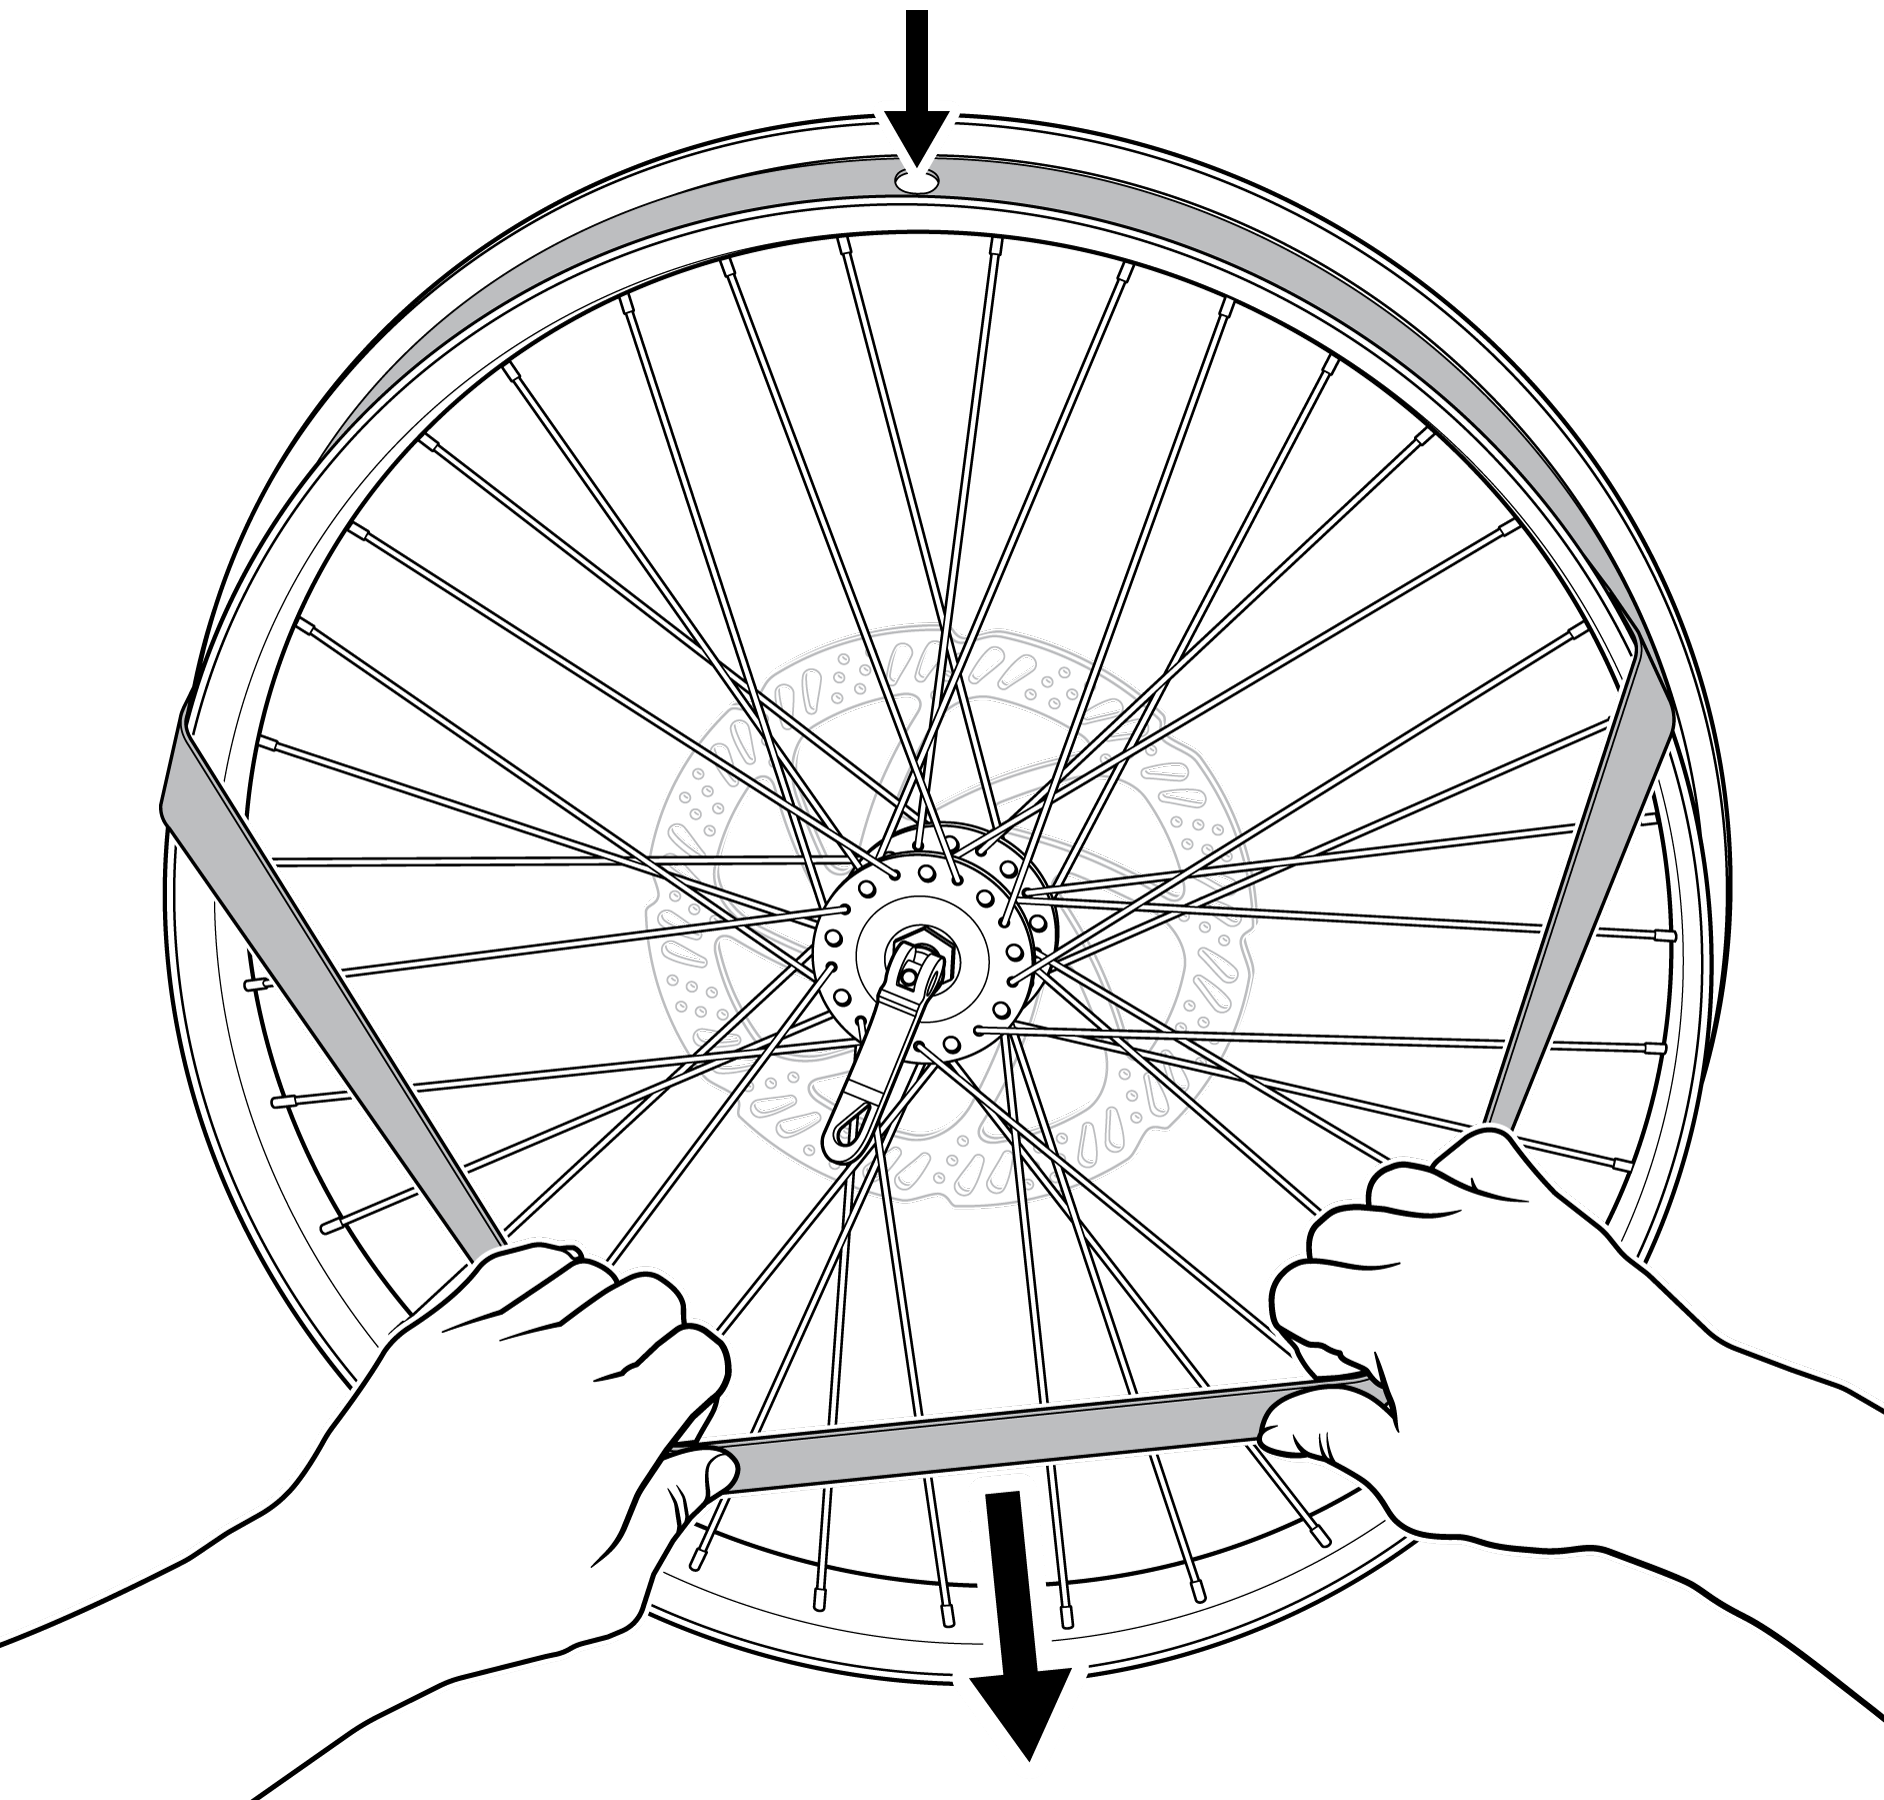
- Starting next to the valve, begin pinching the loose side of the tire onto the rim. You may be able to get the entire wheel fully onto the rim of the wheel by hand.
- If the last bit is too difficult to get on by hand, you'll need to use a tire lever to finish. This process requires great care to prevent the lever from pinching and damaging the tube. Insert the tire lever in with its scoop side facing down, hugging the wheel's rim to avoid catching the tube. Then lift up to pop a portion of the tire onto the rim. Complete until the entire tire is fully mounted onto the rim. You may find it helpful to prop your wheel between some sturdy surfaces.
- Since your tube is not yet inflated, you can still squeeze your tire to inspect the rim strip positioning under the tube. Make sure it hasn't shifted, exposing any of the spoke holes.
- Inspect your tire sidewalls to make sure both sides of the tire are fully inside the rim.
If you have any special flat-preventing tire liners installed, this will affect your tire-inflation process and target pressure. Please consult the instructions for those liners before proceeding with inflation. If you have purchased Tannus liners, please consult these resources:
Installing Tannus Armour liners
- Begin slowly reinflating your tire. When pressure is starting to display on your pressure gauge (at about 10 PSI), double check that the bead of your tire is still fully within the rim on both sides of the tire.
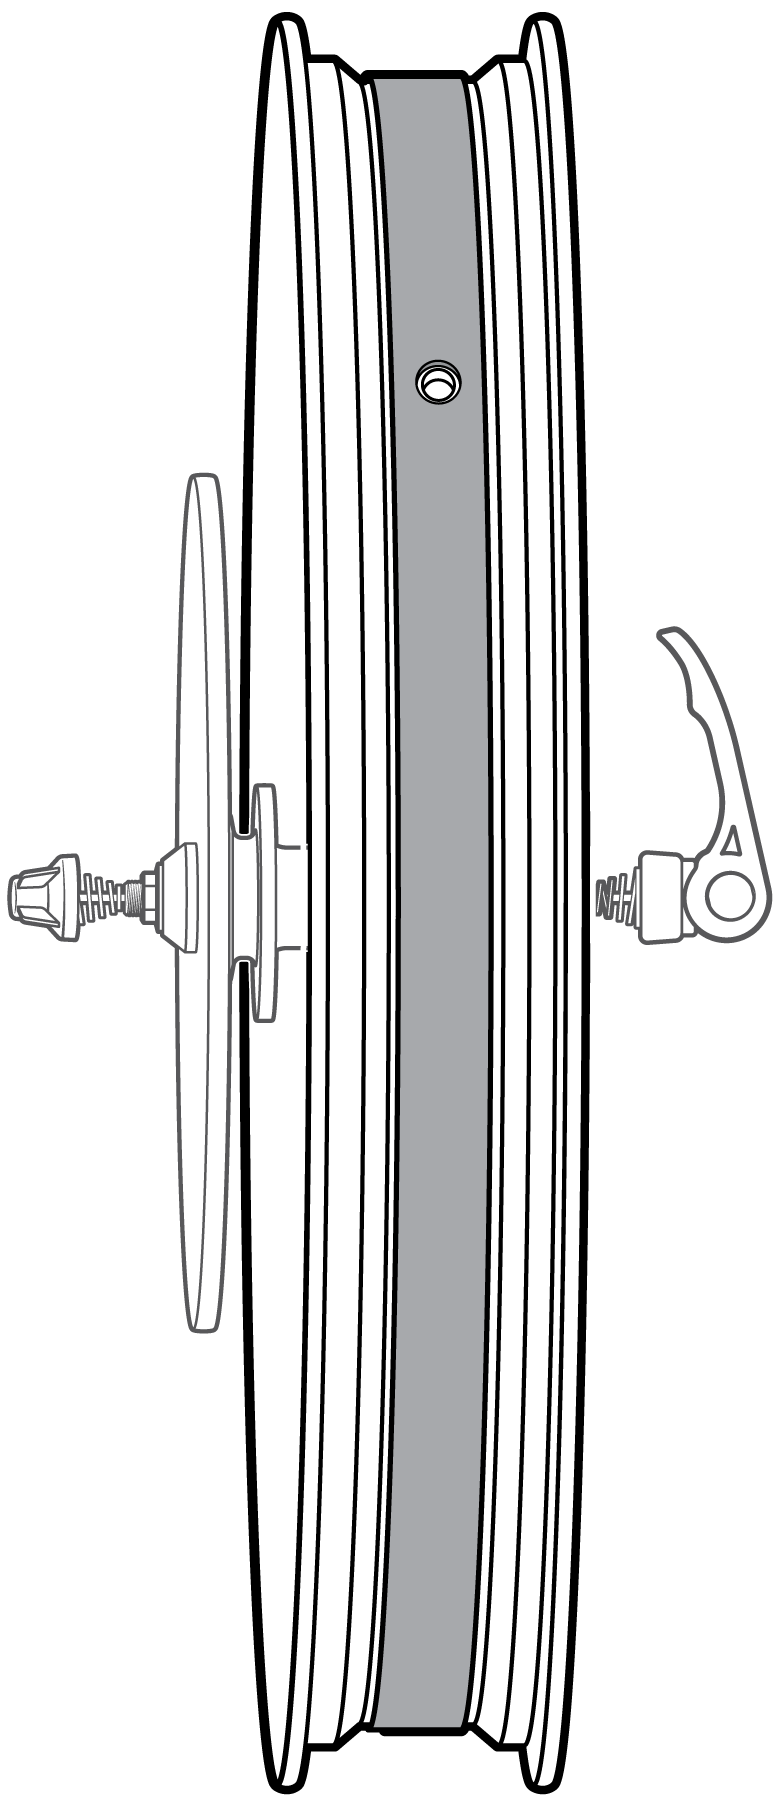
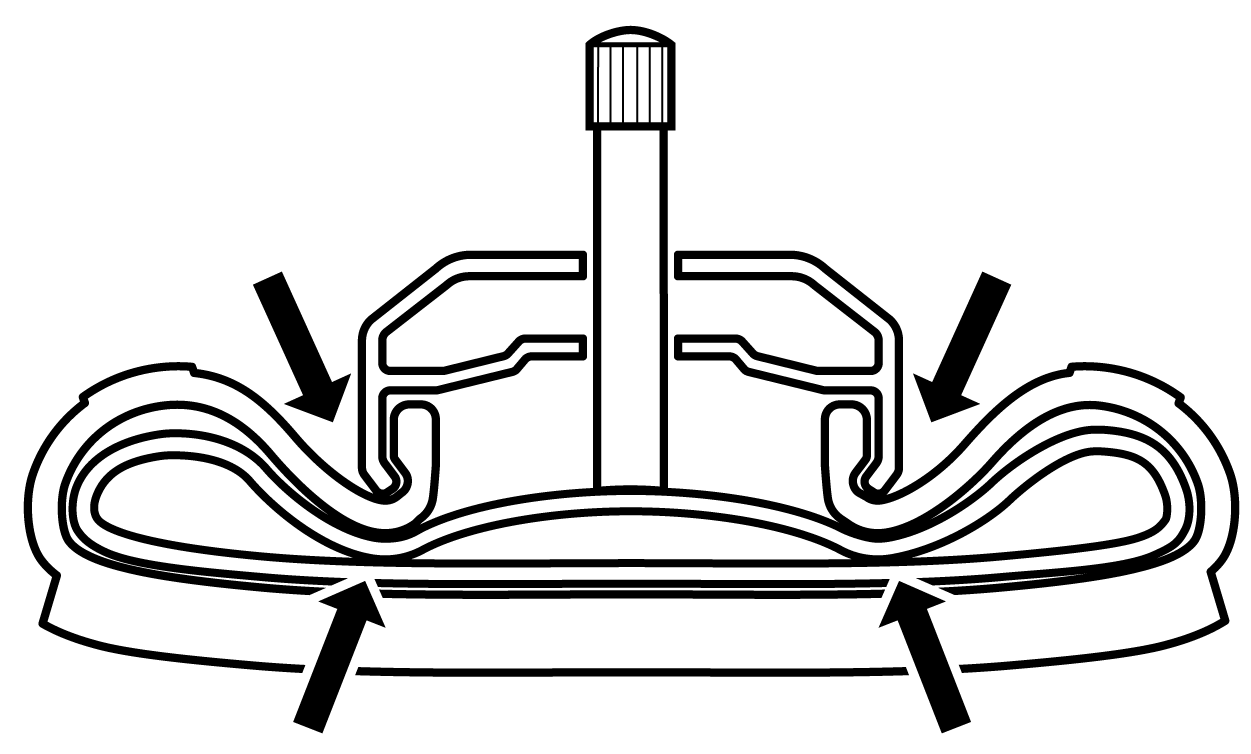
NOTE: The "bead" of your tire is the rigid ends of the tire, containing a metal wire, that a properly inflated tube presses into the rim of the wheel to hold the tire firmly in place (see the orange sections of the tire in the cross-section illustration). When the tire bead is fully and evenly secure in the rim, it called "fully seated." 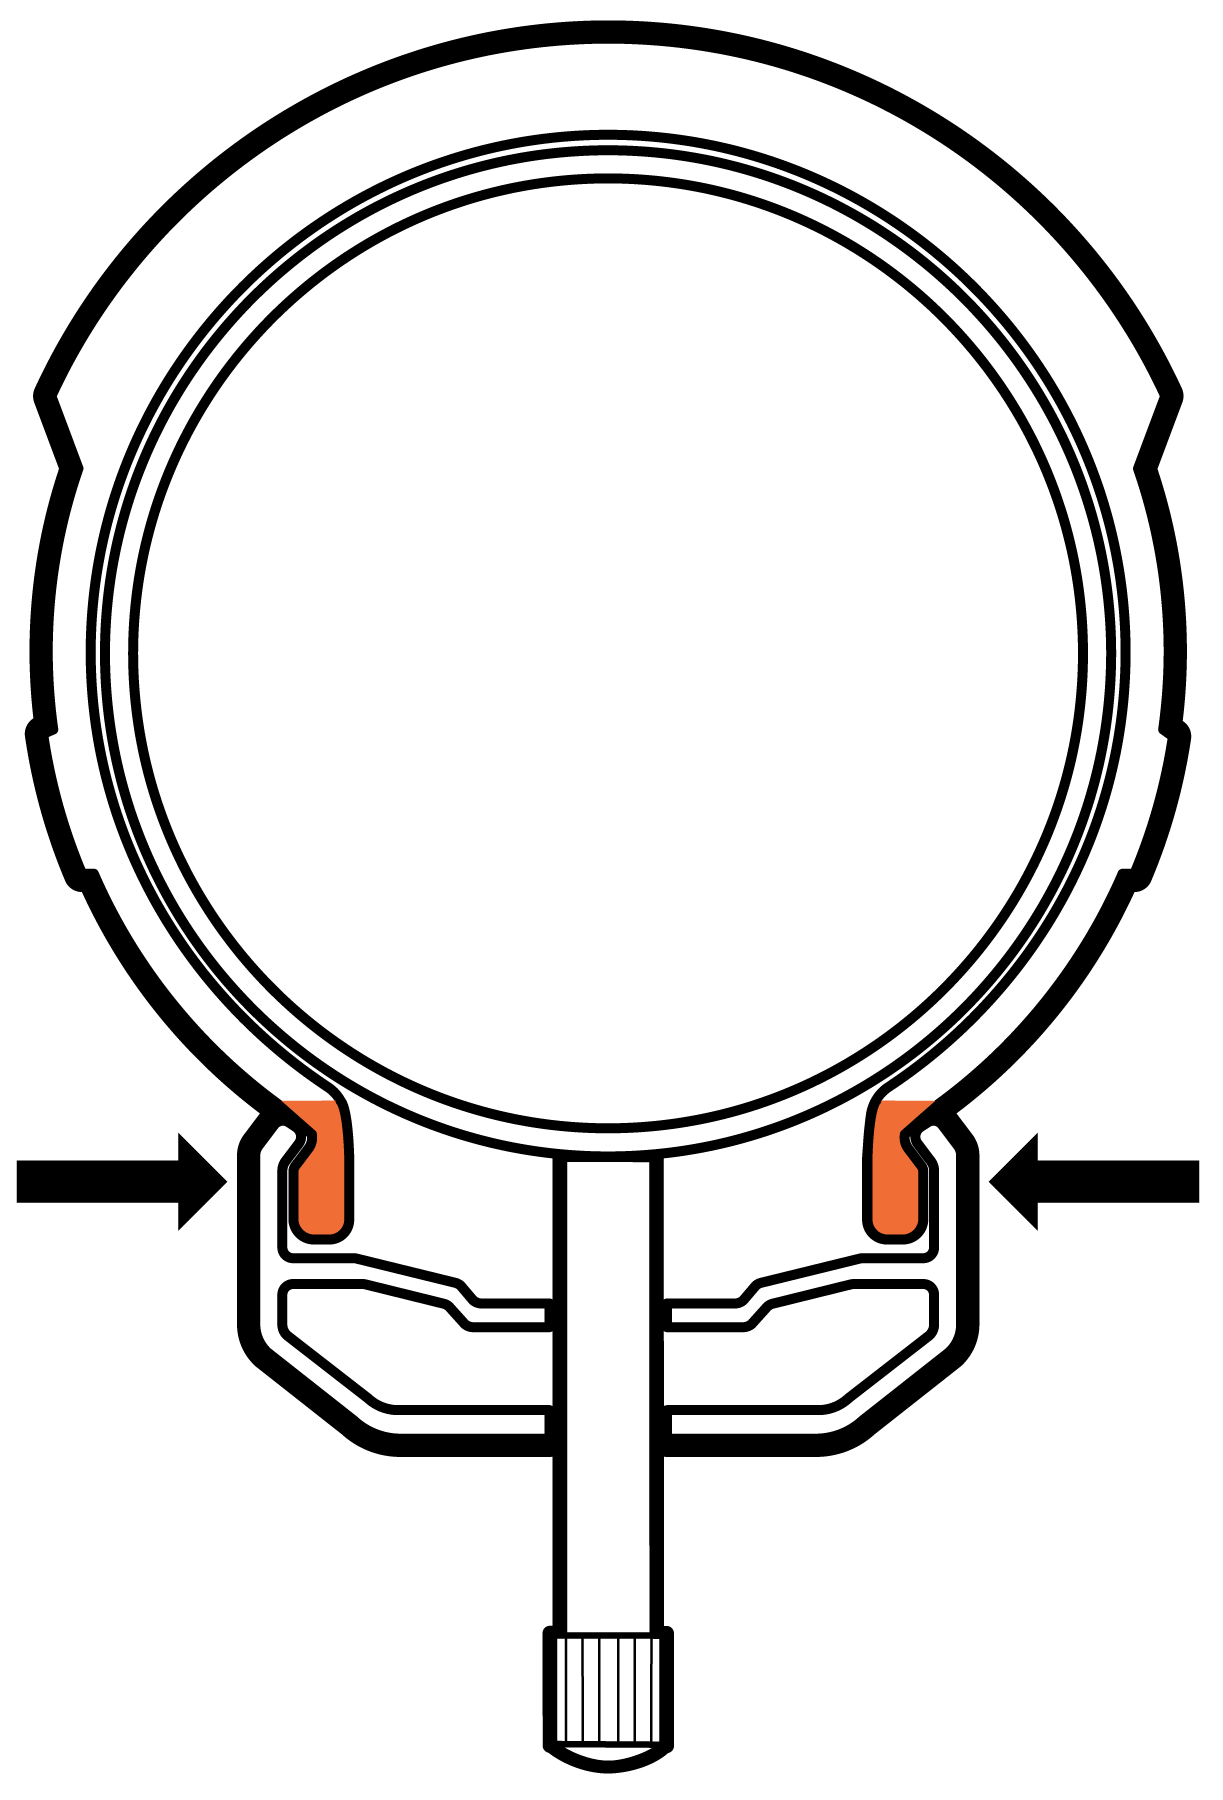
- Inflate your tire according to the pressure recommendation on the tire sidewalls. You'll find this expressed as a PSI (pounds per square inch), or a "bar" value. Do not confuse with the TPI (threads per inch) value or other specifications.
TO RADWAGON 4 CUSTOMERS:
Some RadWagon 4 tires list a PSI of 55-65 on their sidewalls. When these tires are used on the RadWagon, their minimum pressure can be lower than 55 PSI. The minimum PSI for these RadWagon 4 tires is 35 PSI (2.4 bar) and the maximum PSI is 65 PSI (4.48 bar). We recommend a PSI of about 40 PSI (about 2.8 bar) for typical rider/cargo weights and typical riding conditions, but follow the advice in this article to fine-tune your tire pressure for your payload and preferences.
All tires have a maximum pressure value listed on the sidewalls. DO NOT EXCEED THIS VALUE. Many tires also list a minimum tire pressure on the sidewalls. Whether or not your tires list a specific minimum value, check your tires visually before riding to make sure they are not underinflated.
To test your tire pressure, sit on your ebike with whatever cargo you are carrying (do not exceed your ebike's maximum weight capacity listed in its Owner's Manual). Your tires will be fairly round. If they are not, they are underinflated, and you risk having the rim pinch the inner tube (e.g., if you go over a sudden bump, pothole, or something similar), which can damage the tube and leave you with a flat tire.
|
A maximally inflated tire stays very round even with the rider and cargo on the bike. |
A minimally inflated tire still forms a roundish shape when the rider and cargo are on the bike, but has enough pressure to prevent the tube from getting pinched |
|
An underinflated tire does not retain a roundish shape when rider and cargo are on the bike. |
An underinflated tire can compress too much, especially if you hit a bump or pothole, causing a pinch flat. |
NOTE: Inflating your tires to a relatively high pressure (but not beyond the maximum pressure) will make your ride more efficient, though a bit bumpier, and will keep your tires within an acceptable inflation range for longer (all tires lose air pressure very slowly over time). Inflating your tires to a lower pressure can soften your ride and give you slightly better grip, but will reduce the efficiency of your bike.
Overinflating your tires can cause them to burst, potentially causing serious injury or death. Underinflating your tires puts unnecessary wear and tear on your tires and increases your risk of a pinch flat, potentially leading to serious injury or death. Never inflate your tires beyond the maximum pressure listed on the tire sidewalls, and never inflate your tires so little that they don't remain mostly round when you're sitting on your bike.
- When you reach your target pressure, put the valve cap back on and do one more inspection on both sides of the wheel to ensure your tires are evenly seated all the way around. If the tire isn't evenly seated, your options are to deflate and try again, or try again after lightly spraying the tire with some soapy water. See the article "How to Seat a Tire Bead" for more information. Another option is to take the wheel to a local bike shop for help.