RadMission Controller Replacement Guide
The RadMission controller can be replaced if instructed to do so by Rad Power Bikes Product Support.
Follow the instructions below to replace the controller on a RadMission.
Tools needed:
- A Phillips head screwdriver
- Flat side cutters
- A few zip ties
- A table, wall, or friend to help stabilize the bike, or wood blocks (to protect the display when the bike is upside down)
- The replacement controller from Rad Power Bikes
Remove the Old Controller
- Get the bike ready for maintenance. Turn off the bike, remove the battery, and press and hold the power button to discharge remaining power.
- Stabilize the bike. Have a table, wall, or friend ready to help keep the bike in place, or carefully flip the bike upside down and prop the handlebar grips on blocks to protect the display.
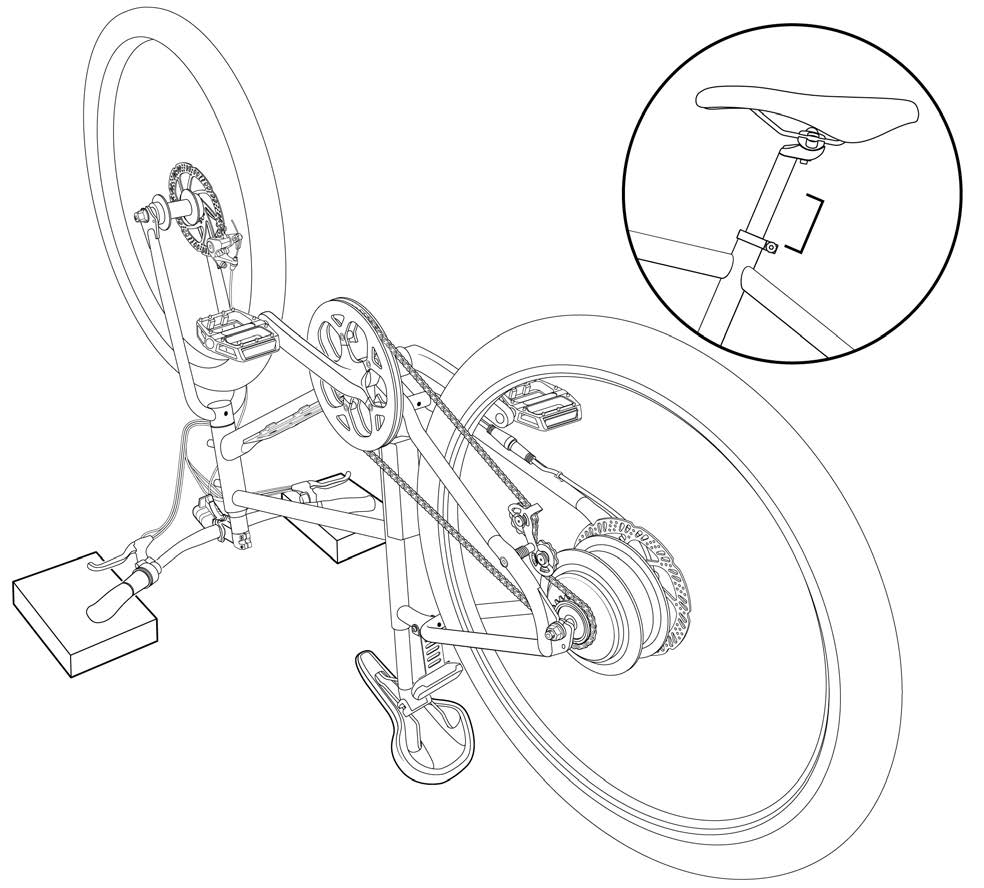
- Unplug all connectors from the controller. Snip zip ties as needed, and pull each side of the connector directly apart, without twisting, to unplug.
- Locate and remove the controller mounting bolts. Use a Phillips head screwdriver to remove the four controller mounting bolts. Press the tool into the bolt head fully and turn the bolt slowly to prevent damaging the bolt head. Set the bolts and mounting brackets aside.
- Remove the old controller and recycle it according to local rules.
Install the New Controller
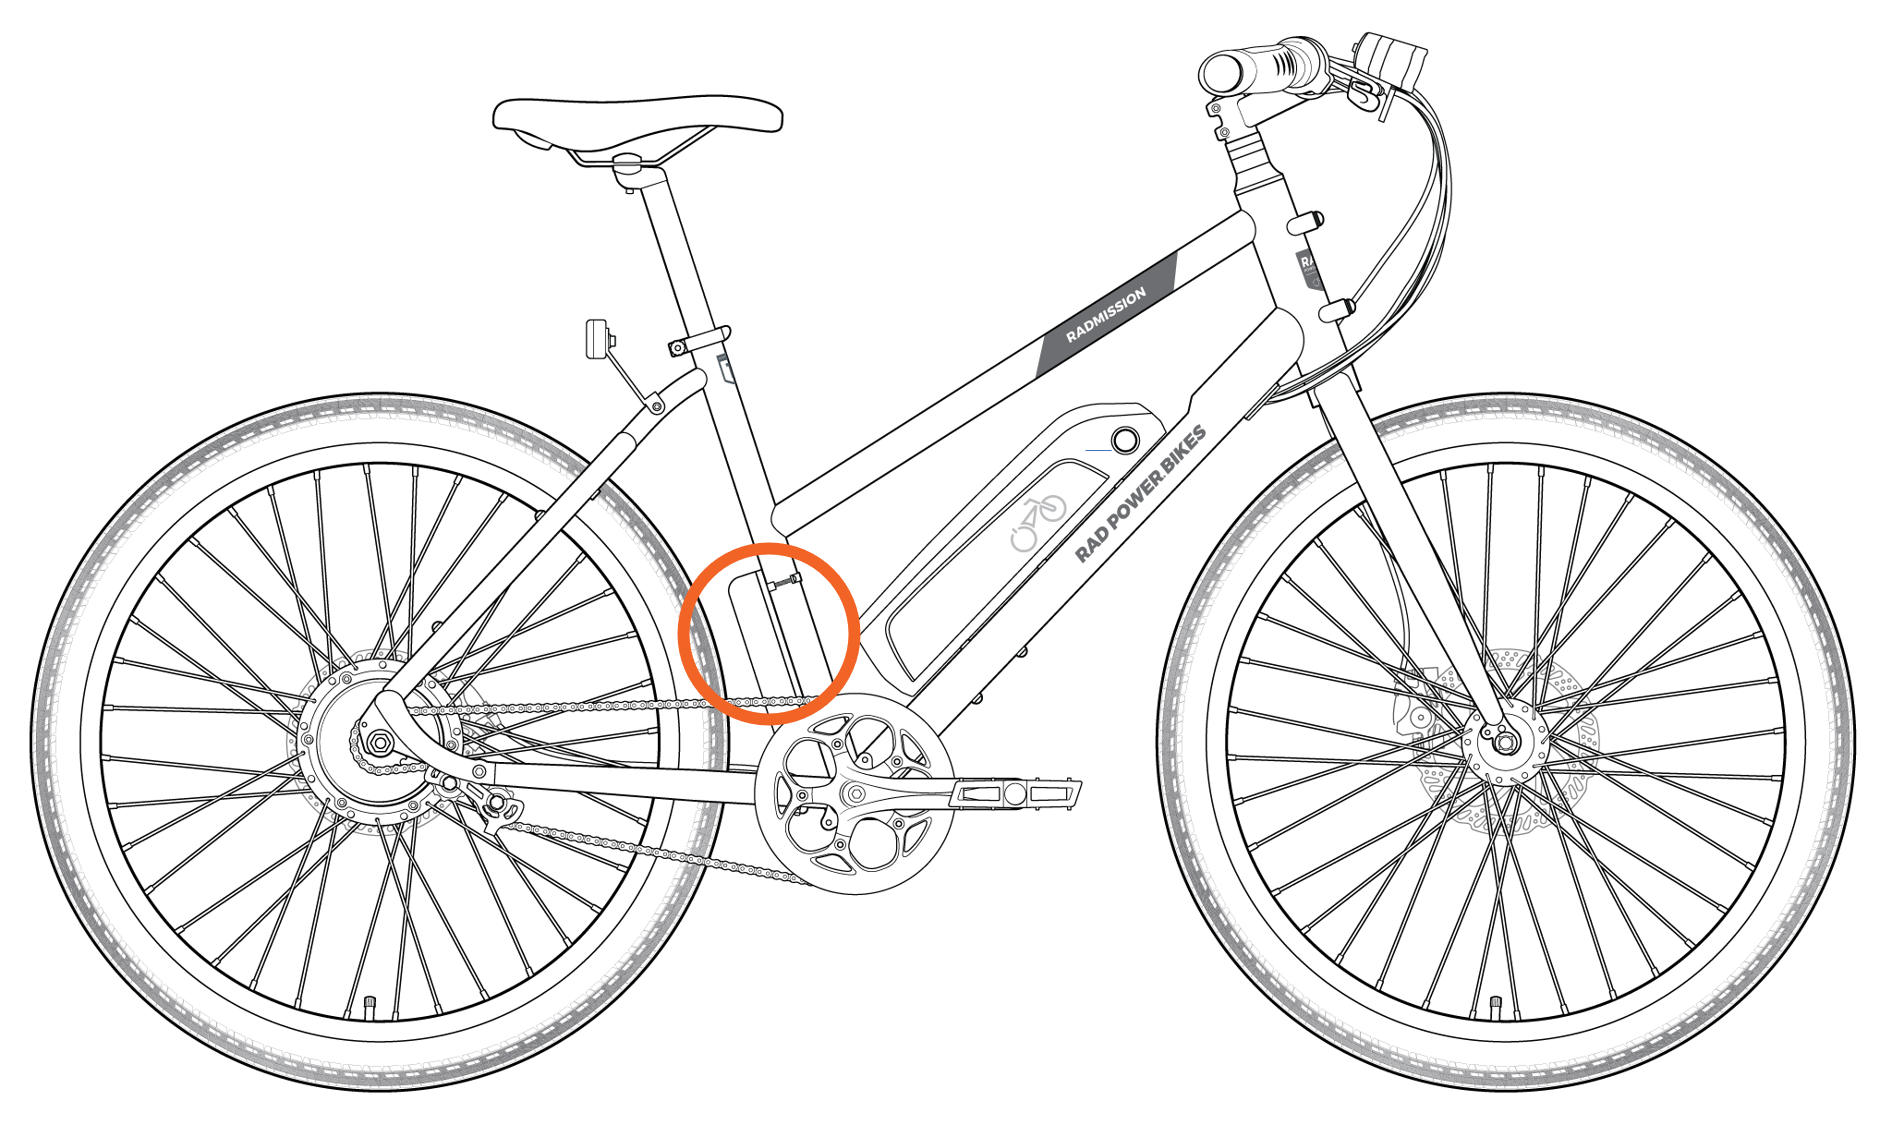
- Locate the new controller and orient it so the mounting holes face the front of the bike and the side with the single cable points upward.

- Place the new controller on the frame where it will be installed. Pass the cables coming out of the bottom of the controller down through the opening between the frame tubing.
- Install the controller on the frame. Pass a mounting bracket through the top mounting hole on the frame and thread in the bolts partway by hand. Repeat with the other bracket on the lower mounting hole.
- Center and secure the controller. Ensure the controller is centered and use a Phillips head screwdriver to tighten the four bolts evenly and securely, alternating between bolts in an “X” pattern. Press the tool into the bolt head fully and turn the bolt slowly to prevent damaging the bolt head.
- Plug in all connectors. Locate the matching connector ends. Carefully align the internal notch and pins (and external arrows) and press directly together, without twisting, to connect.
- Replace any snipped zip ties and trim them to be flush and smooth. Check that all cables are free from any moving parts.
- Reinstall the battery, test the bike fully before riding, and ride Rad!