
Need help? Click the chat button in the lower right corner of your screen to connect with a Customer Support agent live. Mon-Fri: 8 am-5 pm PST

Rad Power Bikes Production Site

RadTrike Wiring Harness Replacement Guide

Use this procedure to replace the wiring harness on the RadTrike in the unlikely event it is damaged or determined to be non-functional by Rad Power Bikes Product Support.

You will need:

  • Flat side cutters
  • A few zip ties
  • The replacement wiring harness from Rad Power Bikes
Remove the old wiring harness

Take pictures of cable connections and cable routing before you start removing the wiring harness, as once you install the new wiring harness you will need to reconnect everything in its original position.

  1. Get the trike ready for maintenance. Turn off the trike, remove the battery, and press and hold the power to discharge remaining power.
  2. Locate the wiring harness at the front of the trike. Remove the neoprene sleeve that covers the cables on the front of the trike, and the velcro straps that secure the cables to the handlebar.
    RADTrike_PowerTrain_2A.png
  3. Unplug the Rad UI remote (green) from the wiring harness. Trace the cable from the remote on the left side of the handlebar to the harness box, and then pull the connectors directly apart without twisting to unplug.
  4. Unplug the throttle (orange) from the wiring harness. Trace the cable from the throttle on the right side of the handlebar to the harness box, and then pull the connectors directly apart without twisting to unplug.
  5. Unplug the front brake (red) from the wiring harness. Trace the cable from the brake lever on the left side of the handlebar to the harness box, and then pull the connectors directly apart without twisting to unplug.
  6. Unplug the headlight (red) from the wiring harness. Trace the cable from the headlight to the wiring harness box, and then pull the connectors directly apart without twisting to unplug.
  7. Locate and unplug the wiring harness connector. Trace the long cable from the harness box to the frame connection point under the downtube. The wiring harness connector ends have a grey stripe on them. Snip the zip ties on the three mounting bosses on the downtube, and then pull the wiring harness connectors directly apart without twisting to unplug.
    Trike_Controller_Cables.png
  8. Remove the old wiring harness. Recycle according to local rules.
Install the new wiring harness

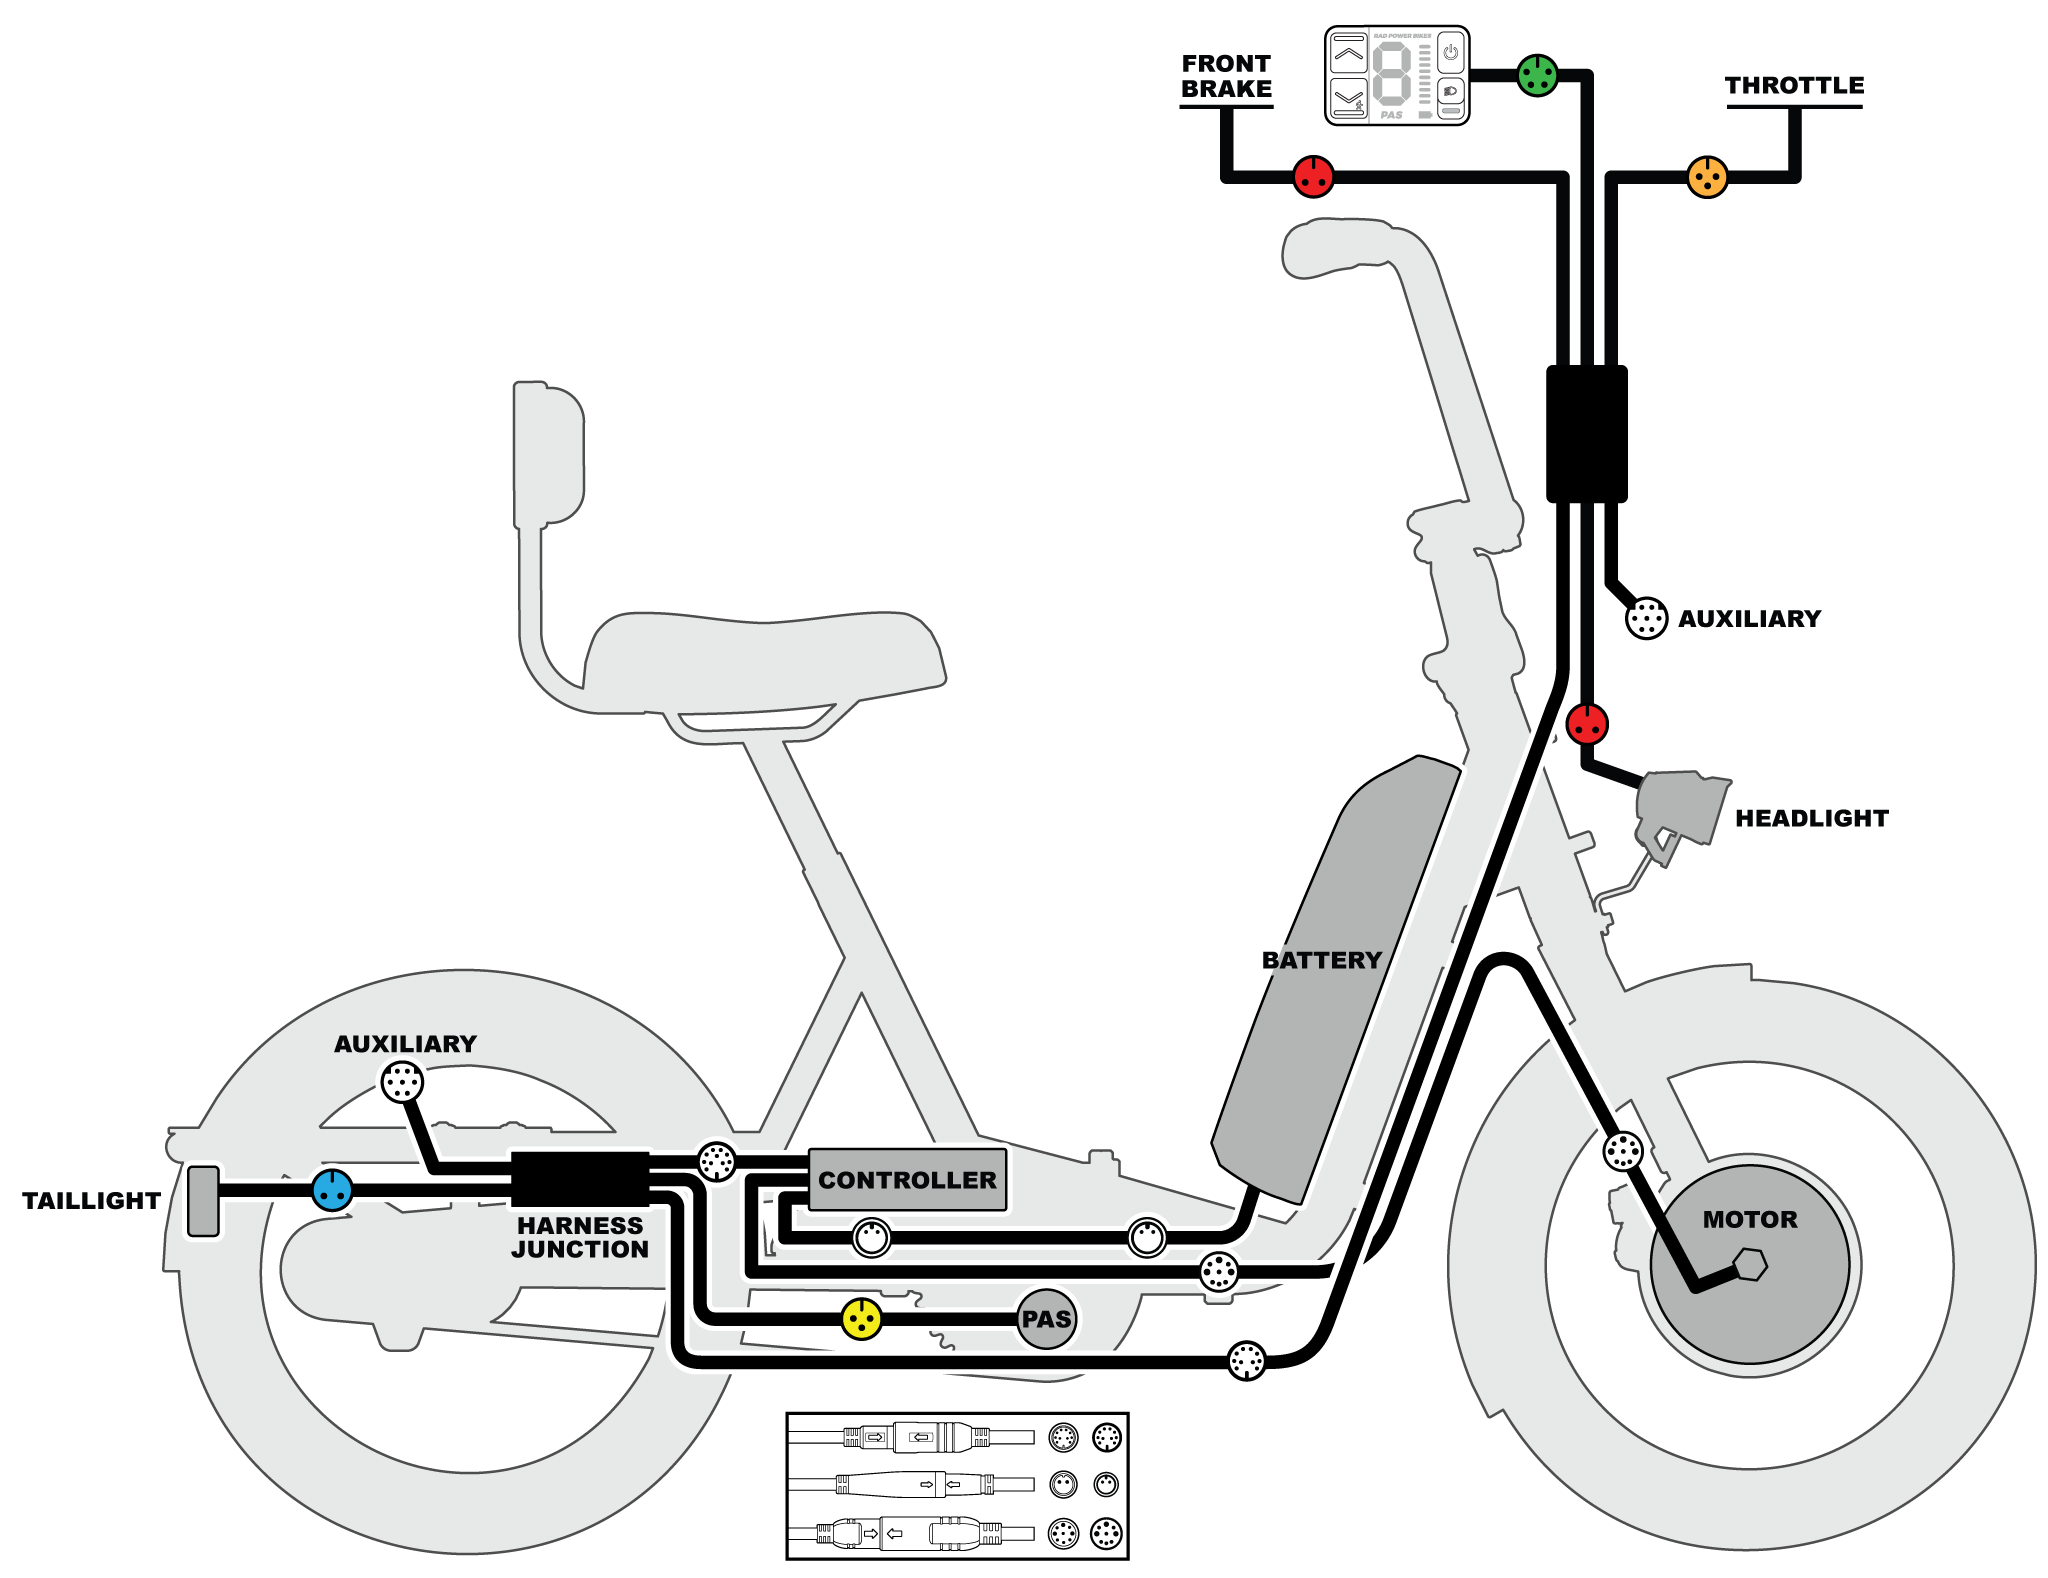
When reconnecting cables, do not plug in a connector to the wiring harness if it does not match in color and shape. Doing so could cause irreparable damage to the connector, the part, or the wiring harness.

  1. Locate the new wiring harness and orient it so that the long wiring harness connector is pointed towards the bottom of the trike.
  2. Plug in the wiring harness connector. Line up the internal notch and pins with the external arrows, and press directly together without twisting to connect.
  3. Route the wiring harness cable along the trike downtube. Take up any cable slack and use a zip tie to secure the cables to the three mounting bosses on the downtube. Use the flat side cutters to cut off any excess from the zip ties, and ensure the cuts are flush and smooth with no sharp points.
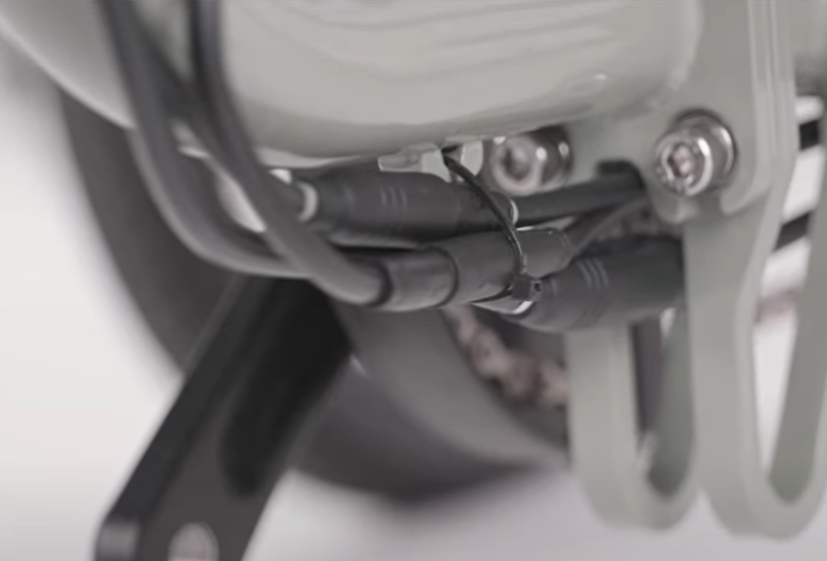
  4. Plug in the headlight. Connect the red connector at the bottom of the wiring harness to the headlight connector, and press directly together without twisting to connect.
  5. Plug in the throttle. Connect the orange connector to the throttle connector, and press directly together without twisting to connect.
  6. Plug in the brake. Connect the red connector to the brake connector, and press directly together without twisting to connect.
  7. Plug in the Rad UI remote. Connect the green connector to the RADUI remote connector, and press directly together without twisting to connect.
  8. Check that all cables are free from any moving parts. Rotate the handlebar to ensure it can move freely and that there is enough cable slack. Replace the neoprene sleeve around the cables, and secure the cables to the handlebar with the velcro straps
  9. Reinstall the battery, test the bike fully before riding, and ride Rad!
  • Was this article helpful?