RadWagon 4 kickstand spring replacement guide
The RadWagon 4 kickstand springs can be replaced if needed after wearing out with normal use over time, or in the unlikely event they are damaged or determined to be non-functional by Rad Power Bikes Product Support.
Follow the instructions below to replace the kickstand springs on your RadWagon 4.
Tools needed:
- Blocks to prop the handlebar grips on (which protects handlebar electronics) when the bike is flipped upside-down
- Approximately 12 inches of strong braided paracord tied into a loop
- Eye protection
- A friend to help
- The replacement springs from Rad Power Bikes
- Get the bike ready for maintenance. Turn off the bike, remove the battery, and press and hold MODE to discharge remaining power.
- Carefully flip the bike upside-down and prop the grips on the wood blocks to protect the display. Squeeze the right brake lever to hold the back wheel in place and help control the bike. Get help from a friend if needed.

- Unfold the kickstand so it is extended upward fully.
- Remove the old springs.
- Locate the section of paracord tied into a loop, which will be used to help remove the spring hooks from the mounting points on the kickstand.
- Place the paracord around the end of the spring hook that is attached to the rectangular mount. Hold the paracord loop with your dominant hand and hold the kickstand still with your non-dominant hand.
Use caution to avoid injury while removing the spring. Wear eye protection and stand to the side so your face and body are out of the rebound path of your hand in the event the cord breaks. Use a braided paracord that is strong enough to withstand significant resistance from the kickstand to prevent cord breakage and potential resulting injury. If needed, place a small towel between the cord and your hand as cushion.
- Stand with your face and body outside of the path of your hand as shown, and pull directly upward on the paracord to lift the spring hook off of the rectangular mount. Remove the other side of the spring from the mounting hole.

- Repeat with the other spring. Recycle both springs according to local rules.
Continue to the next section to install the new springs.
- Locate and install the new springs.
- Orient the springs as shown with the lower hook opening toward the front of the bike, and hook the spring into the bottom mounting hole.
- Place the paracord loop through the rectangular mount opening and around the spring hook. Pull the paracord upward, without twisting, until the spring hooks on to the rectangular mount. Ensure the upper spring hook opening is pointed toward the back of the bike.
- Repeat with the other spring.
- Ensure the springs are installed exactly as shown in the image below.
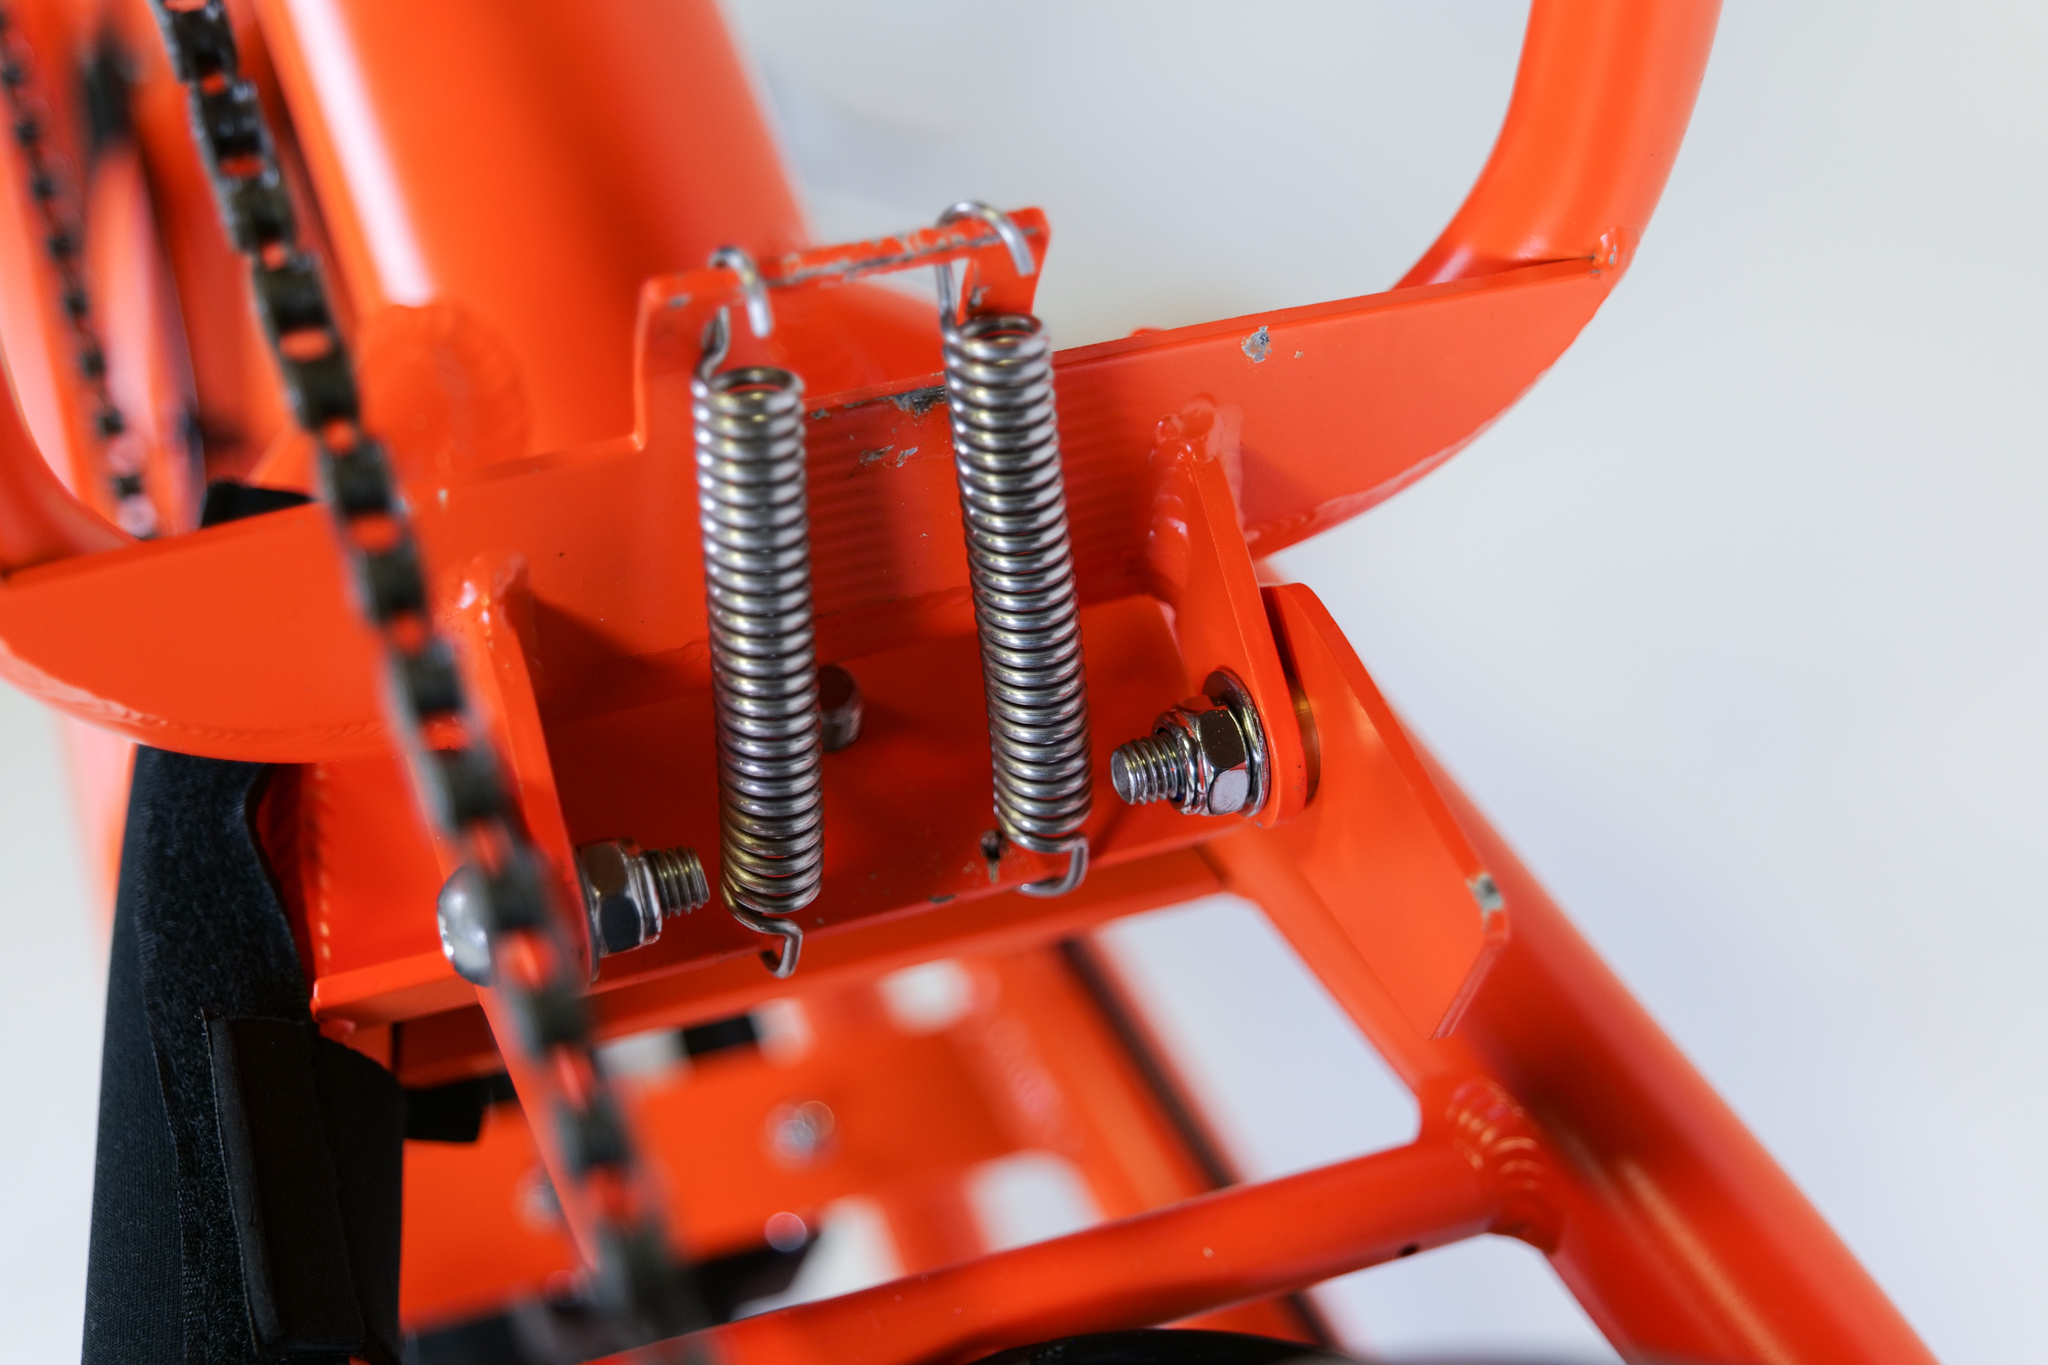
Improper installation of the kickstand spring(s) can lead to premature wear or component failure which could result in damage to the bike and/or bike components. Ensure the springs are properly oriented and installed before riding.
- Orient the springs as shown with the lower hook opening toward the front of the bike, and hook the spring into the bottom mounting hole.
- Flip the kickstand down. The kickstand will have adequate tension now.
- Flip the bike so it is upright.
- Reinstall the battery, test the bike fully, and ride Rad!