RadRunner 3 Plus Controller Replacement Guide
If Rad Power Bikes Product Support determines your RadRunner 3 Plus has a defective controller, use the following procedure to remove and replace the controller.
Tools needed:
- 2.5 mm, 3 mm and 4 mm Allen wrenches
- Torque wrench with Allen bits
- Flat side cutters
- Extra zip ties
- Wooden blocks to prop up the bike
- Nitrile gloves (optional)
- Get ready for maintenance. Turn off the ebike by pressing the Power button on the remote, remove the battery, and then press the Power button one more time to discharge any remaining power.
- Flip over the bike. Apply the rear brake and then lift the front end of the ebike to flip it over. Carefully prop up the handlebar grips on wooden blocks to protect the UI display and remote while performing maintenance.
- Disconnect the motor cable.
Take pictures of cable connections, cable routing and controller placement before you start removing these items, as once you replace the controller you will reinstall everything in its original position.
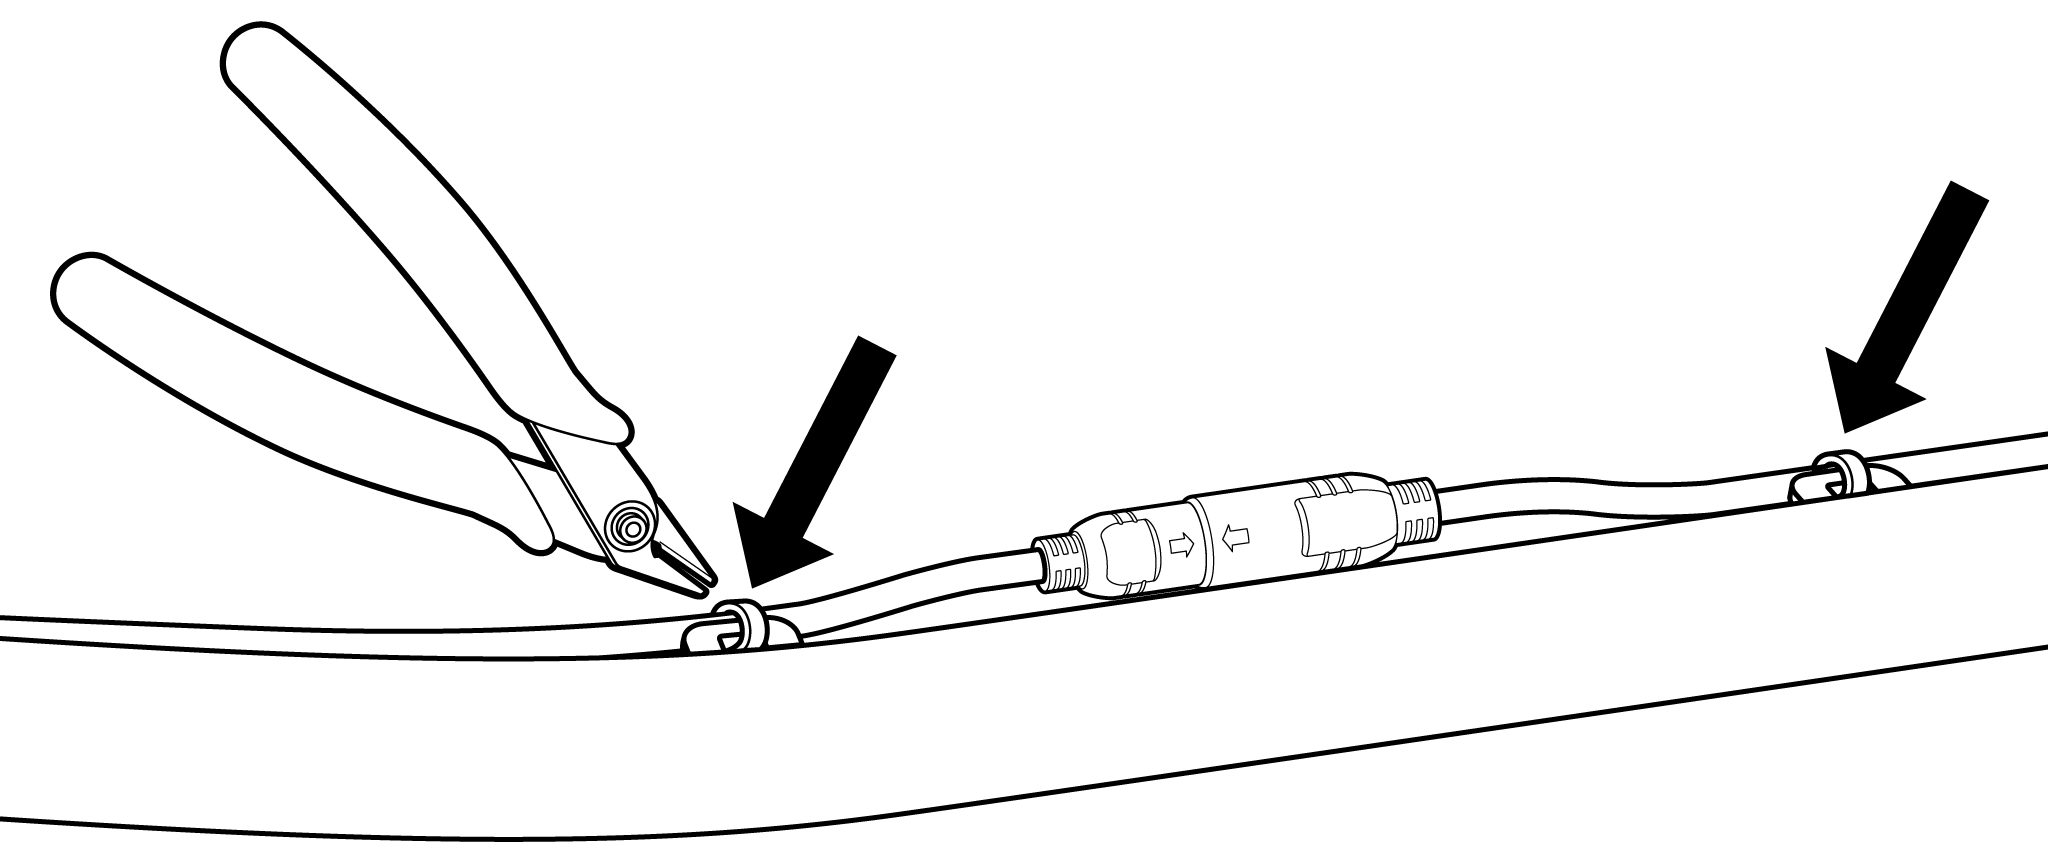
- Locate the motor cable mounted on the non-drive side chainstay.
- Use flat side cutters to cut the two zip ties holding this cable in place.

- Disconnect the cable by pulling the cable ends directly apart without twisting.
- Remove the old controller. The controller is mounted inside the down tube frame, directly underneath the bottom bracket and crank area.
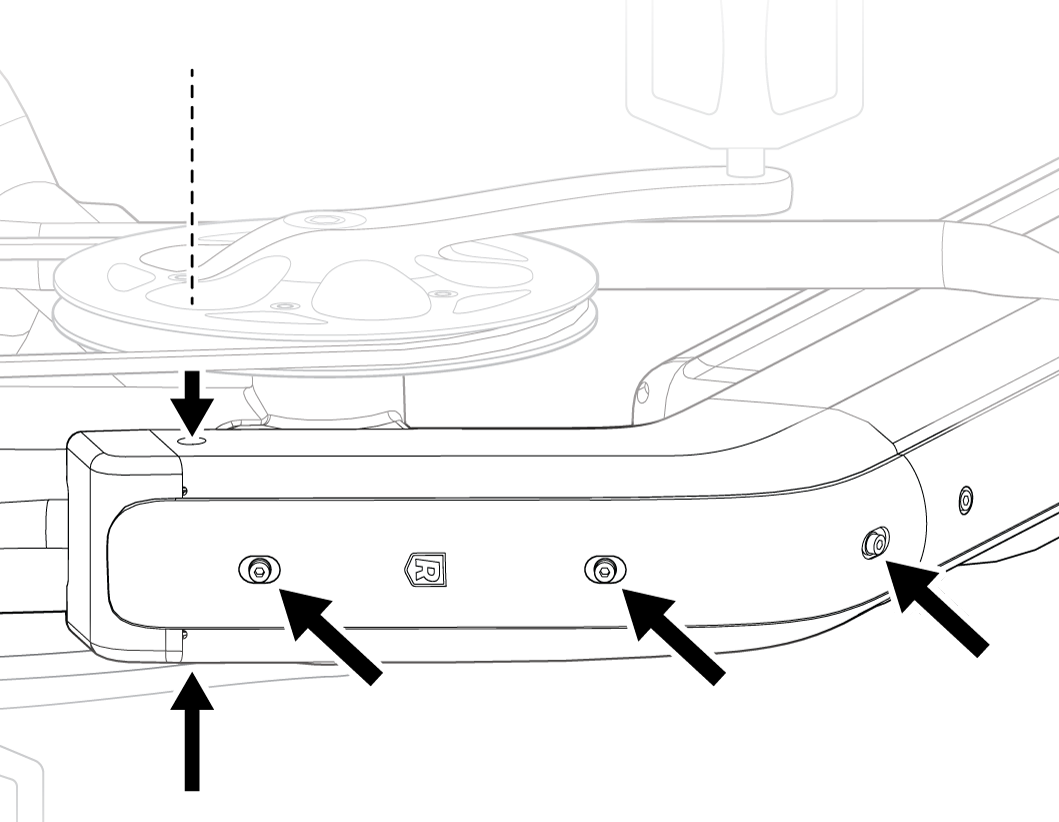
- Use a 3 mm Allen wrench to remove the three bolts and set washers holding the wiring harness cover in place.

- Use a 2.5 mm Allen wrench to remove the two bolts on the side of the down tube end cap. On the drive side, you will need to rotate the chain ring so that the Allen wrench will reach through the chain ring to the bolt.
- Trace the cable runs for the shifter cable (drive side) and wiring harness and rear brake cables (non-drive side) and cut the zip ties that secure these cables to the chain stays.
- Cut the two zip ties securing the wiring harness junction box to the seat tube.
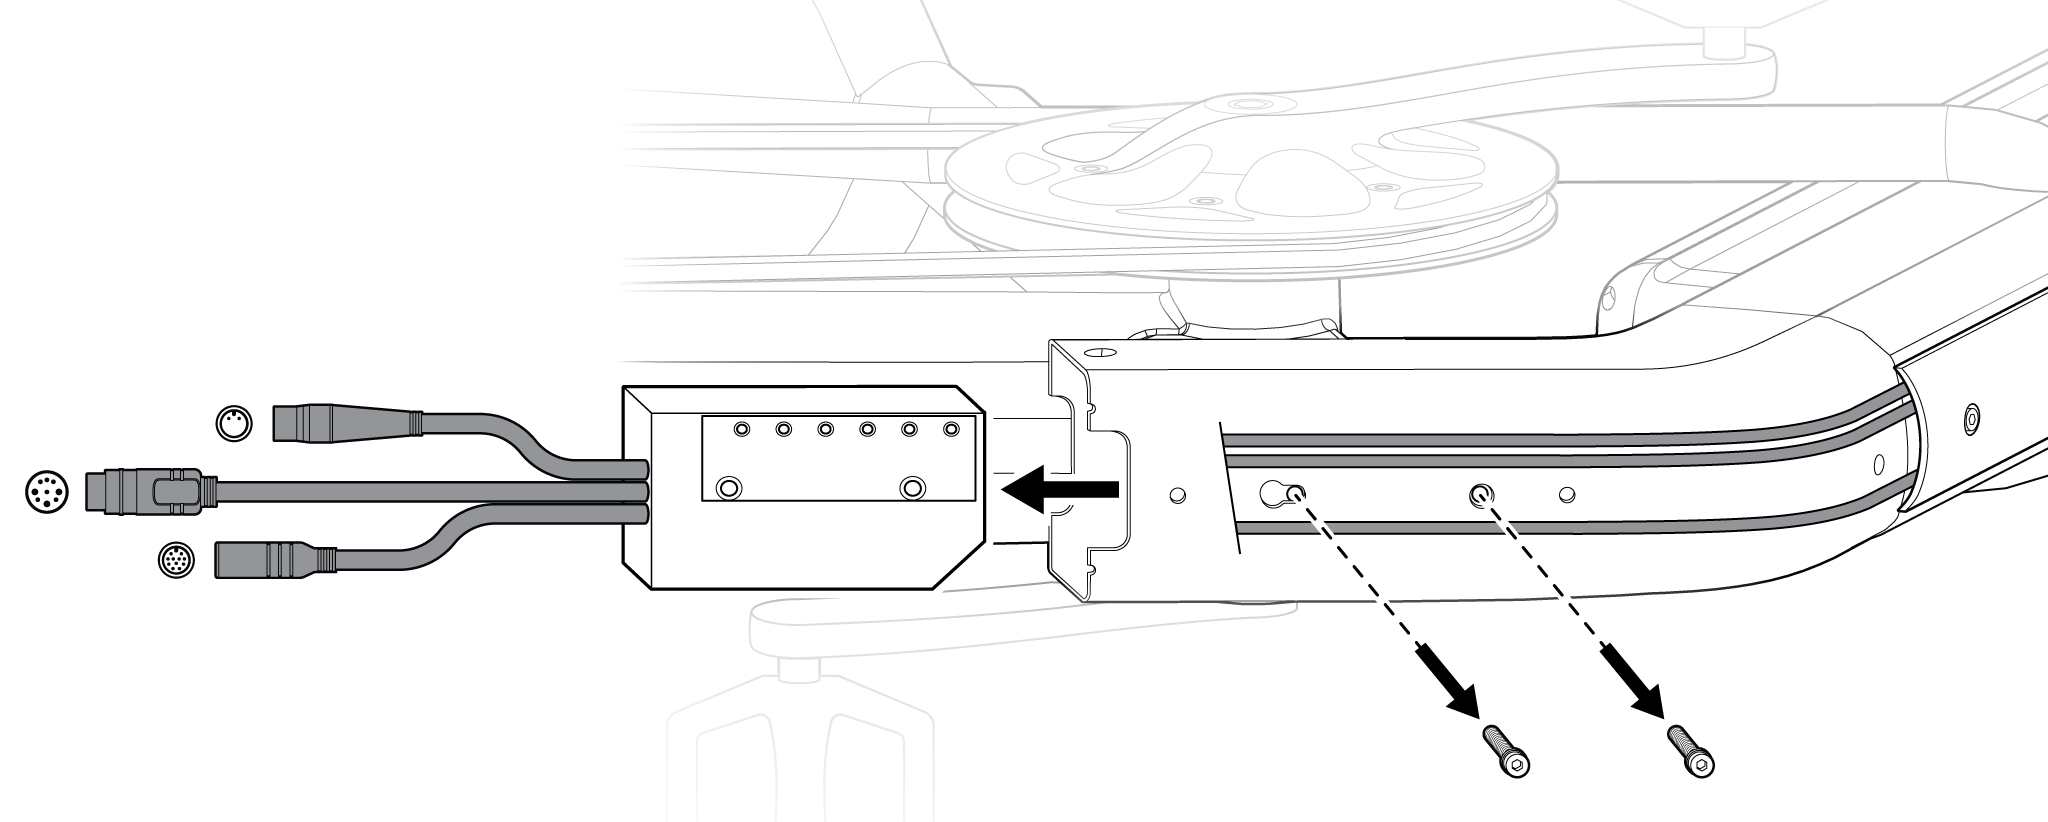
- Use a 4 mm Allen wrench to remove the bolts and set washers that secure the controller to the down tube.

- Carefully remove the cables tucked inside the frame and pull the controller out.
- Disconnect the power and wiring harness cables by pulling the cable ends directly apart without twisting.
- Remove the old controller, and recycle according to local rules.
- Use a 3 mm Allen wrench to remove the three bolts and set washers holding the wiring harness cover in place.
- Install the new controller.
- Orient the new controller so the cables are routed toward the rear, and remount in its original position inside the down tube.
- Use the 4 mm Allen wrench to install the new controller. Use a torque wrench to torque the two bolts to 4-6 Nm.
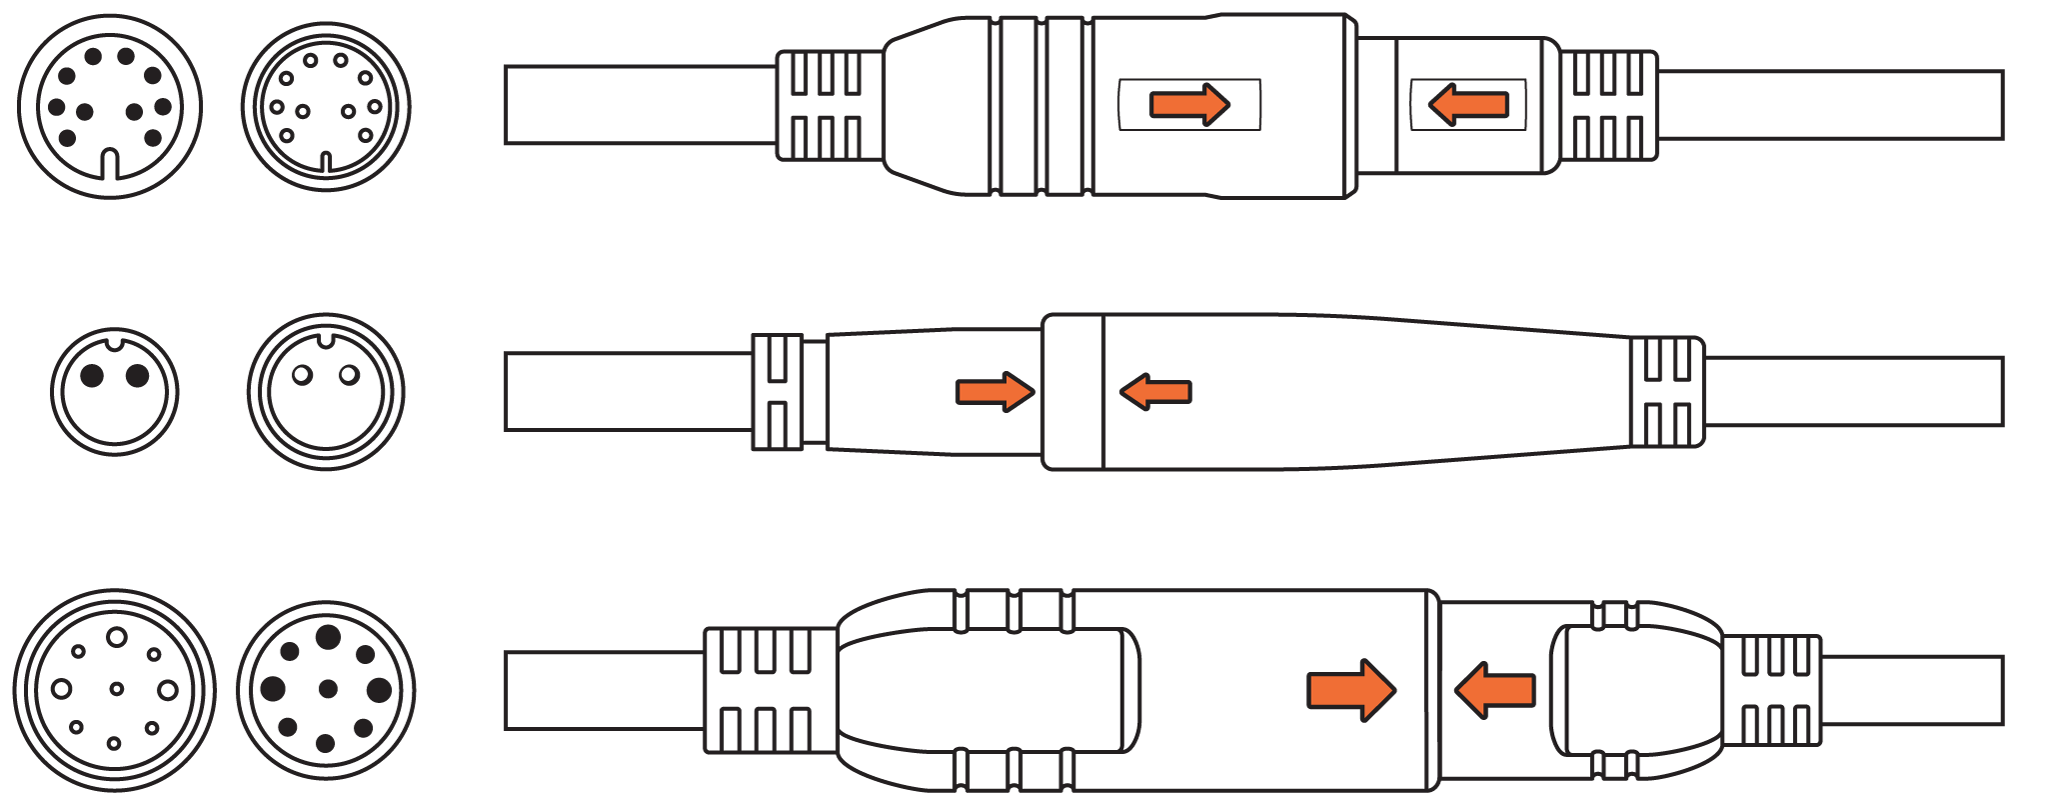
- Reconnect the wiring harness cable (top) by lining up the internal notch and pins and the external arrows of each cable, and pressing together without twisting. Once connected, carefully tuck the excess cable back inside the frame underneath the controller.

- Reconnect the power cable (middle) by lining up the internal notch and pins and the external arrows of each cable, and pressing together without twisting. Once connected, carefully tuck the excess cable back inside the frame underneath the controller.
- Reconnect the motor cable (bottom) by lining up the internal notch and pins and the external arrows of each cable, and pressing together without twisting. Once connected, carefully tuck the excess cable back inside the frame underneath the controller.
- Use the 2.5 mm Allen wrench to reinstall the down tube end cap and tighten until secure. Be careful not to pinch any of the cables when reinstalling the cap.
- Secure cables.
- Use new zip ties to secure the wiring harness junction box to the seat tube.
- Use new zip ties to secure the shifter cable (drive side) and motor and rear brake cables (non-drive side) to the mounting bosses on the chain stays.
- Use flat side cutters to snip off any excess from the zip ties, and ensure the ends are flush and smooth with no sharp points.
- Use a 3 mm Allen wrench to reinstall the wiring harness cover. Tighten until secure.
- Flip the bike back over, reinstall the battery, test the bike fully before riding, and ride Rad!
