RadCity Step-Thru Wiring Harness Replacement Guide
The wiring harness connects various electrical components and can be replaced in the unlikely event it is damaged or determined to be non-functional by Rad Power Bikes Product Support.
The wiring harness replacement involves unplugging the connectors, removing the harness from the downtube and replacing it with a new one, then plugging in the connectors.
This guide uses a 2019 RadCity Step-Thru but the steps will be the same for most RadCity Step-Thru model years.
Tools needed:
- Flat side cutters,
- Flat head screwdriver,
- String (several inches longer than the length of the downtube),
- Electrical tape,
- Scissors,
- A few replacement zip ties, and
- The replacement wiring harness from Rad Power Bikes.
- Power off the bike, remove the battery, and discharge residual power.
- Press and hold the MODE button on the LCD display remote until the display turns off.
- Use the key to turn the battery key barrel to the off-and-unlocked position. Remove the key, then remove the battery.
- Press and hold the MODE button until the display turns off to discharge residual power. The display may flash on briefly.
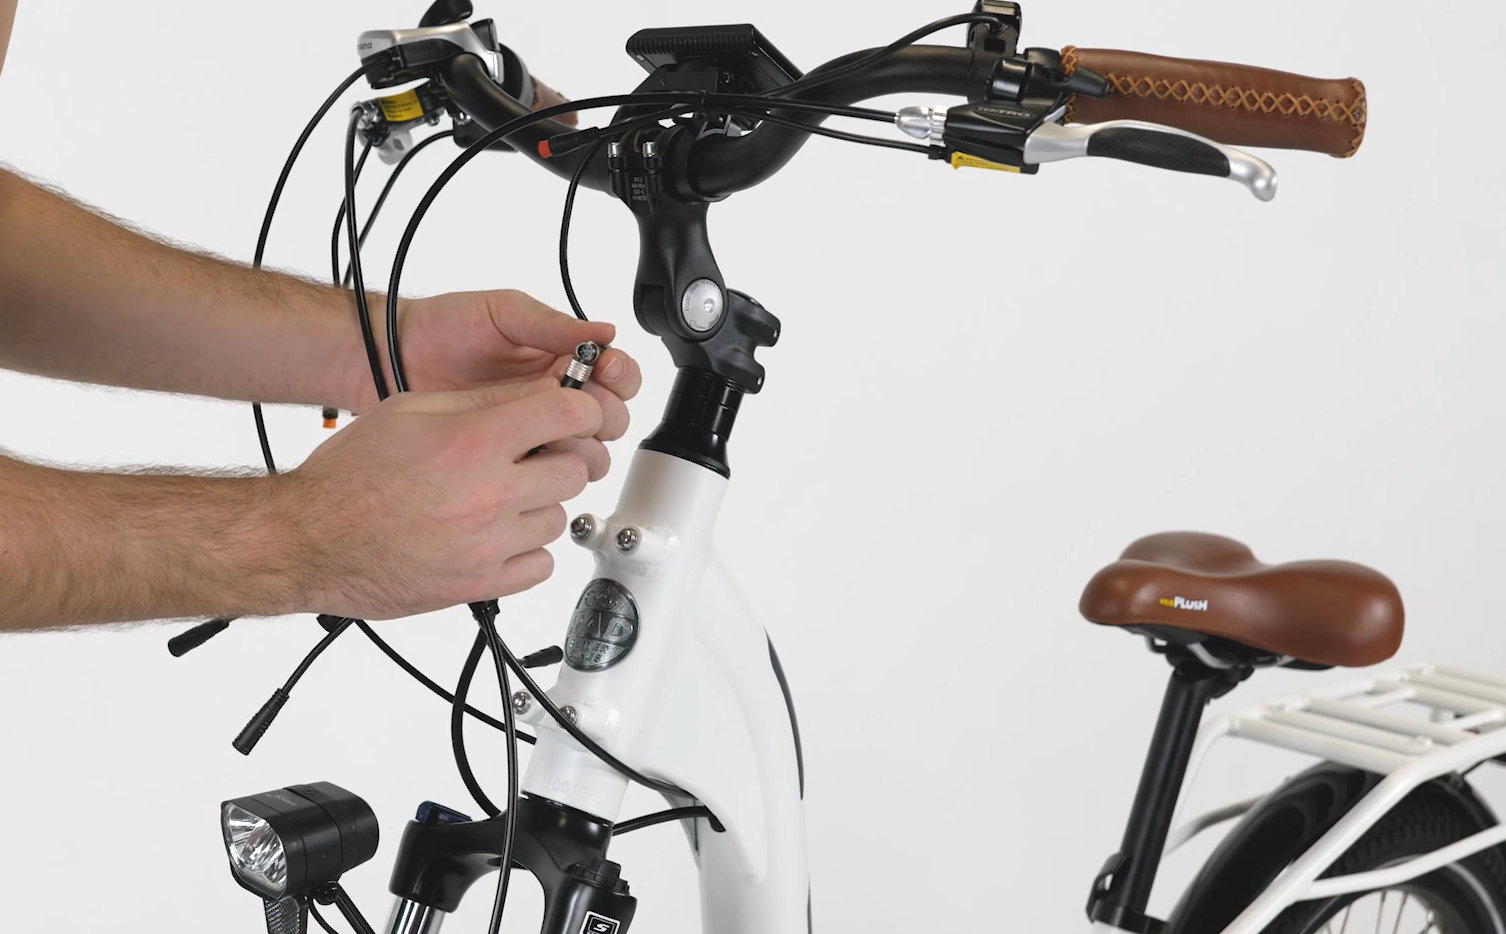
- Unplug the display connector. Trace the cable coming from the display connector on the handlebar to the silver metal display connector at the front of the bike. Snip zip ties to create cable slack, and unplug the display connector by twisting each side of the silver metal portion of the connector until the threaded portion releases, then pull directly apart without twisting.
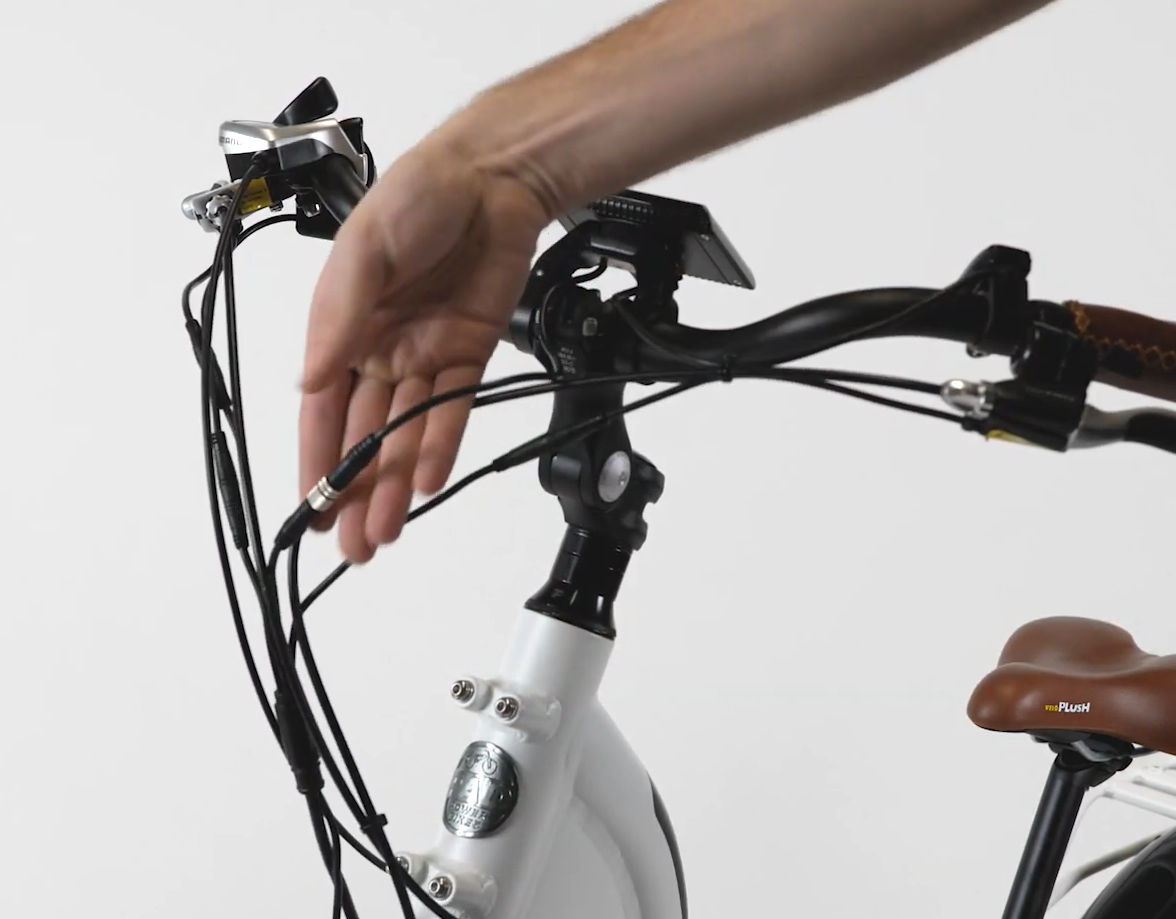
- Unplug the remaining connectors. Unplug the throttle connector, both brake connectors, and the headlight connector by pulling each connector directly apart without twisting.
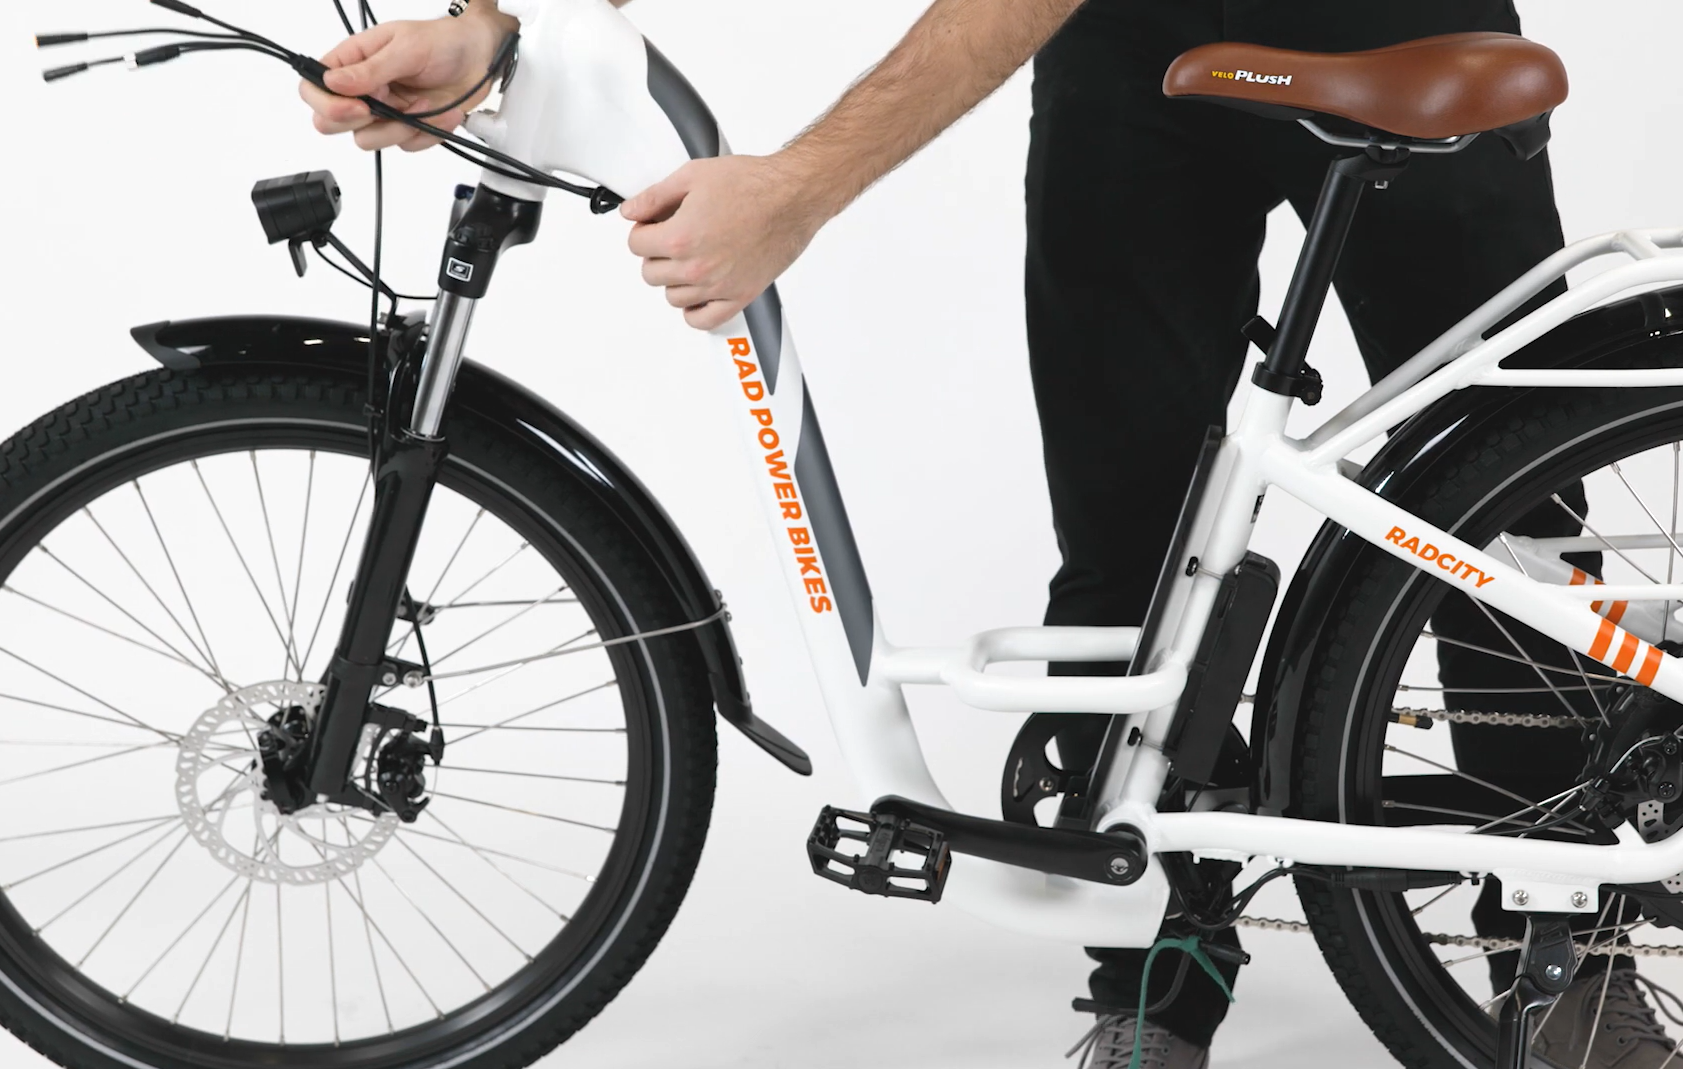
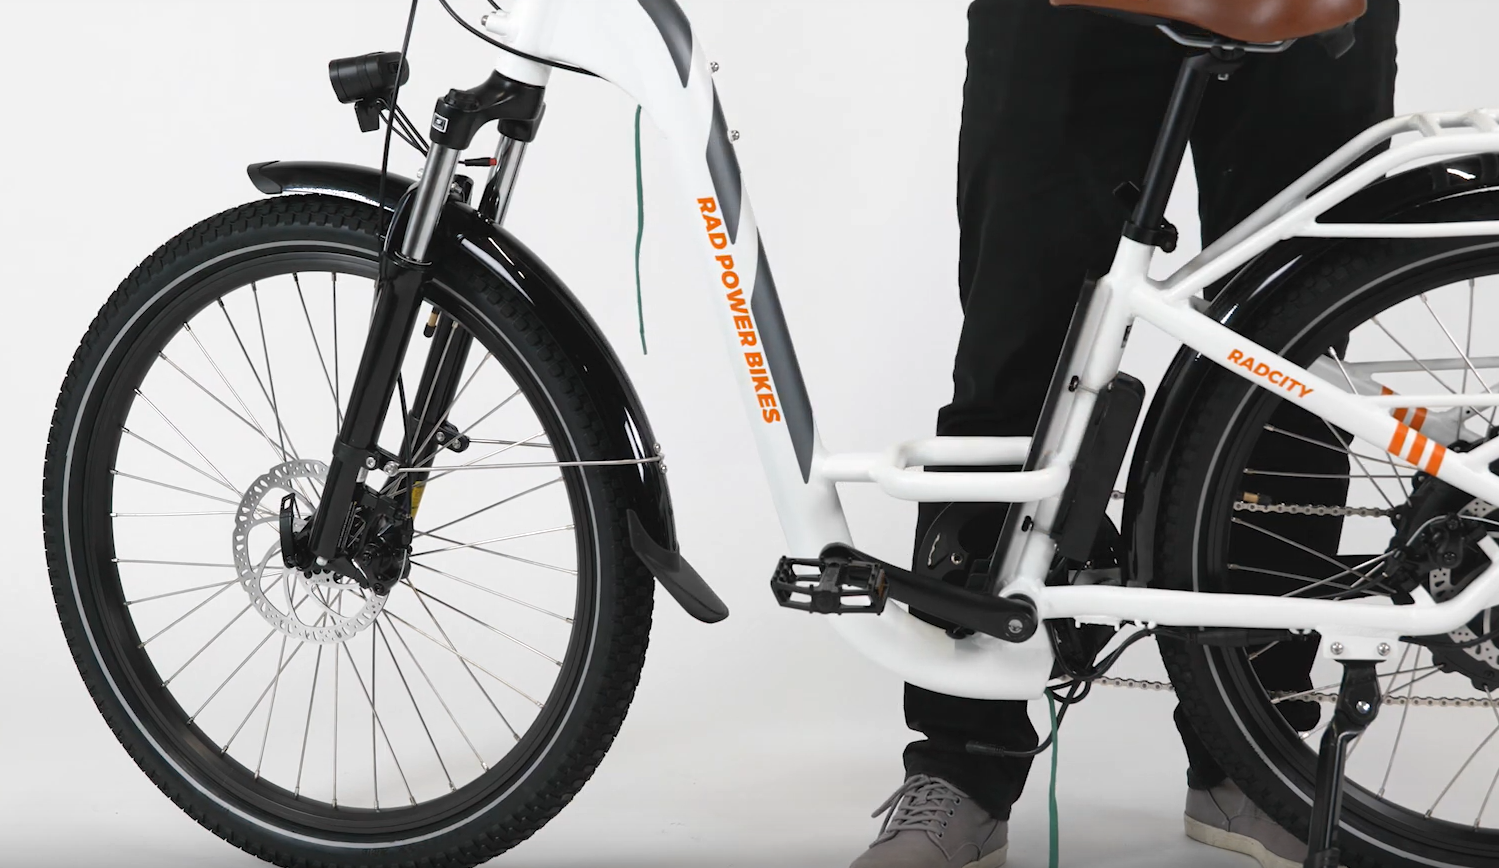
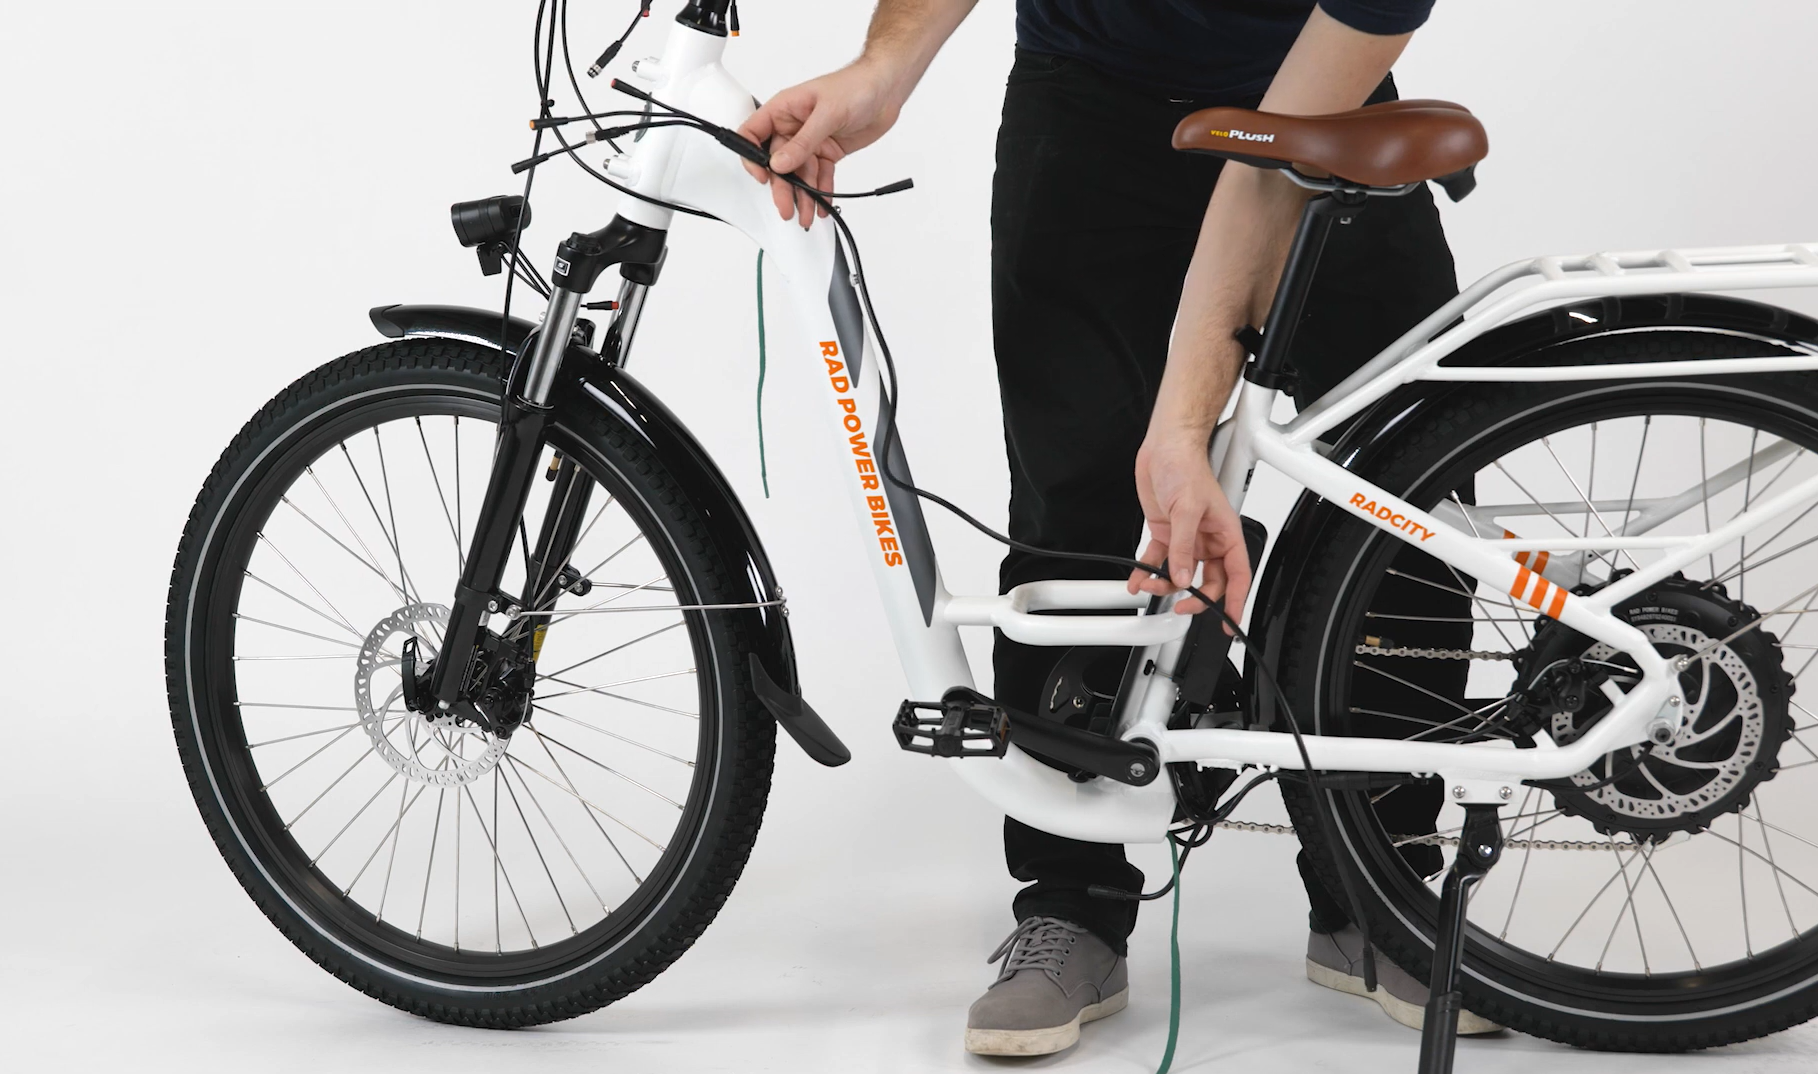
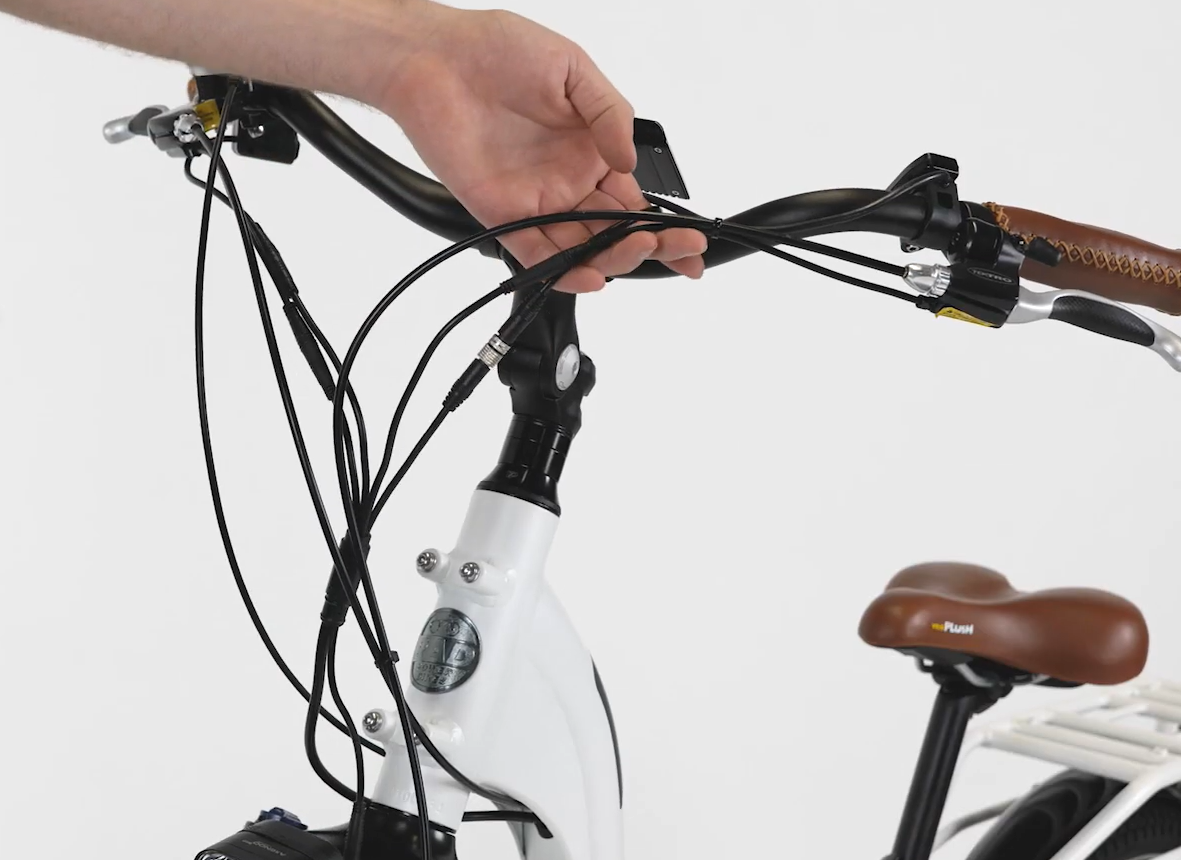
- Provide cable slack. Turn the handlebar to the side, locate the wiring harness cable at the front of the bike, and gently feed the cable into the upper cable opening of the downtube to provide slack.
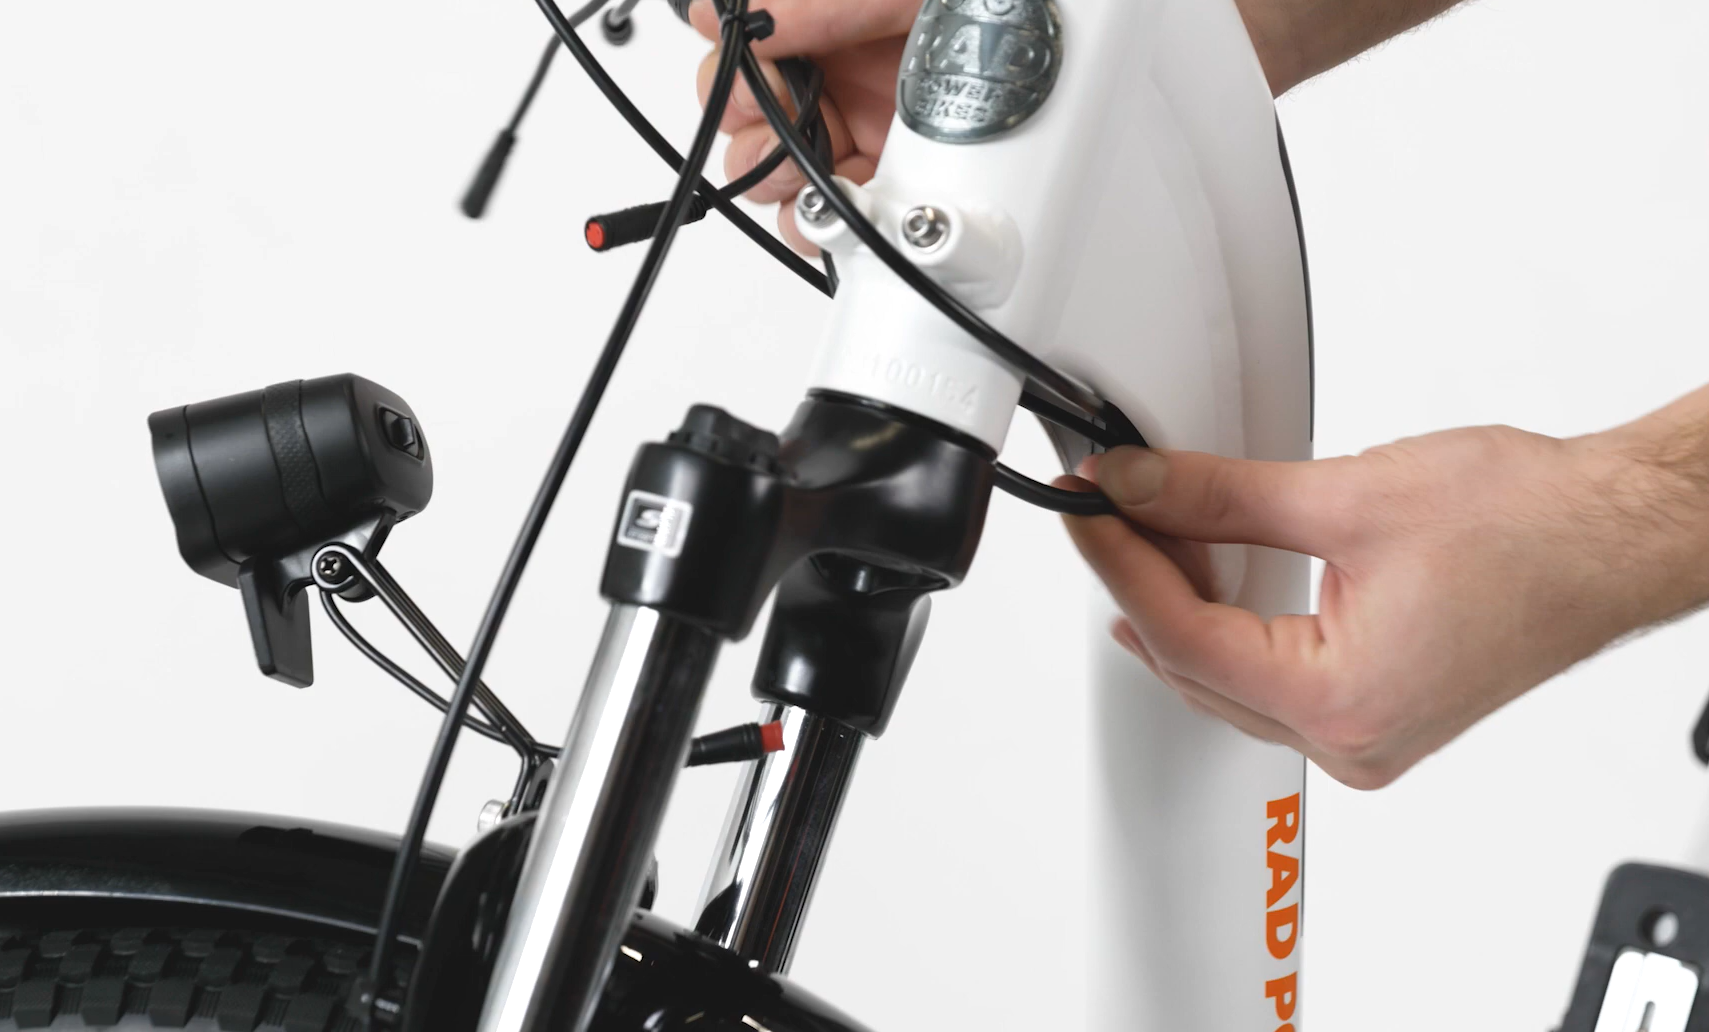
- Unseat the rubber grommets. From the left (non-drive) side of the bike, use a flat head screwdriver to carefully unseat the rubber grommets at the upper and lower cable openings of the downtube. Use caution to not damage the cable housing or scratch the bike frame.
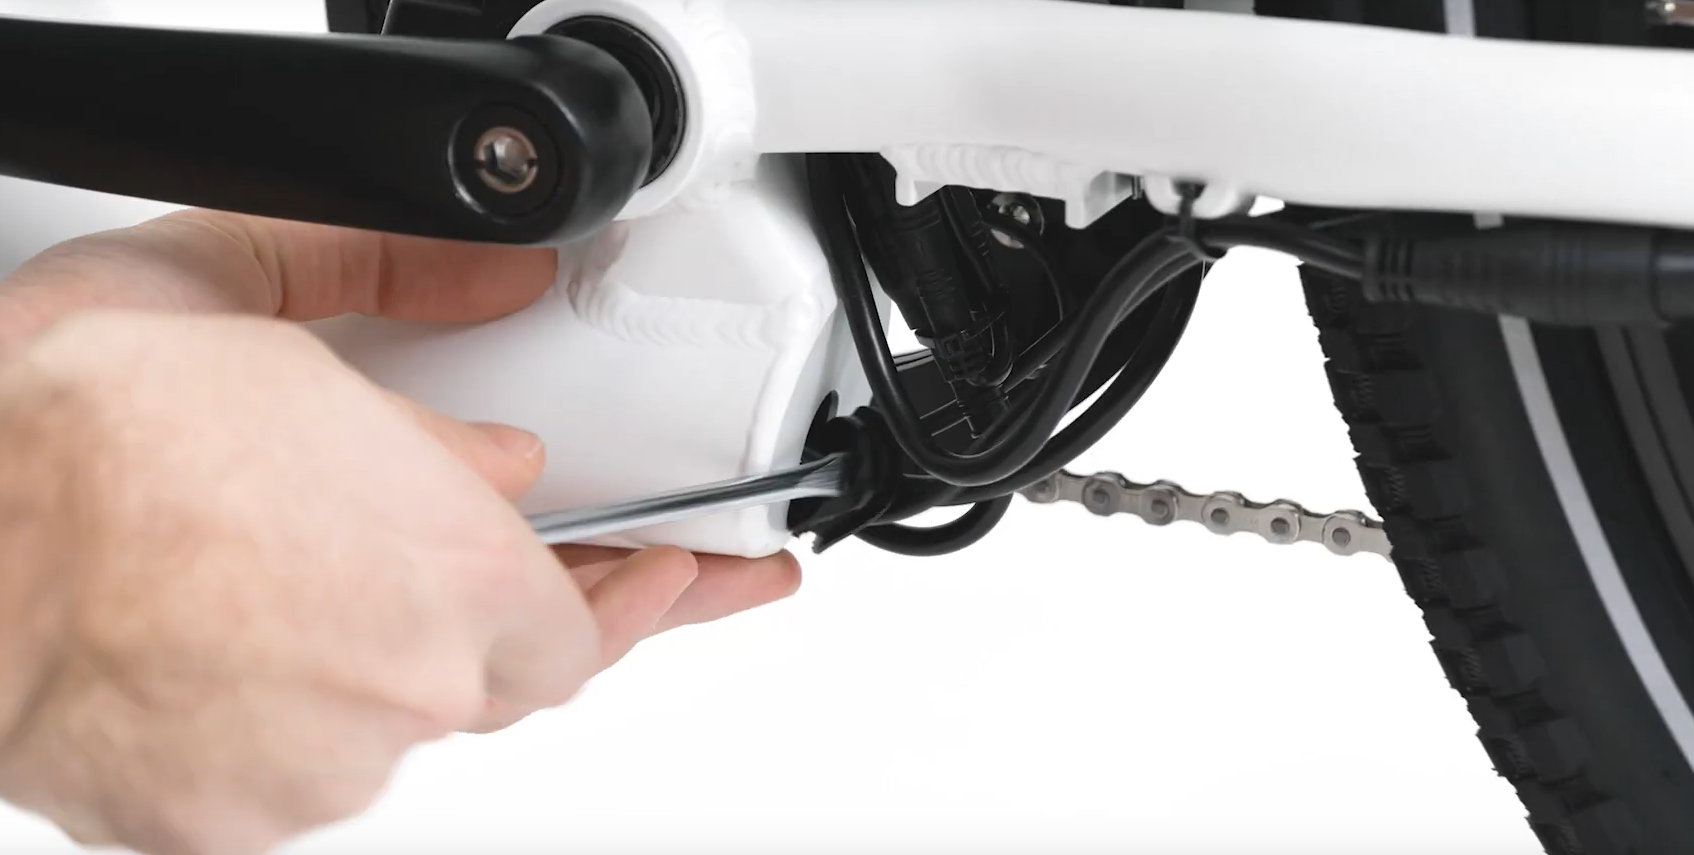
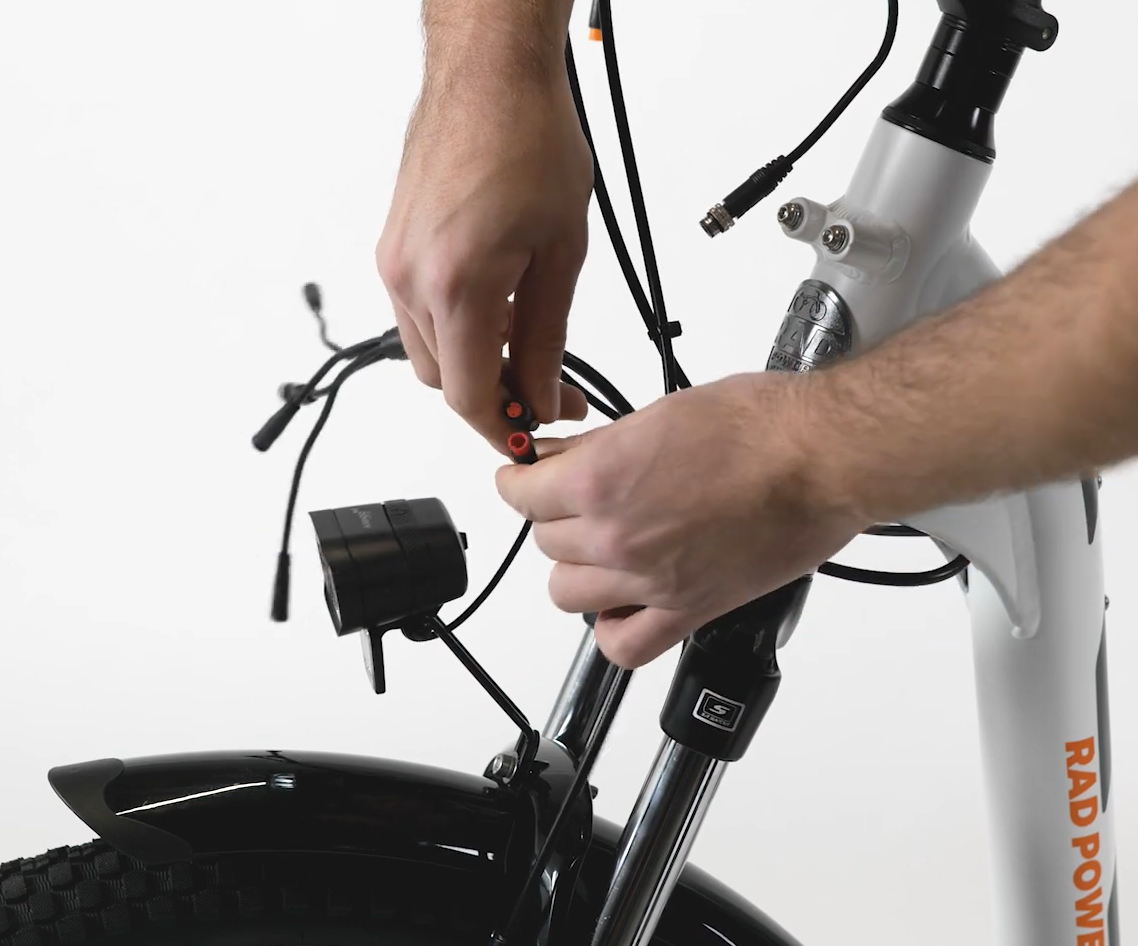
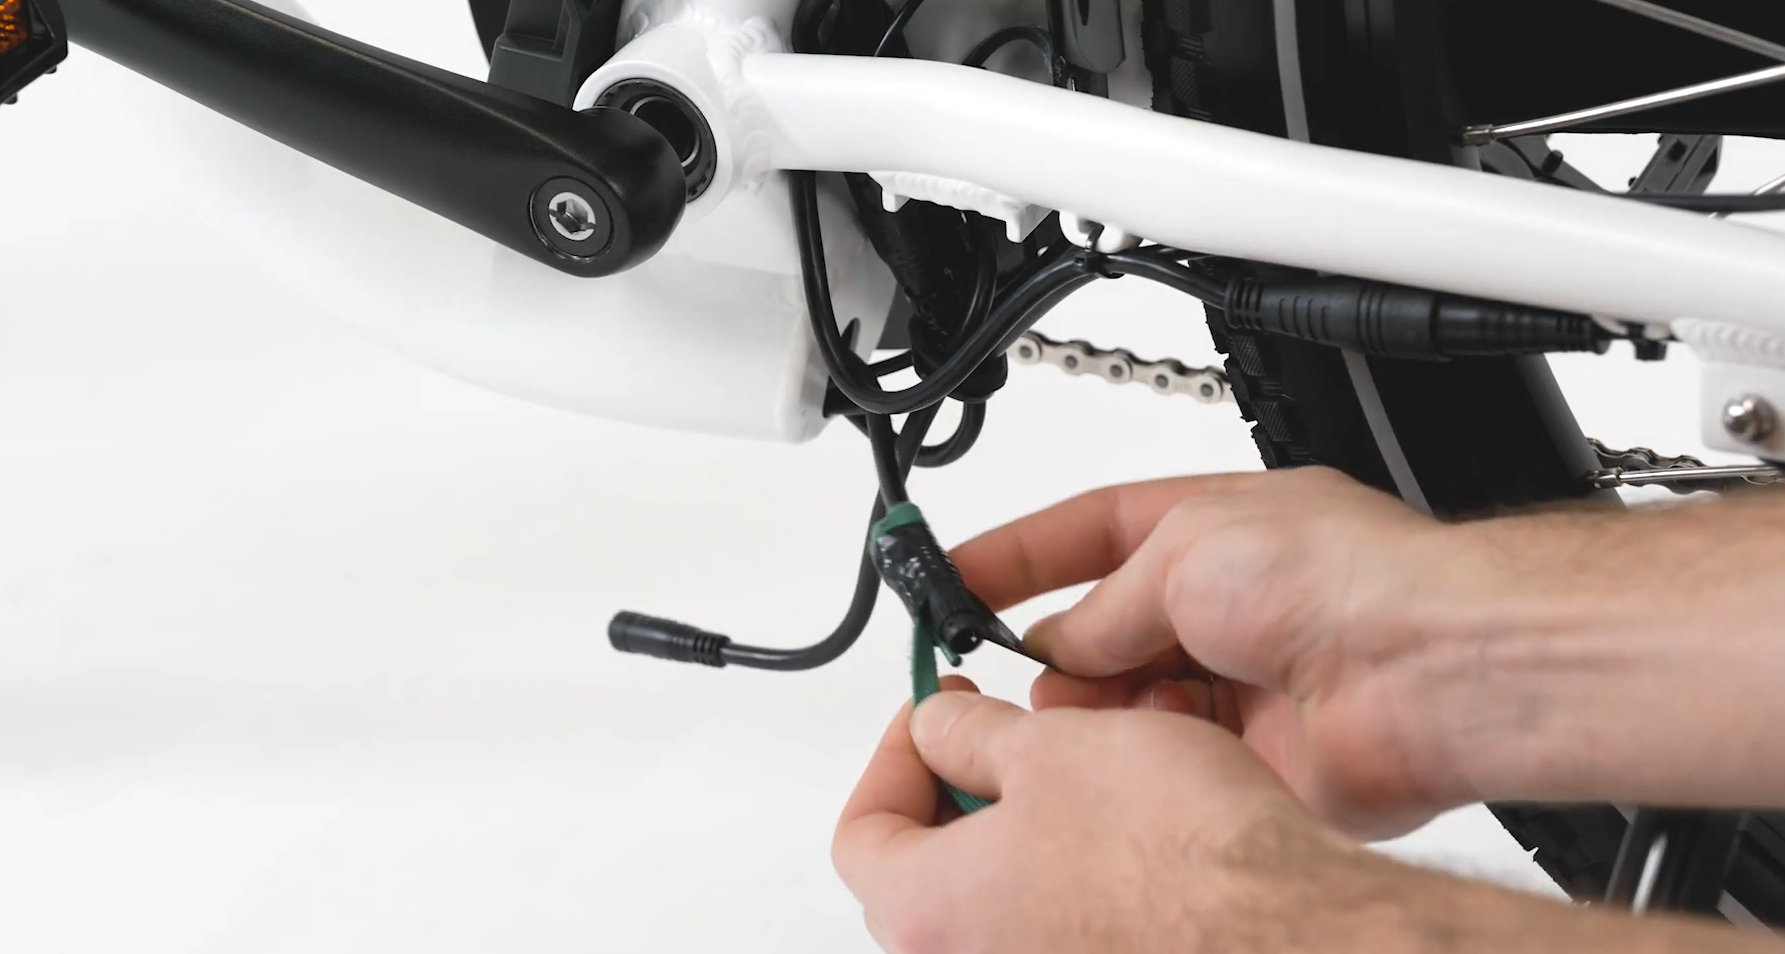
- Remove the wiring harness connector from the bottom of the downtube. Use caution to avoid unplugging the connector while it is still in the frame and gently pull the wiring harness cable out of the lower cable opening to access the connector.

- Unplug the wiring harness connector. At the bottom of the downtube, pull each side of the connector directly apart, without twisting.
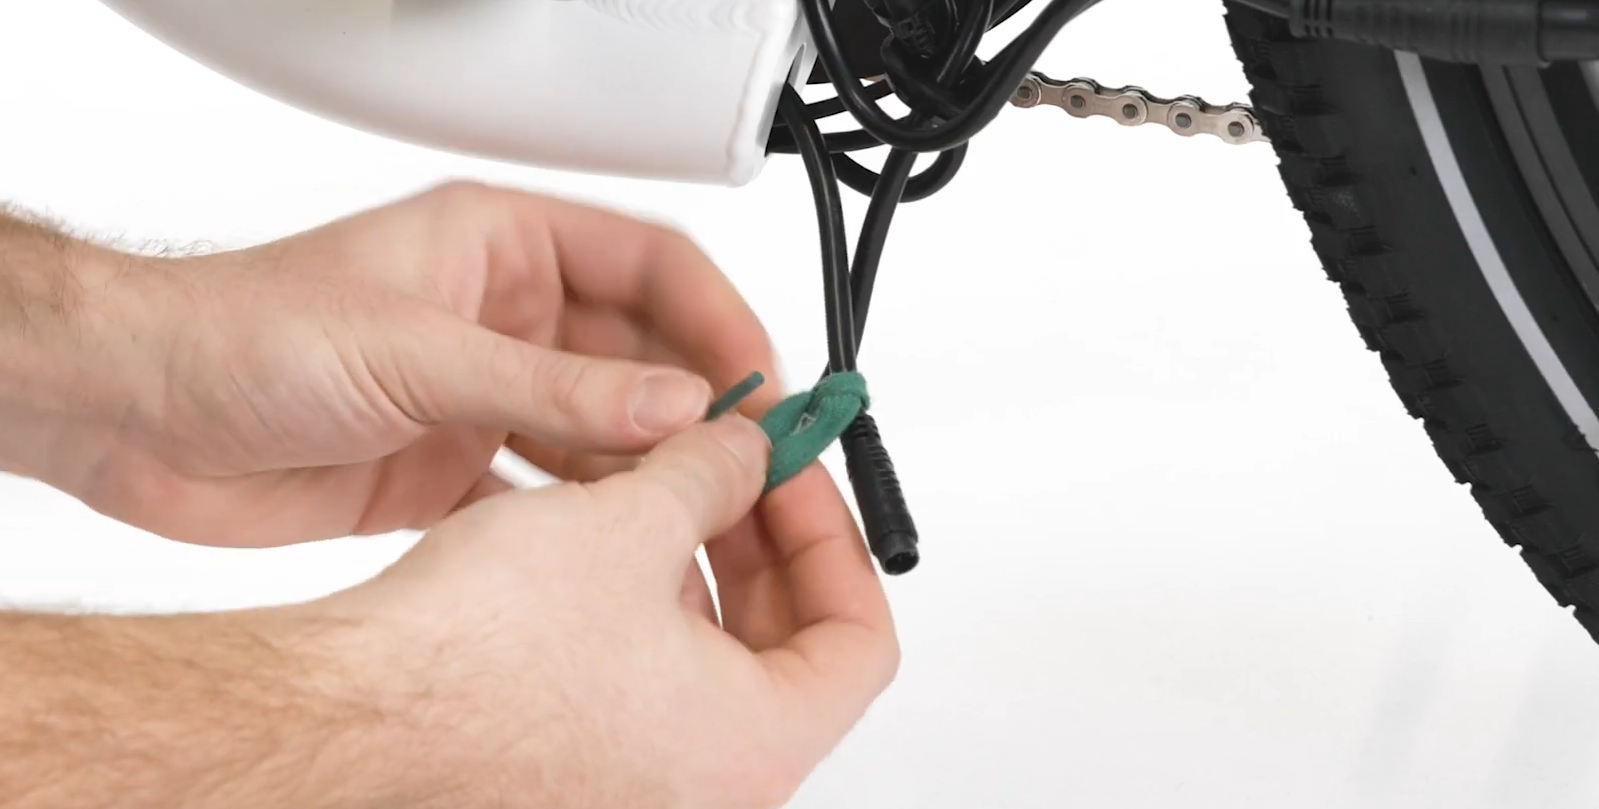
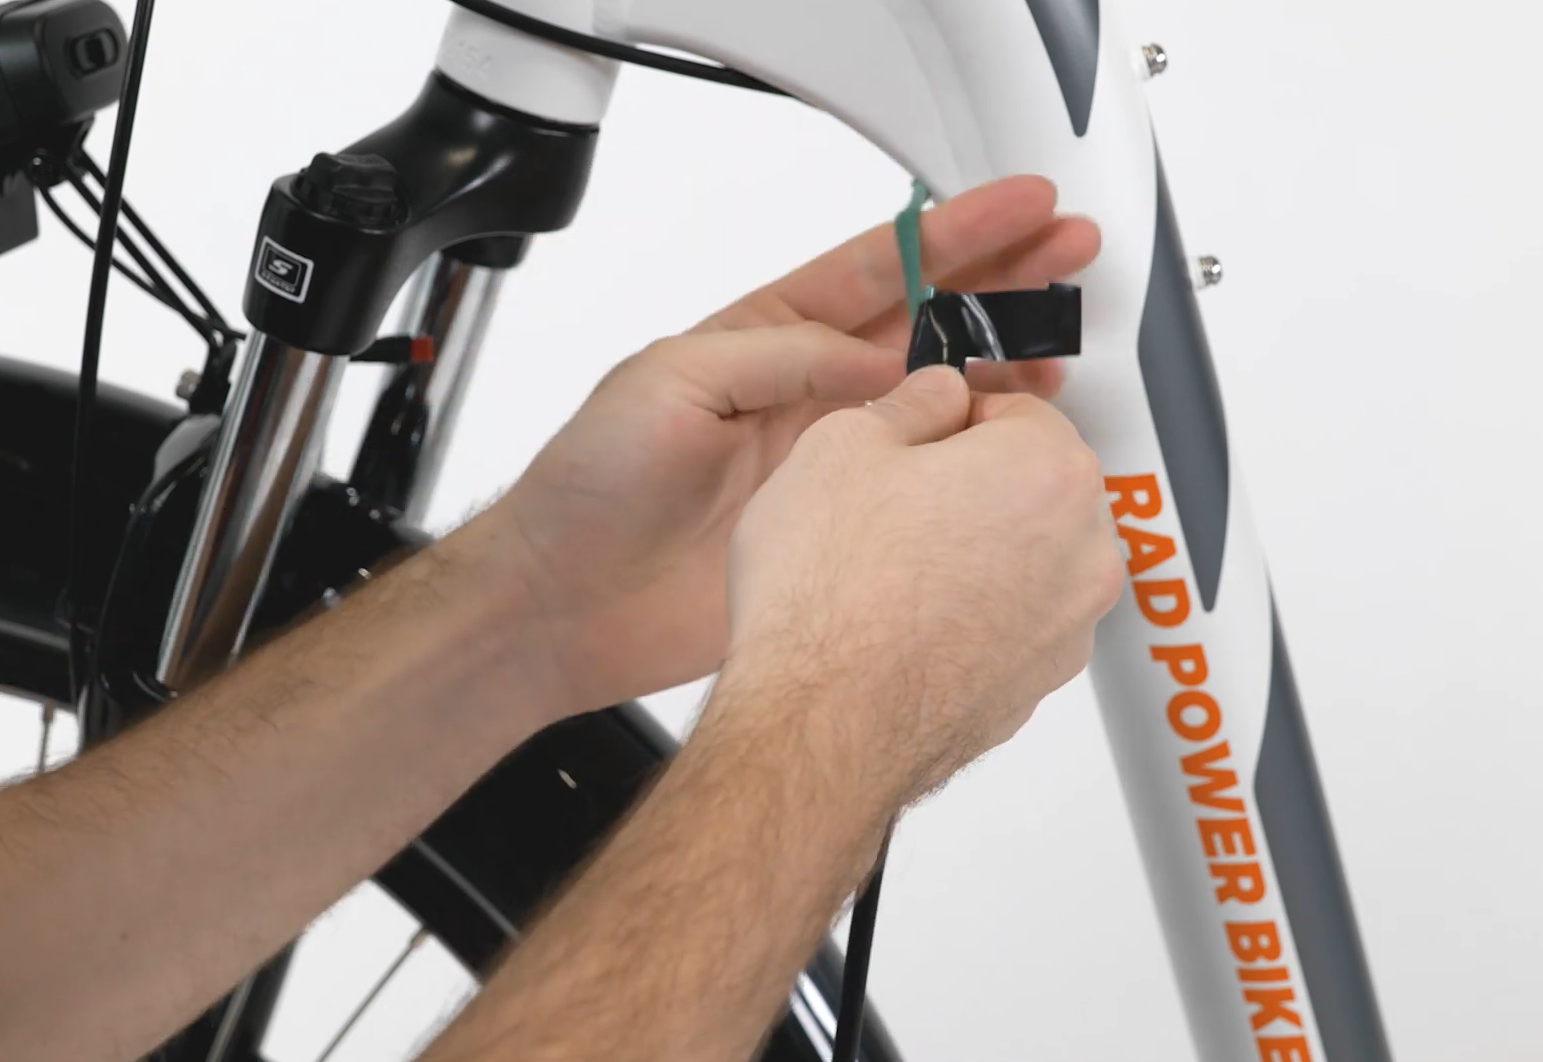
- Secure the string to the connector. Ensure the string is longer than the length between both cable openings. Securely tie the string to the open connector coming out of the lower cable opening.
- Carefully pull the wiring harness cable out of the upper cable opening. Ensure the string comes out of both cable openings and remains inside the downtube. This string will make it easier to reinstall the new wiring harness through and out of the downtube.
- Pass the grommet at the top of the downtube off the wiring harness connector and onto the string at the upper cable opening.
- Untie the string from the old wiring harness connector and allow the string to hang outside of both cable openings.
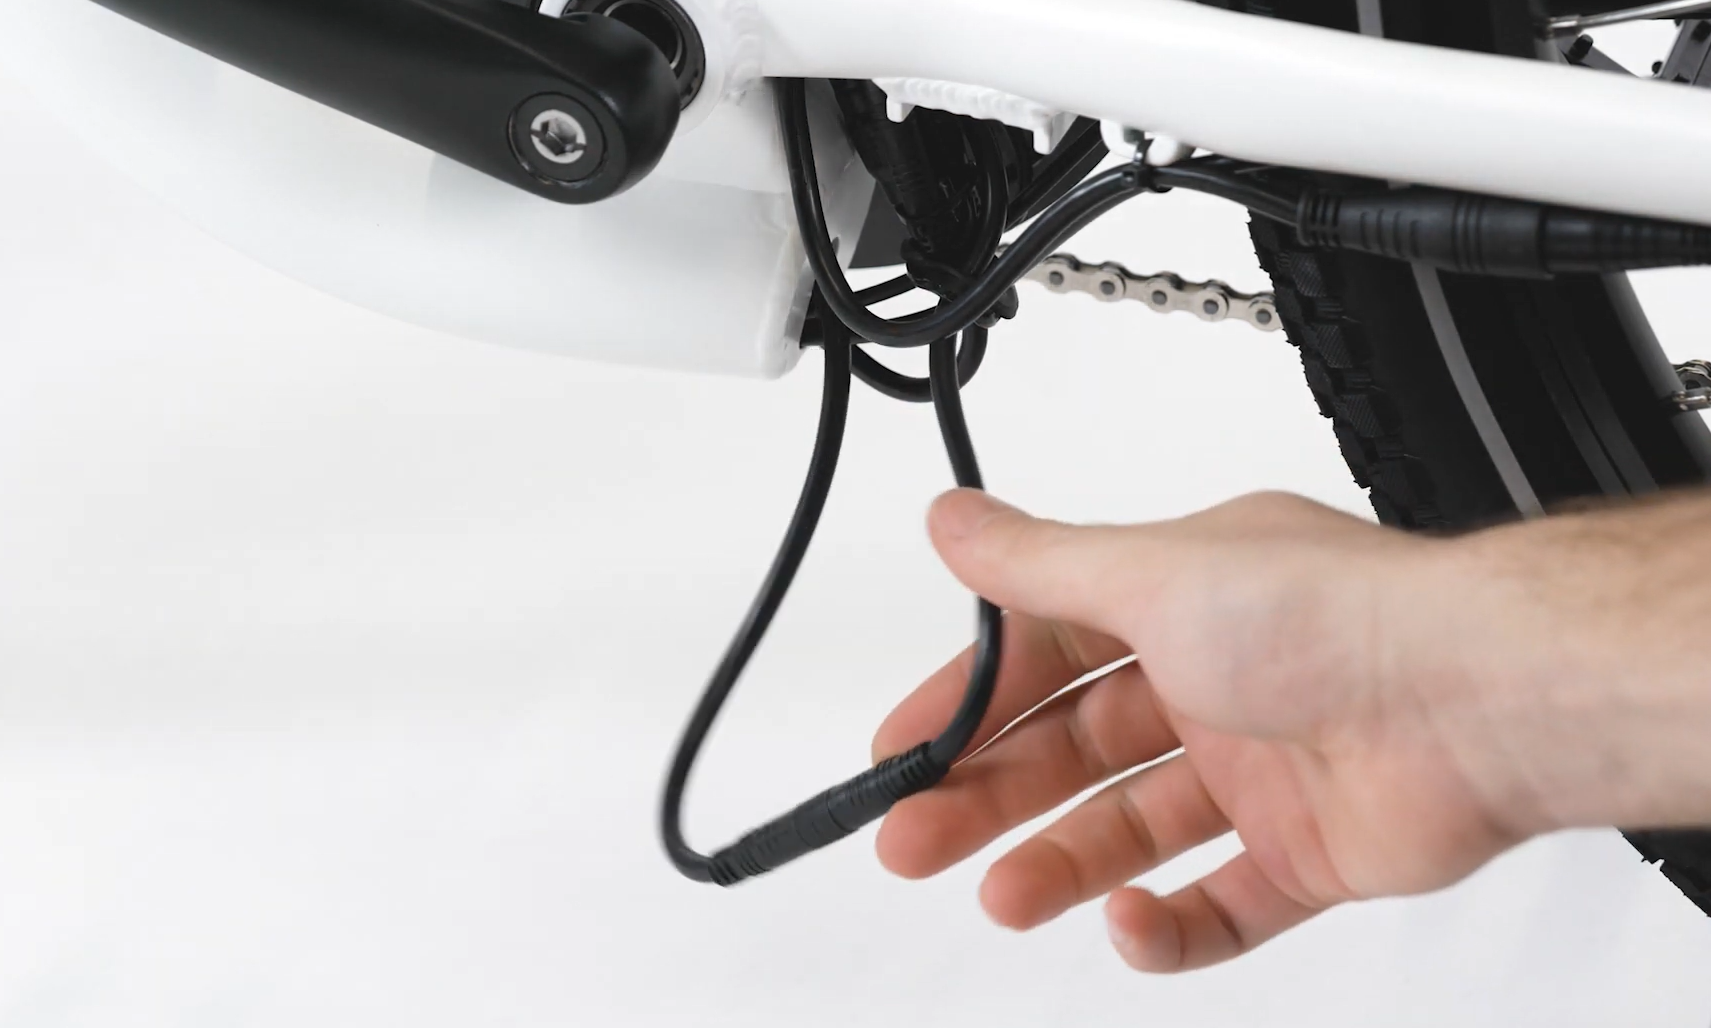
- Remove the wiring harness. Follow your local electronics recycling guidelines to discard the old wiring harness.
- Locate the new wiring harness. The side with only one connector will pass from the upper cable opening, through the downtube, to the lower cable opening.
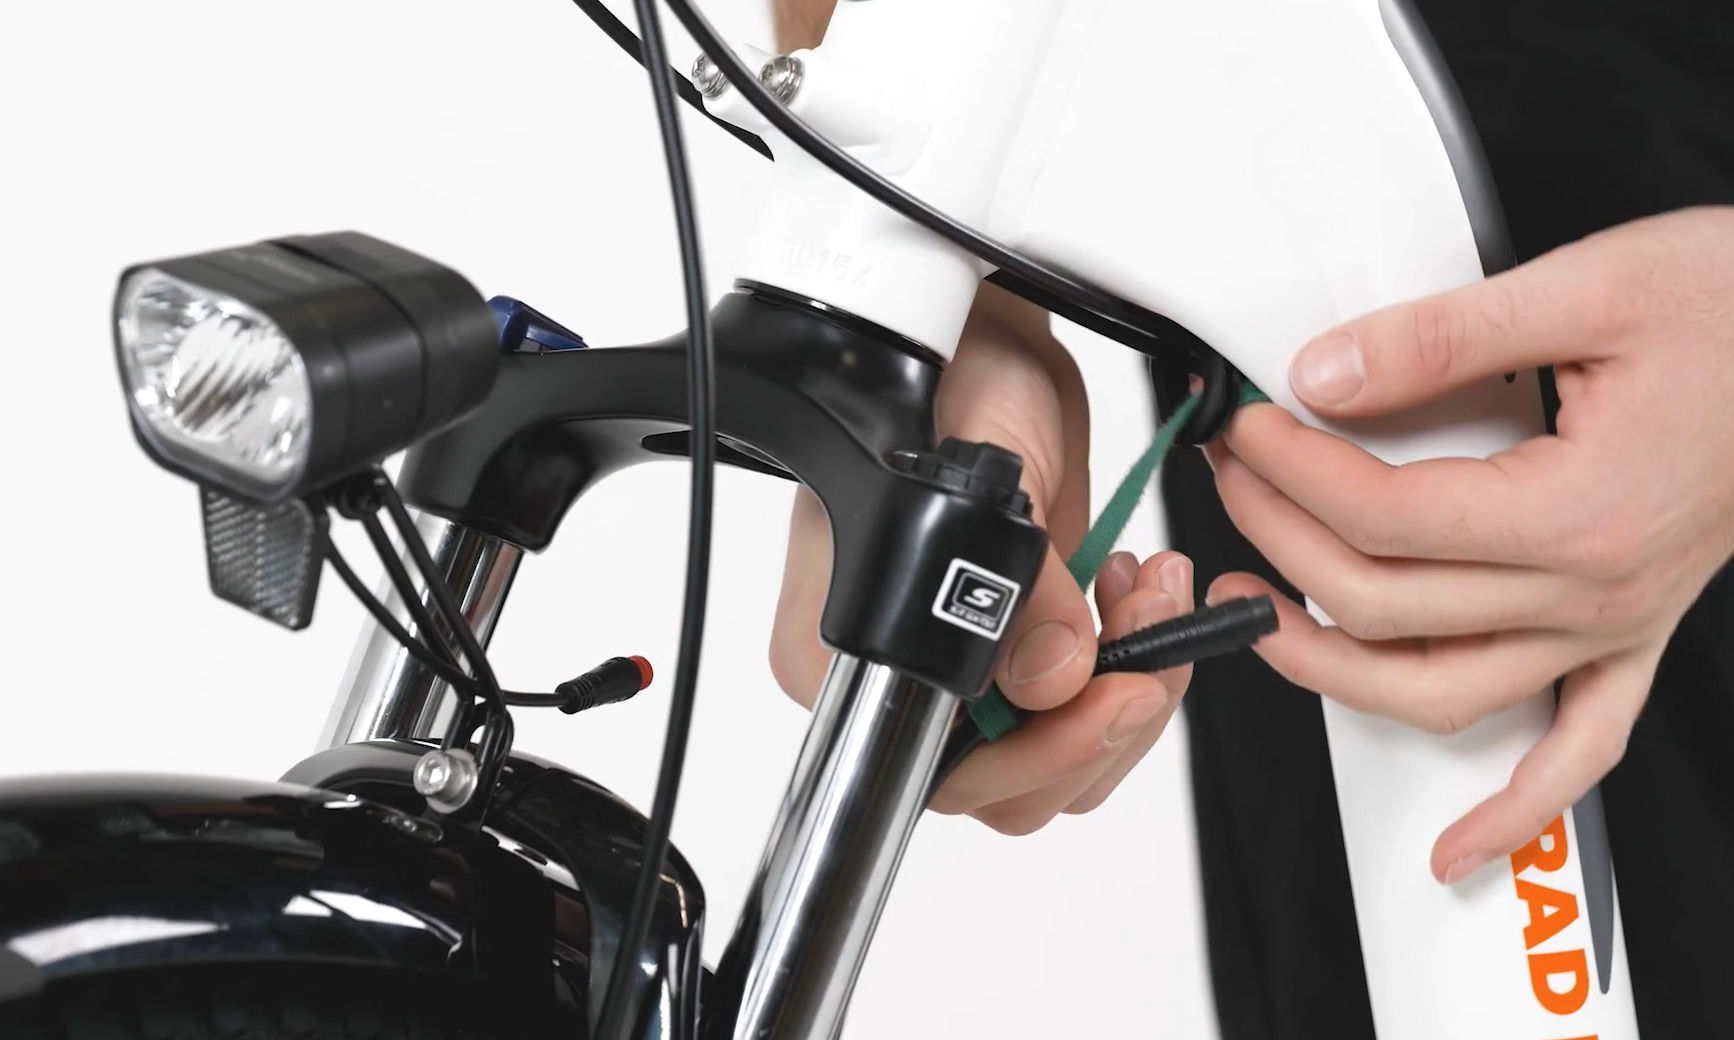
- Secure the string to the wiring harness. Tie the string coming out of the upper cable opening to the single-connector side of the new wiring harness and secure the string to the connector end with electrical tape. This will make it easier to safely direct the new wiring harness’ connector end through the downtube and out of the lower cable opening.
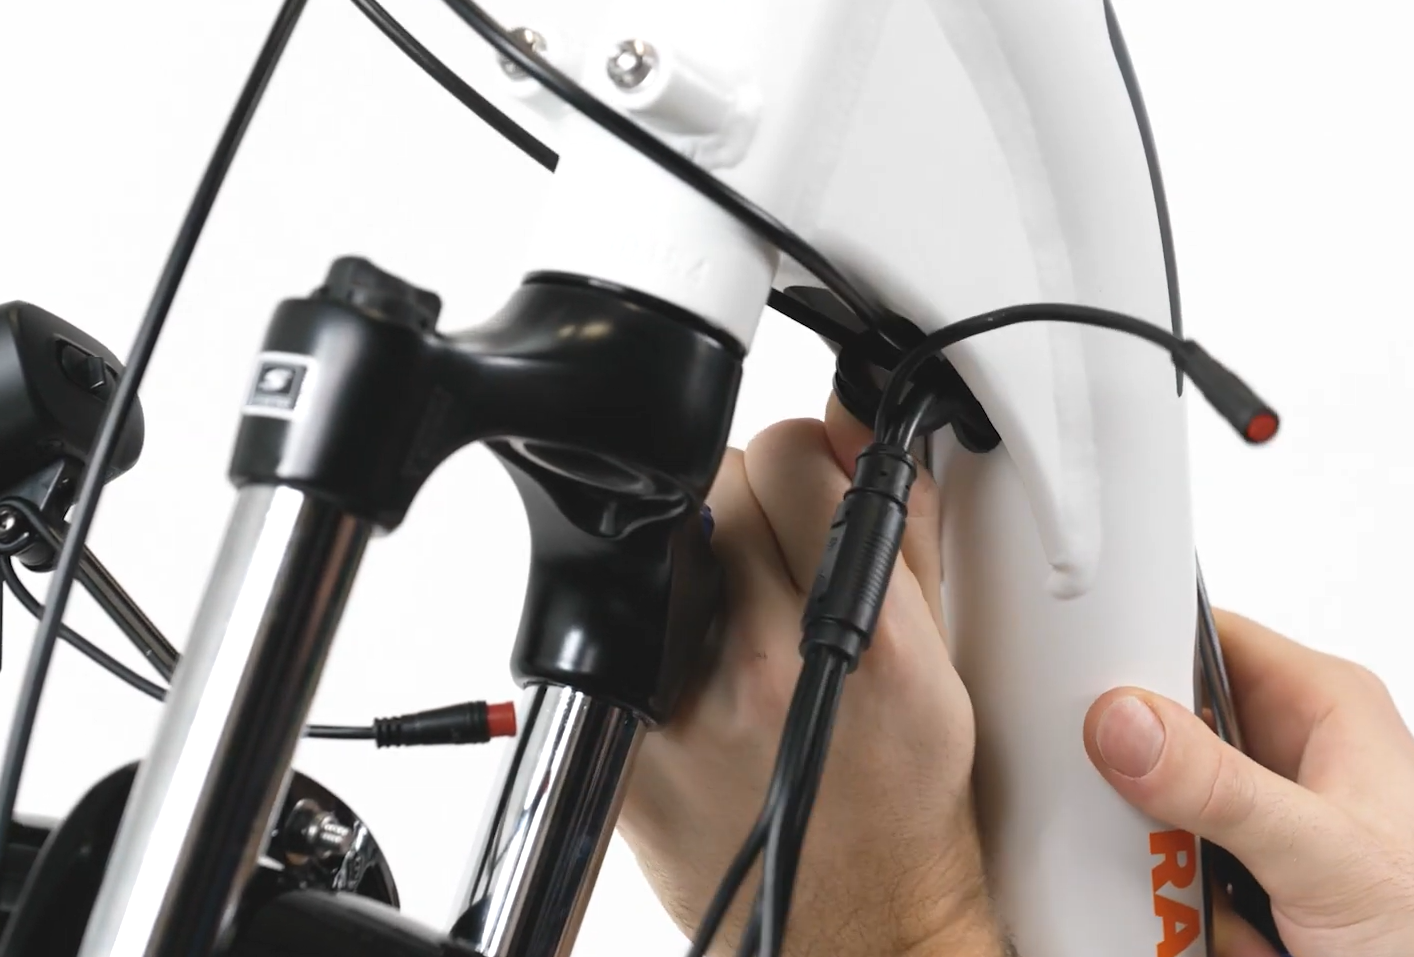
- Pass the connector end through the grommet at the top of the downtube and gently push the connector end into the upper cable opening. Feed the wiring harness cable into the downtube to provide cable slack.
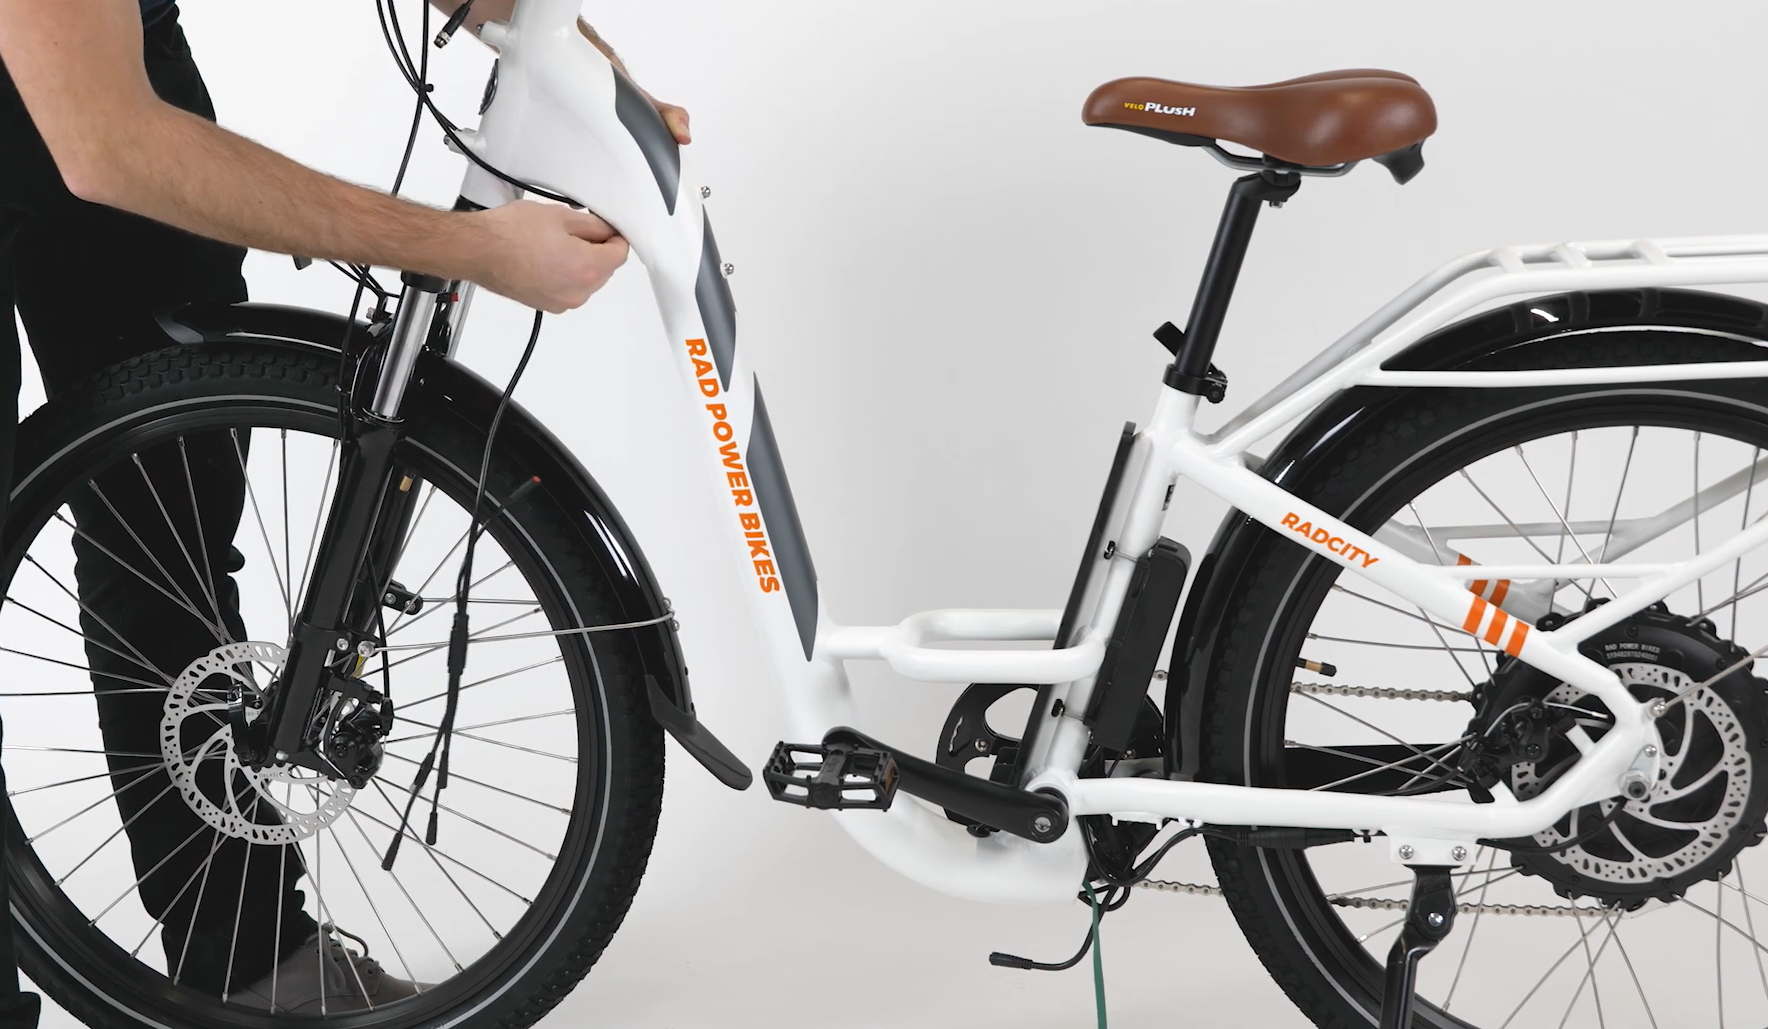
- Gently pull the string at the lower cable opening to guide the wiring harness connector through the downtube, until the connector moves out of the opening. Remove the tape and untie the string from the connector end near the lower cable opening.
Do NOT use any tools (other than the string and tape) to assist in directing the connector end out of the lower cable opening. Tools like pliers, screwdrivers, etc. can easily damage the connector pins and housing, especially when inserted from the lower cable opening upwards into the downtube.
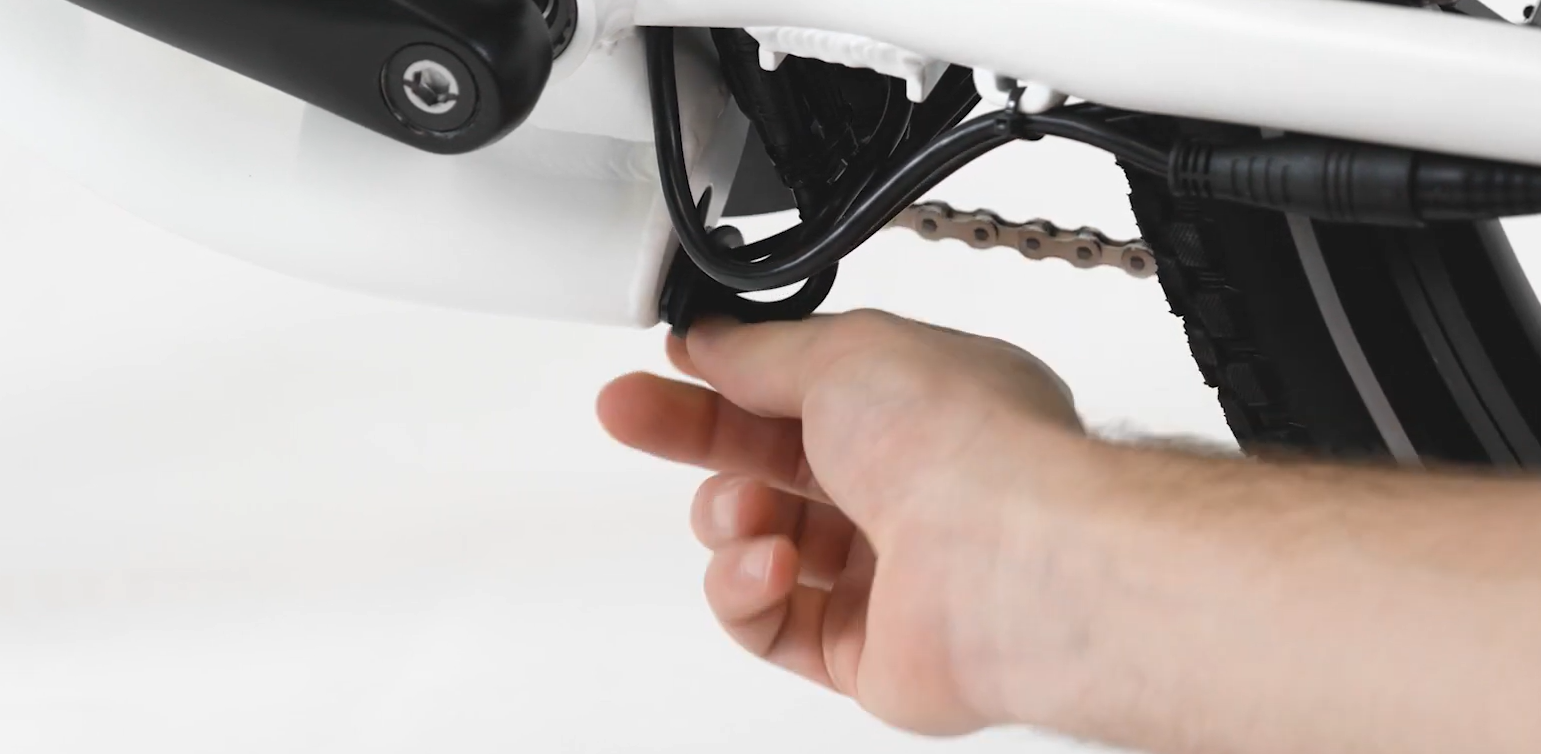
- Plug in the wiring harness connector at the bottom of the downtube, ensuring the connection is secure and passes through the grommet. Align the internal notch and pins (and external arrows) and carefully press together without twisting to fully seat the connection.
- Insert the wiring harness connector back into the frame through the lower cable opening and reinstall the grommet.
- Carefully pull the wiring harness cable from the upper cable opening to afford cable slack at the front of the bike, and reinstall the grommet.
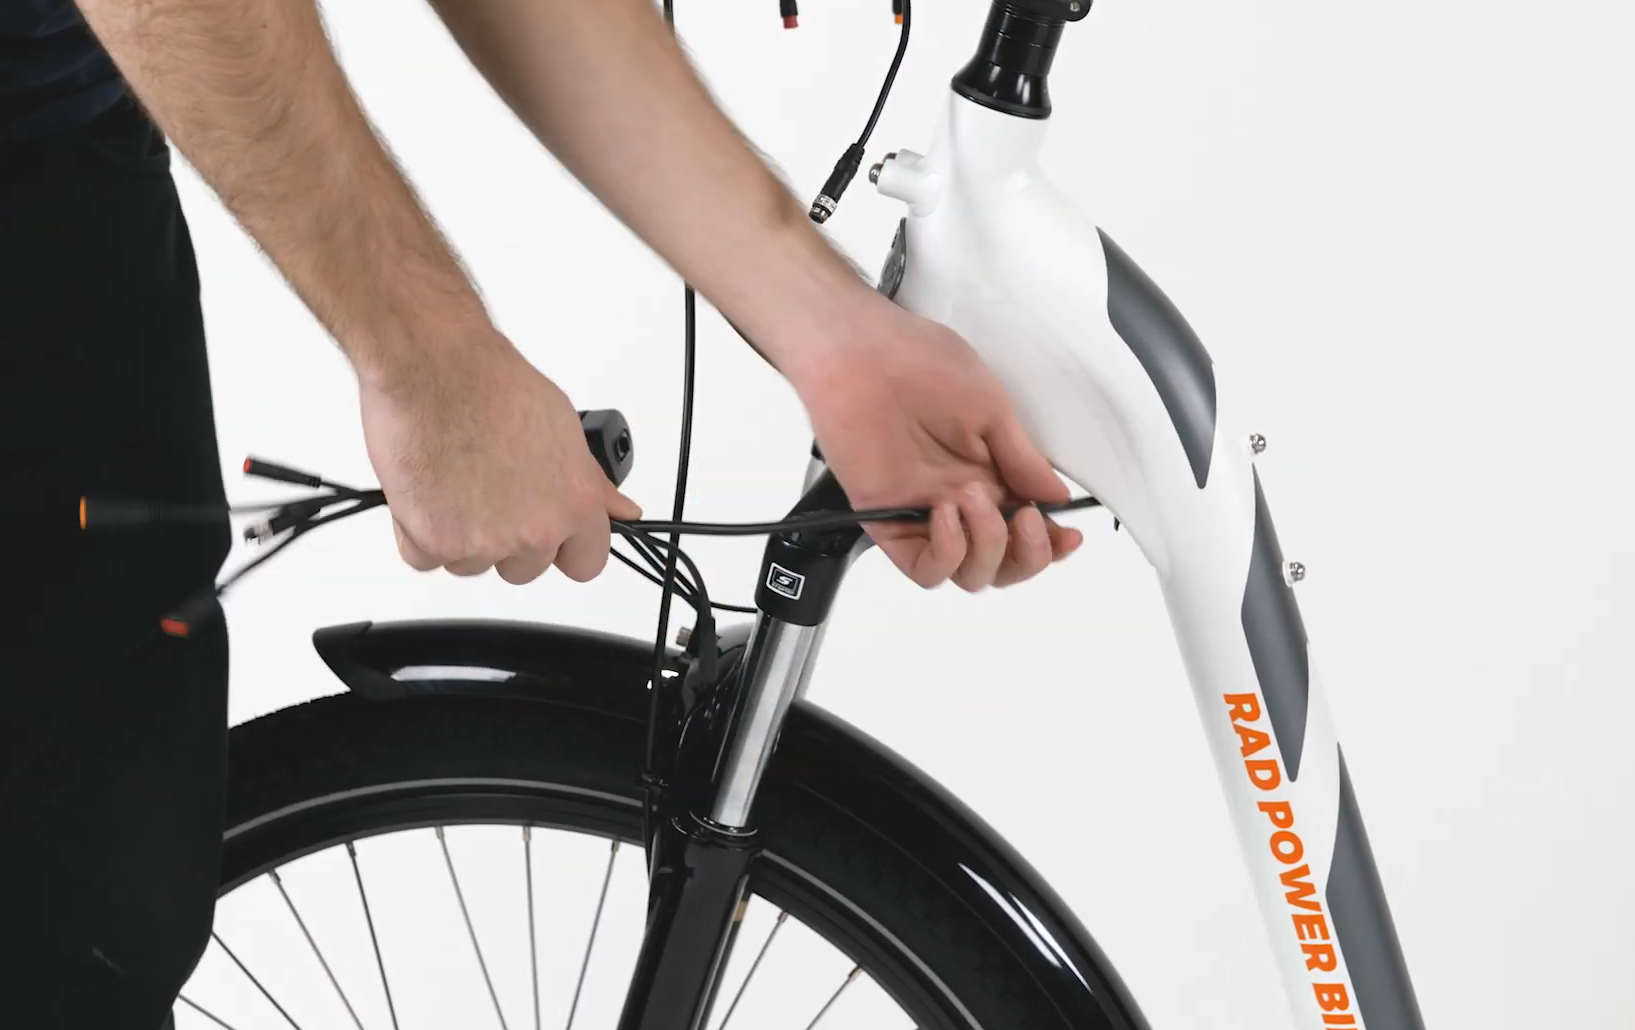
- Plug in each connector to the wiring harness.
- Plug in the display connector. Locate the two sides of the silver metal display connector, carefully align the internal notch and pins, and press directly together without twisting. Then twist only the threaded portions together to fully seat the connection.
- Plug in the headlight connector. Trace the cable coming from the bottom of the wiring harness junction and locate the matching connector end coming out of the headlight. Line up the internal notch and pins (and external arrows) and press directly together, without twisting, to connect.
- Plug in the remaining connectors. Plug in all other connectors at the front of the bike. Locate the wiring harness connector ends and the matching connector ends. Trace the cable from the part to the connector end and ensure the connectors match. Line up the internal notch and pins (and external arrows) and press directly together, without twisting, to connect.
Do not plug in a connector to the wiring harness if it does not match in color and shape. Doing so could cause irreparable damage to the connector, the part, or the wiring harness.
- Plug in the display connector. Locate the two sides of the silver metal display connector, carefully align the internal notch and pins, and press directly together without twisting. Then twist only the threaded portions together to fully seat the connection.
- Replace any zip ties that were removed and use flat side cutters to snip off zip tie excess. Ensure the cut is flush and there are no points that could damage cable housing.
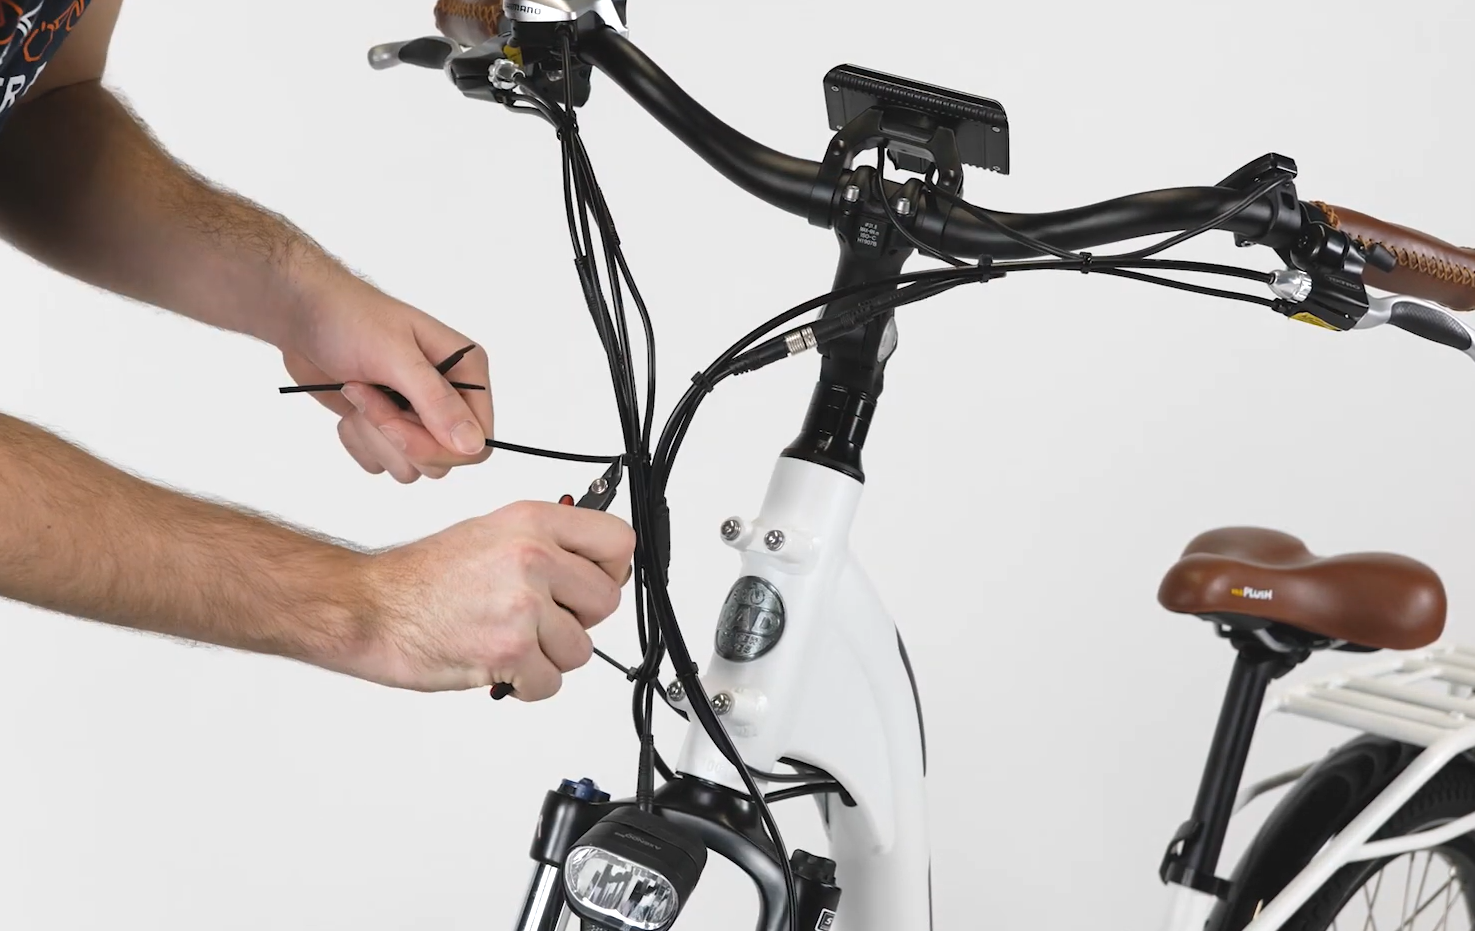
- Check that all cables are free from any moving parts and that the handlebar can turn freely.
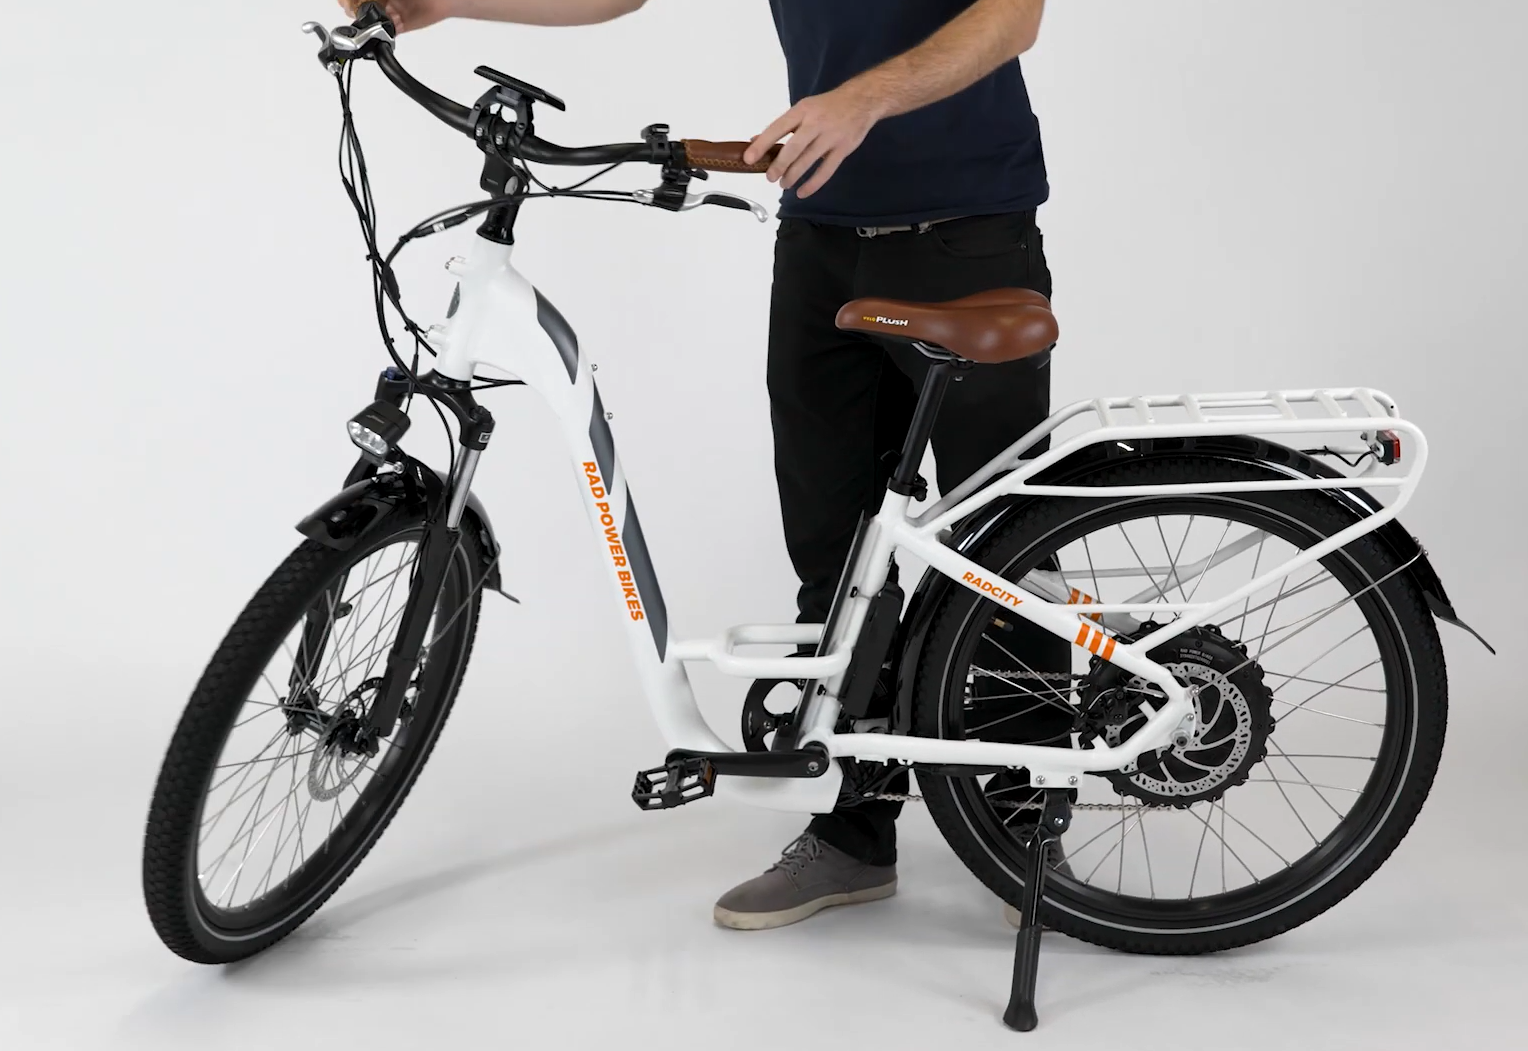
- Reinstall the battery, reposition the quick release lever, and test the bike fully before riding. Have your work inspected by a local, certified, and reputable bike mechanic.