Troubleshoot a bike that won't turn on (bikes with external battery)
In the unlikely event that your ebike won't turn on, this article will help you troubleshoot the problem so you can get back to riding Rad as soon as possible! This procedure will involve testing the battery, and checking electrical component connections on the ebike to isolate the problem.
This article is for ebike models with external batteries (RadWagon, RadRunner, RadMission, RadCity 4 and earlier, RadRover 5 and earlier, RadExpand and RadMini). If you have an ebike with a semi-integrated battery (Radster, RadRunner 3 Plus, RadRover 6 Plus, RadCity 5 Plus), please see the troubleshooting article specific to those models Troubleshooting a Bike that Won't Turn On (bikes with semi-integrated batteries).
Tools needed:
- Flat-side cutters
- Flat head screwdriver
- A few replacement zip ties
A low charge or a loose battery connection can cause your ebike to not turn on when you press the POWER button. Follow the steps below to check that the battery is charged and correctly installed.
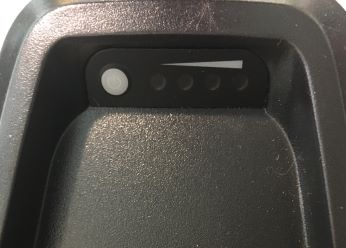
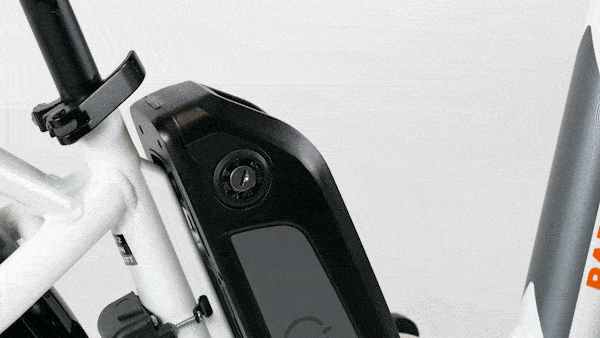
- Check the keyport position on the battery. The battery must be in the ON position (A) for the ebike to power on. If it is not, use your key to turn the battery to this position. If the keyport is in either of the OFF positions (B or C), the ebike will not power on and the battery will not display a state of charge.

- Check the battery state of charge. Press and hold the status button next to the LEDs. The LEDs on the battery gauge will light up--the higher the number of LEDs that are lit up, the higher your current battery level.
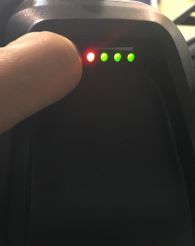
- If the battery is showing no LED lights, charge the battery. Follow the steps HERE for a refresher on how to charge the battery. If the battery is properly connected to the charger but won't charge, follow the steps HERE to check the 5A battery fuse.
- Once the battery is fully charged, try to turn on the ebike. If the ebike does not power on, follow the steps below to check the battery contacts.
- Remove the battery. Turn the keyport to the OFF and Unlocked position (C) and remove the battery, and then press and hold MODE or POWER button to discharge any remaining power.
- Inspect the battery and mounting tray terminal contacts. If you notice any dirt, damage, or moisture, contact Rad Power Bikes Customer Support.
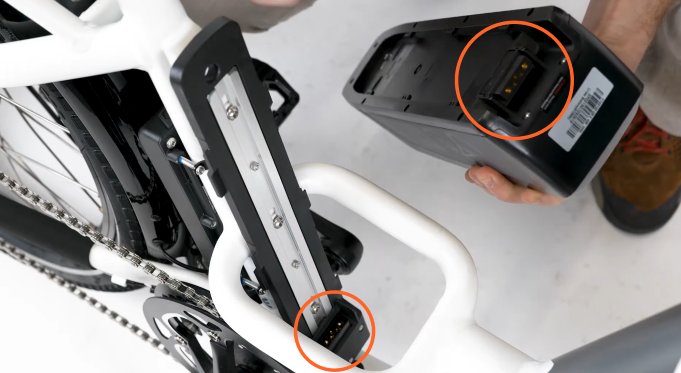
- Reinstall the battery. If the contacts look normal, reinstall the battery and use the key to turn the keyport to the ON position (A).
- Turn on the ebike. Press and hold the MODE or POWER button to turn on the ebike.
- If the ebike powers on and displays an error message, review any error message troubleshooting steps in our Help Center.
- If the ebike does not power on, follow the steps in the next section.
If your battery holds a charge but the ebike is still not powering on, it may be that one of the electrical connections on the ebike is preventing it from powering on, and in order to isolate the problem you will need to check these connections one at a time. Follow the steps below to check the wiring harness connections on the front of the ebike, and the main electrical component connections to the controller on the rear of the ebike. You may need flat-side cutters to snip zip ties holding cables in place.
The example below is for a RadCity 2 Step-Thru model, but the steps will be similar for other models with external batteries.
Take pictures of cable connections and cable routing before you start disconnecting them, as once you fix the problem you will need to reconnect everything in its original position.
Check Display and Wiring Harness Connections
The wiring harness connects all of the cables on the front of the ebike and routes them through the frame to the controller box. The electrical signal passes through the wiring harness to the display and remote (if available on your ebike model), so if the wiring harness is disconnected or damaged you will be unable to power on your ebike.
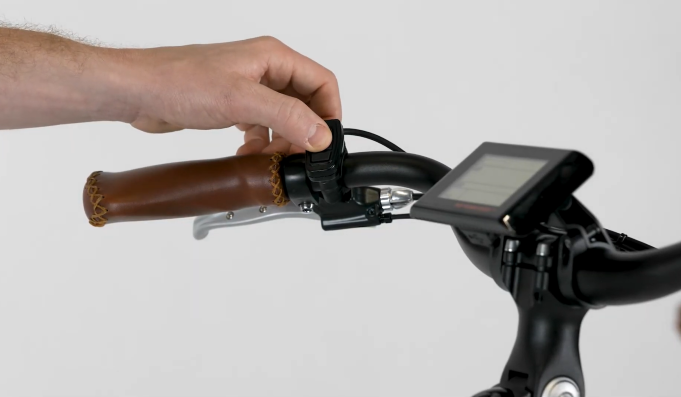
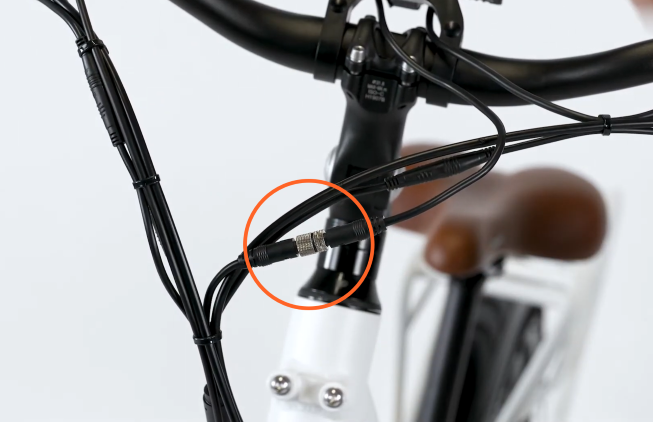
- Check the display connector. If the display cable and/or remote is disconnected or damaged, you won't be able to power the ebike on.
- Trace the cable from the display and remote on the handlebar to the wiring harness.

- Unscrew the metal connectors on this cable and disconnect. Ensure the connectors are free of any debris or moisture, and none of the connector pins are broken.
- Reconnect the display cable. Line up the internal notch and pins and external arrows, press together without twisting to reconnect, and twist the metal ends to secure.
- Power on the ebike to test. If the ebike still does not power on, proceed to the next step.
- Trace the cable from the display and remote on the handlebar to the wiring harness.
- Check the wiring harness. Ensure the wiring harness is not twisted around the front of the ebike, and you can turn the handlebar fully without pinching the wiring harness.
- Power on the ebike to test. If the display connector and wiring harness are properly connected and the ebike is still not powering on, proceed to the next step.
Check Electrical Component Connections
The following steps require checking electrical connections to the controller on the rear of the ebike. The wiring harness, battery tray connector and controller need to be connected and in good working order for the ebike's electrical system to work.
For information about connector checks for your specific model, refer to the articles HERE.
- Remove the battery, and press and hold the MODE or POWER button discharge any remaining power.
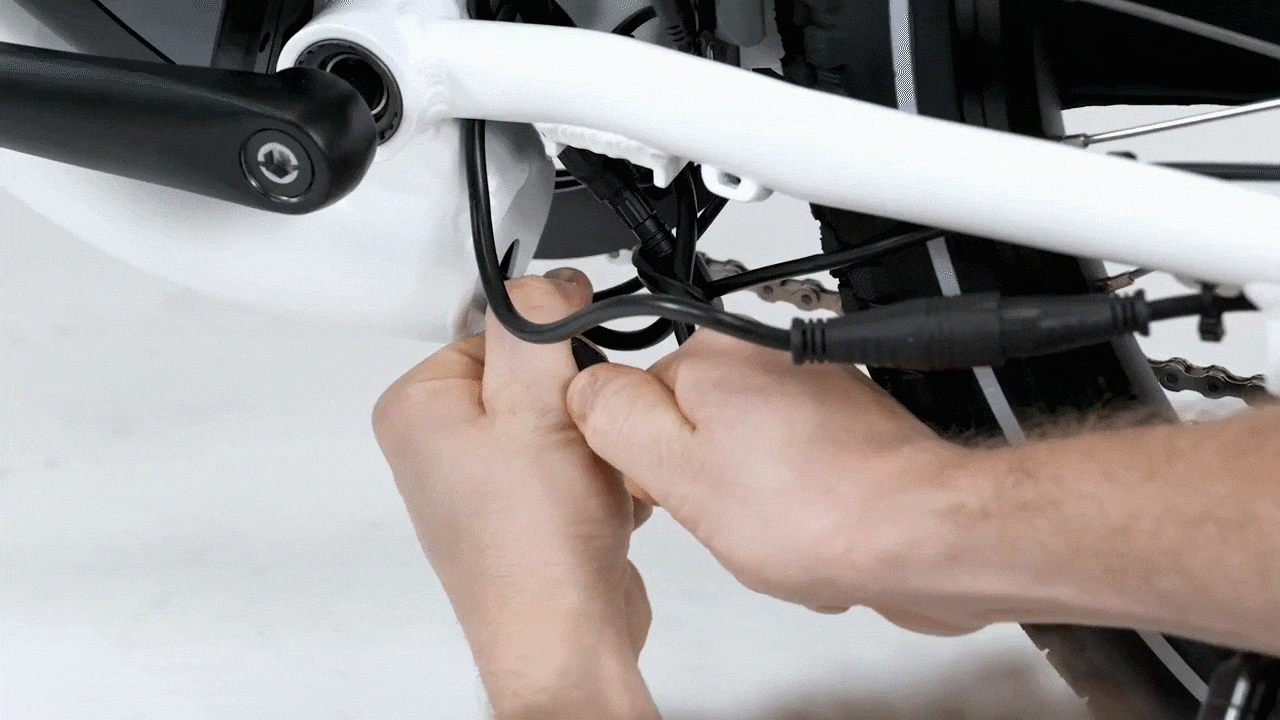
- Check the wiring harness connector. The wiring harness is routed from the front of the bike, through the downtube and connects to the controller. If this cable is disconnected or damaged, your ebike will not power on.
- Use a flat head screwdriver to pry off the grommet that secures the cables inside the frame downtube.

- Disconnect the wiring harness connector and ensure it is free of any debris or moisture and none of the connector pins are broken.

- Reconnect the wiring harness cable. Line up the internal notch and pins and external arrows, and press together without twisting to reconnect.
- Reinstall the battery and power on the ebike to test. If the ebike still doesn't power on, proceed to the next step.
- Use a flat head screwdriver to pry off the grommet that secures the cables inside the frame downtube.
- Disconnect the battery connector. The battery connector is the cable at the bottom of the battery mounting tray that connects to the controller. If this cable is disconnected or damaged the controller won't get power and the electrical signal will not travel through the system.
- Remove the battery, and press and hold the MODE or POWER button discharge any remaining power.
- Trace the cable that connects the battery mounting tray to the controller.
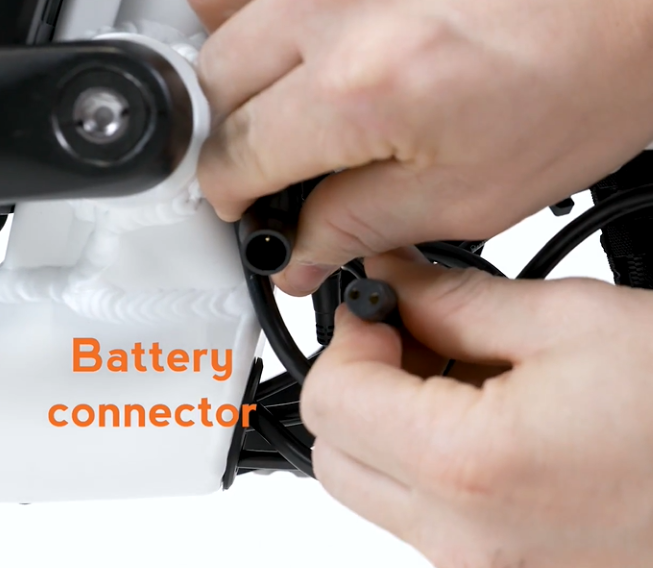
- Disconnect the cable and inspect the interior of the connector to ensure it is free of any debris or moisture and none of the connector pins are broken.
- Reconnect the battery cable. Line up the internal notch and pins and external arrows, and press together without twisting to reconnect.
- Reinstall the battery and power on the ebike. If the ebike still does not power on at this point there may be a problem with one of the electrical components. Contact the Rad Power Bikes Customer Support team for next steps.