Rad Wheel Lock by ABUS installation instructions
The ABUS Shield 4650 SL NR wheel lock can be installed on the RadCity 3, 4 and 5, RadMission, RadKick Belt Drive and RadKick 7-Speed models. The video shows the RadCity 4 model, but the process will be similar for other compatible models, with differences noted below.
When locked, the lock will secure the rear wheel to the frame and help prevent unauthorized use. The lock should only be used when the bike is turned off and parked.
We recommend using an additional lock to secure the bike frame and front wheel to an unmovable structure designed for bike security, such as a bike rack. Check out our Safety and Security Accessories page to see which bike locks you can purchase directly from Rad Power Bikes.
The ABUS Shield 4650 SL NR wheel lock replaces the 5650 L NR model previously sold by Rad Power Bikes. These installation instructions work for both models.
Tools needed:
- A 4 mm Allen wrench
- The wheel lock and key
- The hardware that comes pre-installed on the seat stay mounting points (RadCity 3 and 4, and RadMission 1 models)
- Two (2) M5 12 mm Hex Socket Head or Button Head bolts and washers (RadCity 5 Plus models)
- Get the bike ready for installation. Turn off the bike and prop it on the kickstand. Ensure the bike and pedal assistance is powered off before performing this and any other installation or maintenance.
- Remove the mounting hardware from the seat stay. Use a 4 mm Allen wrench to remove the bolt and washer from each side of the bike. Keep the washers on the bolts and set them aside.
NOTE: The RadCity 5 model do not include these bolts and washers on the seat stay. The ABUS lock should include 12 mm socket head bolts and washers, or you can obtain these from a hardware store.
- Orient the lock so the opening is at the bottom. Make note of the three mounting points; you will use the mounting holes farthest from the opening to install the lock. On the RadKick models you will use the middle mounting points.
- Place the lock in position. Follow the instructions below for your model.
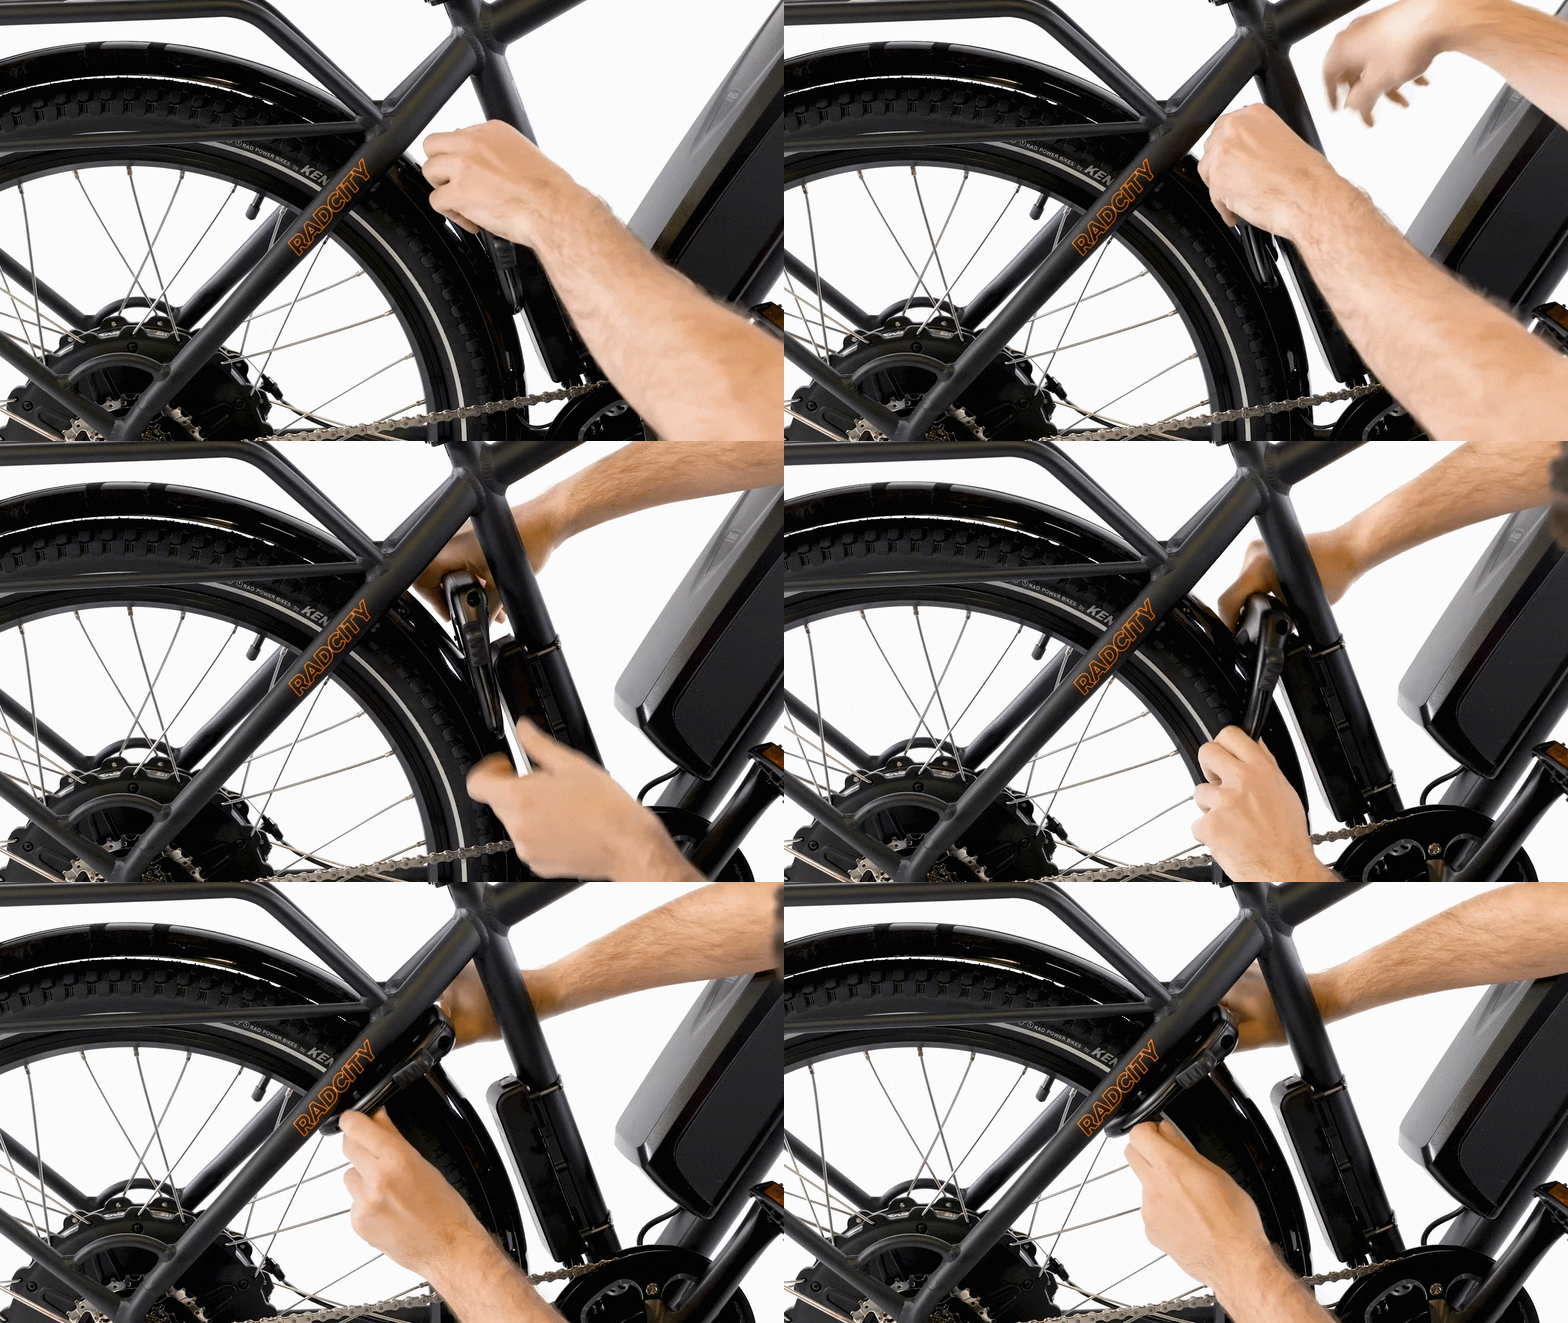
- RadCity High-Step:
- Orient the lock so the logo arch is facing forward, then pass the lock through the bike frame just behind the seat tube.
- Rotate the lock and carefully push the opening over the fender and tire. If needed, gently squeeze the fender to help the lock pass over the fender.
- Place the mounting holes farthest from the lock’s opening against the mounting points on the frame.
- RadCity Step-Thru:
- Remove the battery and set it aside.
- Orient the lock so the logo arch is facing forward and upward, then pass the lock over the battery mounting tray.
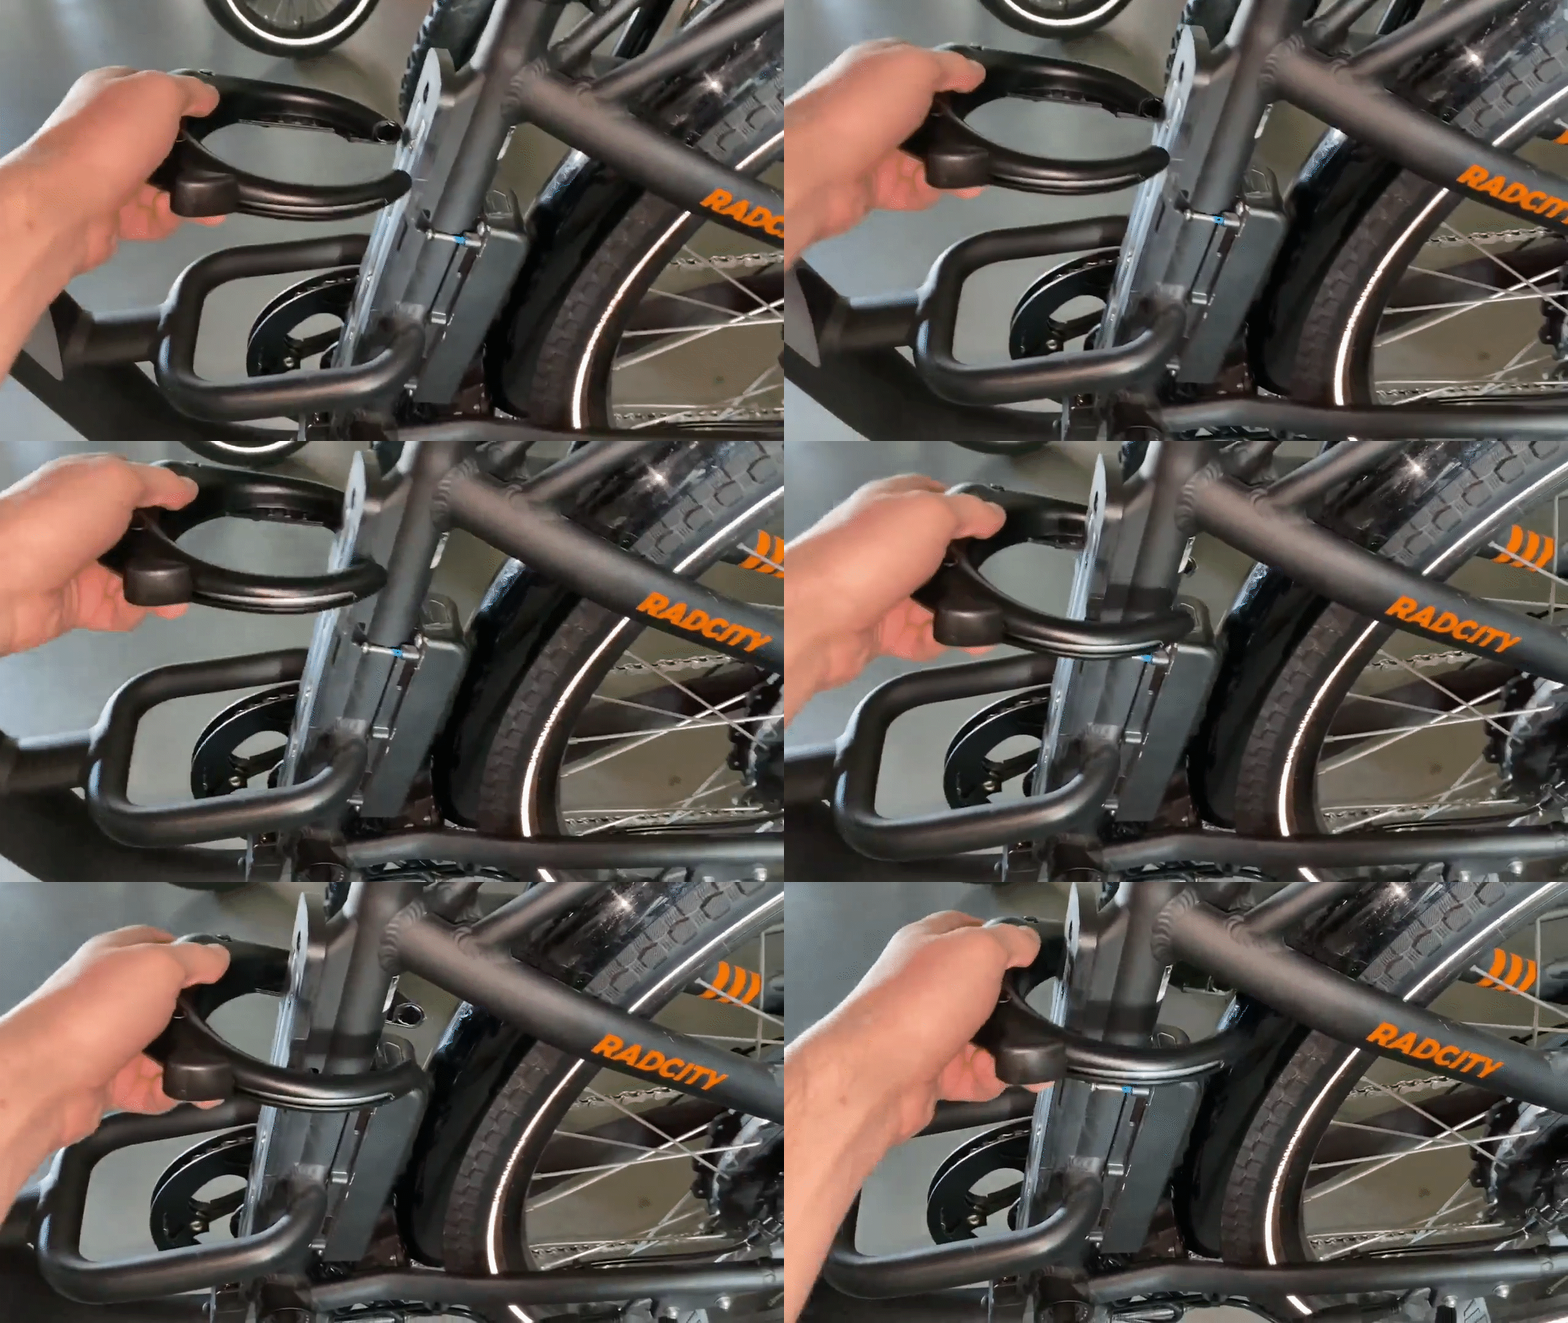
- Rotate the lock so the opening faces the front of the bike.
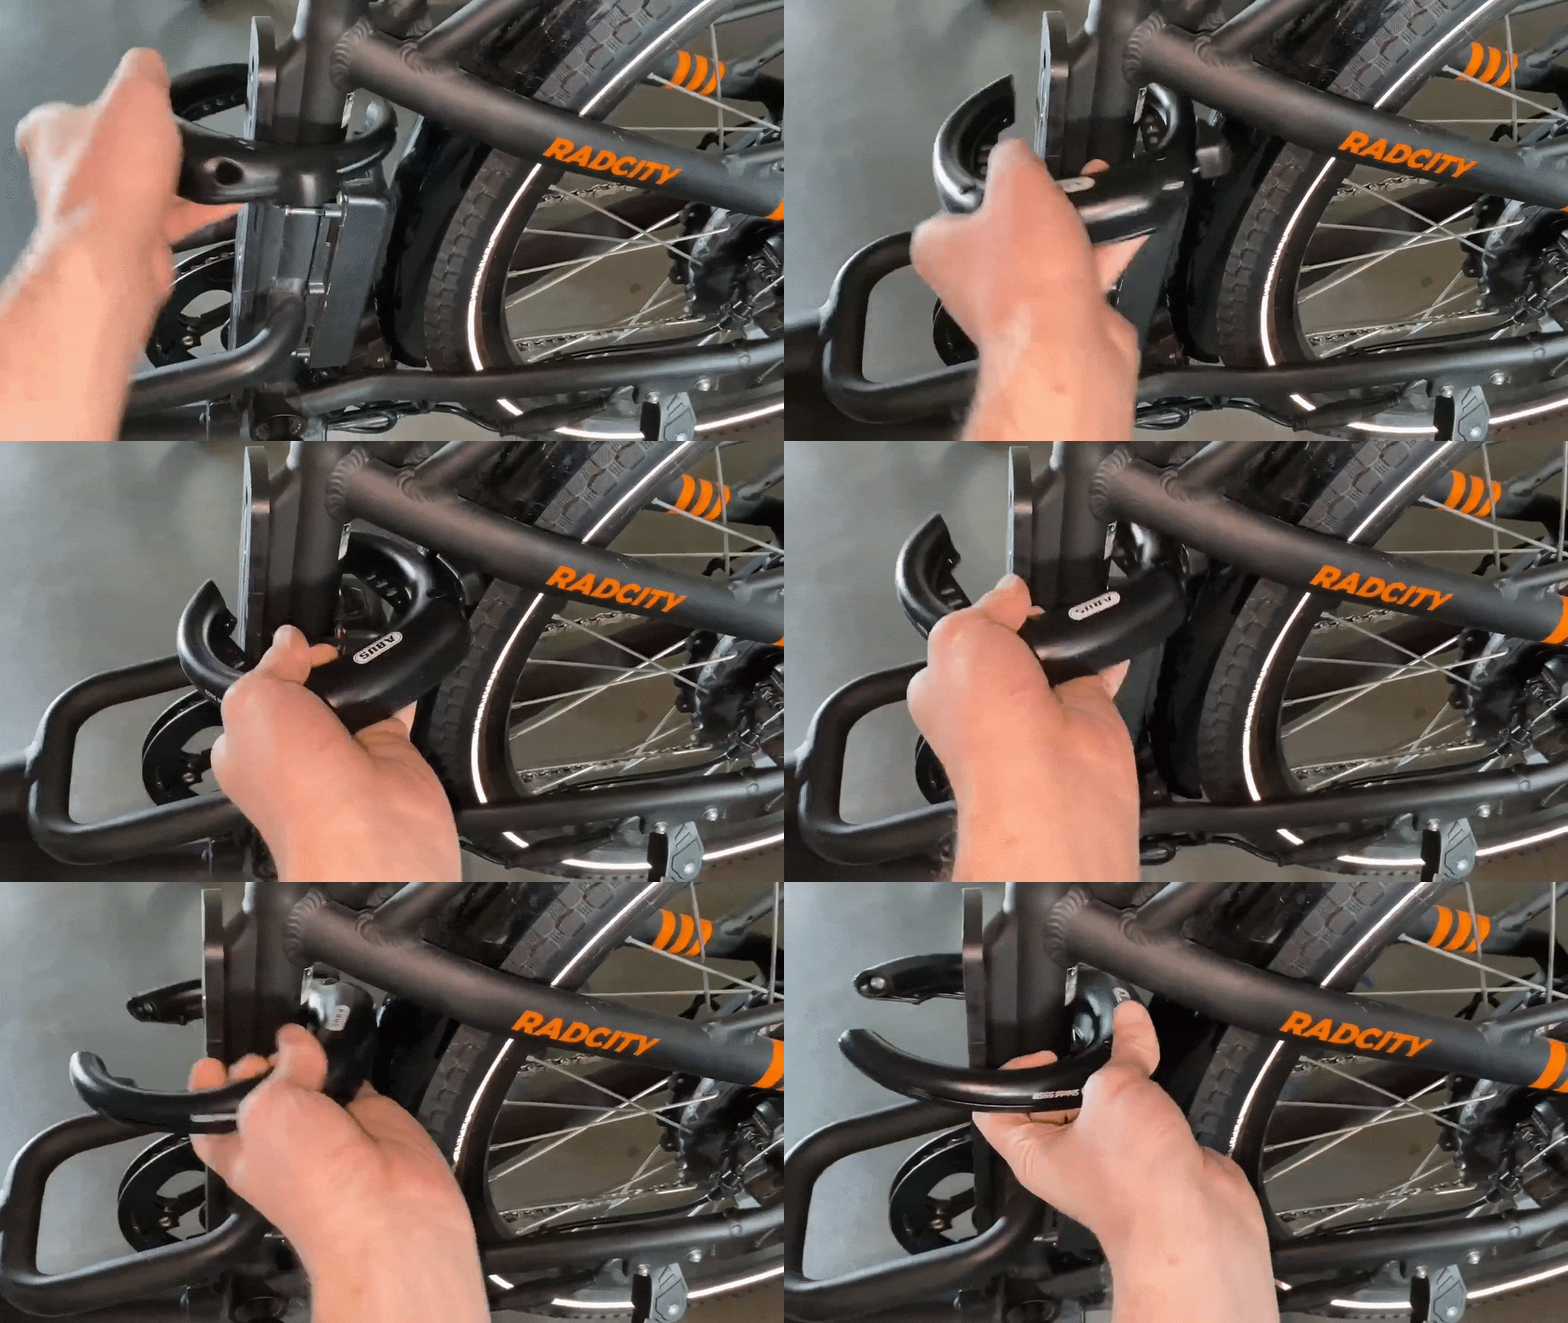
- Pass the lock opening over the seat tube so the lock is behind the seat tube.
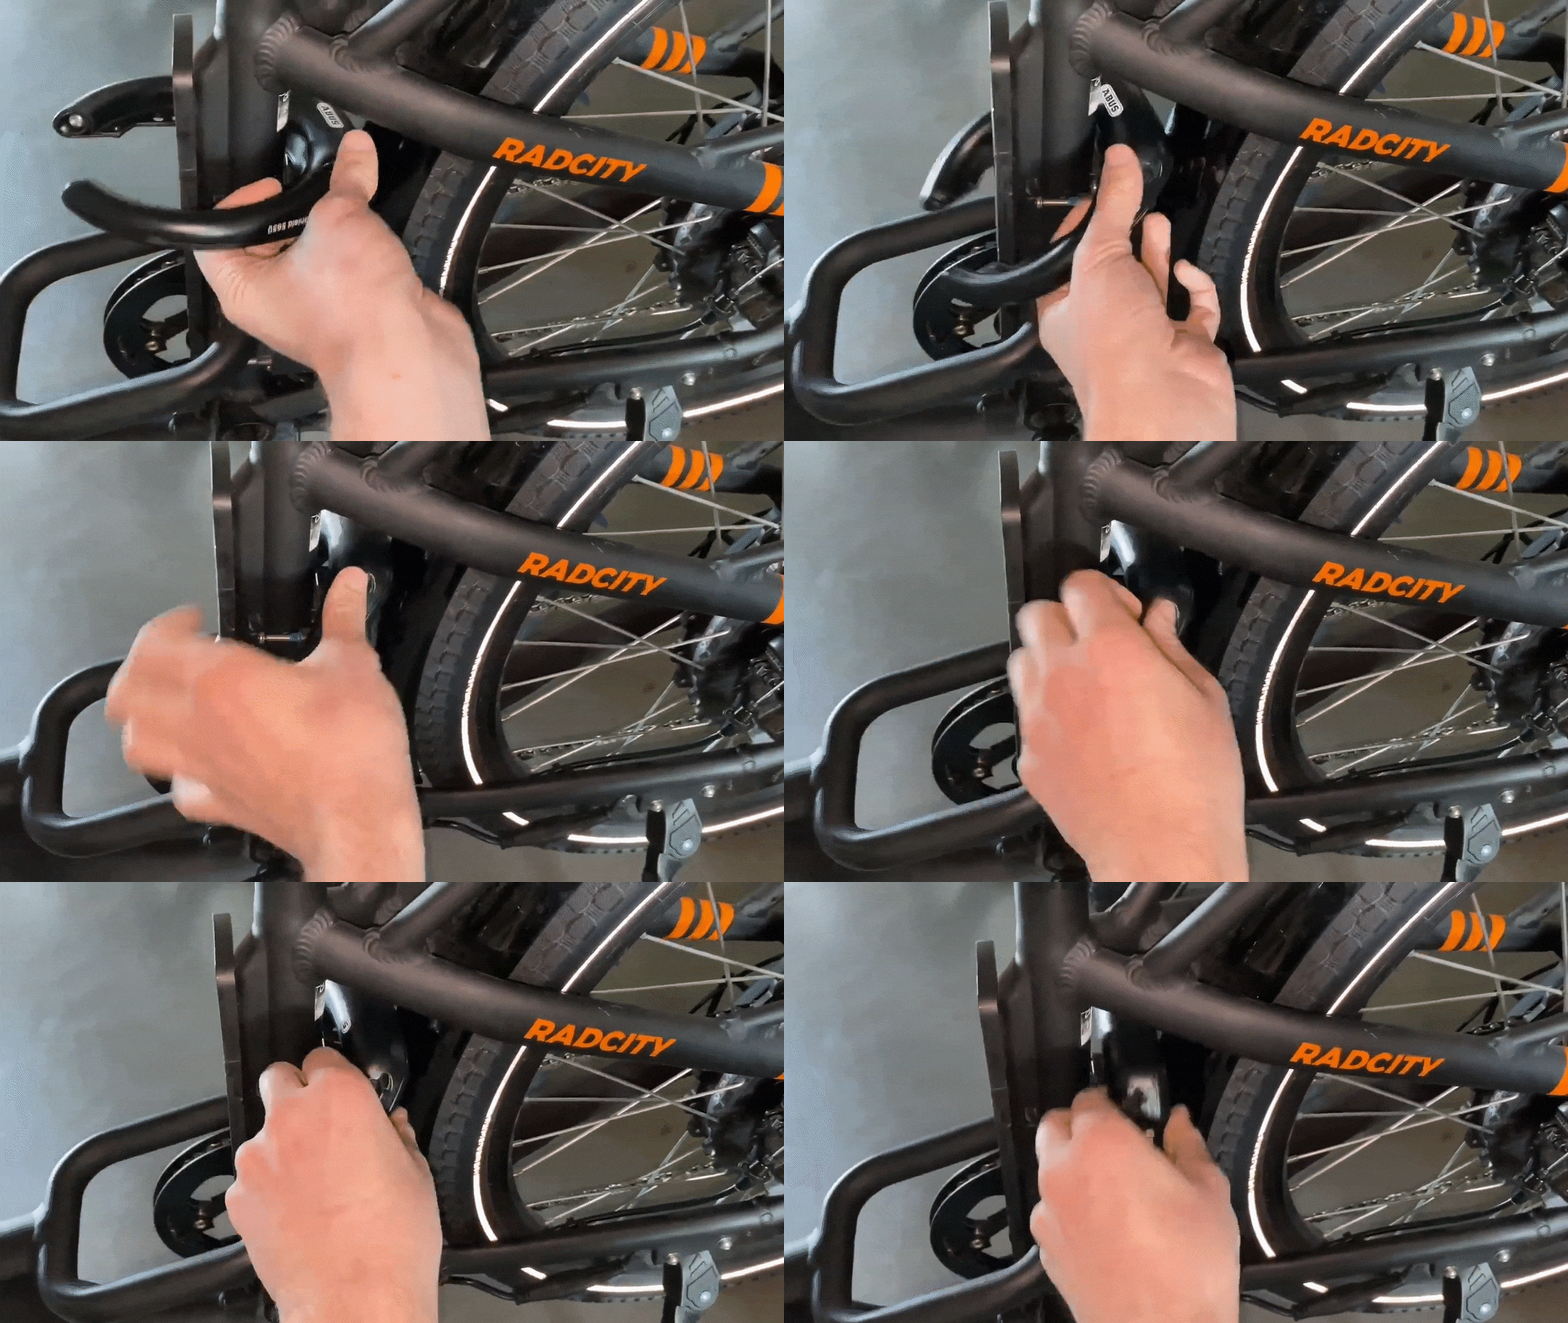
- Rotate the lock and carefully push the opening over the fender and tire. If needed, gently squeeze the fender to help the lock pass over the fender.
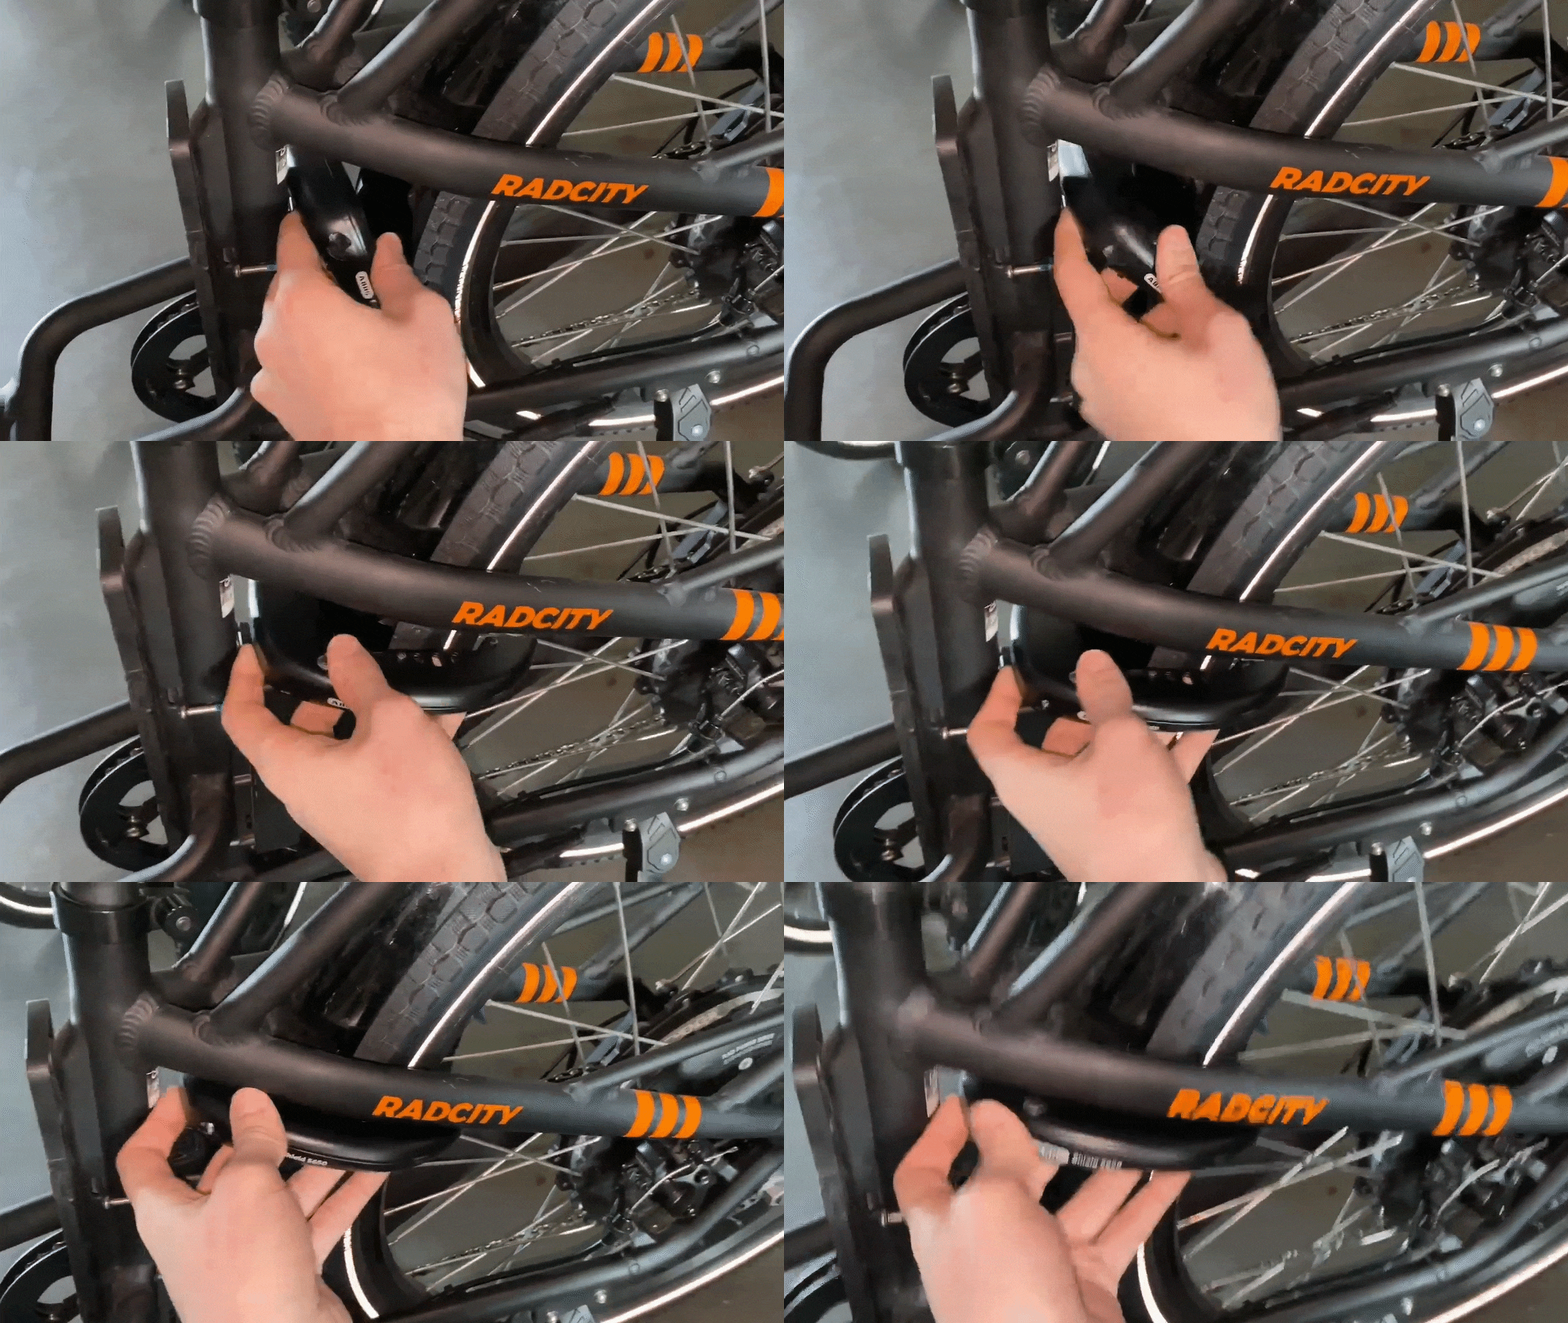
- Place the mounting holes farthest from the lock’s opening against the mounting points on the frame.
- RadKick:
The ABUS Lock fit is very tight on RadKick models, and requires letting the air out of the rear tire to get the lock around the wheel and fender. Take extra care when installing the lock to avoid scratching the frame and/or fender.
- Orient the lock so that the top of the lock faces the ground.
- Let some air out of the rear tire to first get the lock opening around the tire and wheel, and then pass the lock around the fender.

- Rotate the lock so that the top is against the seat tube and the lock mechanism passes through the wheel (see above).
- Position the lock under the mounting bosses on the seat stay. You will use the middle mounting points on the lock to install on RadKick models.
- RadCity High-Step:
- Install the hardware on both sides of the lock. Pass the bolt and washer through the mounting hole on the lock and then carefully thread into the mounting point by hand, partway. Repeat on the other side. Use a 4 mm Allen wrench to tighten both bolts securely.
- Use the lock.
- To lock, turn and hold the key in position. At the same time, move the lever on the other side of the lock downward fully so the lock closes through the spokes. Then return the key to its original position and let go of the lever.
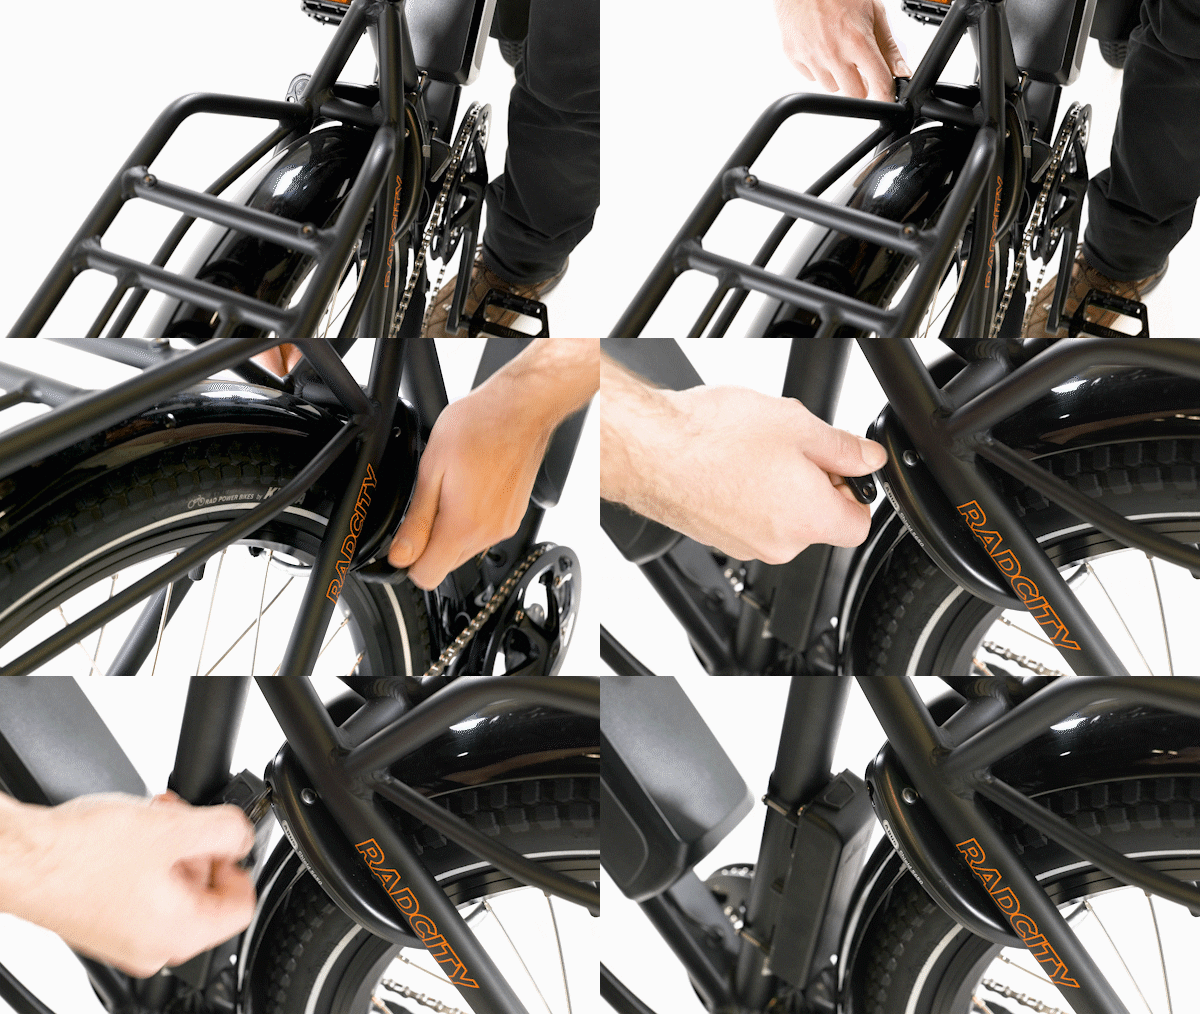
- To lock, turn and hold the key in position. At the same time, move the lever on the other side of the lock downward fully so the lock closes through the spokes. Then return the key to its original position and let go of the lever.
After locking: Always remove the key, take it with you, and double-check that the lock is secure.
- To unlock, insert and turn the key - the lock will open automatically. Then, return the key to its original position and remove the key from the lock before riding.
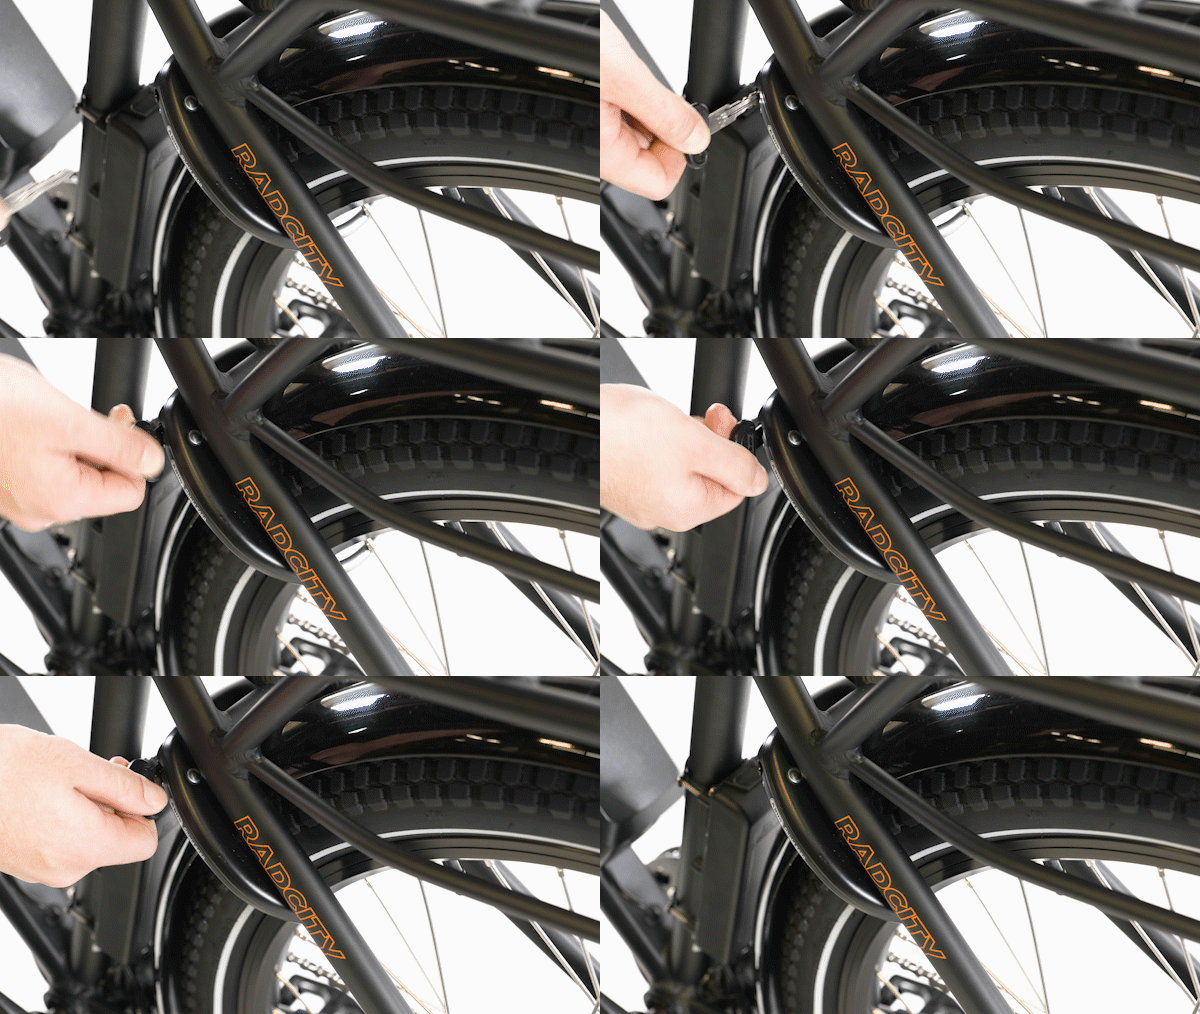
Before riding: Always check that the lock is unlocked and the key is removed before getting on to ride.
- Reinstall the battery if needed, and test the bike and lock fully before riding.
